
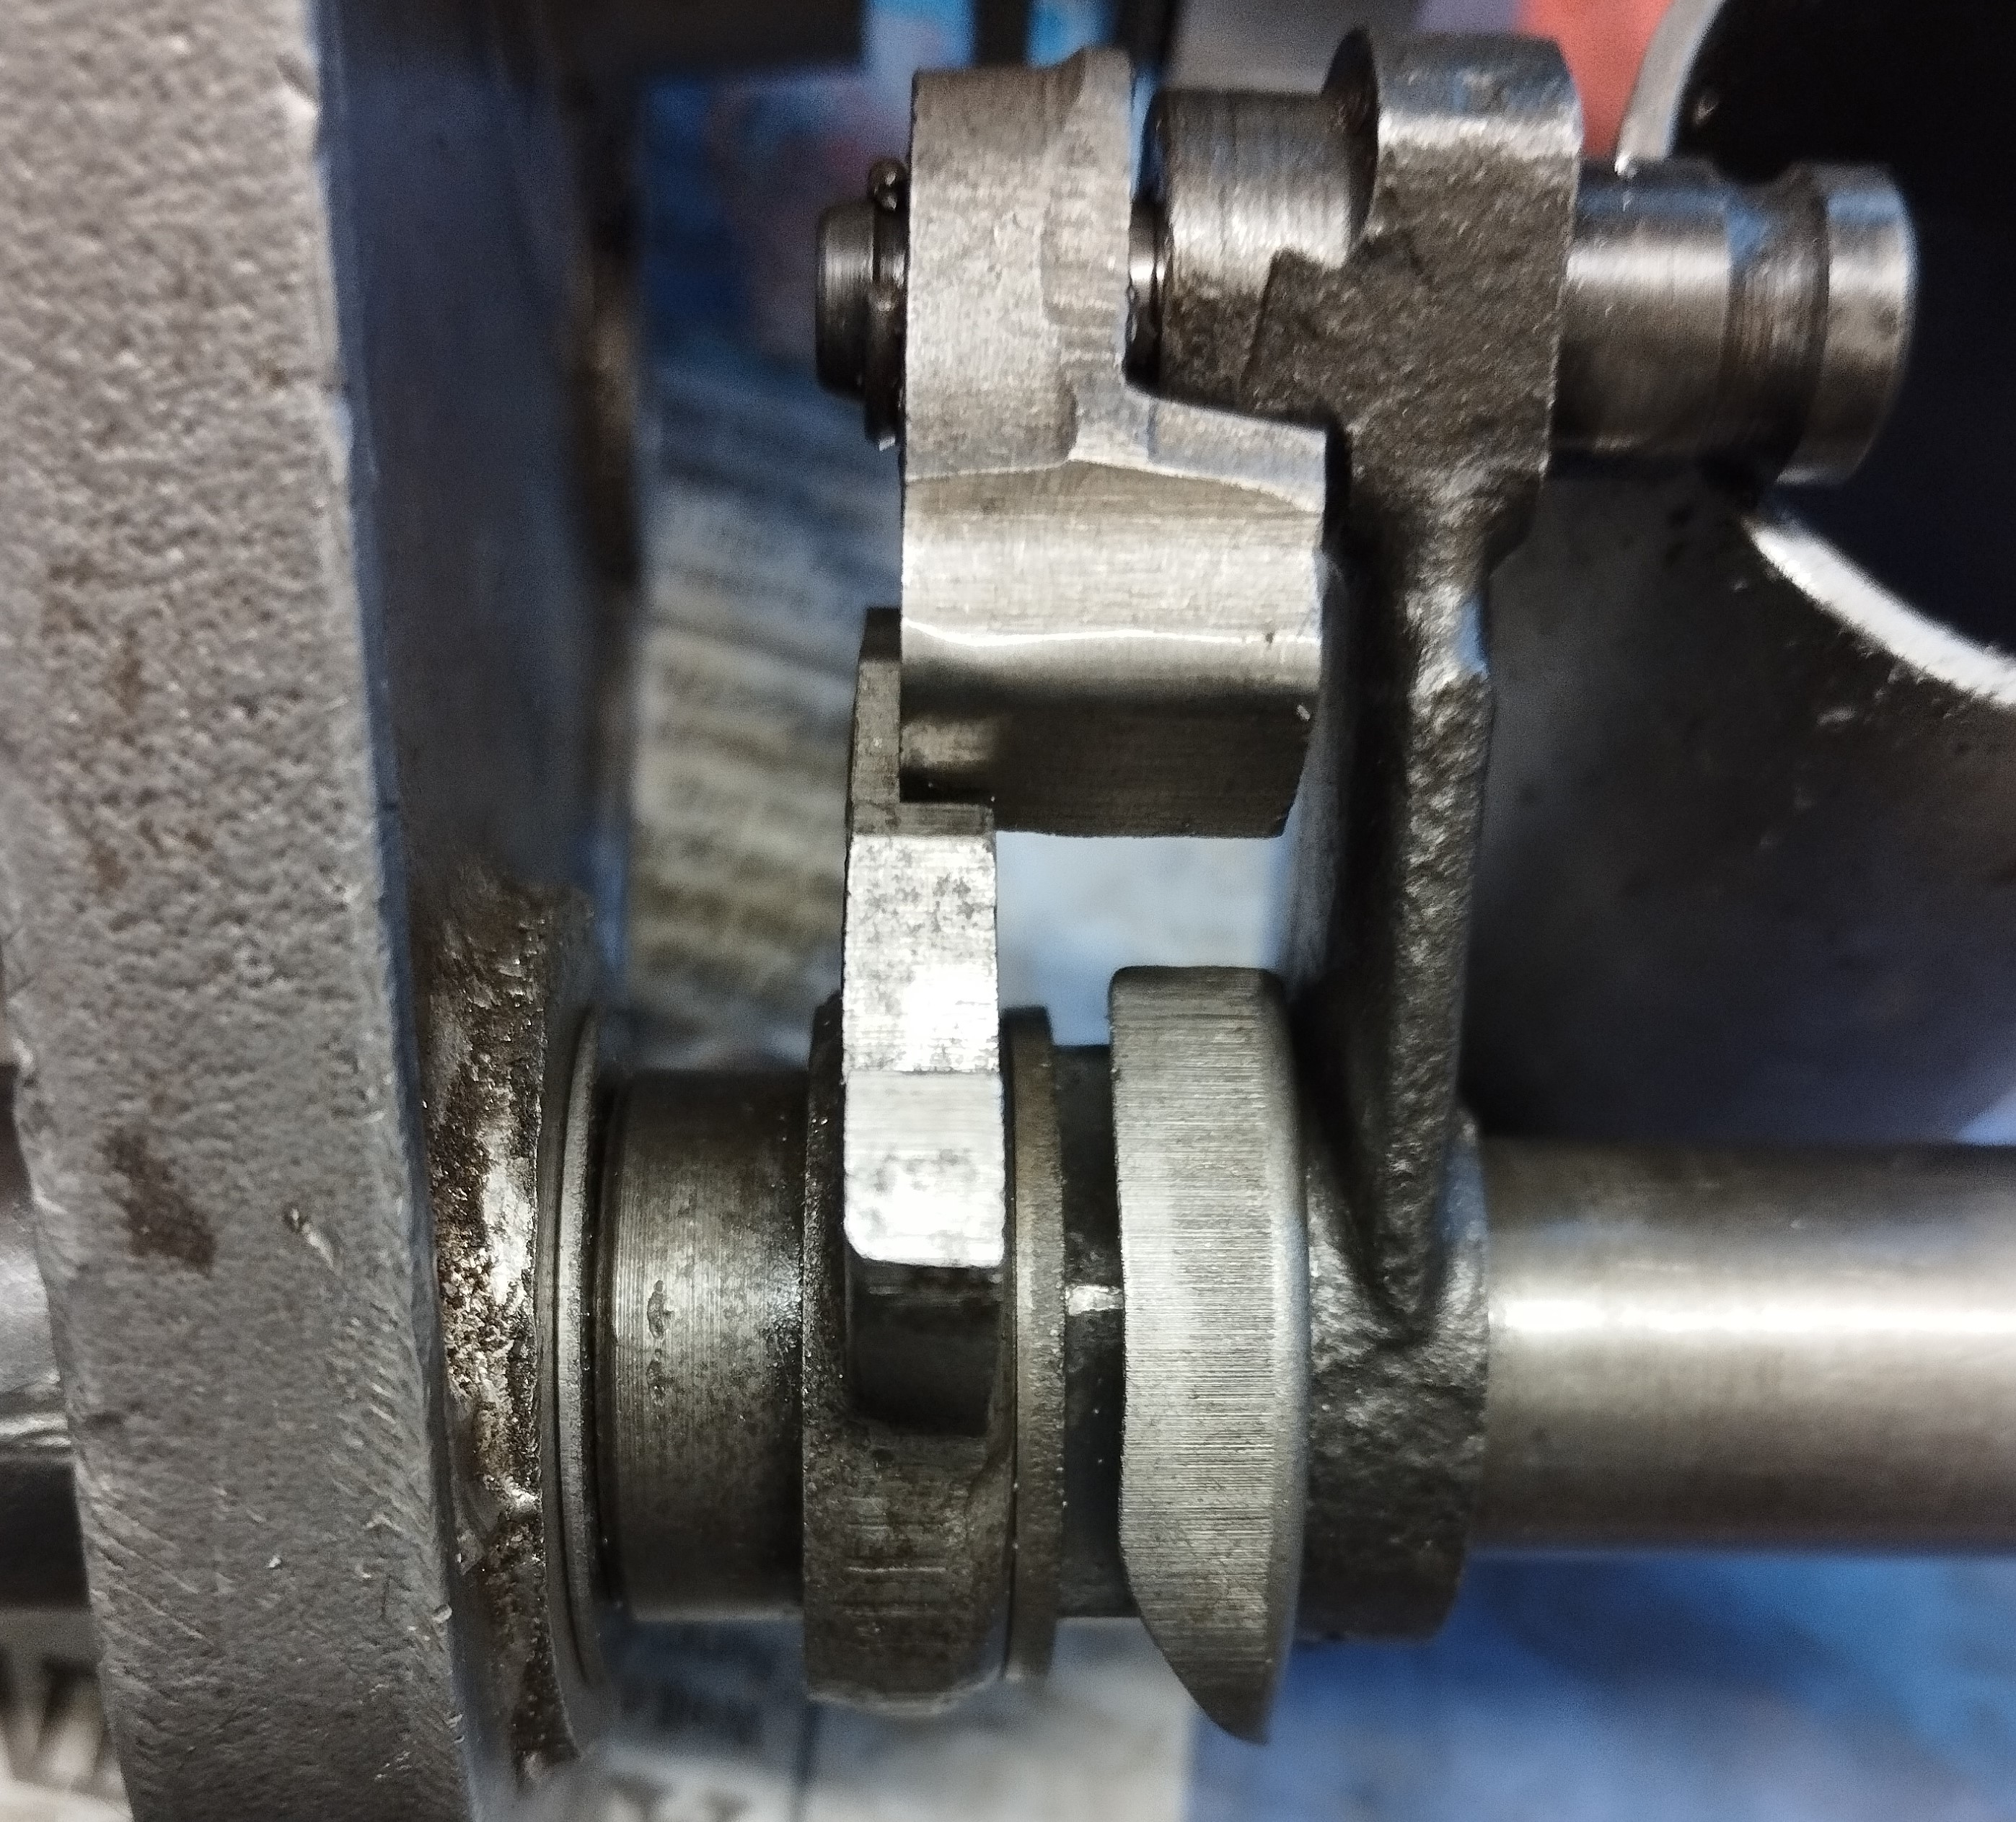
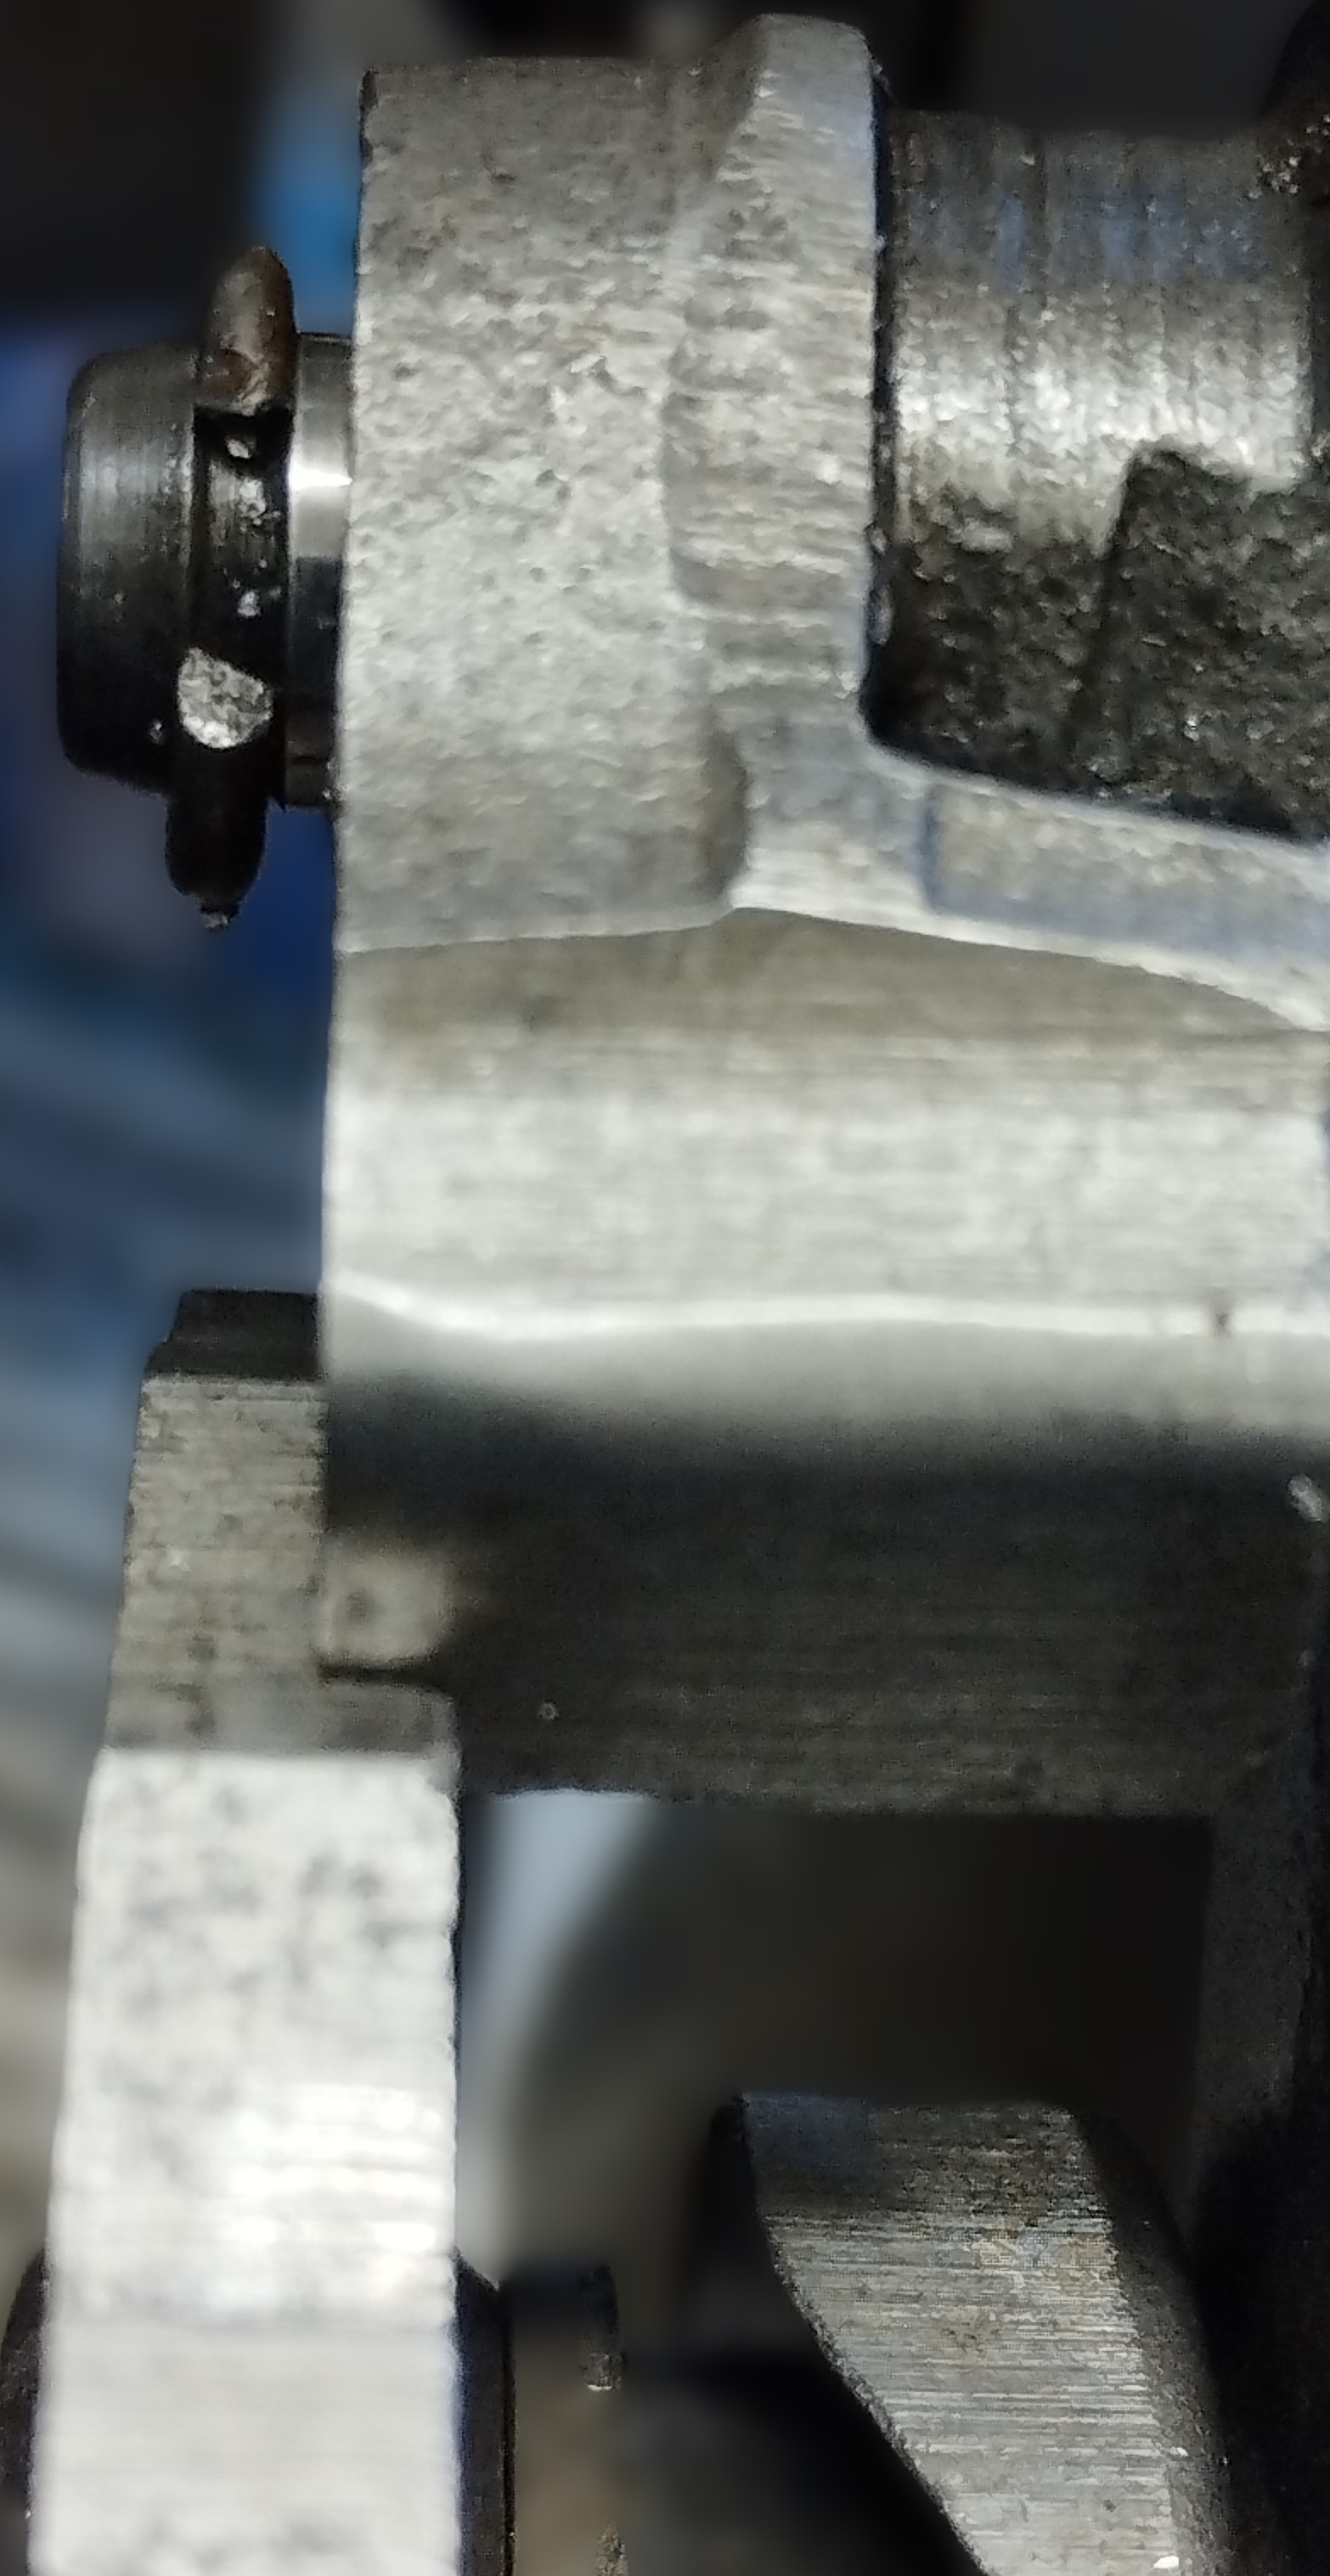
Work proceeds on the (early type) gearbox of the Navigator. I've just had a look at the foot change fittings. All is well except for the alignment of the ratchet and pawl. The attached photos show best and worst conditions.
The wear marks suggest that the box has been used like this for some time. I would like to improve alignment. Improving the alignment of ratchet and pawl would also give the pawl spring better location.
Anyone come across this before? Any suggestions to improve alignment?
That’s got me wondering now!…
- Log in to post comments
Check washers B18 ,B19 B14 …
Check washers B18 ,B19 B14 (spare parts list 1961/1962) are correctly fitted first. If no change then shuffling washers or shims might resolve?
GRAHAM
- Log in to post comments
Shim shuffling
I've had a go at moving the shims around, not much difference, unfortunately.
Its back to square one, the cam segment has far too much end float even with the shims in place. I'll deal with that first then see how much misalignment there is.
- Log in to post comments
Washer B18 041389
Hi John,
Just an observation I made.
Ratchet shaft bush can become loose at temperature. B65 041229.
For this reason washer B18 must be correctly identified and fitted.
Washer B18, large thin, is of greater diameter than OD of bush 041229. It goes on inside of the bush so that the bush is not pushed outwards by the face cam reaction.
B19 is smaller diameter and must not be fitted against inner face of bush B18.
Sorry this is double Dutch to anyone without the parts list and diagram.
Peter
- Log in to post comments
Thrust washers
Hi,
Happy New Year to all,
Further to Peter's post, I found this on the web about the AJS/Matchless lightweight gearbox:-
-
Check for endplay - there should be thrust washers on either side of the centre web as shown in the photos.
-
There may also be a washer under the circlip that hold the selector cam on. This isn't shown in the gearbox diagram, but might be necessary to control the end float.
-
The thin thrust washer (041389 - B18) goes on the inside. The thicker thrust washer (041390 - B19) goes on the outside (under the selector pawl). There's also a thin washer (041323 - B14) under the securing nut.
-
The thrust washers are sometimes missing. They are just washers, so you can improvise replacements. The sizes are: 041389: ID 17.9mm OD 25.4mm T 0.8mm 041390: ID 16.3mm OD 24.4mm T 1.65mm
The web site was
https://www.ifixit.com/Guide/AJS-Matchless+Lightweight+Gearbox+Overhaul/91777
May or may not be accurate but worth checking as the box inners are much the same, I believe.
HTH,
Stan
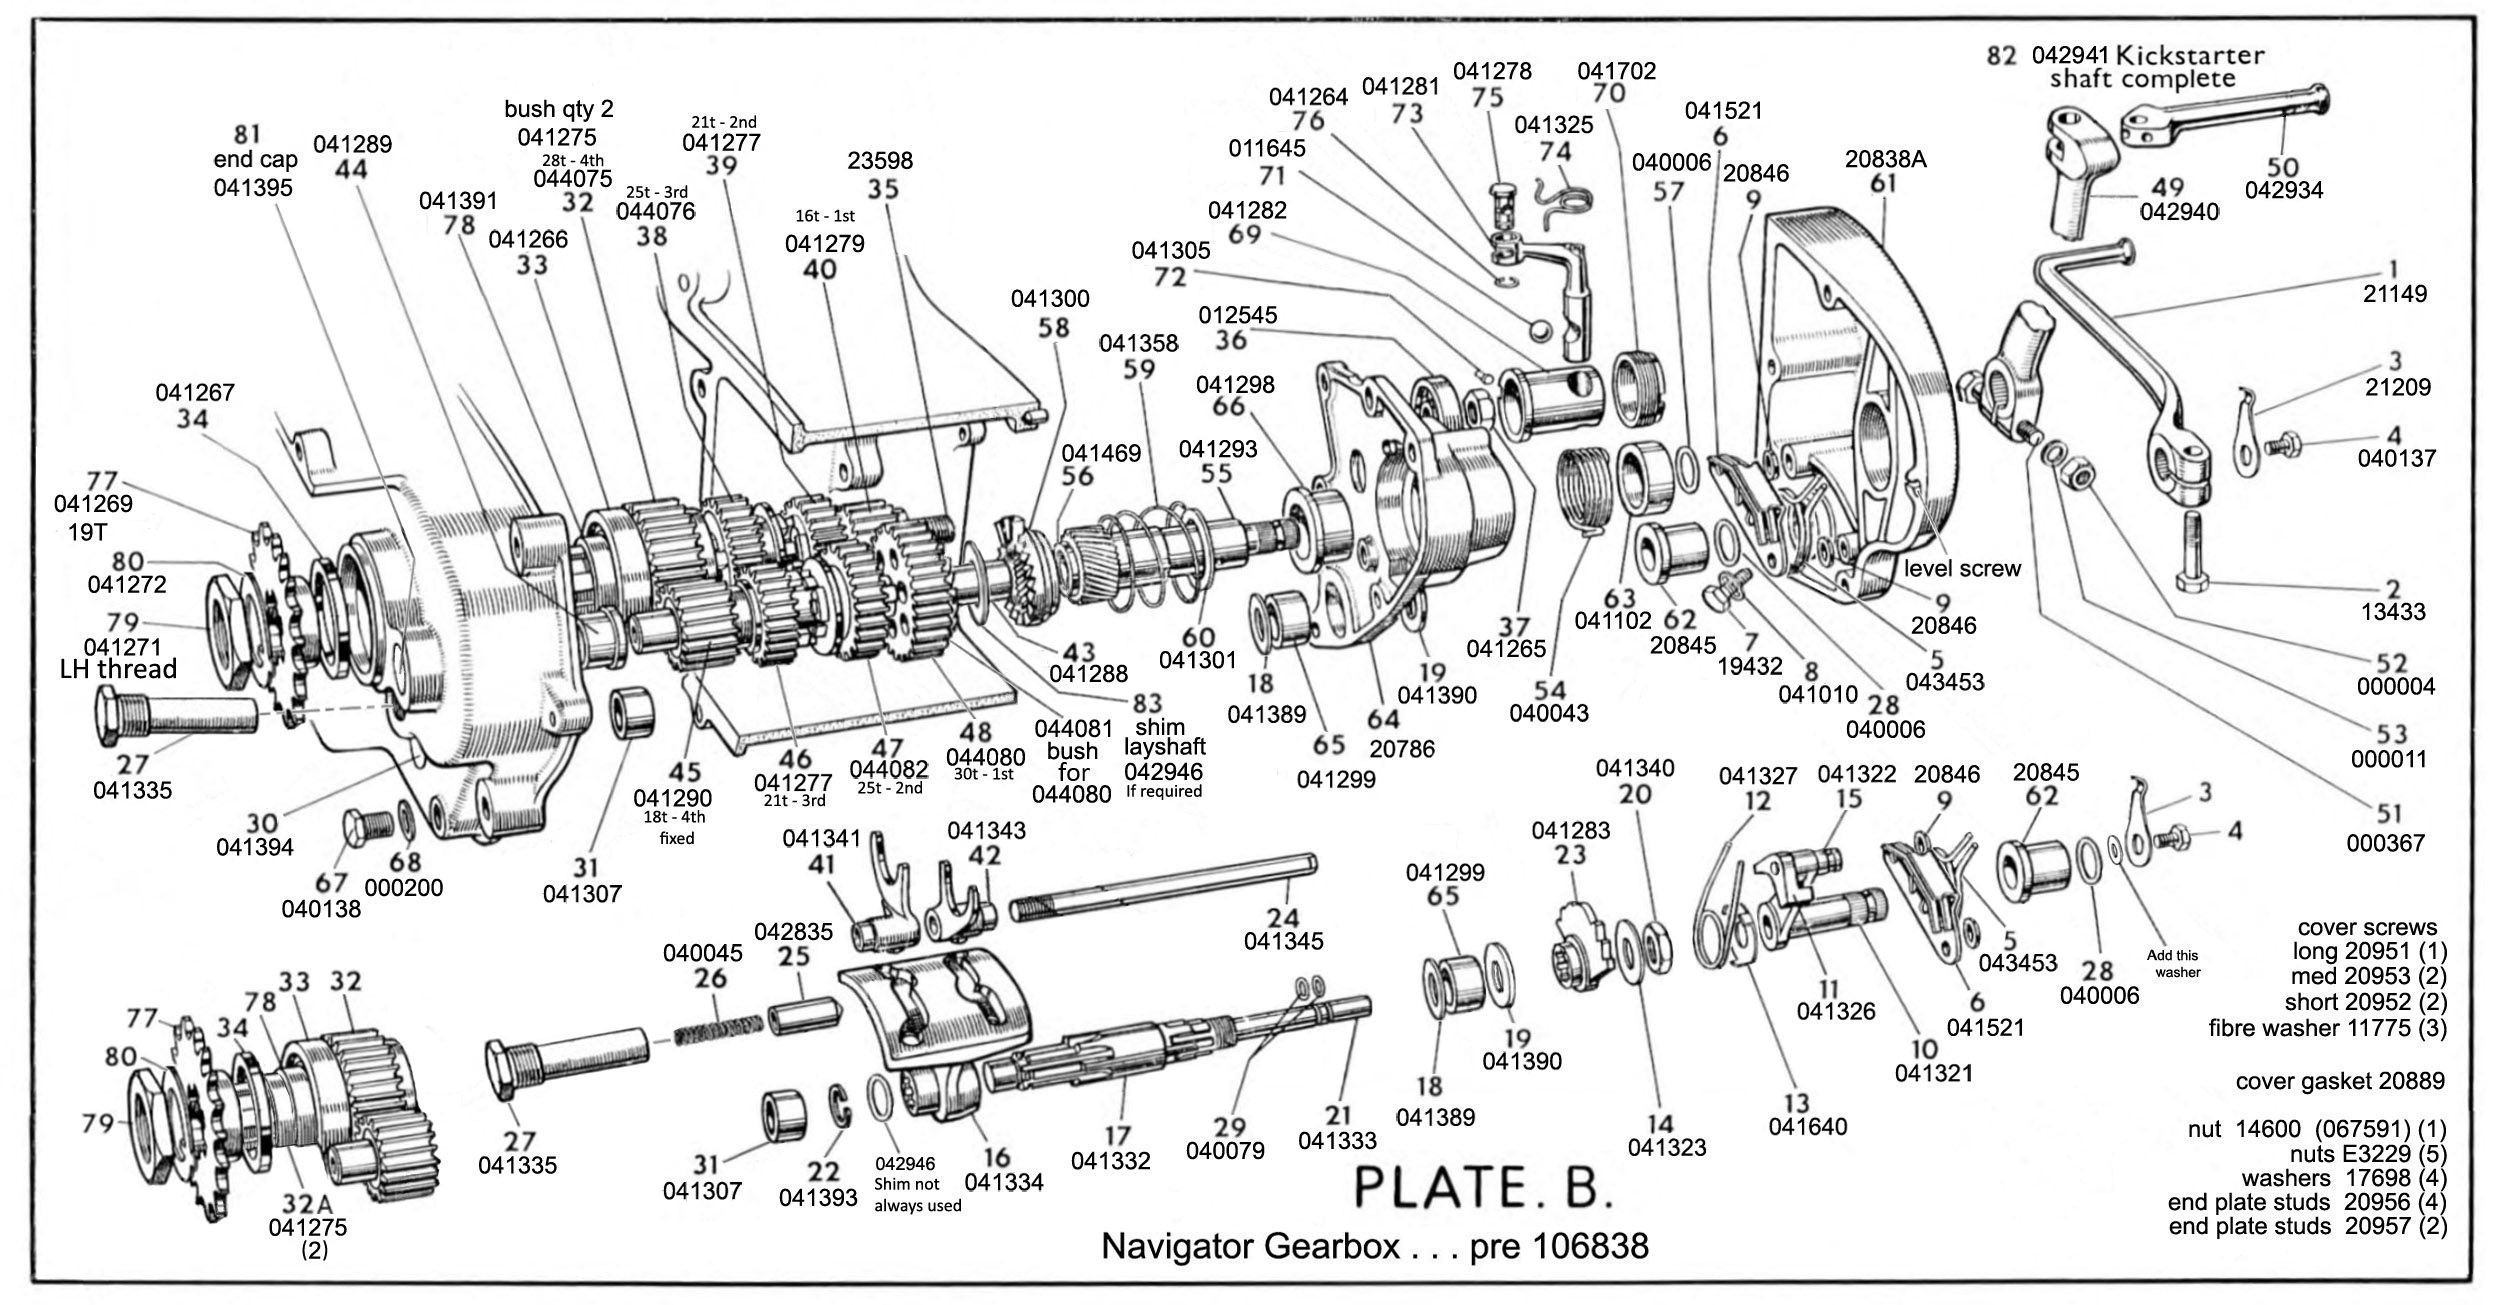
My modified gearbox image attached
- Log in to post comments
Early gearbox drawing
Stan,
Thank you for posting your modified and much improved exploded drawing.
Much clearer and easier to read. If you produced it, many thanks.
The web site you mention is a very good additional guide for early lightweight gearbox. The speaker on the film knows his stuff.
- Log in to post comments
Good information
Thanks for the info. After reading through the "ifixit" guide and a hunt through my spares I have determined that the box was assembled incorrectly. Using the correct washers alignment is now much better.
The guide is helpful, a few points I might not agree with but it got my box sorted so I'm grateful.
Couldn't get the sound to work on the short video. One of the things I would question is that if the bearing surface of the sleeve gear ("output shaft" as the writer calls it) is worn/corroded then the gear is scrap. I have an idea to sort this out. Will need to try before giving details. The info about roller width is useful.
Stan, that's an excellent drawing of the 'box, anymore improved drawings?
- Log in to post comments
'early' gearboxes
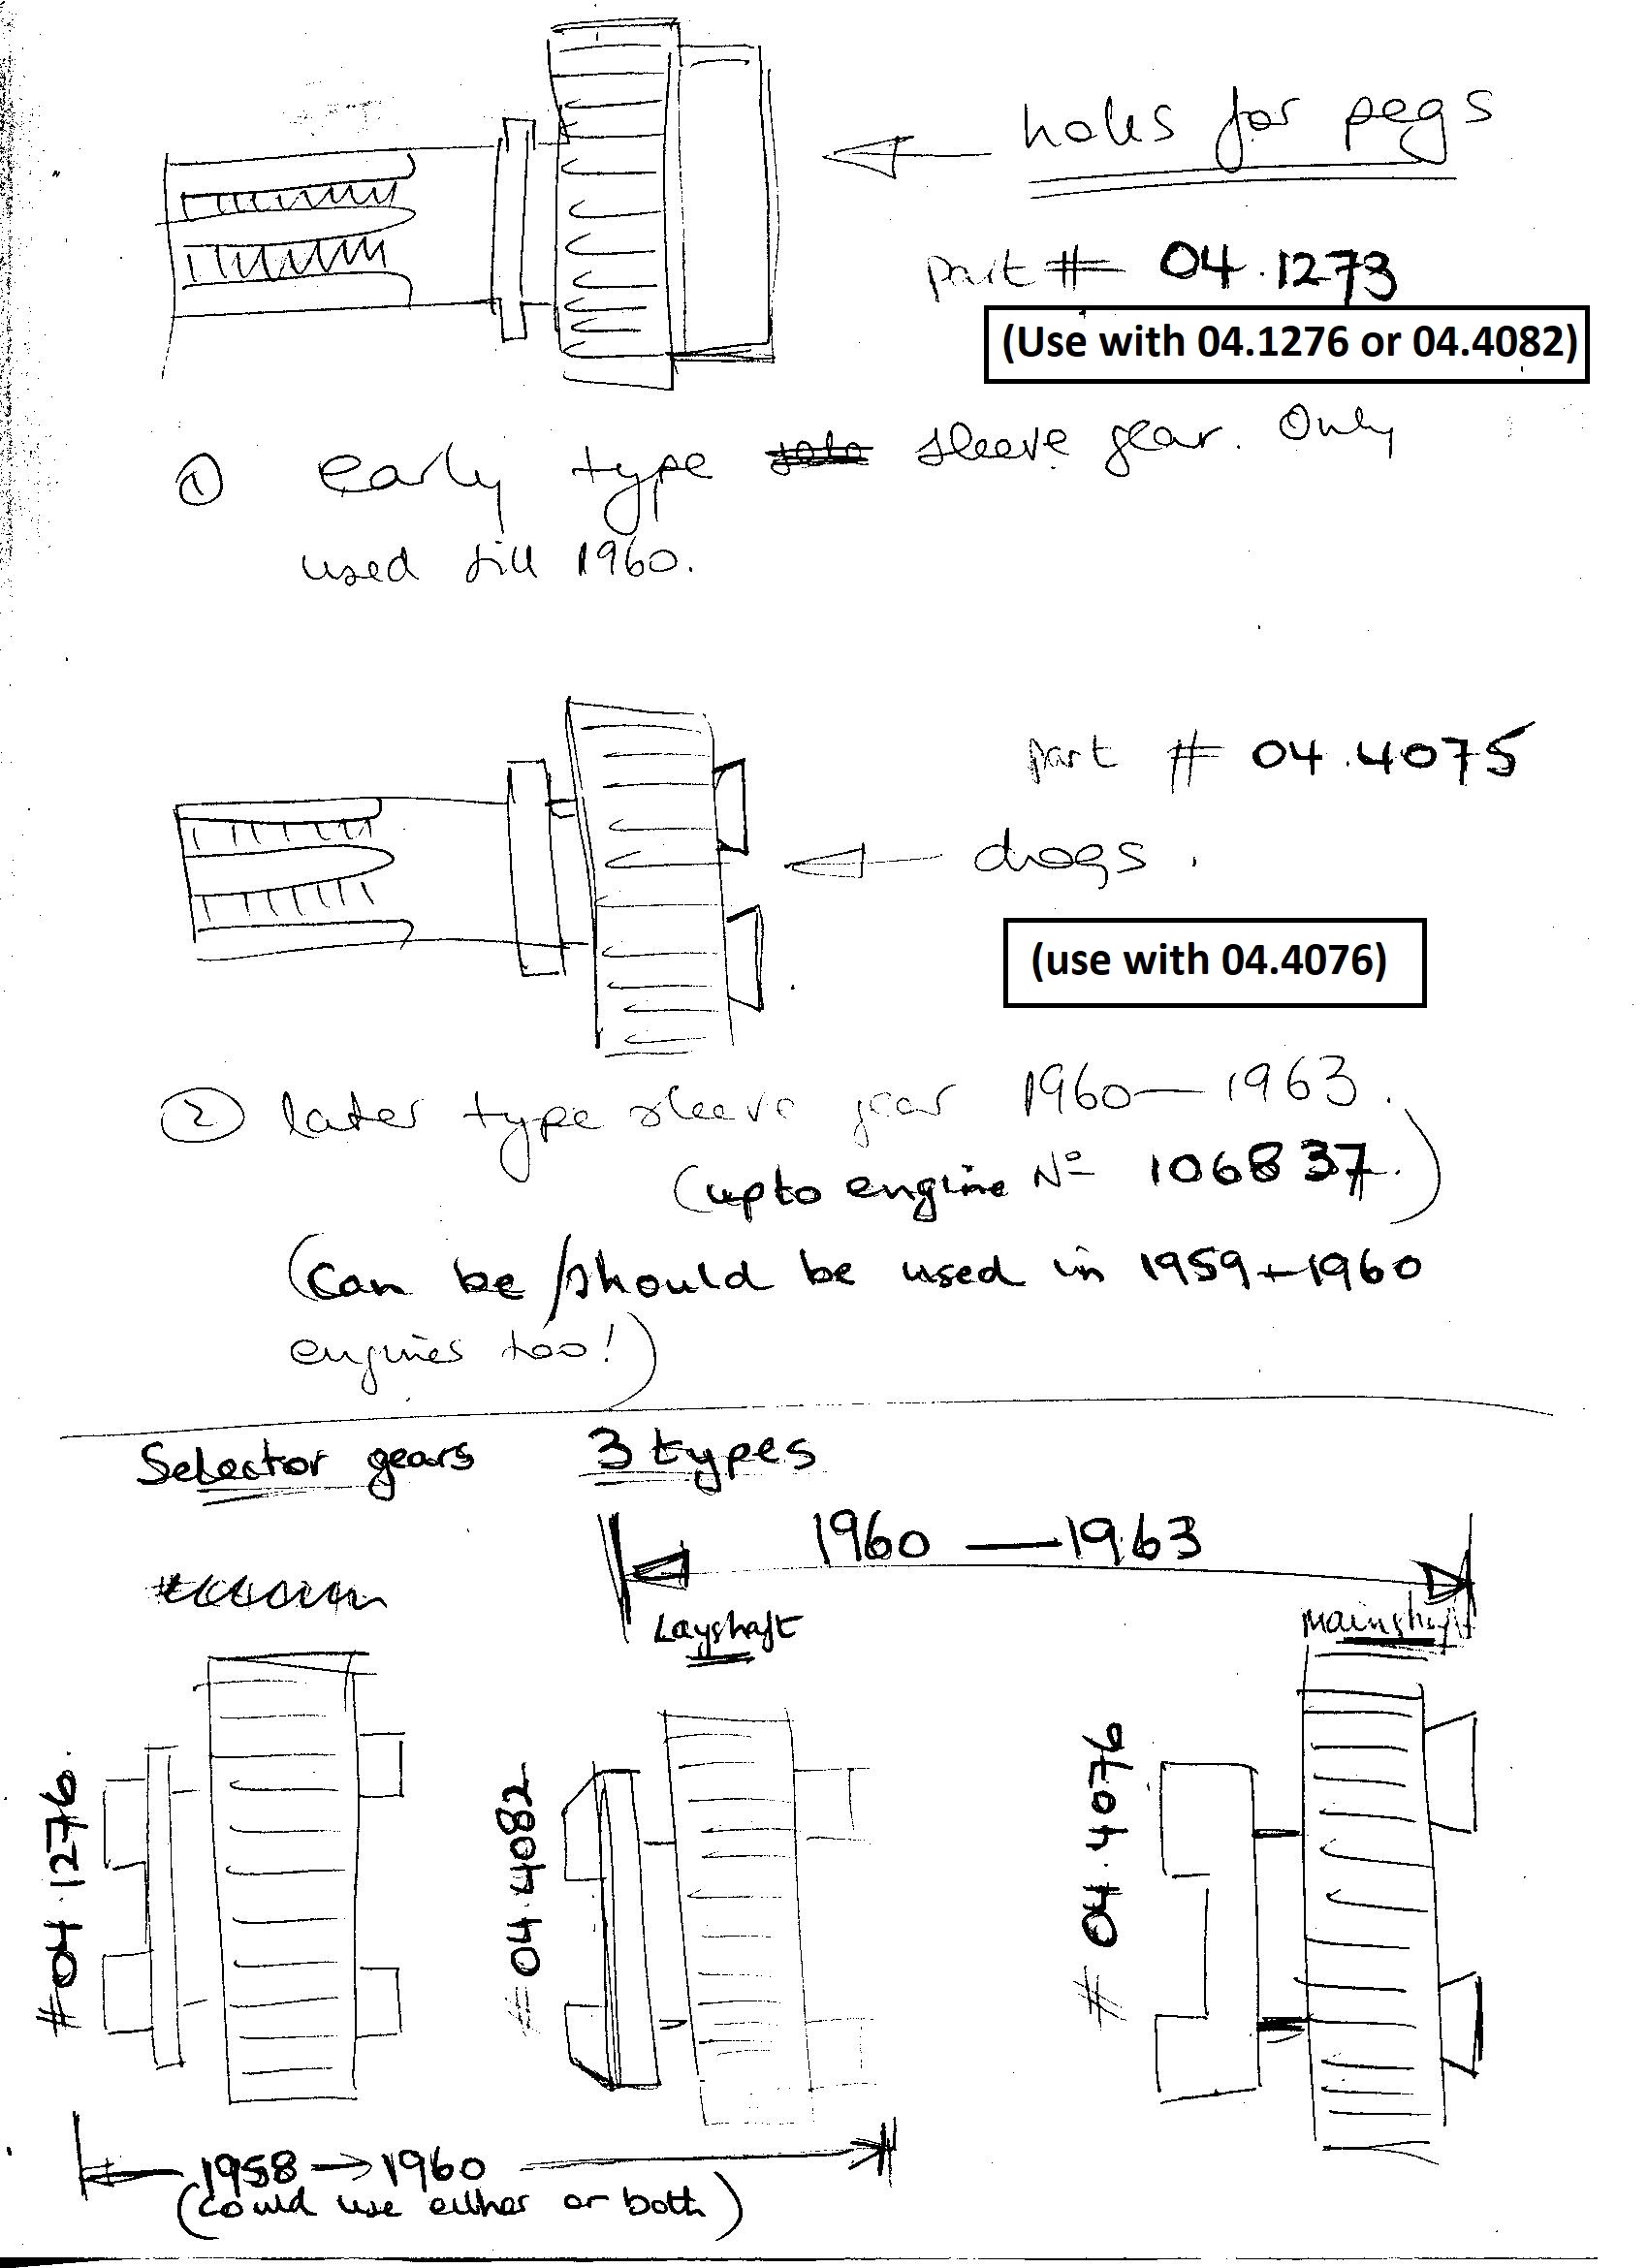
While I appreciate the Gearbox Drawing supplied by Stan Pyke - there were several changes to this gearbox down the years, mainly to do with the sleeve (4th) gear, and its matching selector gear.
The main change concerned changing from pegs & holes, to undercut dogs. This was done to minimise wear, and prevent jumping out of 4th gear. - which can happen to first gear for the same reason.
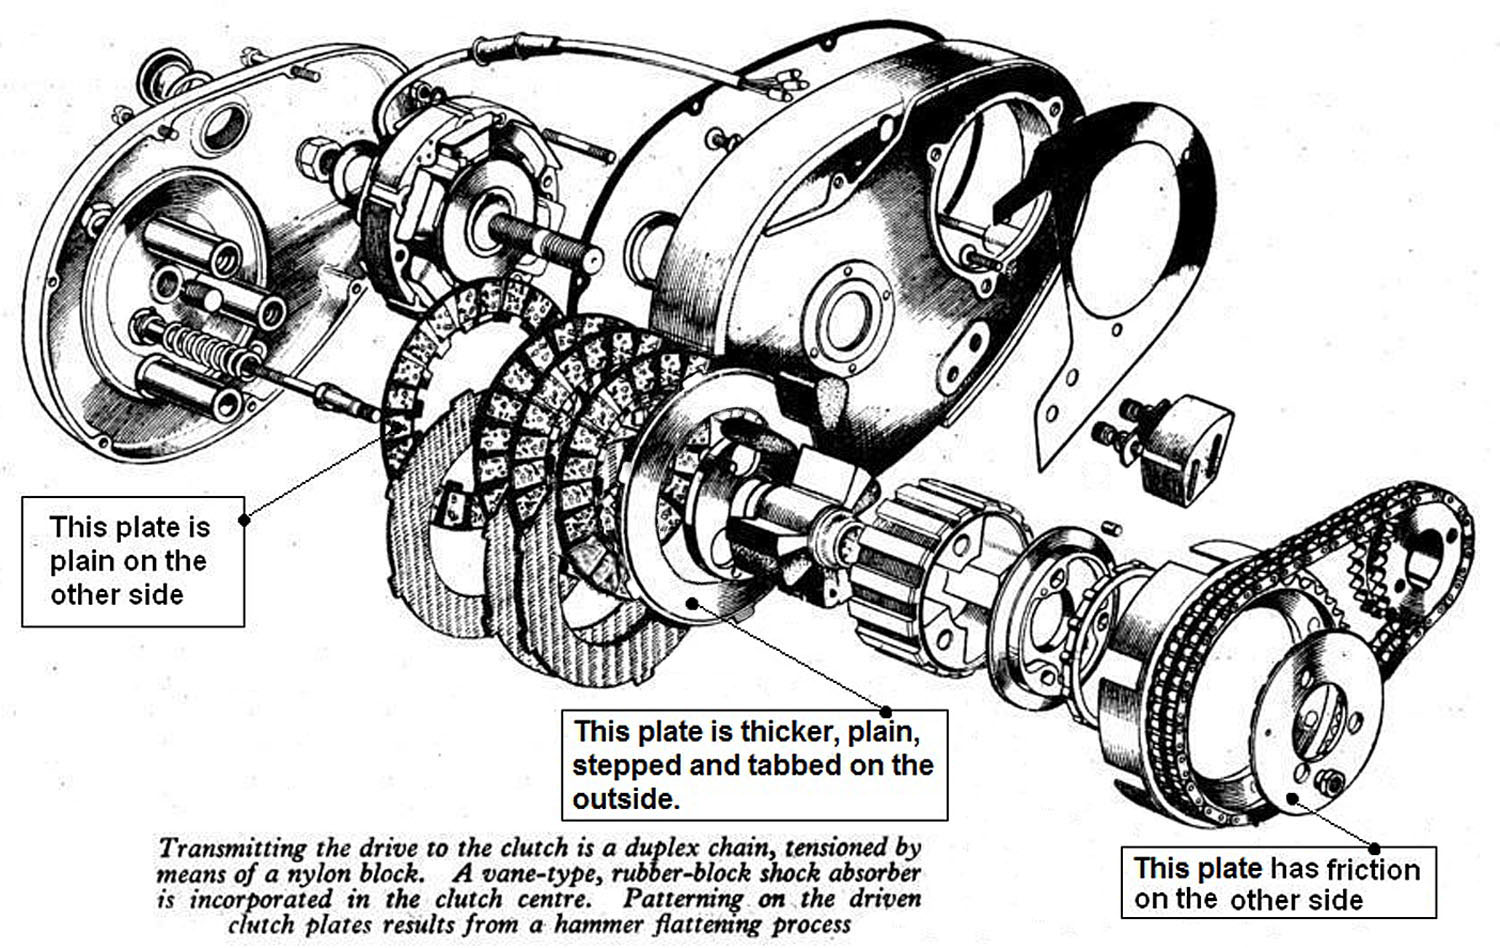
The first Jubilees had a sleeve gear, with 3x double holes facing into the gearbox, that 3pegs located in. It was the same system as employed by the kickstart/1st gear layshaft - so much so, that the selector gears were the same PNo 04.1276 (as shown in Stans Drawing) initially, later changing to PNo 04.4082, which was beefed up - but still used pegs.
Later, the sleeve gear was amended to having undercut dogs, altogether stronger and 4th gear was retained better. The 1st gear arrangement did not change.
So, it is possible to retrofit the later Sleeve gear, provided you also change Mainshaft 3rd selector gear as well.
(PS - this all applies to engines numbered below 106838)
I hope my sketch (attached) helps a little.
- Log in to post comments


That’s got me wondering now!
Dan