
i have recently started a navigator rebuild[found it locally and it has been off the road for 30 years]
I've sorted out the basics [engine, shocks, forks, new tyres and have done a rattle can respray, my intention is to get it back on the road and then sort out any more problems [there will be many!]
I still need to get the electrics sorted out..... am leaving it on 6 volt to start with, but may upgrade later
I have come across the resistance wire, broken!
where can I get another or can I just put in a resistor?
the bike is an early [1961] model......I last had one 50 years ago!
the prop stand is missing, there seems to be a threaded stud coming off the nearside frame at the front, any other prop stands fit?
thanks for any help
Attachments
p8090001-jpg
Hello John! I found this:…
- Log in to post comments
Speak to AO services, AL w…
Speak to AO services, AL will help you out, I went 12 volts which was easy enough.
Dan
- Log in to post comments
Hello John, I have never a…
Hello John,
I have never actually seen another side stand to fit the Navigator but it's most likely that the one fitted to a Francis Barnett (Cruiser 89 I think) would be a straight swop - but that's as rare as the Norton one as it was fitted as an extra.
The side stand was an OPTIONAL EXTRA on the Jubilee and Navigator but I think it was standard on the Electra so US Ebay might be a likely place to try. The NOC shop is another possibility as they had some made. Otherwise you could remake a Japanese one from an autojumble.
Patrick
- Log in to post comments
Previously Ulrich Hoffmann…
Previously Ulrich Hoffmann wrote:
Hello John!
I found this: http://www.jampot.com/article_print.asp?id=395
Resistance wire: This is another part of the charge circuit that is prone to being updated. It is used to reduce the charge rate when you are on ignition only. When you switch onto side lights the resistance is taken out of circuit, and the charge rate stays the same (this all assumes we have an original 6V system!). Should the thing fail then there will be a tendency to overcharge with lights off. I'm sure you can then watch the ammeter and judge battery charge yourself, or run side lights on! If you really must then you could replace the resistor wire with a 10 Watt resistor of about 3 or 4 ohms (or do it properly and go 12V, but we'll talk about that later).
many thanks for this, I think I will ride with the lights on! ill alsso try a repair although it wouldn't take to solder last night.also noted that the headlight glass is not going to get me through an mo.o.t. so will be on the lookout for one of those.
the ignition circuit seems to be working and I now have a headlight and tail/brake light so it is all coming together. once it is on the road I can test it for a year then do a full rebuild and change to 12volt
thanks
Attachments
pa250011-jpg
- Log in to post comments
Previously Dan Field wrote…
Previously Dan Field wrote:
Speak to AO services, AL will help you out, I went 12 volts which was easy enough.
Dan
many thanks, will give 6volt a try for 12 months then probably go to 12volt next year
electrics is not my strong point and I always shy away from it!
Attachments
pa250009-jpg
- Log in to post comments
Previously patrick_mullen…
Previously patrick_mullen wrote:
Hello John,
I have never actually seen another side stand to fit the Navigator but it's most likely that the one fitted to a Francis Barnett (Cruiser 89 I think) would be a straight swop - but that's as rare as the Norton one as it was fitted as an extra.
The side stand was an OPTIONAL EXTRA on the Jubilee and Navigator but I think it was standard on the Electra so US Ebay might be a likely place to try. The NOC shop is another possibility as they had some made. Otherwise you could remake a Japanese one from an autojumble.
Patrick
thanks Patrick, I'll have to start looking around at autojumbles, it has got a centre stand but not the easiest to use, might weld an extension onto it to get a little bit more leverage
the whole bike was painted in hammerite when I bought it, so at least all the body parts are sound!
Attachments
pa250006-1-jpg
- Log in to post comments
Hi John, Resistance wire w…
Hi John,
Resistance wire won't solder but you can join it using a 5 amp electrical connector - the screw on ones.
Good luck trying to find a headlight glass - the Wipac glass will be hard to find but I have seen replacement light units in the 6.5" size which fits the shell.
Patrick
- Log in to post comments
I remember having to use a…
I remember having to use a Japanese unit in the headlight back in the 70 s, it was a good fit. That was after I rear ended a fiat 127 ....... partly due to the ineffectual front brake! Which is why I have a 8" brake now!
- Log in to post comments
a silly question [well thr…
a silly question [well three actually]
Can you change the clutch cable through the inspection/oil filler hole [two screws] or do you take off the gearbox cover?
Where would the best place be to fit an external oil filter?
Recently fitted new tyres and tubes, on the inner tube the valve came with two nuts, did I fit them correctly [one on inside of rim and one on outside]?
horn and all lights working now!!
many thanks
John
Attachments
pa270005-jpg
- Log in to post comments
It certainly looks a lot b…
It certainly looks a lot better in your second picture. What a strange exhaust? One thing though concerns me -in your second picture there is a black line on the front down tube just below the head steady. These frames are known to fracture around this area, so has yours been welded here? Or is it just a black mark on the hammerite?.
I have never tried to change the clutch cable through the filler hole as I never thought about doing this ! Probably worth a go if you're used to micro-surgery.
Dan will be along shortly and he can explain the best method of fitting an oil filter.
By the way the Wipac switch on the right hand side of the headlight seems to have the letter H on it - this seems to indicate it's the light switch. Normally the ignition switch is on the R/H and the light switch is on the left- but it's not really critically important as you already have ignition and lights working.
Patrick
- Log in to post comments
Previously john_day wrote:…
Previously john_day wrote:
a silly question [well three actually]
Can you change the clutch cable through the inspection/oil filler hole [two screws] or do you take off the gearbox cover?
Where would the best place be to fit an external oil filter?
Recently fitted new tyres and tubes, on the inner tube the valve came with two nuts, did I fit them correctly [one on inside of rim and one on outside]?
horn and all lights working now!!
many thanks
John
I'm not a very good mechanic (I despair too easily!) but I have managed to fit a new clutch cable through the inspection hole using long nosed pliers and fingers. Mind you, mine is the later model and I don't know if it's different.
BTW, when I got my Navigator I had so much trouble getting it onto the centre stand that I was going to sell it. Then, on the advice of Howard Thompson, I learned the technique: standing on the left of the bike, press the stand down with your left foot, get the bike solidly balanced on the stand (this is critical) then grasp the grab bar with both hands and lift the bike up and back. Proper lifting technique helps - braced back, straight arms, bent knees - especially if you have a hernia! (Interestingly, hernia auto-corrects to Narnia on my iPad).
Terry
- Log in to post comments
Funnily enough I found I s…
Funnily enough I found I still had that knack 40 years after I owned my first jubilee! My only problem is that I have an aluminium rear mudguard so have to be careful not to pull too hard on the grab rail.
- Log in to post comments
Previously patrick_mullen…
Previously patrick_mullen wrote:
It certainly looks a lot better in your second picture. What a strange exhaust? One thing though concerns me -in your second picture there is a black line on the front down tube just below the head steady. These frames are known to fracture around this area, so has yours been welded here? Or is it just a black mark on the hammerite?.
I have never tried to change the clutch cable through the filler hole as I never thought about doing this ! Probably worth a go if you're used to micro-surgery.
Dan will be along shortly and he can explain the best method of fitting an oil filter.
By the way the Wipac switch on the right hand side of the headlight seems to have the letter H on it - this seems to indicate it's the light switch. Normally the ignition switch is on the R/H and the light switch is on the left- but it's not really critically important as you already have ignition and lights working.
Patrick
the mark on the downtube is just badly painted hammerite.......although I did rush out to check!
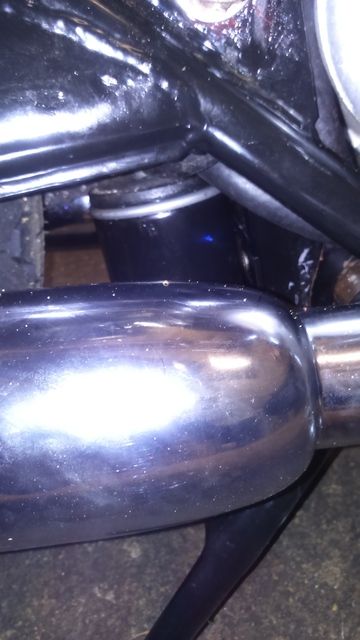
the exhaust is two into one, looks very home made but sounds o.k.
I will keep my eyes open at autojumbles for two original silencers as the spares with the bike included two new downpipes.
I will also be replacing all the oil pipes as the ones on the bike are very brittle.
off to the Garstang autojumble tomorrow so will be on the lookout for bits and bobs
cheers
John
Attachments
pa250010-jpg
- Log in to post comments
I ummed and ahhed about wh…
I ummed and ahhed about where to put a filter and decided in the end to fit it to the centre section just above the centre stand stop. It just fits but it's a bit fiddly getting the bolts in! Easier to measure while it's together and fit when the engine is out, but I did it and have big hands! One problem I had was the centre stand stop bolts just founded the canister, so I counter sunk them. I didn't expect anyone to look there, but will post a pic in a minute to show how I did it.
How was the auto jumble at Garstang, is that your neck of the woods, my dad had a shop in bamber bridge.
Dan
- Log in to post comments
Previously Dan Field wrote…
Previously Dan Field wrote:
I ummed and ahhed about where to put a filter and decided in the end to fit it to the centre section just above the centre stand stop. It just fits but it's a bit fiddly getting the bolts in! Easier to measure while it's together and fit when the engine is out, but I did it and have big hands! One problem I had was the centre stand stop bolts just founded the canister, so I counter sunk them. I didn't expect anyone to look there, but will post a pic in a minute to show how I did it.
How was the auto jumble at Garstang, is that your neck of the woods, my dad had a shop in bamber bridge.
Dan
Garstang autojumble was o.k., but didn't get much,so will be on ebay tomorrow.
There is nothing major to get for the bike, it would probably get an m.o.t. without any problems, little things like front cowl, the one that goes around the headstock, and maybe air filter and back panels.
Still have to do all the paperwork, as it came with no documents ( last on the road 30+ years)
It has got the original matching engine frame numbers, so should not be too much of a problem, but realistically i don't need it on the road until warmer weather.......there's aways the bsa or re for a run out in winter.
Look forwardvto the foto of oil filter
I'm up at W ray ( famous for scarecrows, fastest internet in the world and wray bike night
Cheers
John
- Log in to post comments
Word of warning, if you us…
Word of warning, if you used Halfords rattle cans, the paint is not petrol proof. Neither is their lacquer. They do sell a petrol proof lacquer for motorcycle tanks, but it's spray pattern is awful. Like you I've done a quick resto, mine had been half done badly when I bought it as a box of bits on eBay. Just the front brake to set up and chain guard and rear brake switch before the mot.
- Log in to post comments
Ok here are the pics, sorr…
Ok here are the pics, sorry not very good quality


- Log in to post comments
Previously Dan Field wrote…
Previously Dan Field wrote:
Ok here are the pics, sorry not very good quality
- Log in to post comments
Previously terry_grimwood…
Previously terry_grimwood wrote:
Previously john_day wrote:
a silly question [well three actually]
Can you change the clutch cable through the inspection/oil filler hole [two screws] or do you take off the gearbox cover?
Where would the best place be to fit an external oil filter?
Recently fitted new tyres and tubes, on the inner tube the valve came with two nuts, did I fit them correctly [one on inside of rim and one on outside]?
horn and all lights working now!!
many thanks
John
I'm not a very good mechanic (I despair too easily!) but I have managed to fit a new clutch cable through the inspection hole using long nosed pliers and fingers. Mind you, mine is the later model and I don't know if it's different.
BTW, when I got my Navigator I had so much trouble getting it onto the centre stand that I was going to sell it. Then, on the advice of Howard Thompson, I learned the technique: standing on the left of the bike, press the stand down with your left foot, get the bike solidly balanced on the stand (this is critical) then grasp the grab bar with both hands and lift the bike up and back. Proper lifting technique helps - braced back, straight arms, bent knees - especially if you have a hernia! (Interestingly, hernia auto-corrects to Narnia on my iPad).
Terry
Cheers terry
I can never understand why some bikes are a nightmare to get onto stands.BMWs have a lifting handle....easy
I've fitted one to the bsa , works a treat
- Log in to post comments
Previously john_day wrote:…
Previously john_day wrote:
Can you change the clutch cable through the inspection/oil filler hole [two screws] or do you take off the gearbox cover?
John, I guess it is better to take the gearbox cover off!
Today I fitted a new cable to my Navigator and I almost needed three hands to get it into the clutch actuating lever! The gearbox cover was off. You have to get the cable in the right position, also you have the move the lever to the left and slide on the slotted pin!
It would not have been possible to work only through the inspection cover. The slotted pin holding the cable once fell behind the inner gearbox plate. It is a very narrow place to work in!
- Log in to post comments
Previously Ulrich Hoffmann…
Previously Ulrich Hoffmann wrote:
Previously john_day wrote:
Can you change the clutch cable through the inspection/oil filler hole [two screws] or do you take off the gearbox cover?
John, I guess it is better to take the gearbox cover off!
Today I fitted a new cable to my Navigator and I almost needed three hands to get it into the clutch actuating lever! The gearbox cover was off. You have to get the cable in the right position, also you have the move the lever to the left and slide on the slotted pin!
It would not have been possible to work only through the inspection cover. The slotted pin holding the cable once fell behind the inner gearbox plate. It is a very narrow place to work in!
thanks for that Ulrich
are there any springs or selectors that drop out when you remove the cover.
the clutch is working fine at the moment but all the cables on the bike are 30+years old so I'm replacing them all
just sent off for an age related certificate so am almost ready to get it back on the road [legally]
Cheers
John
- Log in to post comments
Hi John, Ulrich will be up…
Hi John, Ulrich will be up to speed with this job but from memory it is pretty straight forward and obvious but a bit fiddly getting the gear change pawl to line up properly - so put the gearbox into neutral before removing the cover. While you have the cover off it's a good time to replace the O rings. There are four of these and again they are pretty obvious how to change.
Patrick
- Log in to post comments
Previously patrick_mullen…
Previously patrick_mullen wrote:
Hi John, Ulrich will be up to speed with this job but from memory it is pretty straight forward and obvious but a bit fiddly getting the gear change pawl to line up properly - so put the gearbox into neutral before removing the cover. While you have the cover off it's a good time to replace the O rings. There are four of these and again they are pretty obvious how to change.
Patrick
thanks Patrick
i'll order some oil seals ready for the cable renewal......it does seem to be a big job to change a cable!
oh and an alloy mudguard, all the fashion in the 60s
Attachments
pa250008-jpg
- Log in to post comments
a very simple question, on…
a very simple question, on refitting the wipac lens........... which wy around does the retaining fastener fit?
ie which way fits to the front????
Attachments
pb140010-jpg
- Log in to post comments
Actually your picture does…
Actually your picture doesn't look very like the clip that I remember ! Could it be a homemade one? I think the spring clip was called a W clip - probably because it was a sort of W shape. The two ends of the W located in the rolled over back edge of the headlight rim and the bottom of the W pressed against the light unit. There are four or five of them equally spaced around the rim.
Patrick.
- Log in to post comments
I think this is the clip t…
I think this is the clip that secures the rim onto the shell. I've got mine with right angled end facing inwards and the other end overlapping the rim.
- Log in to post comments
Previously Maurice Turling…
Previously Maurice Turlington wrote:
I think this is the clip that secures the rim onto the shell. I've got mine with right angled end facing inwards and the other end overlapping the rim.
thanks Maurice I,ve done that and it seems to work, not a lot of room in the headlamp shell for all the gubbins!
work in progress.....
Attachments
pb150012-jpg
- Log in to post comments
Previously patrick_mullen…
Previously patrick_mullen wrote:
Actually your picture doesn't look very like the clip that I remember ! Could it be a homemade one? I think the spring clip was called a W clip - probably because it was a sort of W shape. The two ends of the W located in the rolled over back edge of the headlight rim and the bottom of the W pressed against the light unit. There are four or five of them equally spaced around the rim.
Patrick.
thanks again Patrick, my apologies, it was a terrible photo and I didn't make myself clear, it was the clip that holds the rim to the shell. problem now solved.
now where does that spring go?????!!!
Attachments
pb150016-jpg
- Log in to post comments
Previously john_day wrote:…
Previously john_day wrote:
now where does that spring go?????!!!
Nowhere!
There is only one mainstand spring. (the right one on your pic.)
- Log in to post comments
hi John, Now that Maurice…
hi John, Now that Maurice has put us right I can see that it is definitely the clip that holds the light into the shell. My excuse is that I am going senile; I can remember when the new Norton 650SS was the superbike
Ulrich is right about your second spring. It shouldn't be there at all but the stand seems to hang down too low and the 'proper' spring on the right seems to be much too long. I have had a look under my Navigator and the spring there has 11 coils - about half of what you have.
Patrick
- Log in to post comments
Hi John, I've had another…
Hi John,
I've had another look at your picture (with my best glasses on) and I think that the spring hook is wrongly connected. It should swivel on the bottom engine mounting stud and hook over the stand/frame spacer. I'm sure that's how it is fitted on my bike and the stand definitely comes back to the stop. What is the spring hook connected to on your bike?
Patrick
- Log in to post comments
Previously patrick_mullen…
Previously patrick_mullen wrote:
Hi John,
I've had another look at your picture (with my best glasses on) and I think that the spring hook is wrongly connected. It should swivel on the bottom engine mounting stud and hook over the stand/frame spacer. I'm sure that's how it is fitted on my bike and the stand definitely comes back to the stop. What is the spring hook connected to on your bike?
Patrick
cheers Patrick,
ill pop out this afternoon and have another go and forward photos if I get it right, have posted this photo on another stream...... its a delux
Attachments
p9010009-jpg
- Log in to post comments
That's definitely a non-o…
That's definitely a non-original method of fitting a stand on a Navigator and the stand itself has been much modified. The Standard and De Luxe both use the same stand and the same fittings.
You should find that the nut on the bottom engine bolt is a special nut with a shoulder on it. This nut holds the engine tightly in the frame but allows the spring hook to swivel freely. If it's missing check the other engine bolt nuts -someone could have swopped them around in the past. The NOC shop I think does one but they are easy enough to make by simply modifying a standard nut.
Here's a picture of my Navigators - a De Luxe and a Standard. You can see why I can't get to them to take a picture -three MGBs and five Nortons!.
Attachments
p1080002-jpg
- Log in to post comments
Previously patrick_mullen…
Previously patrick_mullen wrote:
That's definitely a non-original method of fitting a stand on a Navigator and the stand itself has been much modified. The Standard and De Luxe both use the same stand and the same fittings.
You should find that the nut on the bottom engine bolt is a special nut with a shoulder on it. This nut holds the engine tightly in the frame but allows the spring hook to swivel freely. If it's missing check the other engine bolt nuts -someone could have swopped them around in the past. The NOC shop I think does one but they are easy enough to make by simply modifying a standard nut.
Here's a picture of my Navigators - a De Luxe and a Standard. You can see why I can't get to them to take a picture -three MGBs and five Nortons!.
thanks patrick
photos as promised
Kawasaki prop stand spring
works a treat........ fitted with the aid of 32 two pence pieces!
Attachments
pb160017-jpg
- Log in to post comments
Previously john_day wrote:…
Previously john_day wrote:
Previously patrick_mullen wrote:
That's definitely a non-original method of fitting a stand on a Navigator and the stand itself has been much modified. The Standard and De Luxe both use the same stand and the same fittings.
You should find that the nut on the bottom engine bolt is a special nut with a shoulder on it. This nut holds the engine tightly in the frame but allows the spring hook to swivel freely. If it's missing check the other engine bolt nuts -someone could have swopped them around in the past. The NOC shop I think does one but they are easy enough to make by simply modifying a standard nut.
Here's a picture of my Navigators - a De Luxe and a Standard. You can see why I can't get to them to take a picture -three MGBs and five Nortons!.
thanks patrick
photos as promised
Kawasaki prop stand spring
works a treat........ fitted with the aid of 32 two pence pieces!
brilliant.
just had the dating certificate back from David Catton...... many thanks , took less than a week
dated 24th November 1961, went to Elite motors, Tooting London
so it qualifies for an age related number
everything on the bike now works [clutch cable to fit] so hopefully after Christmas its an m.o.t. then a few runs to sort out any problems. next winter could see a rebuild
it sounds good, but will try and pick up some original exhausts at autojumbles [I've got some new downpipes[ came in box of spares
- Log in to post comments
John you can a pair of uni…
John you can a pair of universal silencers for under £100 but I managed bought a pair of s/H late type cigar silencers at Netley for £50 so they are about!
- Log in to post comments
Previously john_day wrote:…
Previously john_day wrote:
Previously john_day wrote:
Previously patrick_mullen wrote:
That's definitely a non-original method of fitting a stand on a Navigator and the stand itself has been much modified. The Standard and De Luxe both use the same stand and the same fittings.
You should find that the nut on the bottom engine bolt is a special nut with a shoulder on it. This nut holds the engine tightly in the frame but allows the spring hook to swivel freely. If it's missing check the other engine bolt nuts -someone could have swopped them around in the past. The NOC shop I think does one but they are easy enough to make by simply modifying a standard nut.
Here's a picture of my Navigators - a De Luxe and a Standard. You can see why I can't get to them to take a picture -three MGBs and five Nortons!.
thanks patrick
photos as promised
Kawasaki prop stand spring
works a treat........ fitted with the aid of 32 two pence pieces!
brilliant.
just had the dating certificate back from David Catton...... many thanks , took less than a week
dated 24th November 1961, went to Elite motors, Tooting London
so it qualifies for an age related number
everything on the bike now works [clutch cable to fit] so hopefully after Christmas its an m.o.t. then a few runs to sort out any problems. next winter could see a rebuild
it sounds good, but will try and pick up some original exhausts at autojumbles [I've got some new downpipes[ came in box of spares
when I put clutch cable to fit..........I didn't think it would be such a pain
exhaust off , no problem [[two into one]
gear lever off, bit of a pain
kickstart, similar pain
gearbox cover of....o.k.
clutch cable out...no problem
new cable in, great all going well
sod it.......... not enough free play in cable
back to the drawing board, are there two different cables or do I have to cut down the outer cable to fit???? help please
Attachments
pb210025-jpg
- Log in to post comments
Yes there are two differen…
Yes there are two different cables- one that fits the early gearbox up to 1963 and another which fits the later gearbox. But I don't know the difference in them. Your picture seems to show a big difference in length - presumably the longer one is your 'old' cable..
Where did you get the new cable? Best bet is to contact Andy S - he will know better than most people.
Patrick
- Log in to post comments
Previously patrick_mullen…
Previously patrick_mullen wrote:
Yes there are two different cables- one that fits the early gearbox up to 1963 and another which fits the later gearbox. But I don't know the difference in them. Your picture seems to show a big difference in length - presumably the longer one is your 'old' cable..
Where did you get the new cable? Best bet is to contact Andy S - he will know better than most people.
Patrick
cheers once again patrick
the spare cable came in a box of bits with the bike......just assumed it was right. ive just spent 2 hours with a dremel cutting back the outer cable to get it to fit, should get it all back together today........but two days to change a clutch cable , must be a record, 20 minutes on most bikes with external levers!!!
- Log in to post comments
Hi John, The Jubilee/Navig…
Hi John,
The Jubilee/Navigator was 'skilfully' designed to keep retired persons fully occupied. You will NEVER be at a loss for something to do once you're on the road.!
- Log in to post comments
Mine took a day, so you'r…
Mine took a day, so you're not alone! Mine has a home made actuating arm that needed similar cable adjustment!
- Log in to post comments
Previously patrick_mullen…
Previously patrick_mullen wrote:
Hi John,
The Jubilee/Navigator was 'skilfully' designed to keep retired persons fully occupied. You will NEVER be at a loss for something to do once you're on the road.!
how right you are!
all back together, filled gearbox with oil 2 1/4 pints of 50
went out into the garage this a.m. 1/2 pint oil over the floor
will investigate later!!!
- Log in to post comments
The answer this time might…
The answer this time might be a very simple one - you have overfilled the gear box !. Early gearboxes only took 1 3/4 pints (one litre) of oil. The later gearbox took more.
- Log in to post comments
Previously patrick_mullen…
Previously patrick_mullen wrote:
The answer this time might be a very simple one - you have overfilled the gear box !. Early gearboxes only took 1 3/4 pints (one litre) of oil. The later gearbox took more.
thank you, glad I read your comments before taking the gearbox cover off, cleaned up the garage floor [the ramp actually] and not a drip has appeared since.......result
off to sunny Madeira for a fortnight , so after that it will be road tested [back lanes, honestly officer] and hopefully then made legal
Photo is of my navigator in '67
no, it's not me posing!
Attachments
img015-pdf
- Log in to post comments
You can't beat black and…
You can't beat black and white photos- they just add so much character. Your bike is quite remarkable as it still has all of it's original tinware and badges;virtually everyone was in to cafe racers then and go faster bits were essential even if they didn't make it go any faster.
All Norton Jubilees and Navigators leak oil -I was told it was a special design feature; it automatically rustproofed the bike and as long as it dripped oil you "knew" it was OK for oil, so you didn't need to check the oil tank !!. Anyway I hope you don't believe that.
Totally different to my modern German car- I asked the main dealer how you checked the oil as it doesn't have a dipstick. He seemed to think this was a silly question - it will flash up a warning message on the dash if it needs any attention and the main dealer will top up the oil. It apparently needs a factory trained technician to do this. Well that's what he told me.
In comparison the Jubilee handbook for 1959 gives detailed instructions for dismantling the engine and gearbox. Probably because they knew it would require regular 'fettling' just to get the rider home.
Enjoy your spell in the sunshine.
Patrick
- Log in to post comments
Previously patrick_mullen…
Previously patrick_mullen wrote:
You can't beat black and white photos- they just add so much character. Your bike is quite remarkable as it still has all of it's original tinware and badges;virtually everyone was in to cafe racers then and go faster bits were essential even if they didn't make it go any faster.
All Norton Jubilees and Navigators leak oil -I was told it was a special design feature; it automatically rustproofed the bike and as long as it dripped oil you "knew" it was OK for oil, so you didn't need to check the oil tank !!. Anyway I hope you don't believe that.
Totally different to my modern German car- I asked the main dealer how you checked the oil as it doesn't have a dipstick. He seemed to think this was a silly question - it will flash up a warning message on the dash if it needs any attention and the main dealer will top up the oil. It apparently needs a factory trained technician to do this. Well that's what he told me.
In comparison the Jubilee handbook for 1959 gives detailed instructions for dismantling the engine and gearbox. Probably because they knew it would require regular 'fettling' just to get the rider home.
Enjoy your spell in the sunshine.
Patrick
thanks Patrick, great holiday, lots of walking, bit of fishing, now back to the navigator.....
starts easily on emergency on a flat battery, warms up nicely, ticks over, gearbox works, speedo and all lights horn etc. open up throttle......... blah! sounds like a fuel problem to me so will investigate this p.m.
and yes there are a few drops underneath the gearbox, but not bad for a fortnight, certainly not worth taking off the gearbox cover to investigate.
- Log in to post comments
first time on the road tod…
first time on the road today!
it went really well, gears o.k. clutch smoother than the thunderbolt, seems to rev more than the bsa, speedo smooth up to about 70 [ honestly officer]
sounds good, even with the two into one exhaust
still a problem with fuel starvation, will check it out later
pleased with progress...... but at 6 foot 5 inches it does seem a very small bike
will take it out later this week for a longer run, and then it's a time to make it road legal, I have the dating certificate, so I think its cover note, then m.o.t., then apply for registration number and document
- Log in to post comments


Hello John!
I found this: http://www.jampot.com/article_print.asp?id=395
Resistance wire: This is another part of the charge circuit that is prone to being updated. It is used to reduce the charge rate when you are on ignition only. When you switch onto side lights the resistance is taken out of circuit, and the charge rate stays the same (this all assumes we have an original 6V system!). Should the thing fail then there will be a tendency to overcharge with lights off. I'm sure you can then watch the ammeter and judge battery charge yourself, or run side lights on! If you really must then you could replace the resistor wire with a 10 Watt resistor of about 3 or 4 ohms (or do it properly and go 12V, but we'll talk about that later).