
Could anybody help me please with these questions.
1) When the distributor is fitted, what stops the "end floating" of it's drive shaft, as you can quite easily push the shaft in so the advance retard mechanism touches the points plate on the underside.
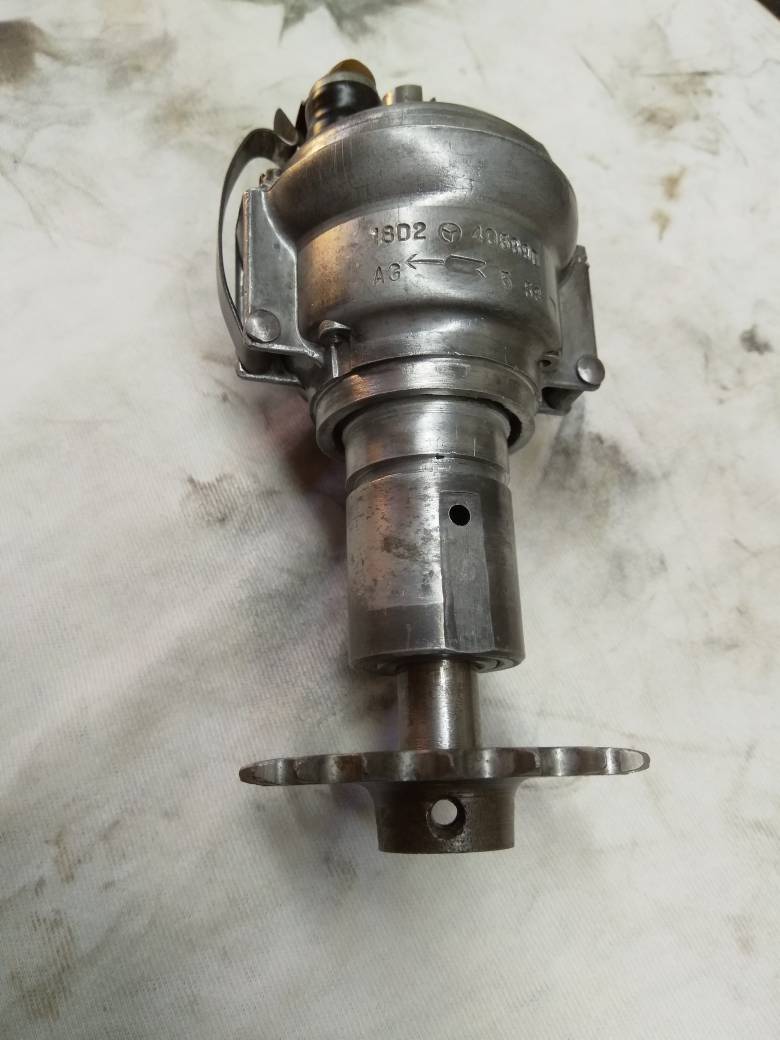
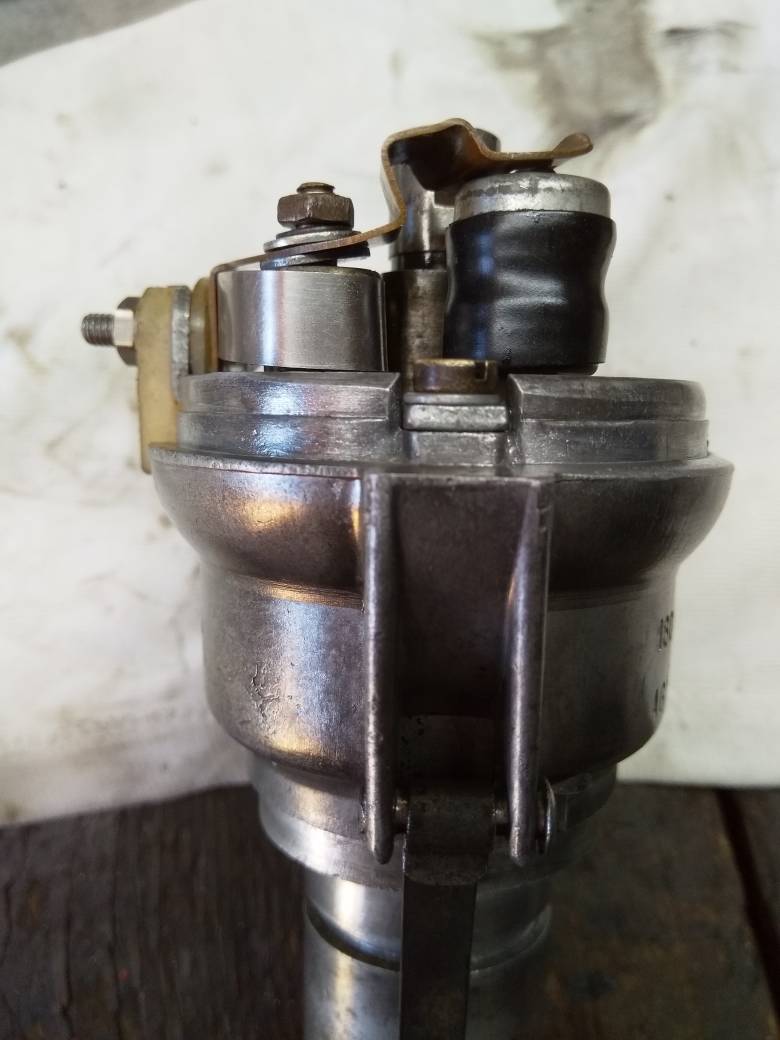
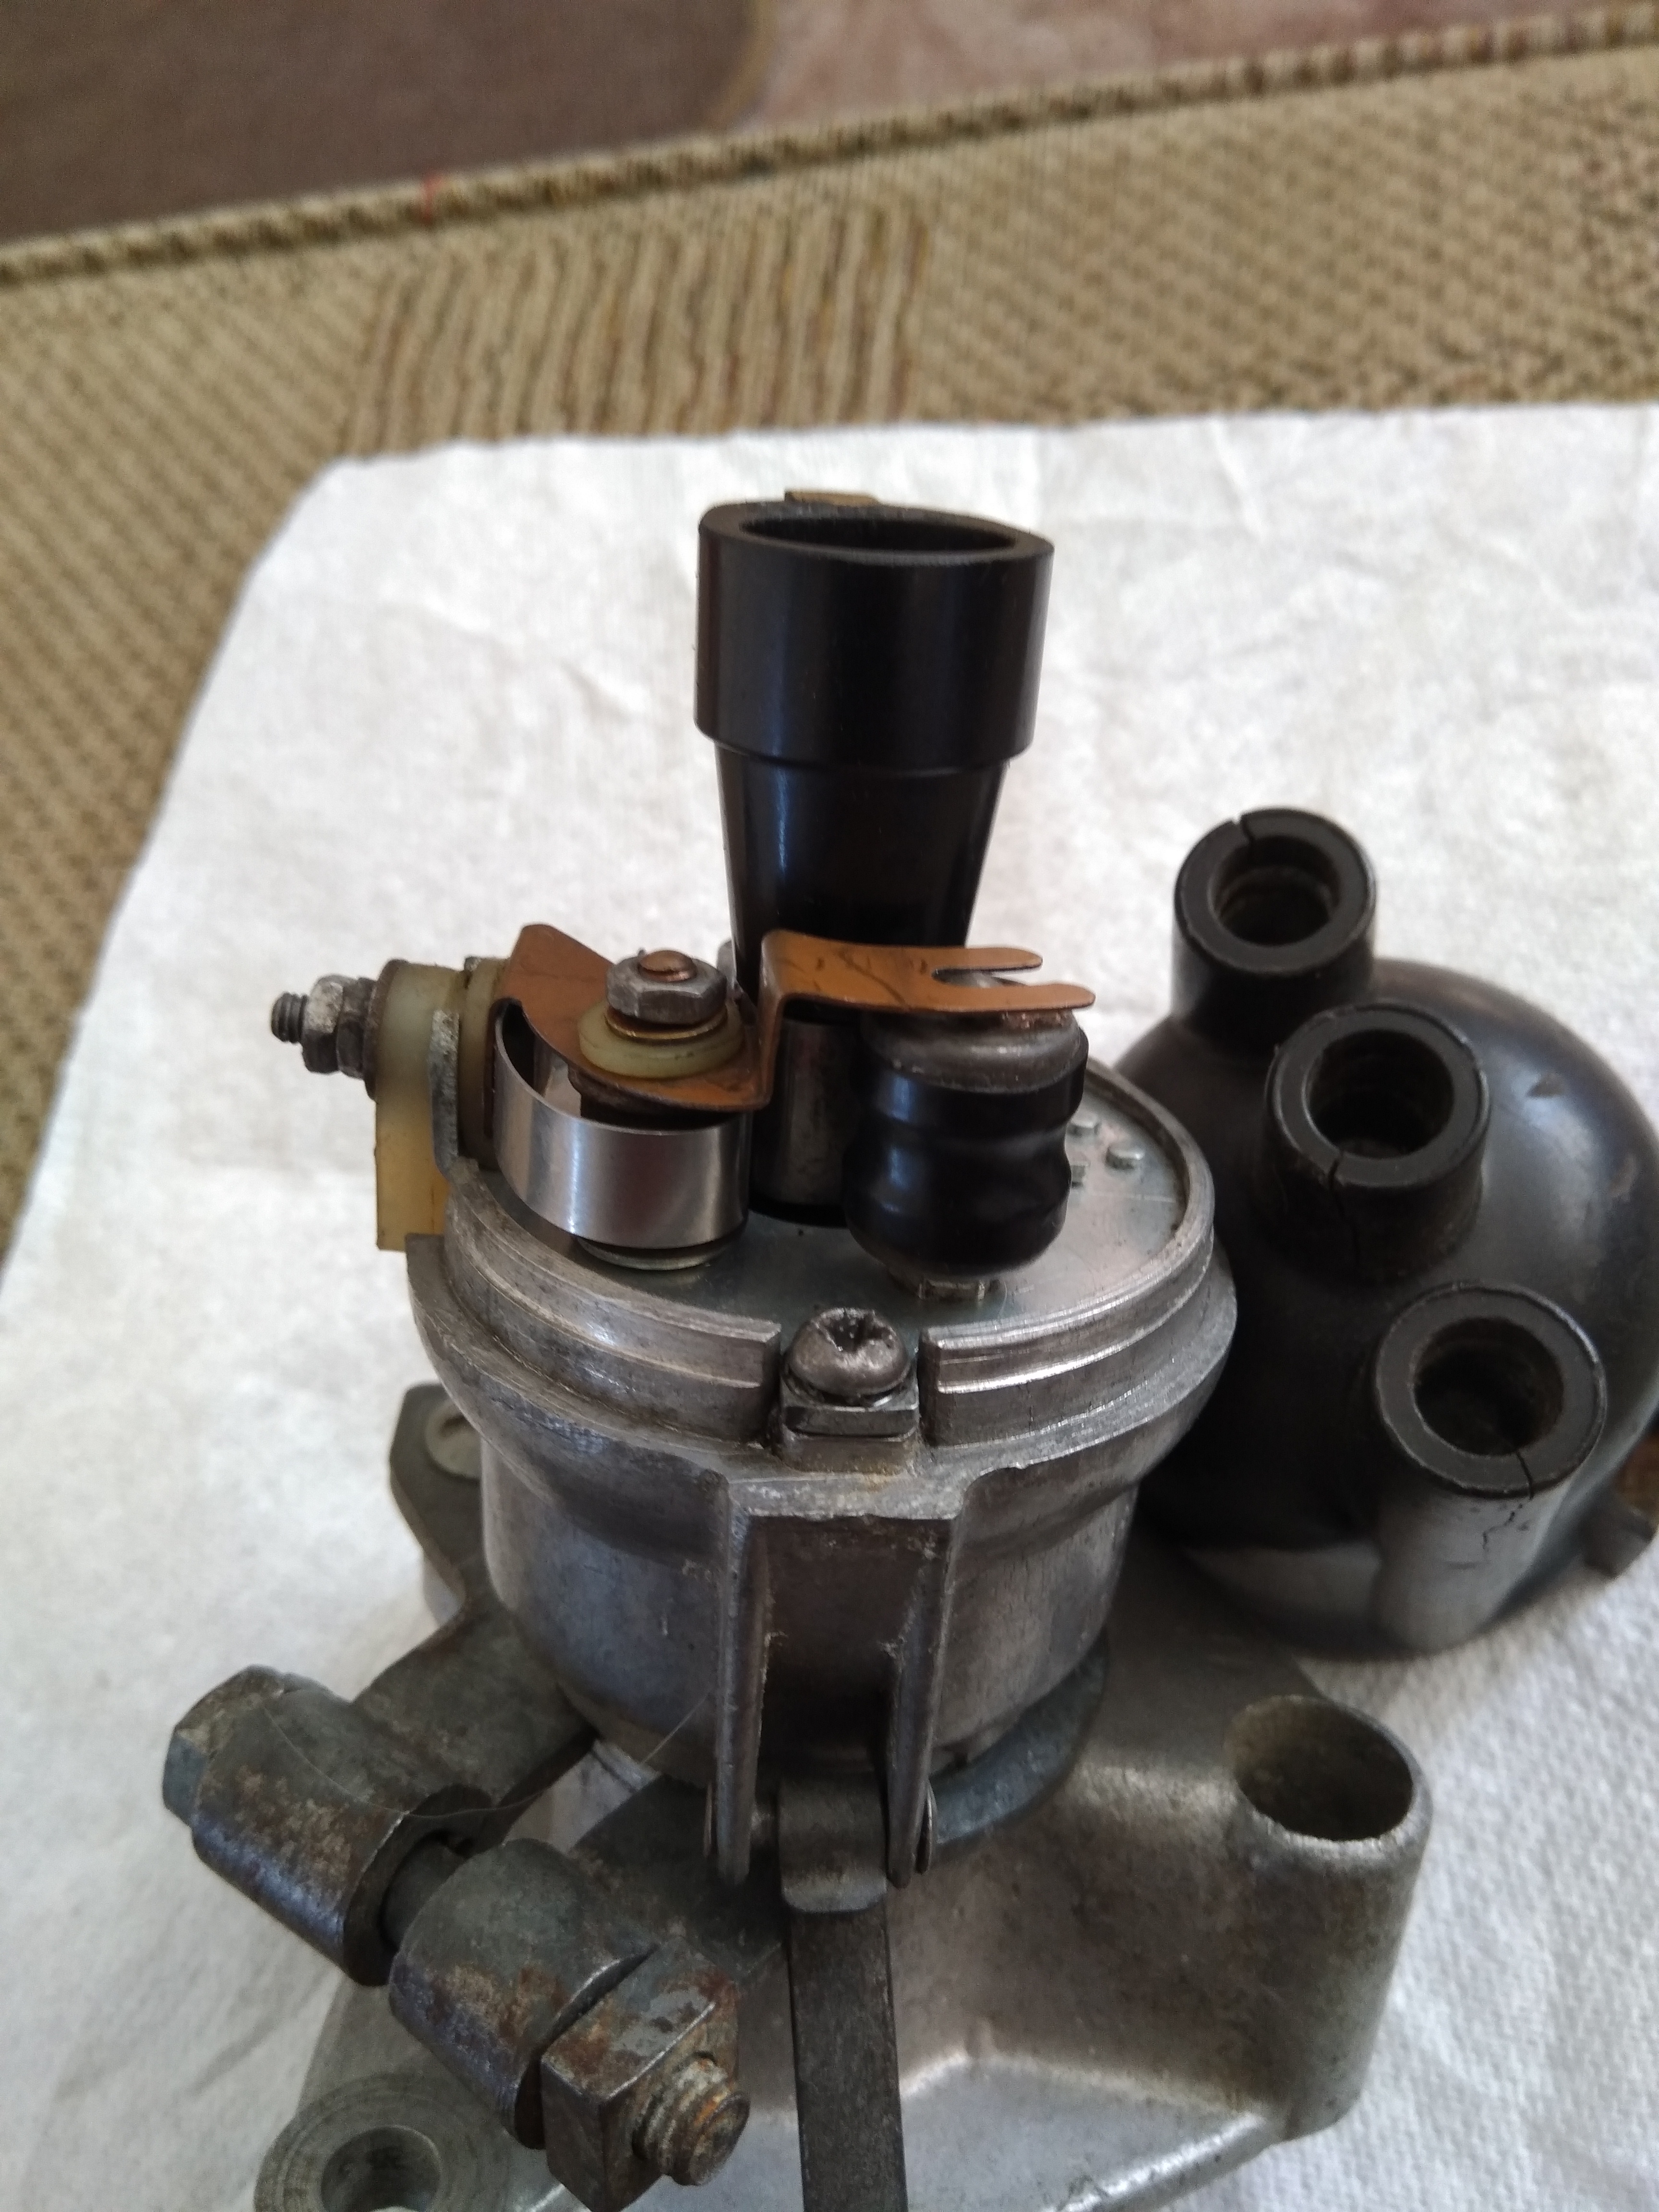
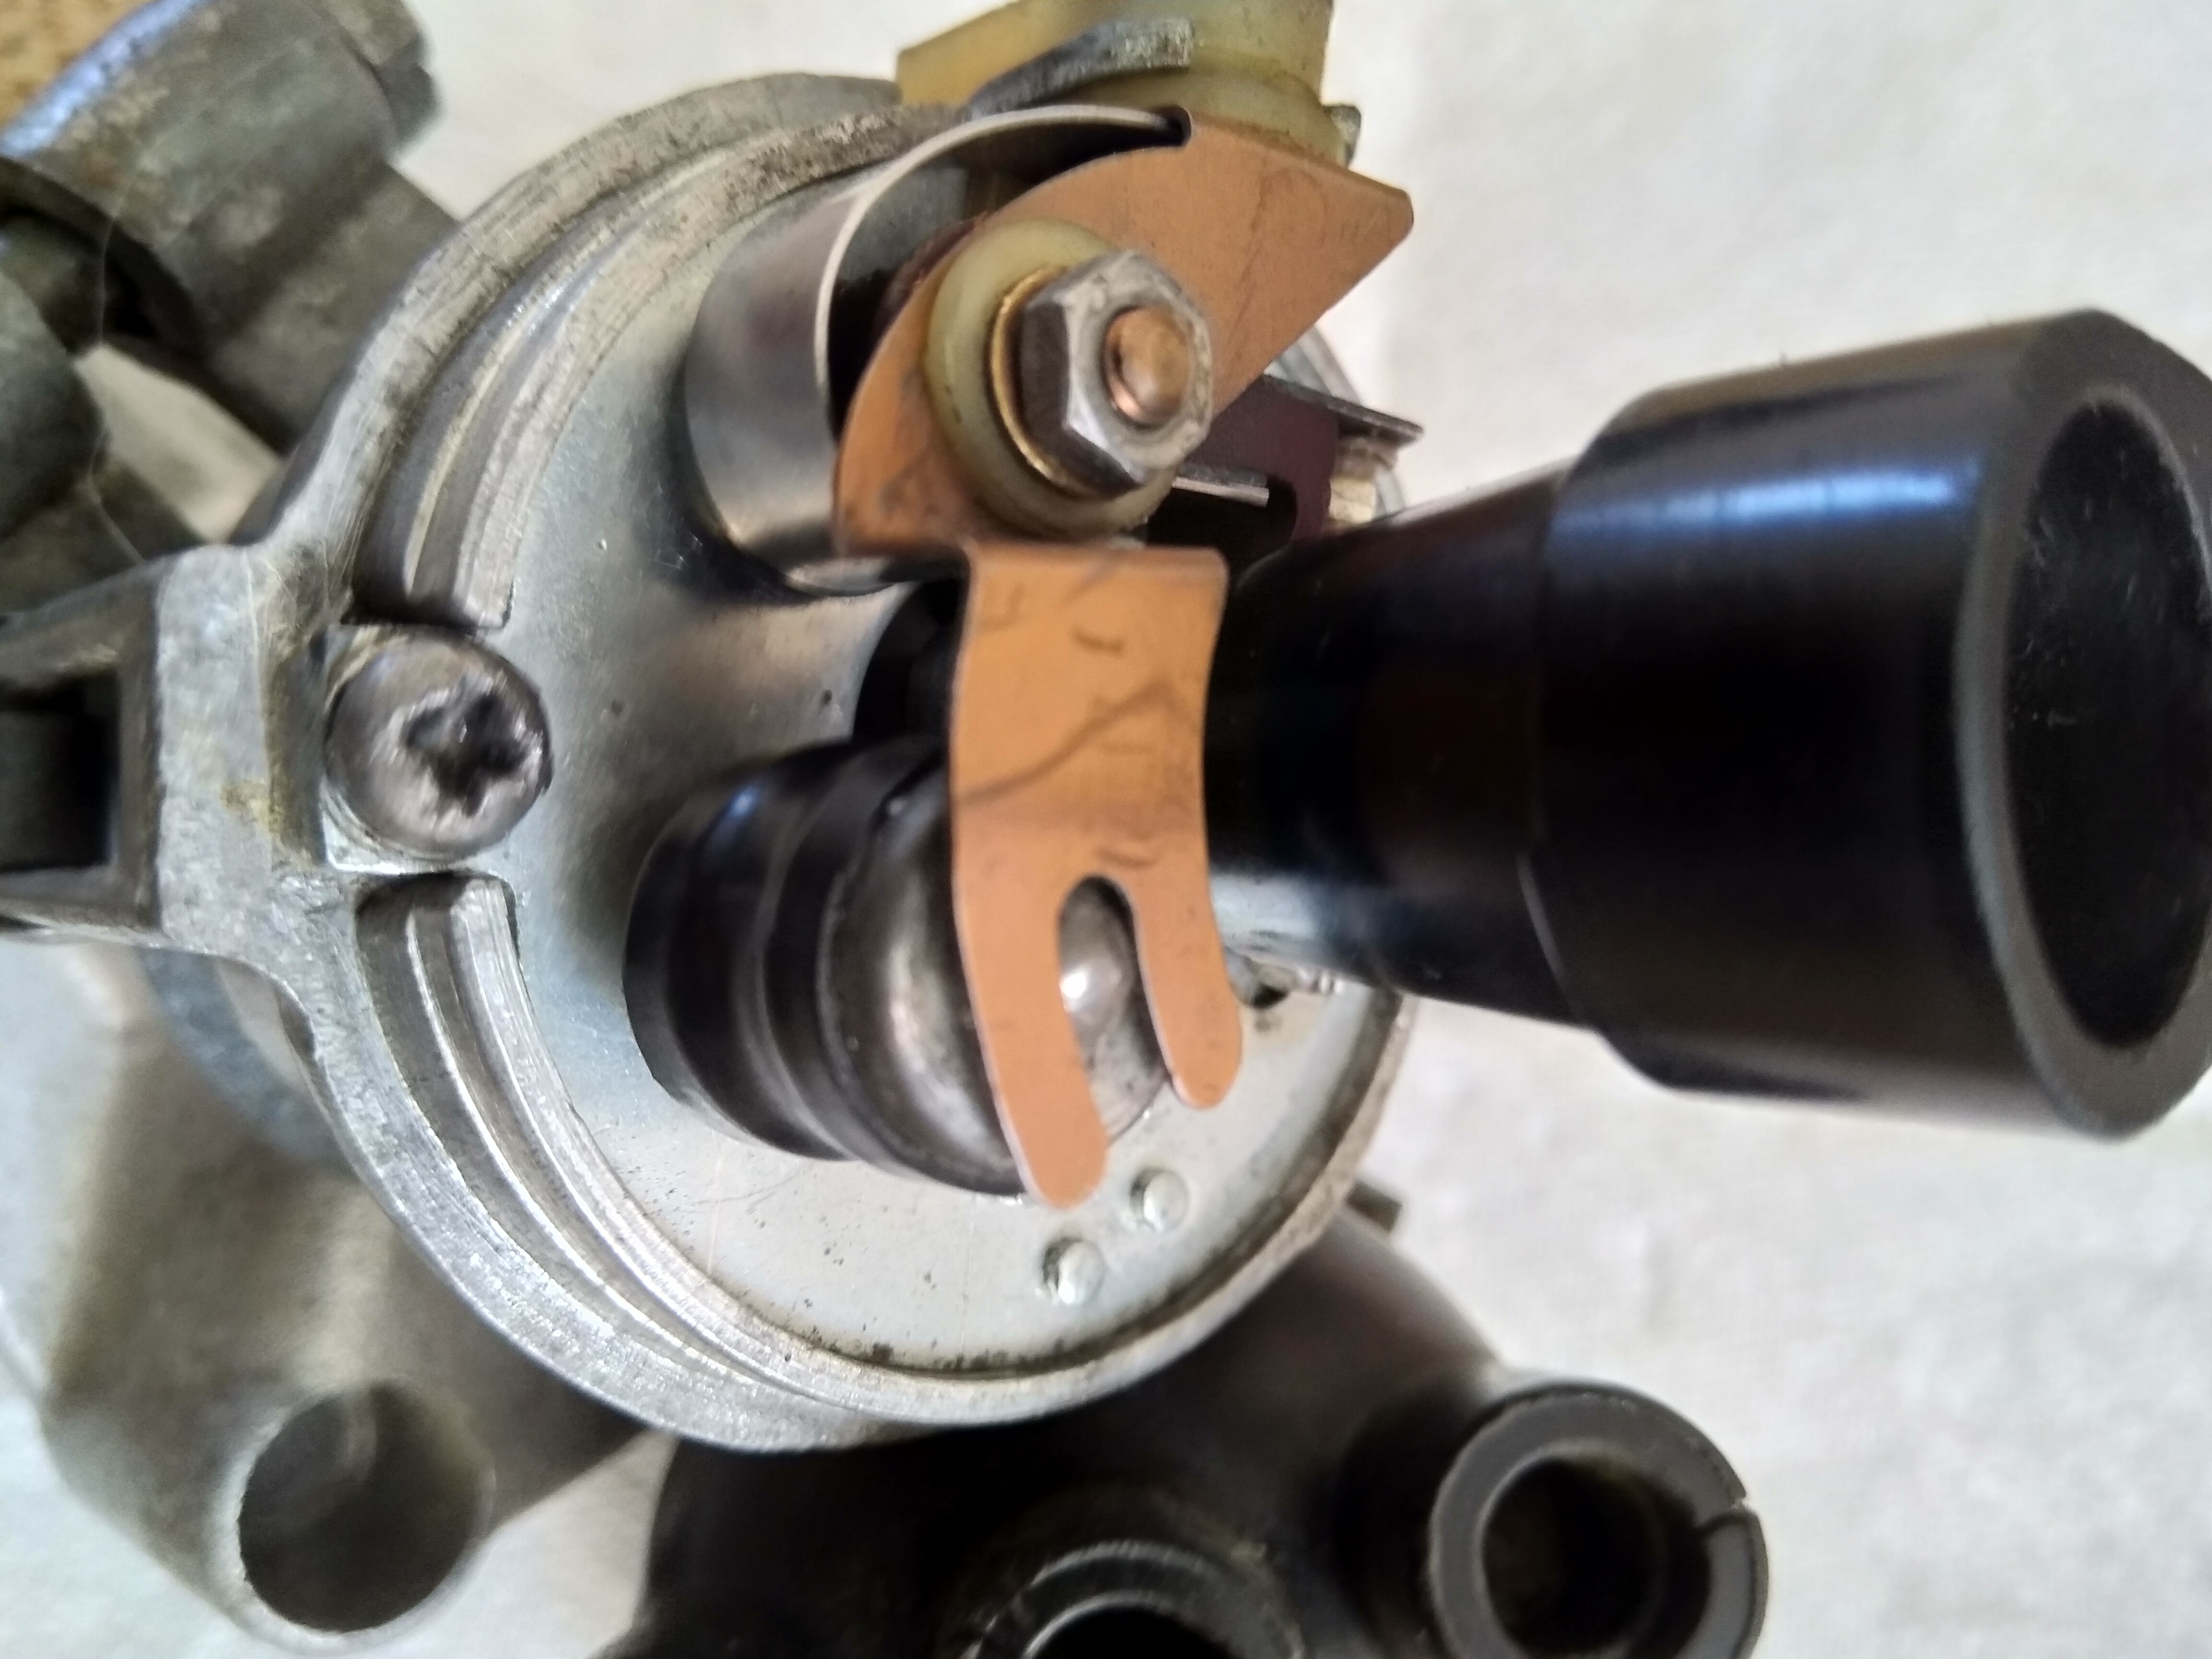
2) What is wrong with the seating of the condenser conductor plate, this looks wildly wrong to me, I have not tightened this down, in case I damage it.

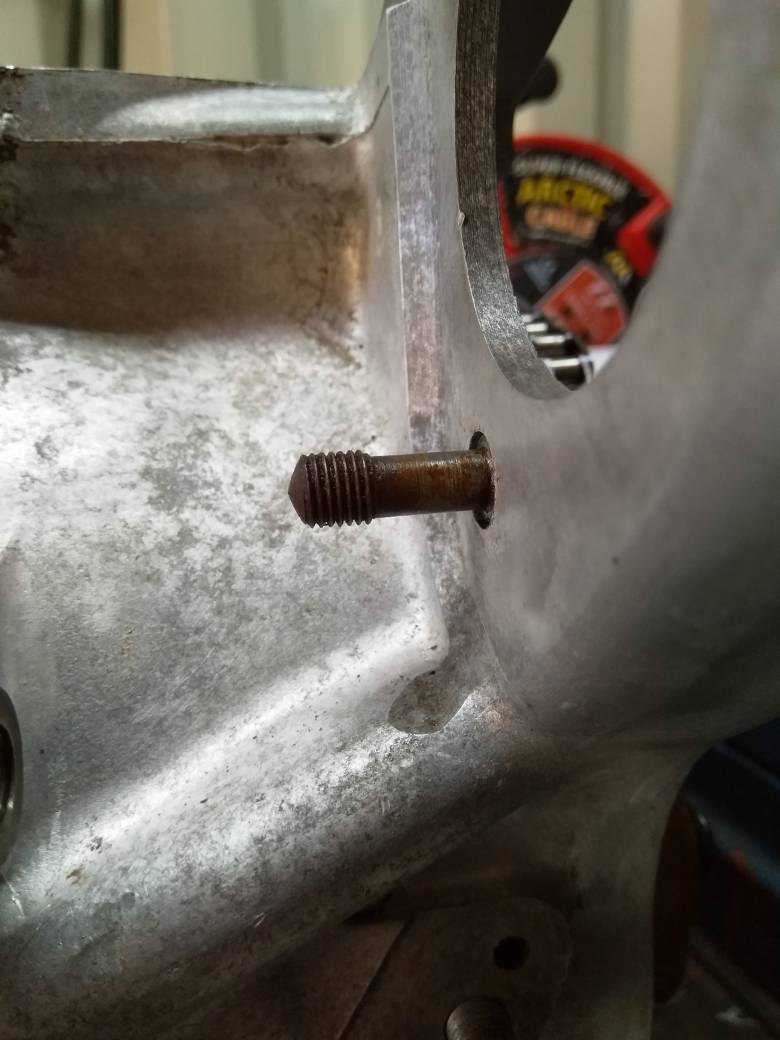
3) why are the retaining bolt holes for the distributor mount so deep, do the have some kind of special slim nut?
4) Why is there a "waisted" stud for the distributor mount?
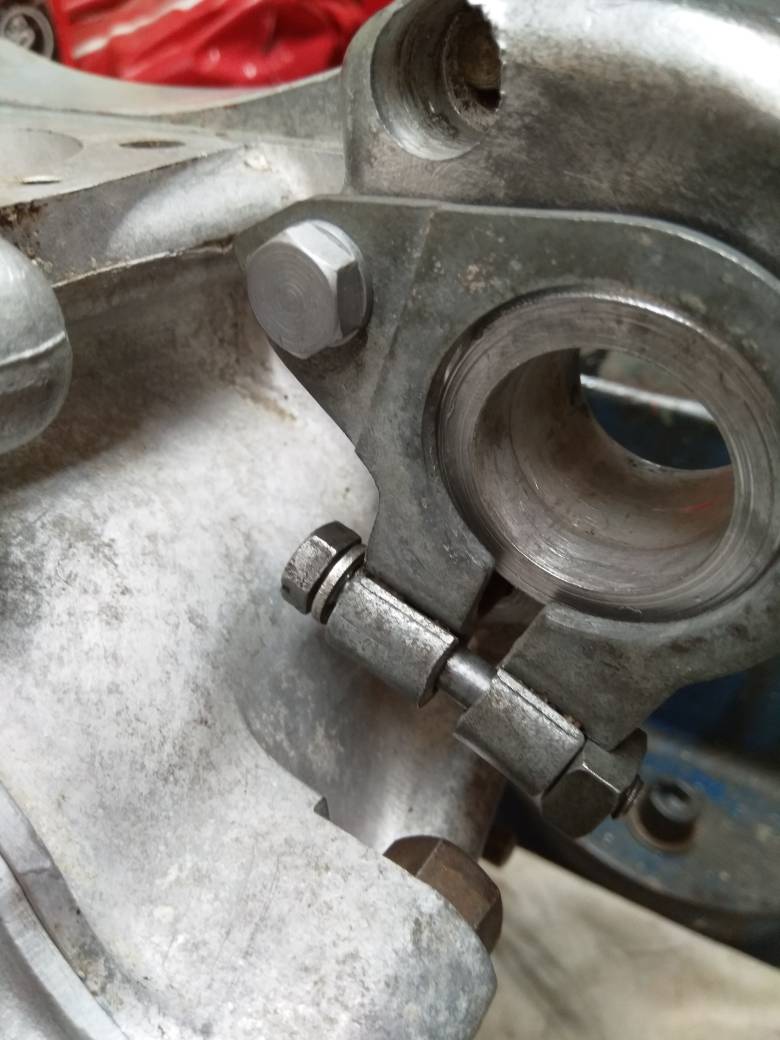
5) Is this the right way round for the distributor clamp, it look incredibly hard to reach, especially with all the engine assembled and in the frame?
If any body could shed some light on these questions for me, I would be extremely grateful, thanks.
Andy
There should be a shim…
- Log in to post comments
There are two different…
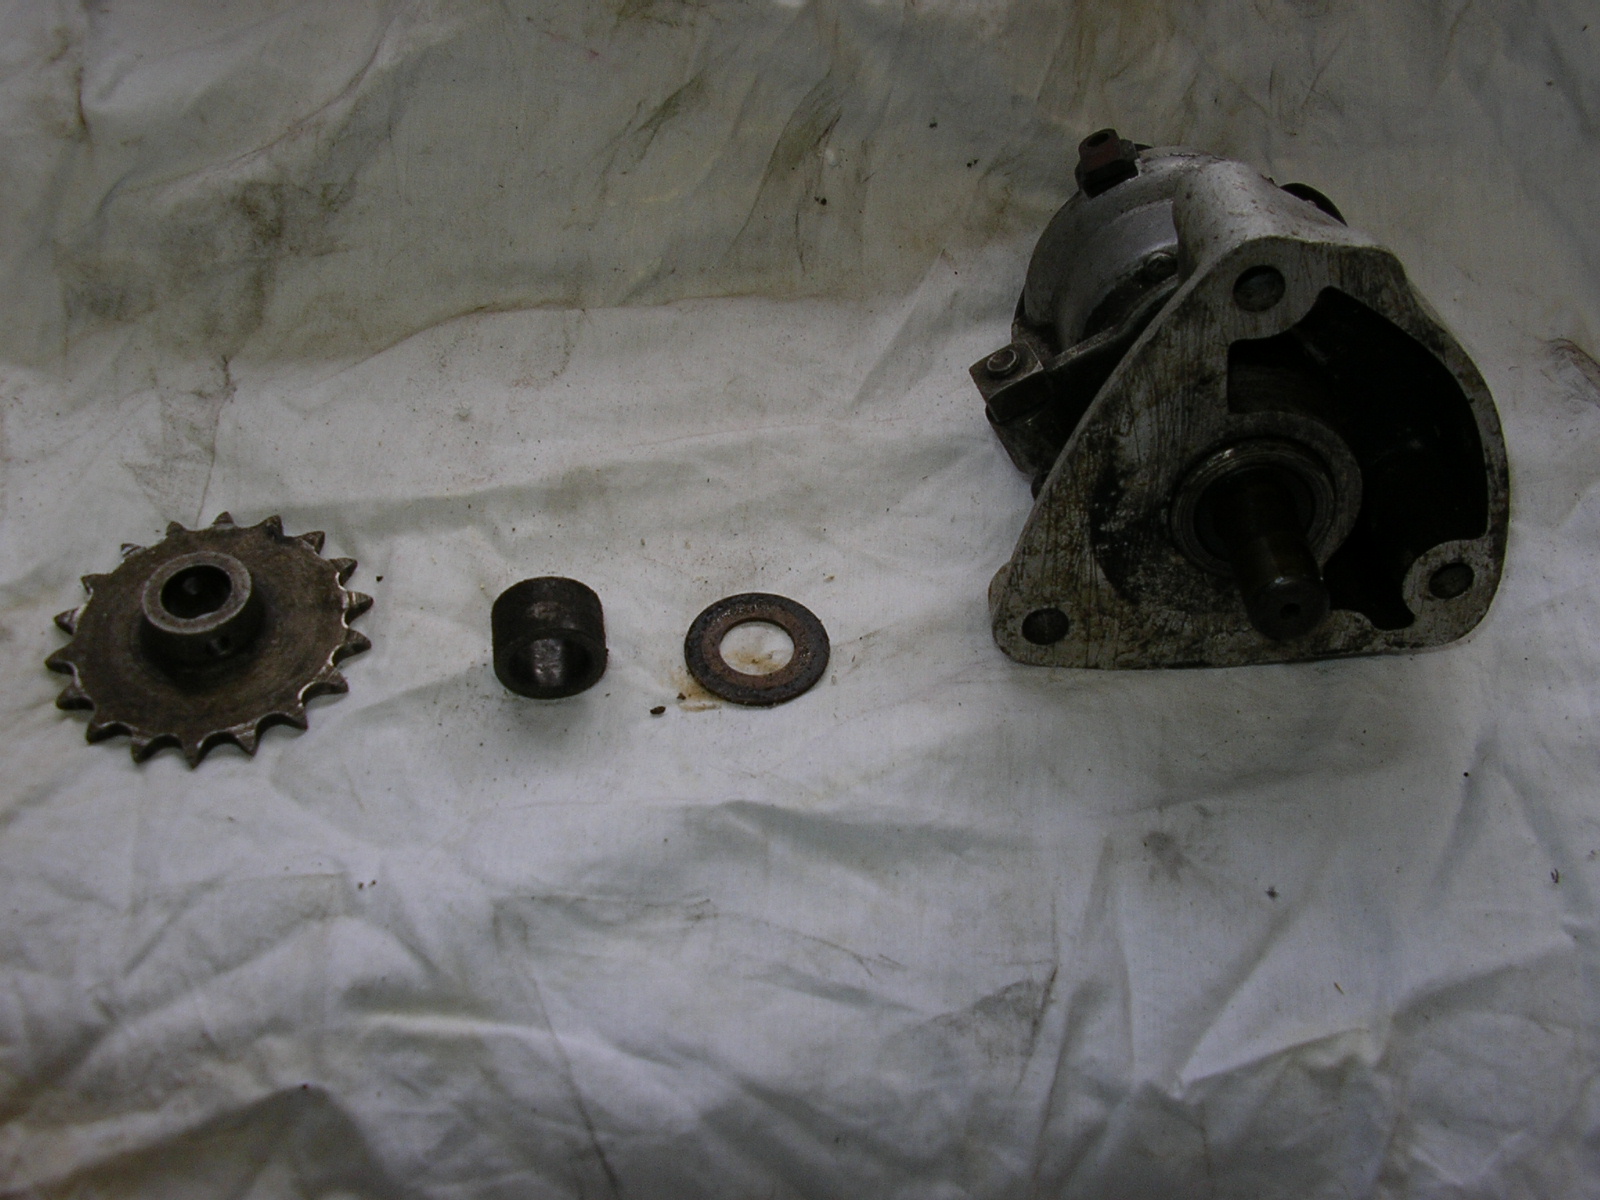
There are two different condensers used in the 18D2, one with just a 'pip' on each end, and another with the 'pip' on one end and a threaded stud on the other. The latter is slightly longer and thus requires a different conductor clip. It looks to me like you have the latter type studded condenser, but the earlier type conductor clip. You can see the difference with yours in the photo's below.
I'm still running an original old early type condenser in my 99, and it's still working ok, but agree with earlier comments about reliability of replacements. The trouble I had was finding a set of points where the heel didn't wear away in five minutes! The Boyer points assist module doesn't help for that!
Regards, Tim
- Log in to post comments
18D2 et al
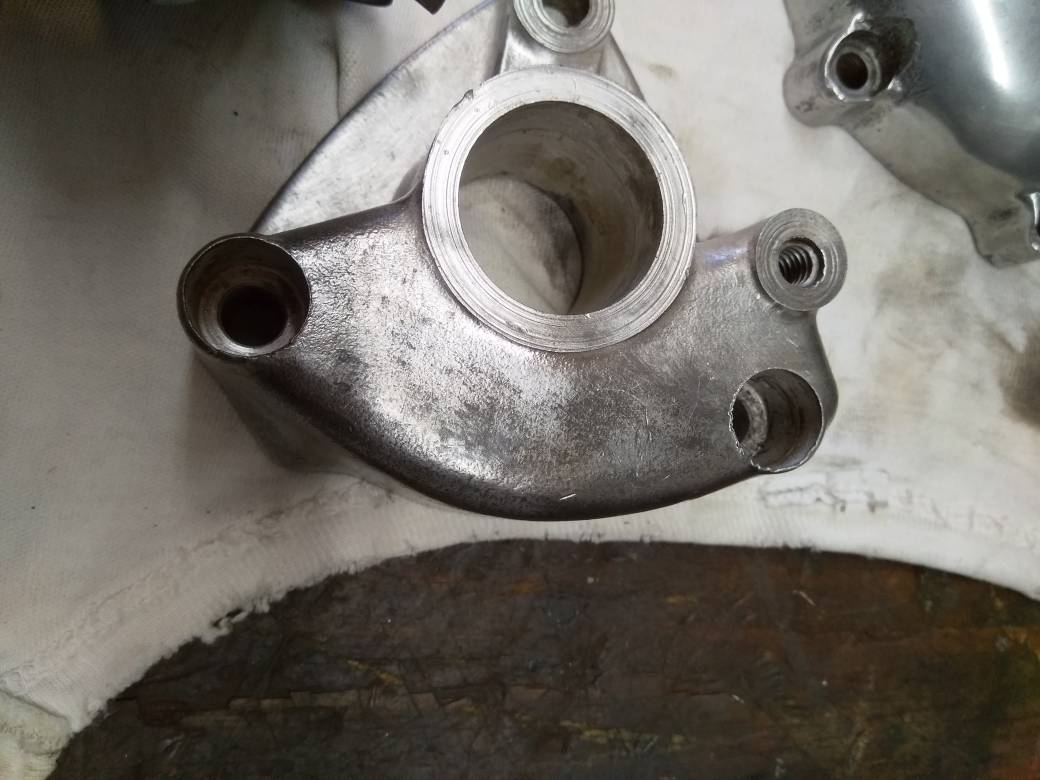
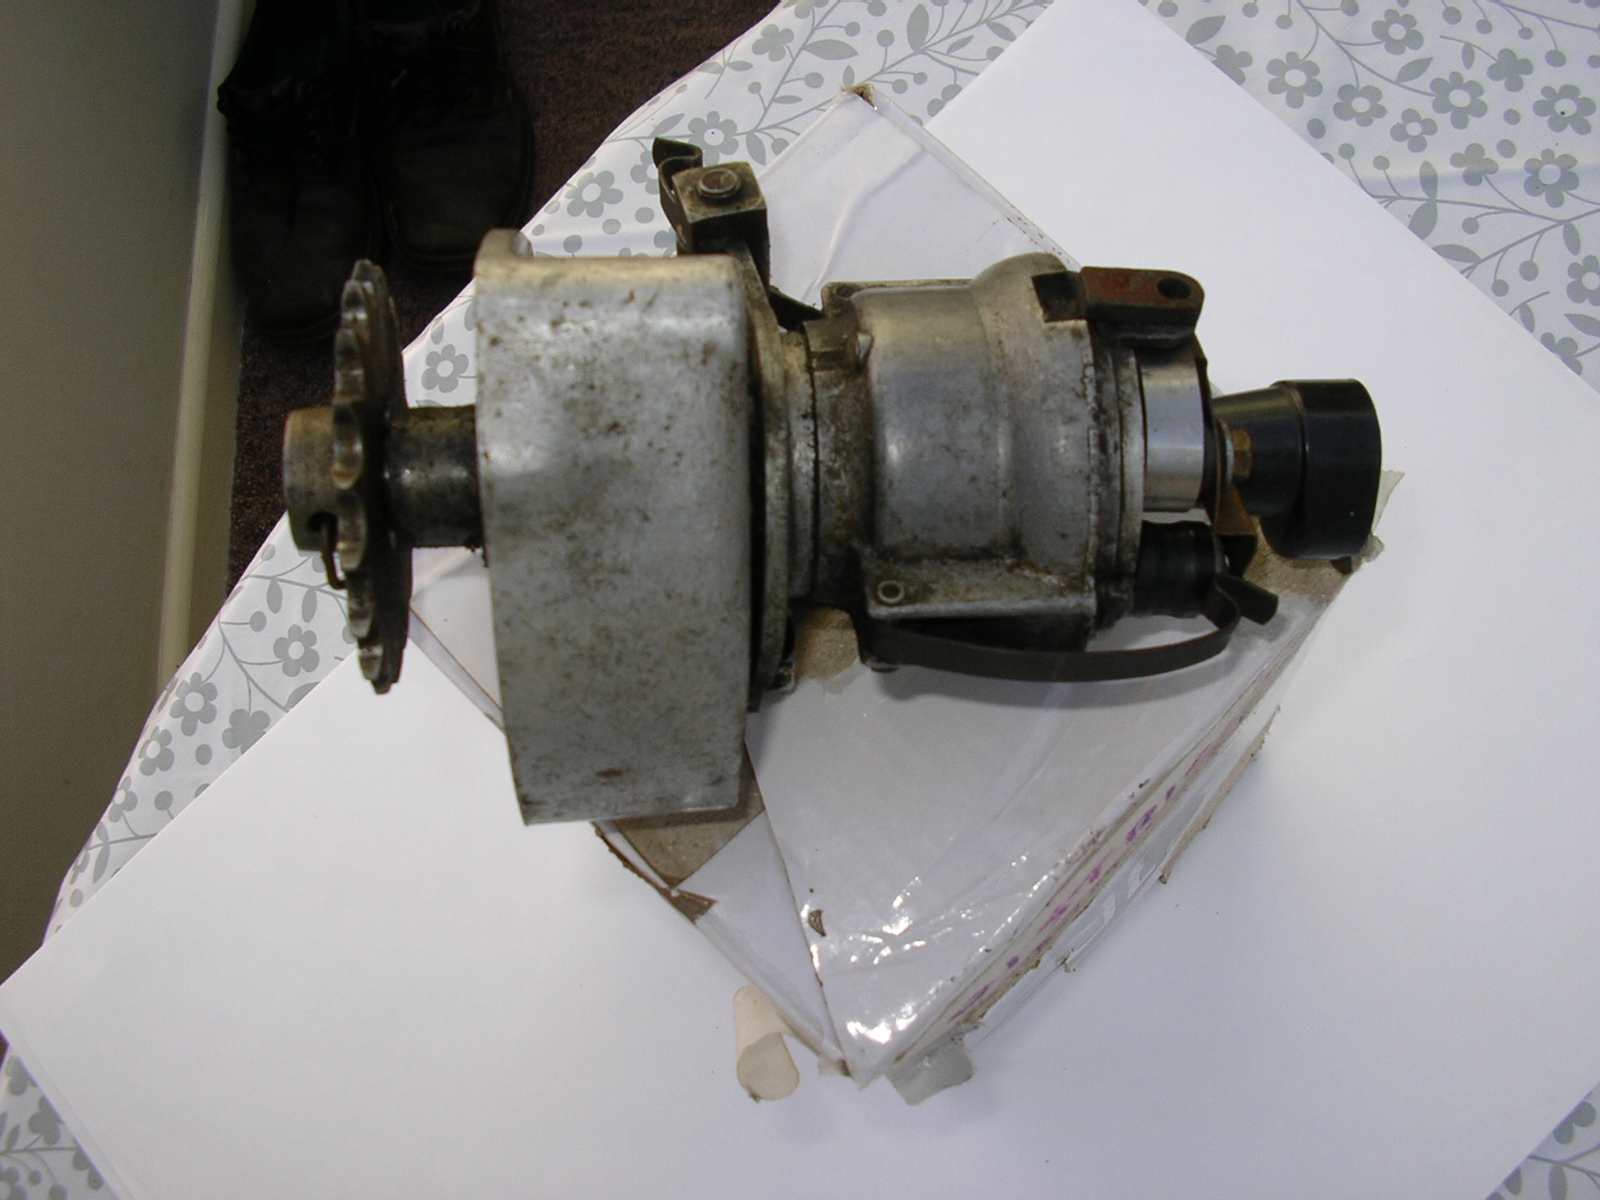
I sell a full Boyer Bransden ignition kit for the 18D2 which gets rid of the advance/retard as well I also sell the 18D1 cap Used on the kit to get rid of the 'cows udder'. The missing spacer/washer behind the sprocket was copper coloured, and it also had a couple pips to aid the oil getting to the body bearing, but these pips worn out quick and gave excessive end float. I have used a normal steel washer as a spacer and to get the right endfloat have found myself rubbing the washer down on an oil stone to get 5 thou endfloat. The body has a phosphor bronze bearing which does wear along with the shaft. Replacing the bearing is a tool makers job, but the wear in the shaft can still be a problem with it being 'waist-ed'. Underneath the advance/retard is a nylon spacer, bit of a fancy washer as it covers a 'lump' in the body. Don't loose it!
PS. A similar unit is the 18D1 fitted to ES2 Model 50 and Model 19. The 18D2 was also fitted to Triumphs and AJS/M and even others, thay have different body mountings and shafts so beware what you might buy.
- Log in to post comments
End float on 18D2 drive shaft
Thanks for your excellent info, I will definitely invest in the ignition kit and 18D1cap.
Could you please clarify on one point for me please, every body is talking about a washer to stop end float, i'm not really clear on where exactly a washer would go.
It appears to need more like a tube type arrangement to go between sprocket and distributor body to stop the floating of the shaft, could you go into more detail on that please.
I include a diagram of what i'm thinking it needs, maybe?

- Log in to post comments
My points have been in there…
My points have been in there for decades and have also done 40 days riding round the IOM , I suspect yours are pattern ones .
- Log in to post comments
That's where the shim should…
That's where the shim should go, if you have room for more than a couple of mm you may have an incorrect distributor or sprocket. . your photo's appear to show correct parts.
- Log in to post comments
SHIM?
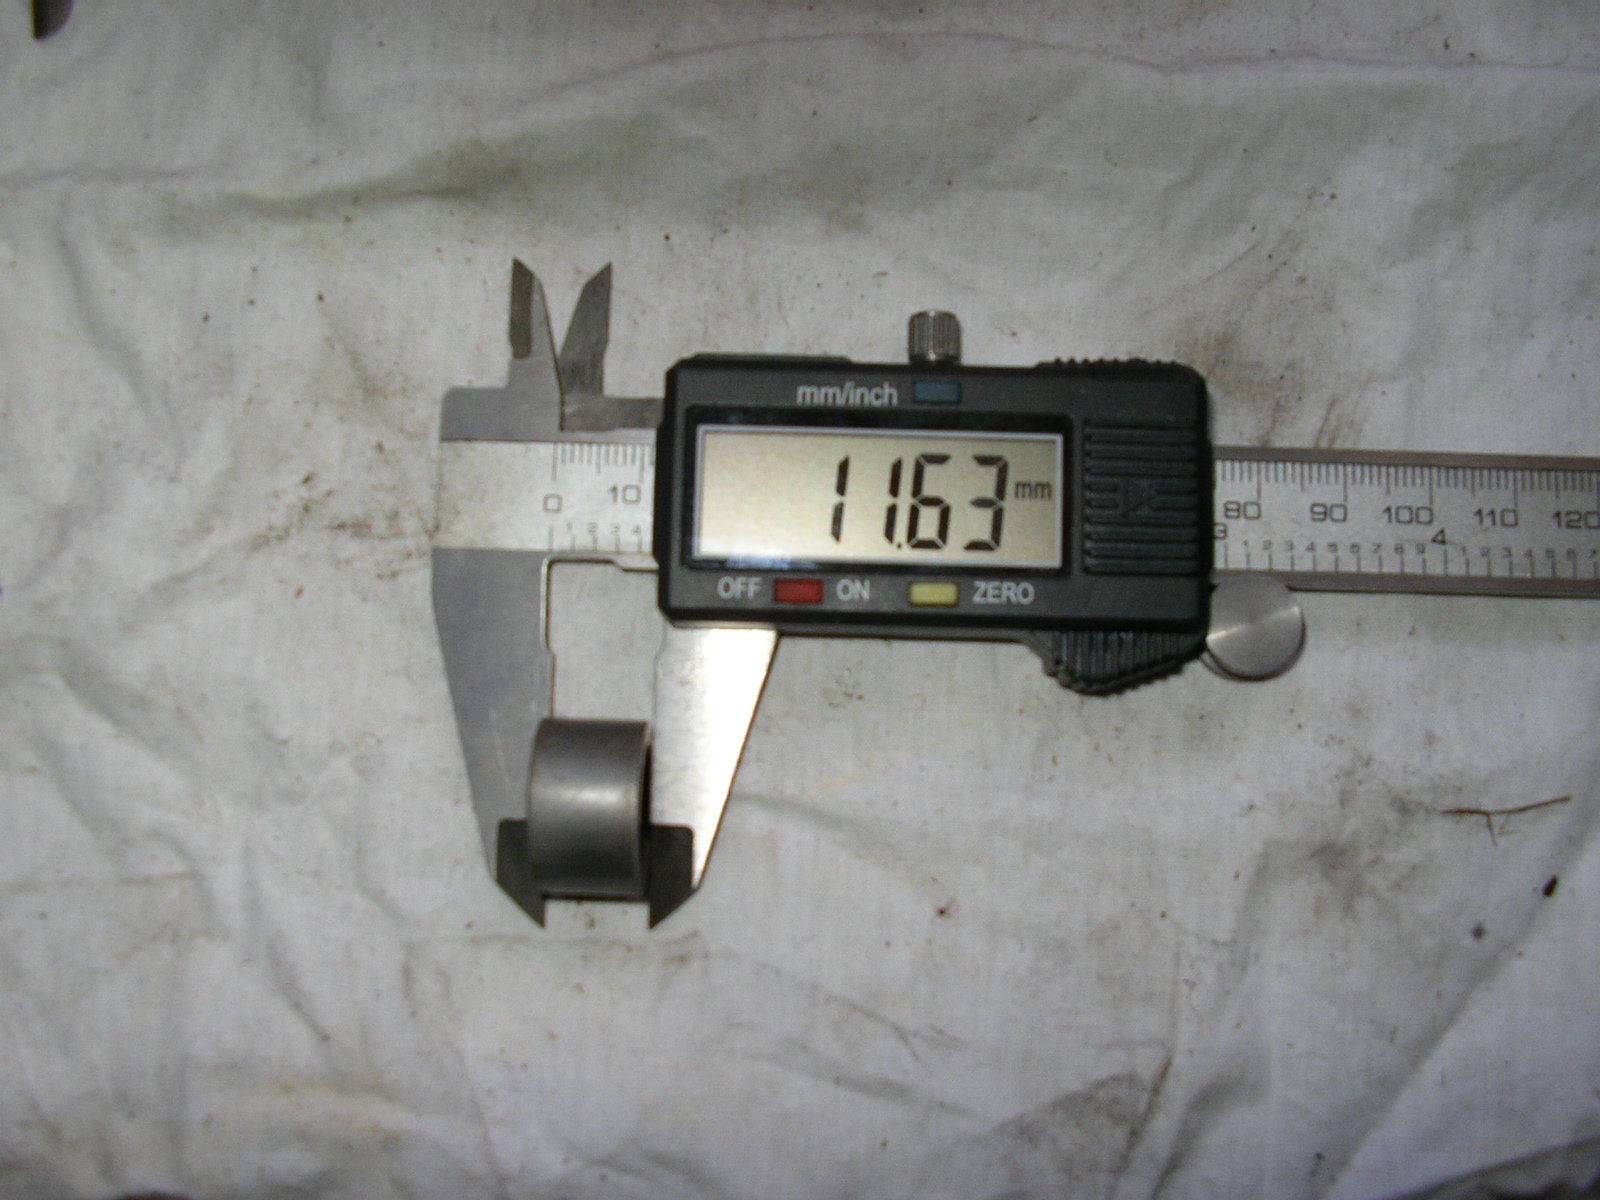
Aha the plot deepens a bit. The 'shim' -washer we refer to above I have measured as about 1.5mm copper coloured and of course quite worn after this time. And in fact these were ones I have taken out and replaced in the past with several 18D2 that have been turned into Electronic.
So this leaves us with the above issue/pictures. In this case the sprocket seems to be turned round and secured by a bigger (than before at 3mm) pin. And there needs to be a 1/2" spacer between the body and sprocket as opposed to a thin washer. We do have some pictures of a spacer but more information needed, any one got pictures of spacer?
- Log in to post comments
Sleeve nuts
I don't know why the studs are wasted, but you can definitely get quite special long domed sleeve nuts with a hex section only at the domed end. The hex has been machined off for the 1/2" or so part that goes into that alloy housing .
Steve
- Log in to post comments
From dim memory (dimmer by…
From dim memory (dimmer by the day!) I would say the sprocket is the right way round, and I don't remember a tubular spacer,just a coppery shim. My sprocket is fixed with a thin solid pin, That ones hole looks bigger ?maybe a roll pin. As long as the sprocket lines up with the intermediate gear and a few thou of end float ,it should work, Check the sprocket teeth number matches the intermediate , In case its from something else.
- Log in to post comments
Sparky Thingy
Photos show 18D2 as removed from engine. The sequence of fitment was....
Sprocket with flange outboard with 5/32" - 4mm roll pin holding in place.
Tubular spacer. 3/4" across, 15/32" long.
Brass washer.1.60mm - 1/16" thick?
Dizzy Body.
- Log in to post comments
What can one say?
Indeed-what? I came hear to tell you all about the above spacer and fitment and find 'Possible No Help' has been here before. Still saves my time-I can go get a beer.
I will add- the coppery washer seems to be used on both these mountings. And the roll pin is 3mm on the most common one with just the coppery washer while the larger pin of 4mm is used with the larger bushe/spacer and with the sprocket reversed.
Seems we learn something every day........
- Log in to post comments
Something new, very true…
Something new, very true..I have seen an oiling screw on some 18D1 installations perhaps only needed on motors that do not get much oil in that area. More than enough oil on my 99.
- Log in to post comments


There should be a shim behind the sprocket. I think a copper washer(about 2mm thick) is usual. As you say without it the dissy can explode or the rotor arm smashes the cap. Perhaps the capacitor is taller than it should be. Deep holes for special bolts (similar to allen bolts but different!) Waisted stud to allow chain adjustment. Clamp position awkward but you can get a small spanner on the bolt head .,only needs a very little slackening and not too tight or it breaks. If you want to get rid of capacitor and get better sparks fit a Boyer points assist electronic box, points will last forever and first kick starts will be easy. Not expensive and incorporates a timing light.On my bike the box is stuck to the side of the battery. If you can find some allen bolts then you may also find a key that fits!!.