
A new puzzle just released from Ravensburger puzzles
Norton Jubilee 3D Engine puzzle with many moving parts ,
maybe even running when properly put together.
Additional puzzles can be purchased including cylinder heads and valve drive mechansim.
Also gear lever and kickstart lever is available!
Only genuine with the blue triangle on the box!
Uli Hoffmann
Living in Ravensburg, Germany
There has to be something…
- Log in to post comments
Yes but is there a picture…
Yes but is there a picture on top of the box to show how it all goes together??
- Log in to post comments
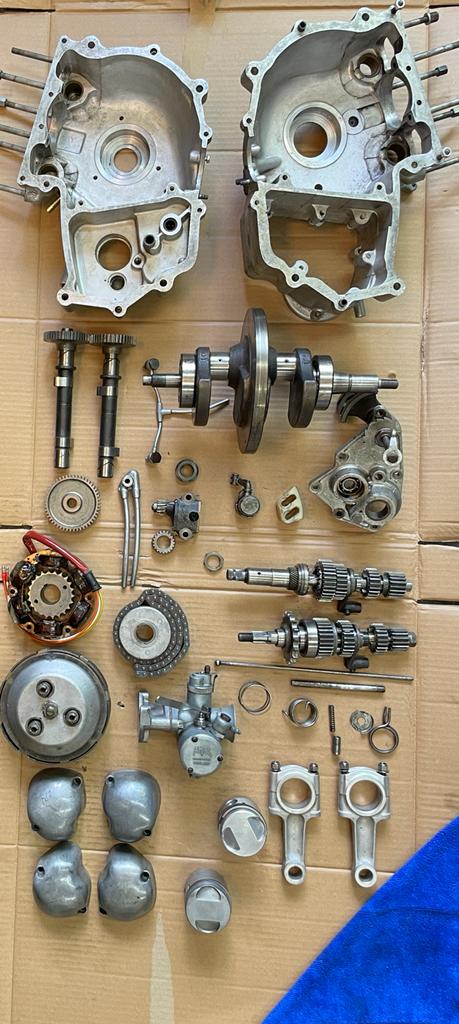
Parts 1-29 or so
I started the puzzle and made quite some progress..
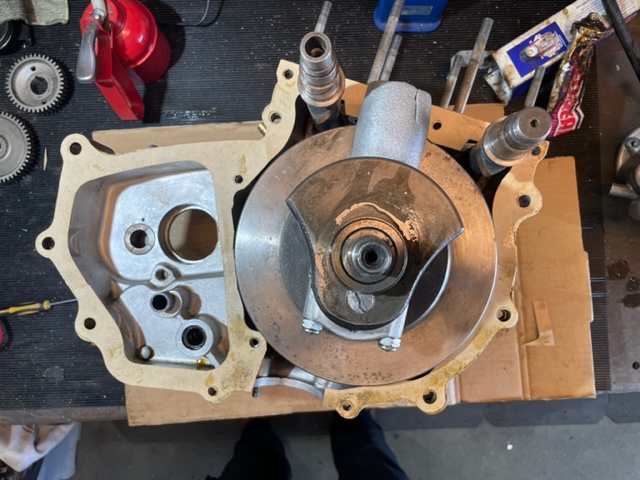
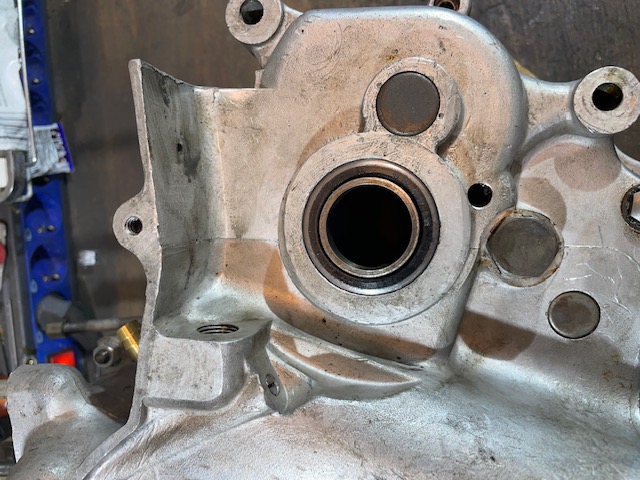
Yesterday I installed the main bearings with the help of my workshop oven.
They fell right into place in the heated engine halves.
The conrods were installed with new shells. The journals looked good and so standard size shells could be used.
Before that I cleaned the sludge trap and srewed in new sludge trap plugs from the NOC.
It took quite some force to get them in and I had to grind the tops to get the inner races of the bearings seated correctly.
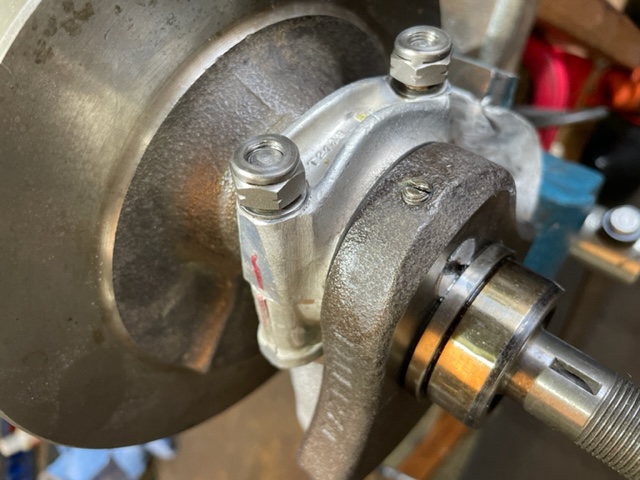
Conrods nuts "(new) were torqued up with 18 Newtonmeters. Picture show the loose nuts.
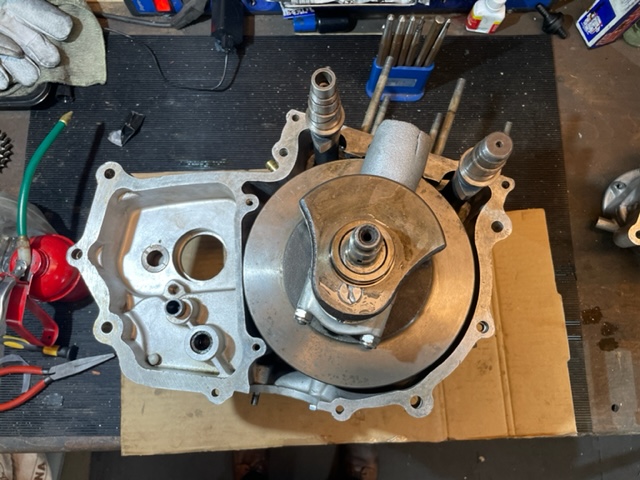
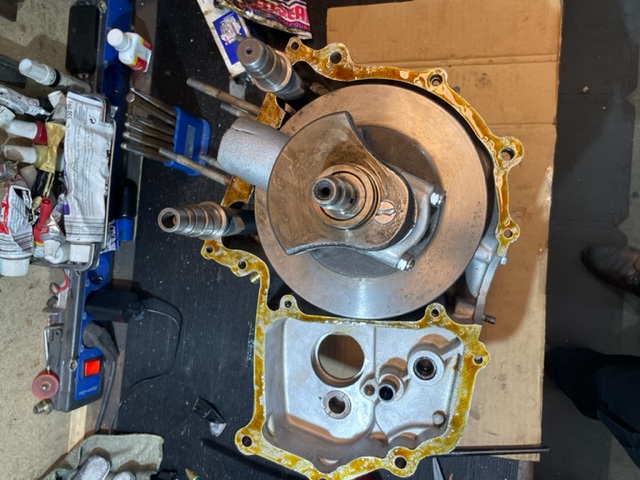
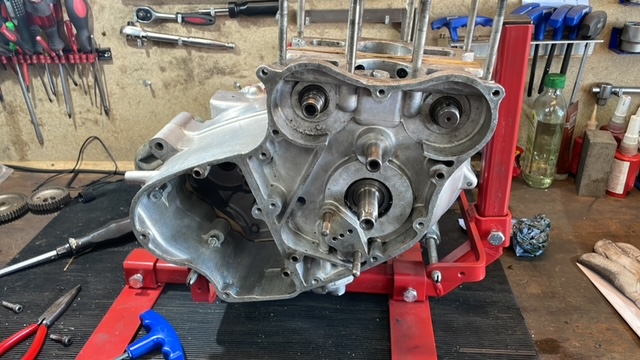
The camshafts and crankshaft were inserted and I tested the fit of the two engine cases
if they go fully home before using Wellseal and the paper gasket.
So the engine cases are closed and I could mount it on my universal engine stand.
Now I have a better handling of the motor to throw the rest on it!
- Log in to post comments
Now I get the joke! …
Now I get the joke!
"Ravensburger AG, whose headquarters are located in the city, is a company internationally known for board games, jigsaw puzzles and children's books. "
Wikipedia
- Log in to post comments
Some progess
I set the timing gear and installed the oil pump .
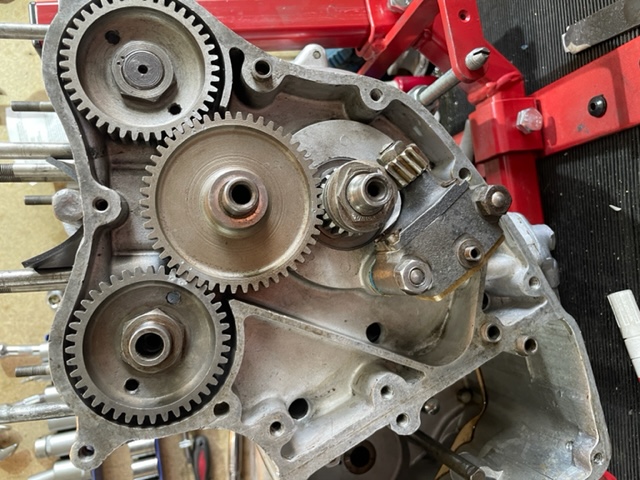
Then I noticed I forgot to put in the sleeve gear bearing into to gearbox. I was not able
to get the bearing in properly into heated gearbox case . so I had to split the cases once more
to put it into the oven in my workshop and slide the bearing in.Luckily you can split the cases without removing the timing gear.
I also noticed a difference betwwen my Navigator engine and this earlx Jubilee motor: there are no springs in the left side camshaft bushes.
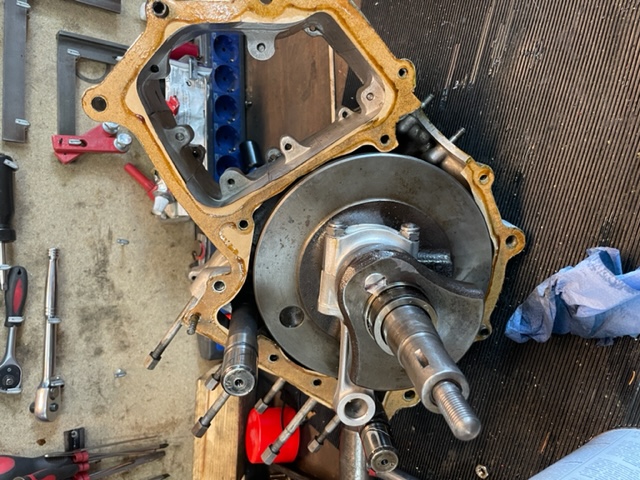
Next was to plug off the original crank case vent. I used a srew and a nut with loctite to close the hole in the sleeve nut for the vent pipe.
Now I threw in the gearbox innards. Well, I was done after fitting the shafts several times.
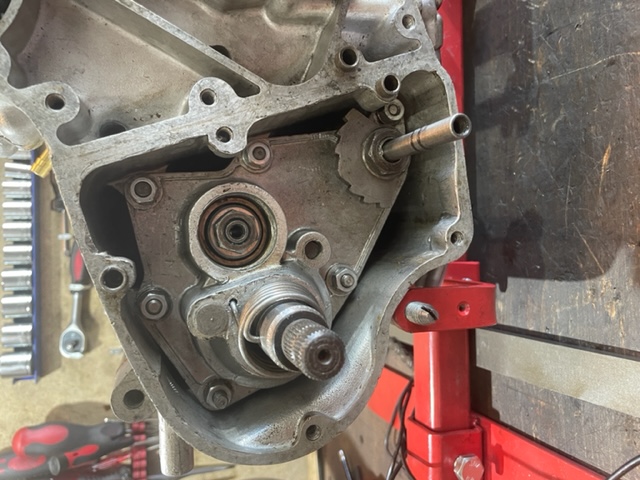
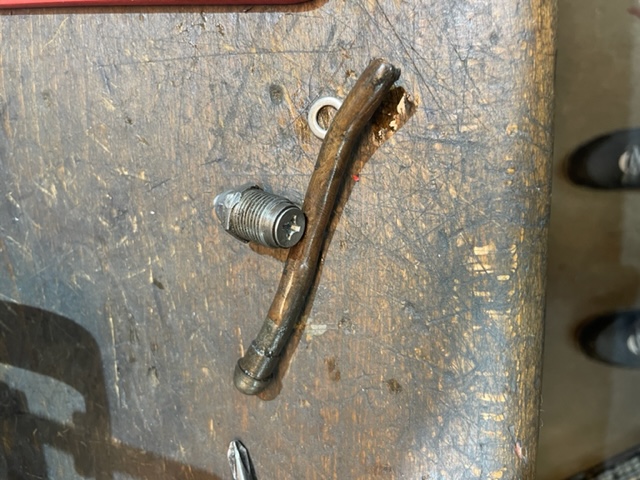
Another special early Jubilee feature is the clutch pushrod with soldered on ball for the release mechanism.

A new order at NOC spares was placed because the gearbox sprocket was quite worn
and the nut for it was missing .

- Log in to post comments
Ball for pushrod
Never seen the ball bearing in clutch mechanism soldered to pushrod. Easily checked if you have the correct parts list. It will list the soldered clutch pushrod and ball assembly as a part. If the clutch pushrod is one part, and the ball bearing is another listed part, they were never meant to be soldered together.
Looks a bit non-standard to me.
Anyone else ever seen it?
Very early Jubilees had camshaft without thrust piston and springs. Cams and contact breakers had to put up with sideways play.
Peter
- Log in to post comments
Ball soldered on pushrod
Sadly - it means the pushrod & ball got welded to each other at some point on this engine. These items were NEVER assembled together.
Otherwise - good work, Uli!
- Log in to post comments
More progress
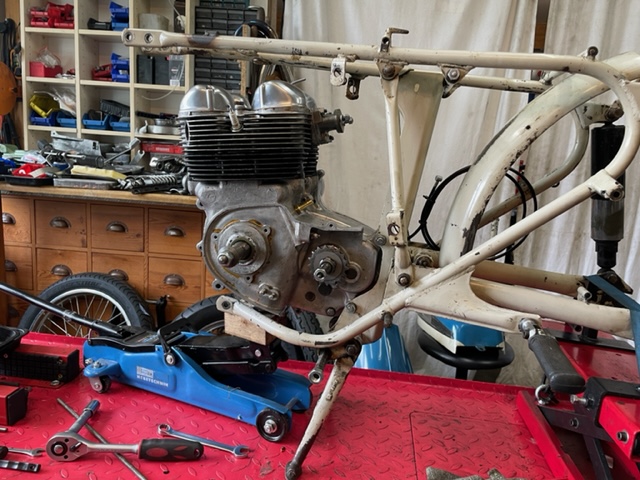
The motor has been completed except the primary drive which will be added when positioned in the frame.
The parts arrived just in time from the NOC shop.
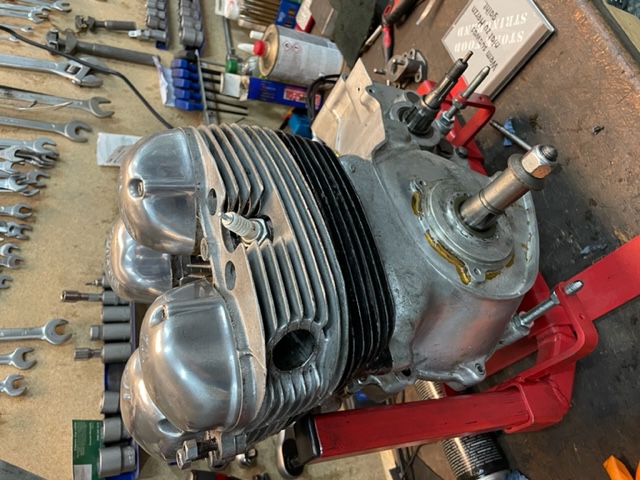
I will keep the patina but not the dirt since 1959!
The parts will be protected with Owatrol later on.
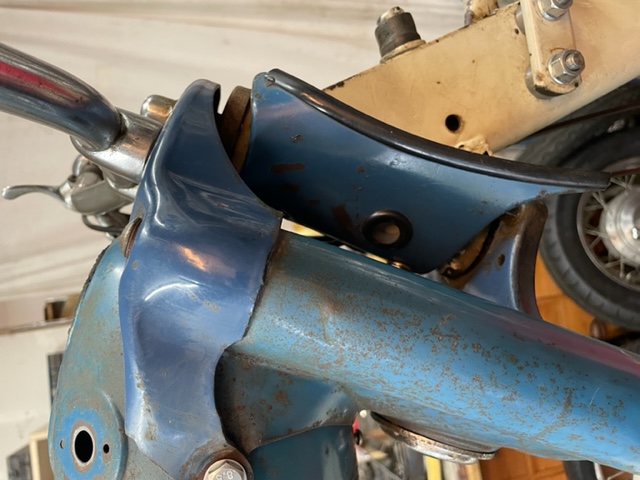
I cleaned up the frame and mudguards, chainguards etc. with petrol.
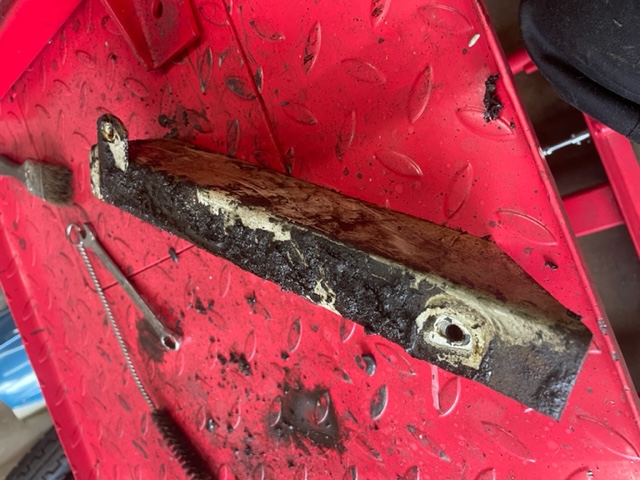
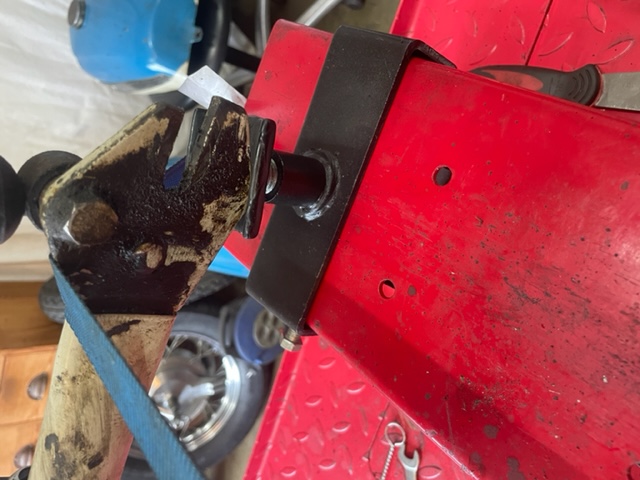
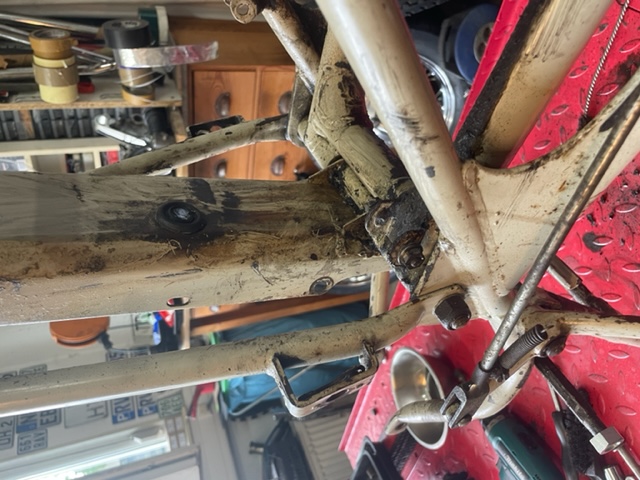
Then I took of the front frame member with the forks and wheel to lift in the engine.
It took some persuasion to get the holes for the new stainless studs and frame spacers aligned.

There are two tones of blue on the fork I guess the yokes were repainted.
- Log in to post comments
A deluxe then
You had to be very eagle eyed to see that this was an early Jubilee Deluxe model from the first photo. Only the special carb tickler for Deluxe models only. Early because of lack of camshaft end plungers.
Many with early Deluxe ask questions on:-
Petrol tank rear mount.
Rear mudguard. The short one and splash cover.
Tool box mounts.
Lifting handle.
Deluxe seat and seat mounts.
Battery mounting.
Rectifier original mounting position.
Oil tank filler with dipstick.
Deluxe oil tank.
Frame number location.
It would be great if you could tell the wider community the answer to some of the above as you get further into your puzzle.
Great story so far. Well done and thanks for publishing.
Peter
- Log in to post comments
Clutch centre washer 22196
Hi Ulrich,
Hard to tell from your photos, but I believe you might have one of the very early Jubilees. It will have the smallest mainshaft spline and there will be a thick hardened special washer to go into a counterbore on the back of the clutch centre.
See the recent thread on washer 22196. Miss it out at your peril.
Take care.
Peter
- Log in to post comments
Early deluxe details
My deluxe has 340 stamped on the right engine case behind the cylinder so it is bike No 340 ever produced. The other late Jubilee standard I also bought i is one of the last 14 bikes ever built.
I will take pics of most of the details listed in Peter´s comment. Except the position of the original rectifier. The square rectifier was in the parts box and not mounted on the bike so I also have no idea of it´s location.
- Log in to post comments
It´s all your fault Stan Pyke ! :)
I am converting the Jubilee to a 12 Volt system with positive ground to run a Boyer ignition.
I shamelessly copied Stan Pyke´s idea of using one switch at the headlamp as an ignition switch.
I bought a simole on/off ignition switch on Ebay and
glued the key for it into an internally broken original Wipac switch with JB Weld.
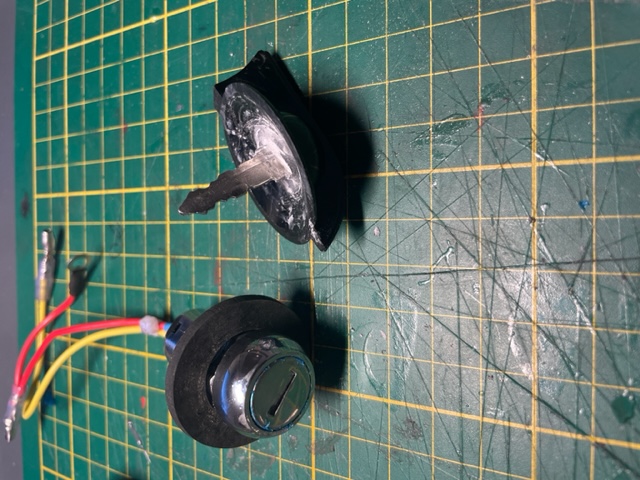
The other switch is for turning on and off the lights.
Here is the plug with the hopefully correctly soldered on cables.
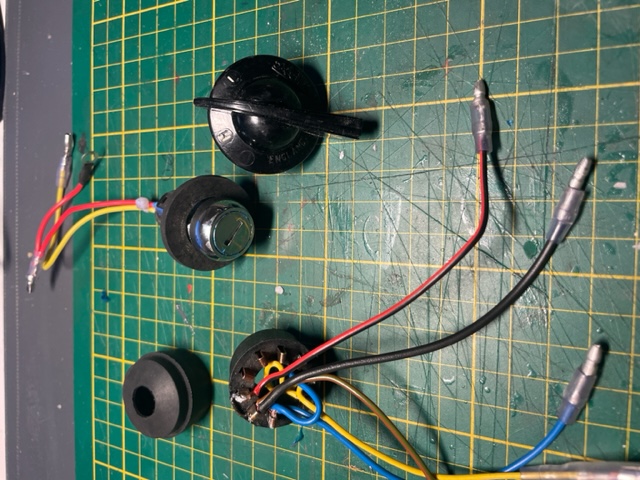
Test fit into the lampshell but I have to fix some electrical gremlins. E.g. lights are always on.
I used a wiring diagram drawn by another NOC member for a 12 Volt conversion of
the Norton Lightweights but I guess I mixed up some connections.
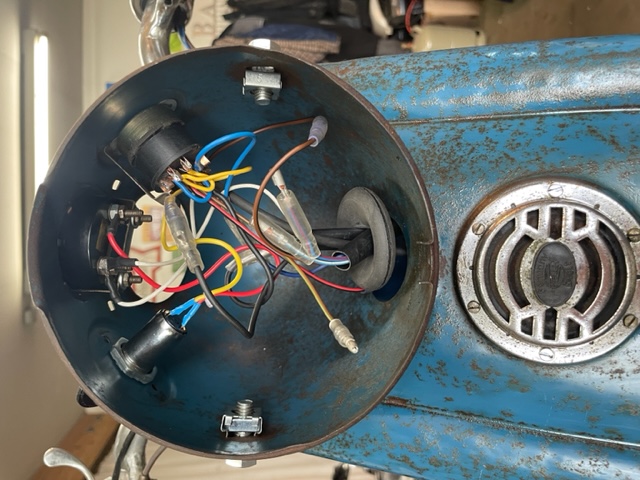
The horn is a German HELLA one, as mentioned the bike was originally imported into Germany .
Don´t know if it was a dealer conversion.
- Log in to post comments


There has to be something else in life appart from Nortons, I'll keep looking and if I find something else worthwhile I will pass it on. !!