
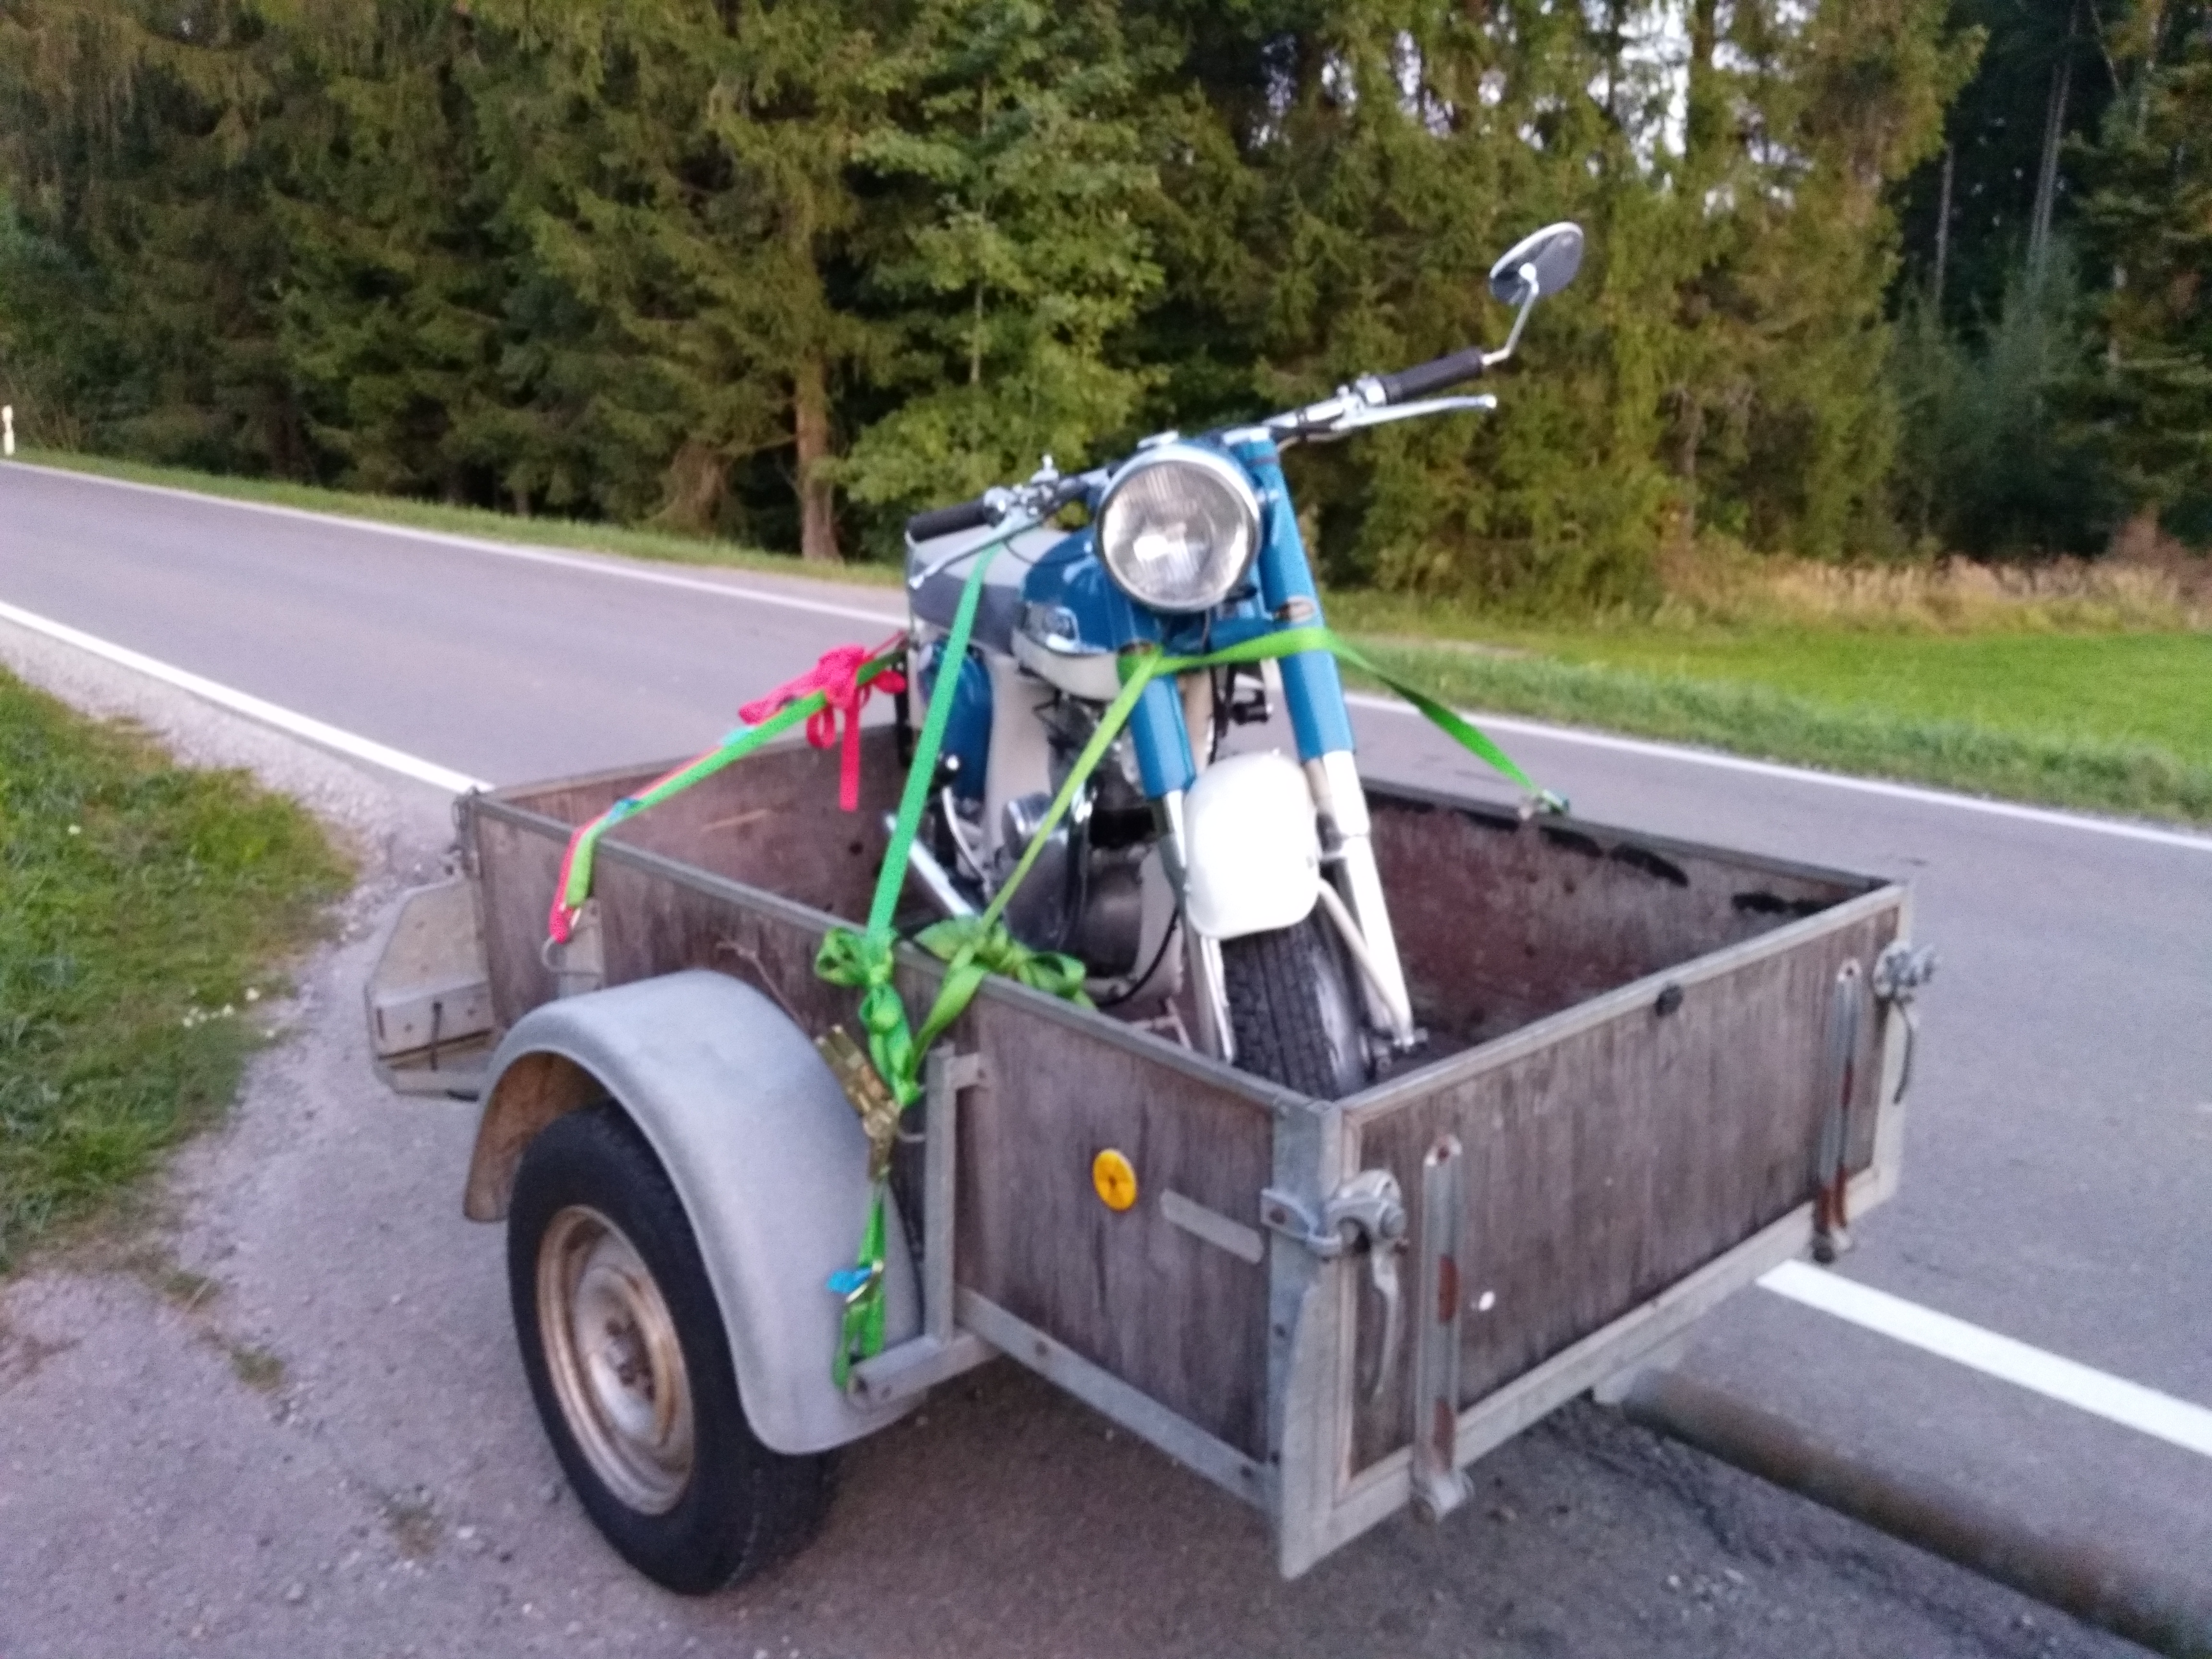
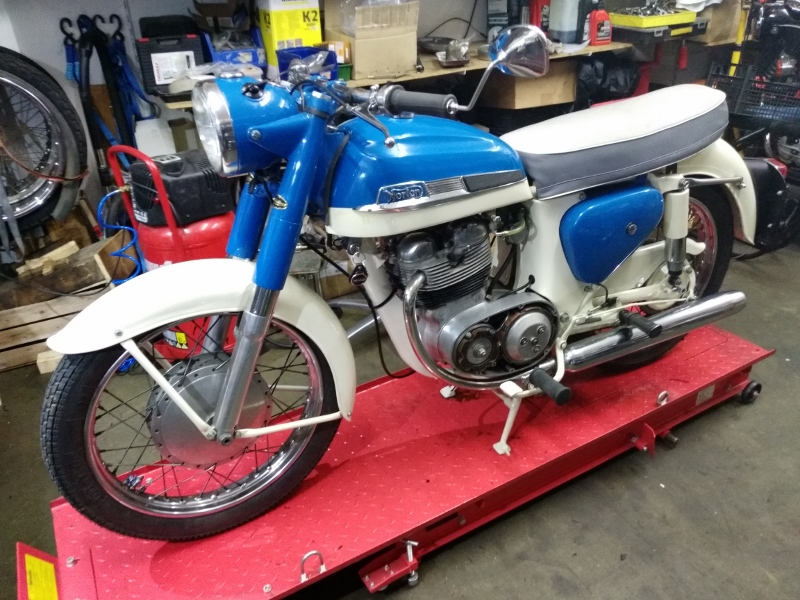
So after curing the oil loss with a new composite head gasket and some high temperature sealant the first longer ride on my Navigator was half a success! I made it to the British Bike Meeting in Salem, some 25km away from my home but not back. The engine seized and the Navigator was loaded up to the Chariot of Shame.
This is the result:
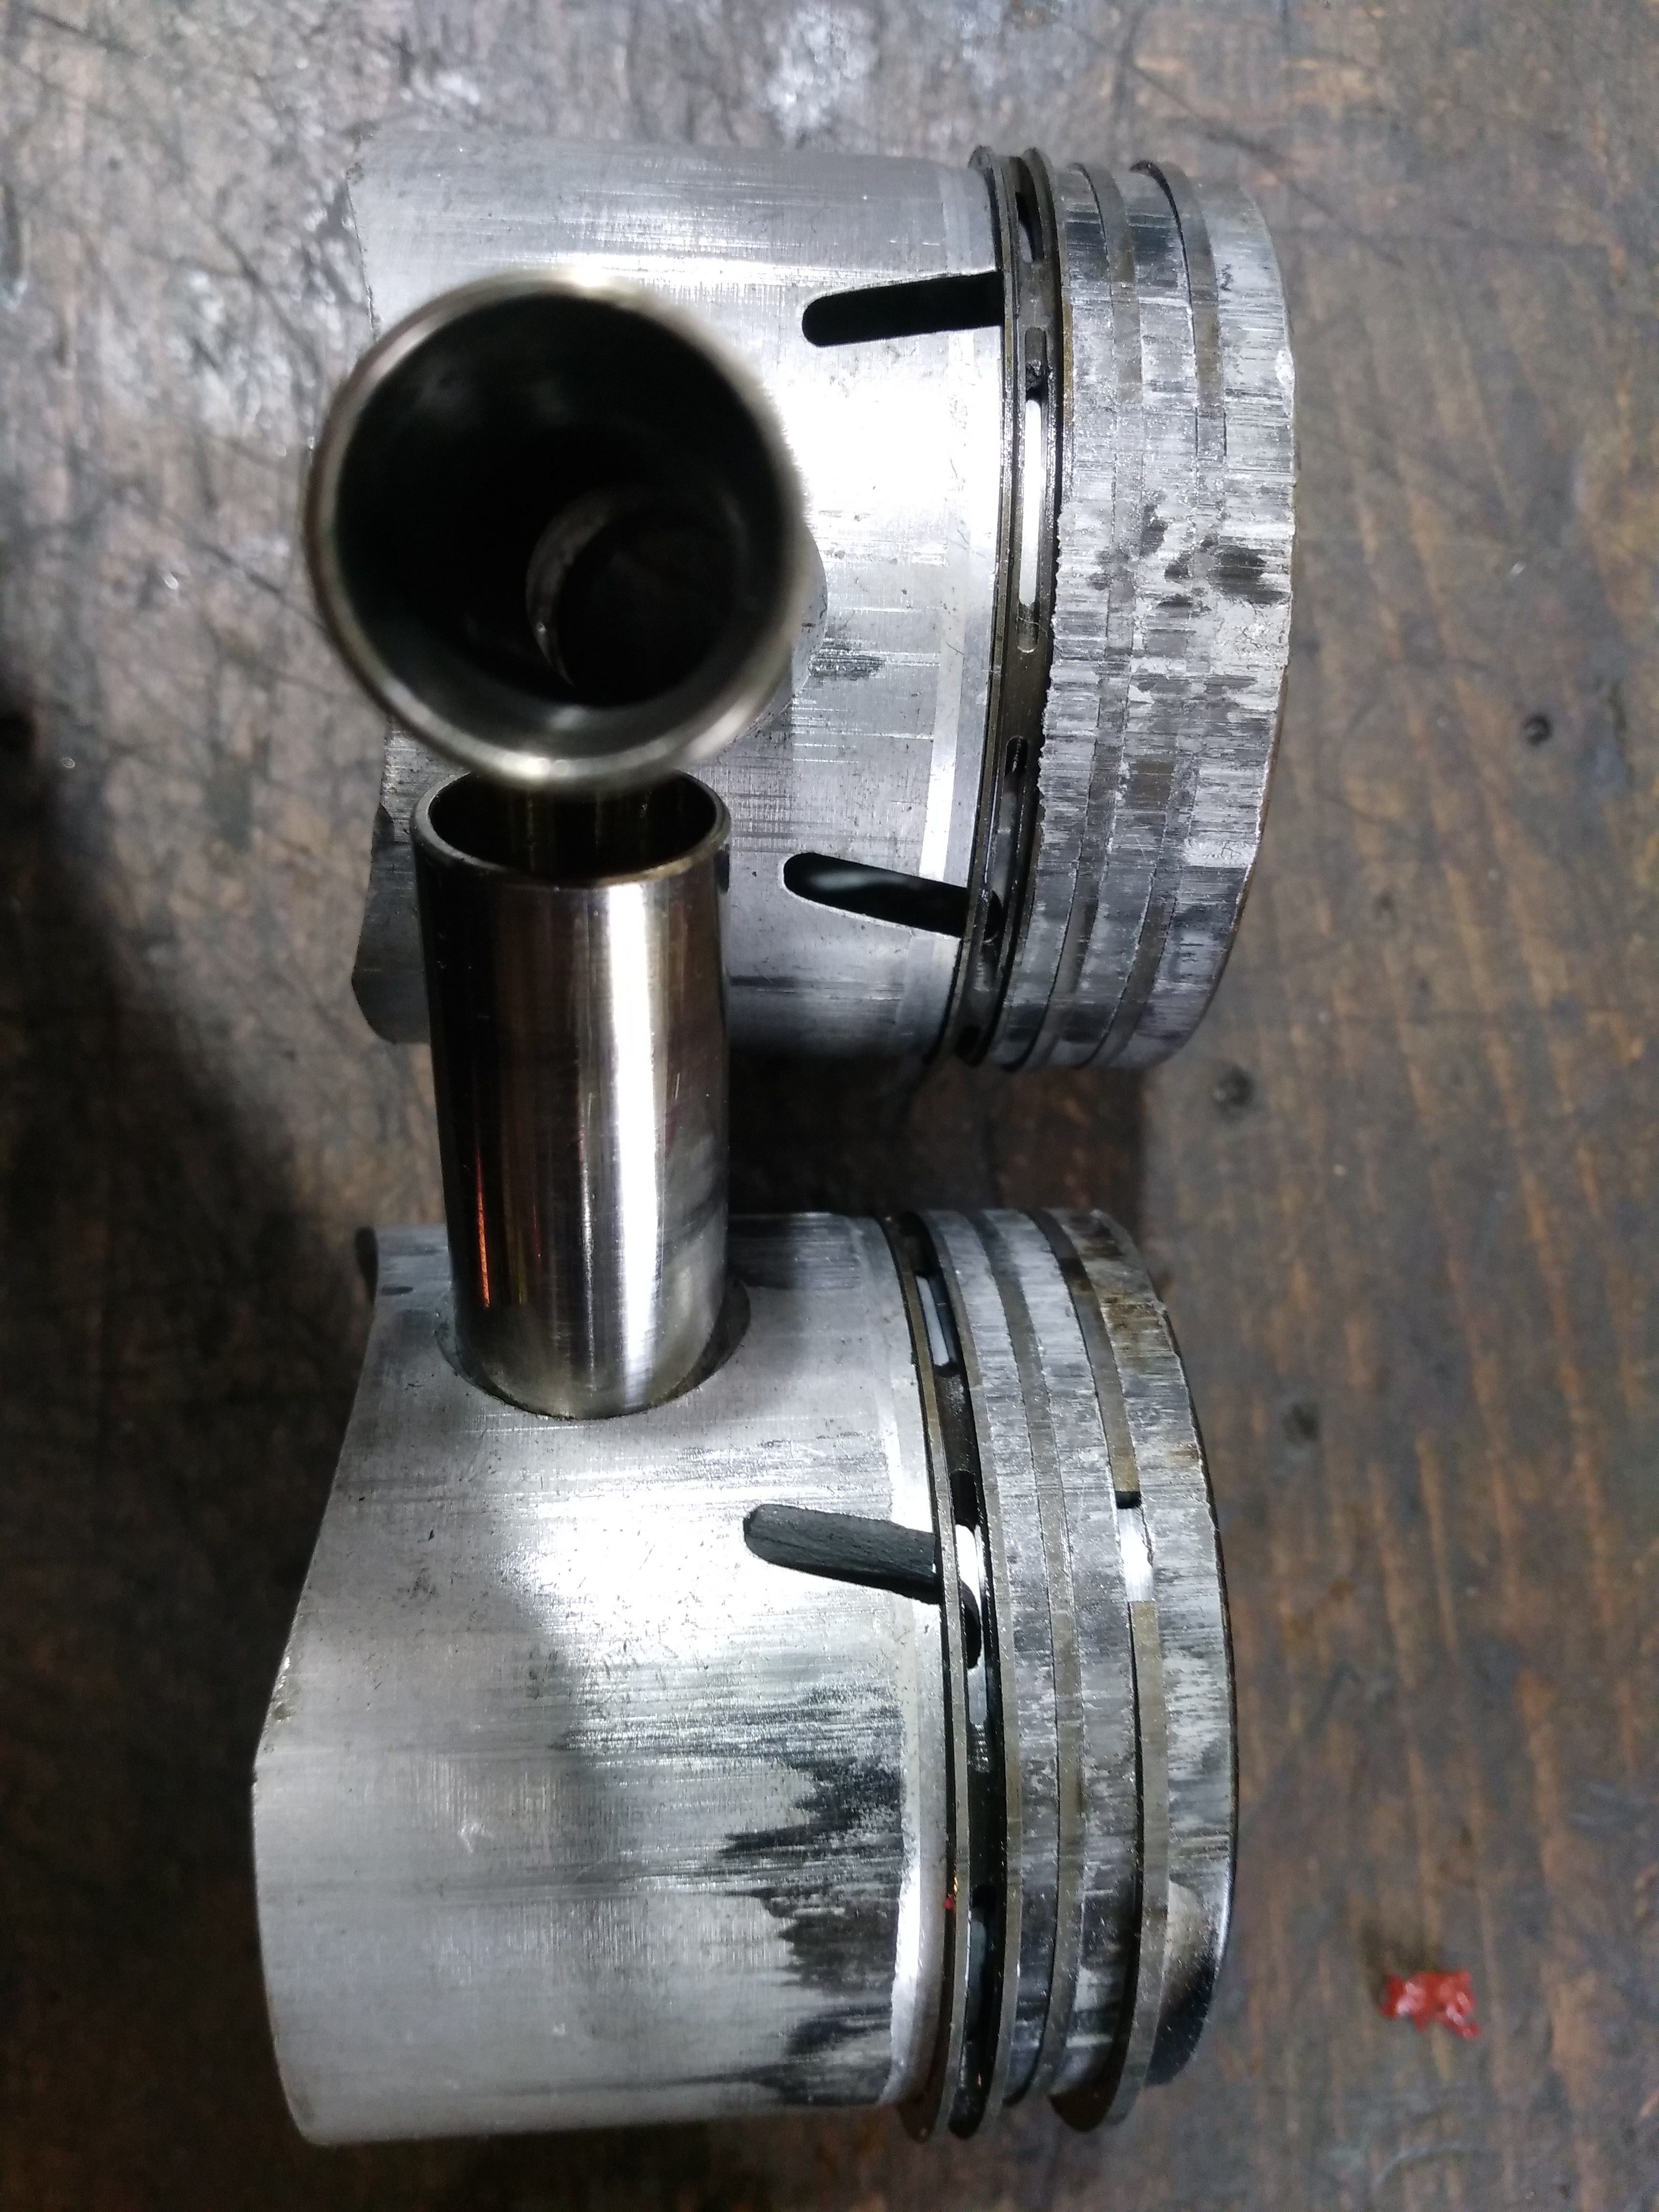
Bad marks on the pistons and some scoring in the cylinders.
Will take it to the engine shop who bored the cylinders so we can discuss how to solve the problem.
Navgator first outing
- Log in to post comments
What a shame!
Ulrich, what a shame. I hope you can get it sorted.
Looks like the pistons 'picked up' in the cylinders
Was it a tight fit getting the pistons in the bore?
Did anyone check the ring gap with the piston in the cylinder before assembling the cylinder to the crankcase.
Did you lubricate the pistons and cylinders generously on assembly.
Is the oil pump working well, for example did you see oil returning to the oil tank at a good flow rate.
Did you run in the engine gently before you first run?
Sorry if I am stating the obvious.
Dennis
- Log in to post comments
Dennis, the oil pump is…
Dennis,
the oil pump is working fine, I checked the return flow several times.
There were no problems fitting the cylinder.
I had the engine running several times before the first longer run. Ok, I did not check the ring gap.
After we hauled the bike back to my workshop and checking the engine I found out the left intake
rocker had way too much clearance because I did not tighten the spindle clamping nut enough so the
rocker came loose.
Hope I can save the pistons. The cylinders need some honing.
Will report soon.
- Log in to post comments
Although it looks bad, the…
Although it looks bad, the main damage would appear to be in the ring lands which should have more clearance than the skirt . If new rings can be made to work its just possible that you could save the pistons after a good clean up. I would be looking at clearances ,timing, and carburation. Its also possible that the pistons were not made correctly.
- Log in to post comments
Hi Uli That's bad news…
Hi Uli
That's bad news indeed, they look like heptolite pistons, while its unlikely with new ones they did suffer from cracking usually from the gudgeon pin up to the rings, this allowed the piston to expand more and seize, I have one in my hand that did just that in 1977!
Hopefully you can clean them up satisfactorily but it does look like like the piston clearance was too tight or they were running very hot. I doubt a wide valve clearance would could that problem.
Fingers crossed.
Dan
- Log in to post comments
Piston saver
Thanks folks for all the kind words!
The pistons are NOS Hepolites in +010 from NOC spares. They have one pair left if these are no good any more.I supplied them with the cylinder to the machine shop. They are specialized in engine boring etc.They do good work usually.
The engine seized at an uphill road after a longer ride on a "autobahn" with continuous speed at about 80 kph ( speedo is not working). Thats kilometres per hour not miles!
What are the Norton specs for ring gap and clearance?
I run SAE 40 oil in my Navigator as suggested per manual.
Cheers
Uli
- Log in to post comments
When similar happened to my…
When similar happened to my Dommie many years ago, it was due to one carb needle being lower than the other - and one overheated on a long hill climb.
That led me to a rebore etc etc. The reason for the rebore was the state of the cylinder walls.
But in retrospect, I think most of what looked like severe damage was in fact aluminium from the piston, and I suspect it could have been removed using caustic soda with no loss to the bore size. I think I could have got away with new pistons, and saved myself a lot of trouble and time. Maybe others have similar tales to tell?
- Log in to post comments
Pistons are shot
Herbert had a look at my pistons: they are not reusable in his opinion.
I have a Boyer ignition. The bike is converted ro 12 volts. Will check the ignition timing. I made a mark on the alternator rotor at TDC and adjusted the ignition rotor accordingly, but just read in the Boyer instruction sheet:
Set engine to the full advance timing mark on compression.
What is correct now?
- Log in to post comments
HinUli I agree the best way…
HinUli
I agree the best way to time the engine is with a disc and a strobe, that’s what I did on the jubilee.
The Boyer gives a very steady spark, as you would expect.
dan
- Log in to post comments
Save the cylinder!
Visited the engine shop this morning, the barrels can be rehoned. I ordered the last pair of Navigator 63mm+010 pistons from NOC spares. When arrived I give them to the shop for measurement to get the right clearance for the barrels. I have to adjust the ignition timing according to Nicholas´post. to 24 degrees BTDC.
- Log in to post comments
Ignition timing
Just to get it right: Lookin on the left side of the engine it turns anticlockwiese when running. Right?
So I turn it clockwise from TDC to 24 degrees. Right?
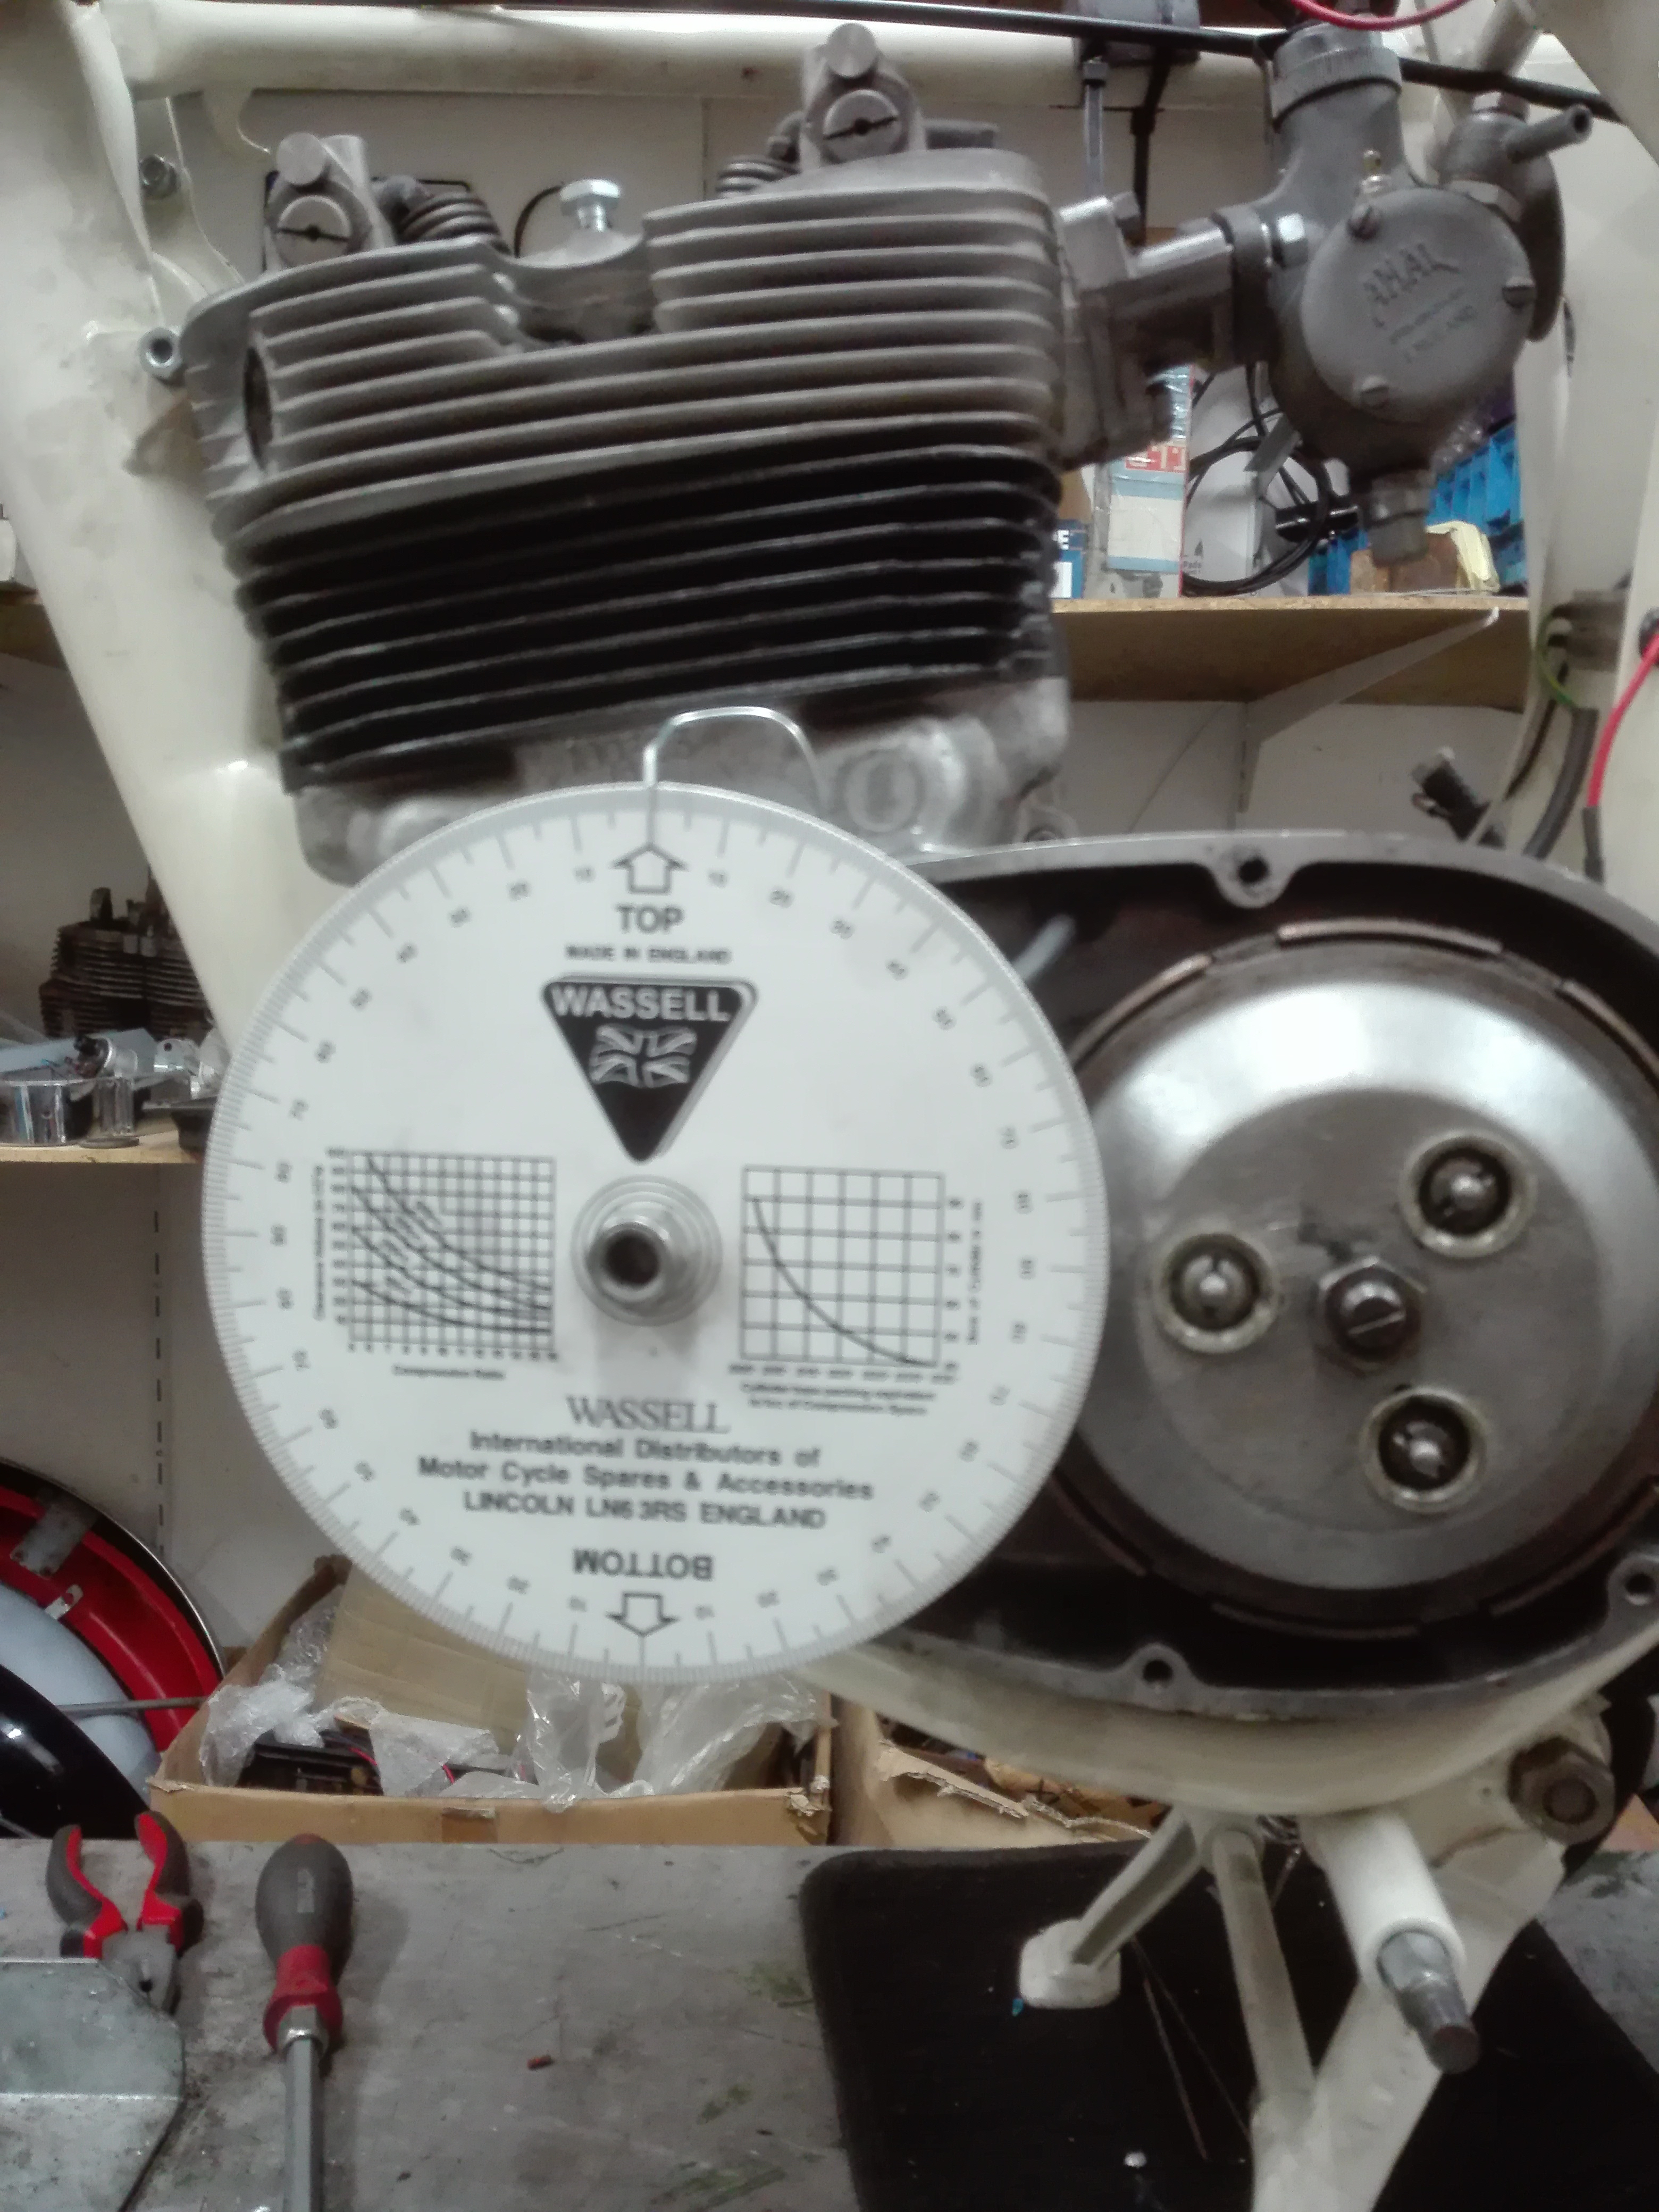
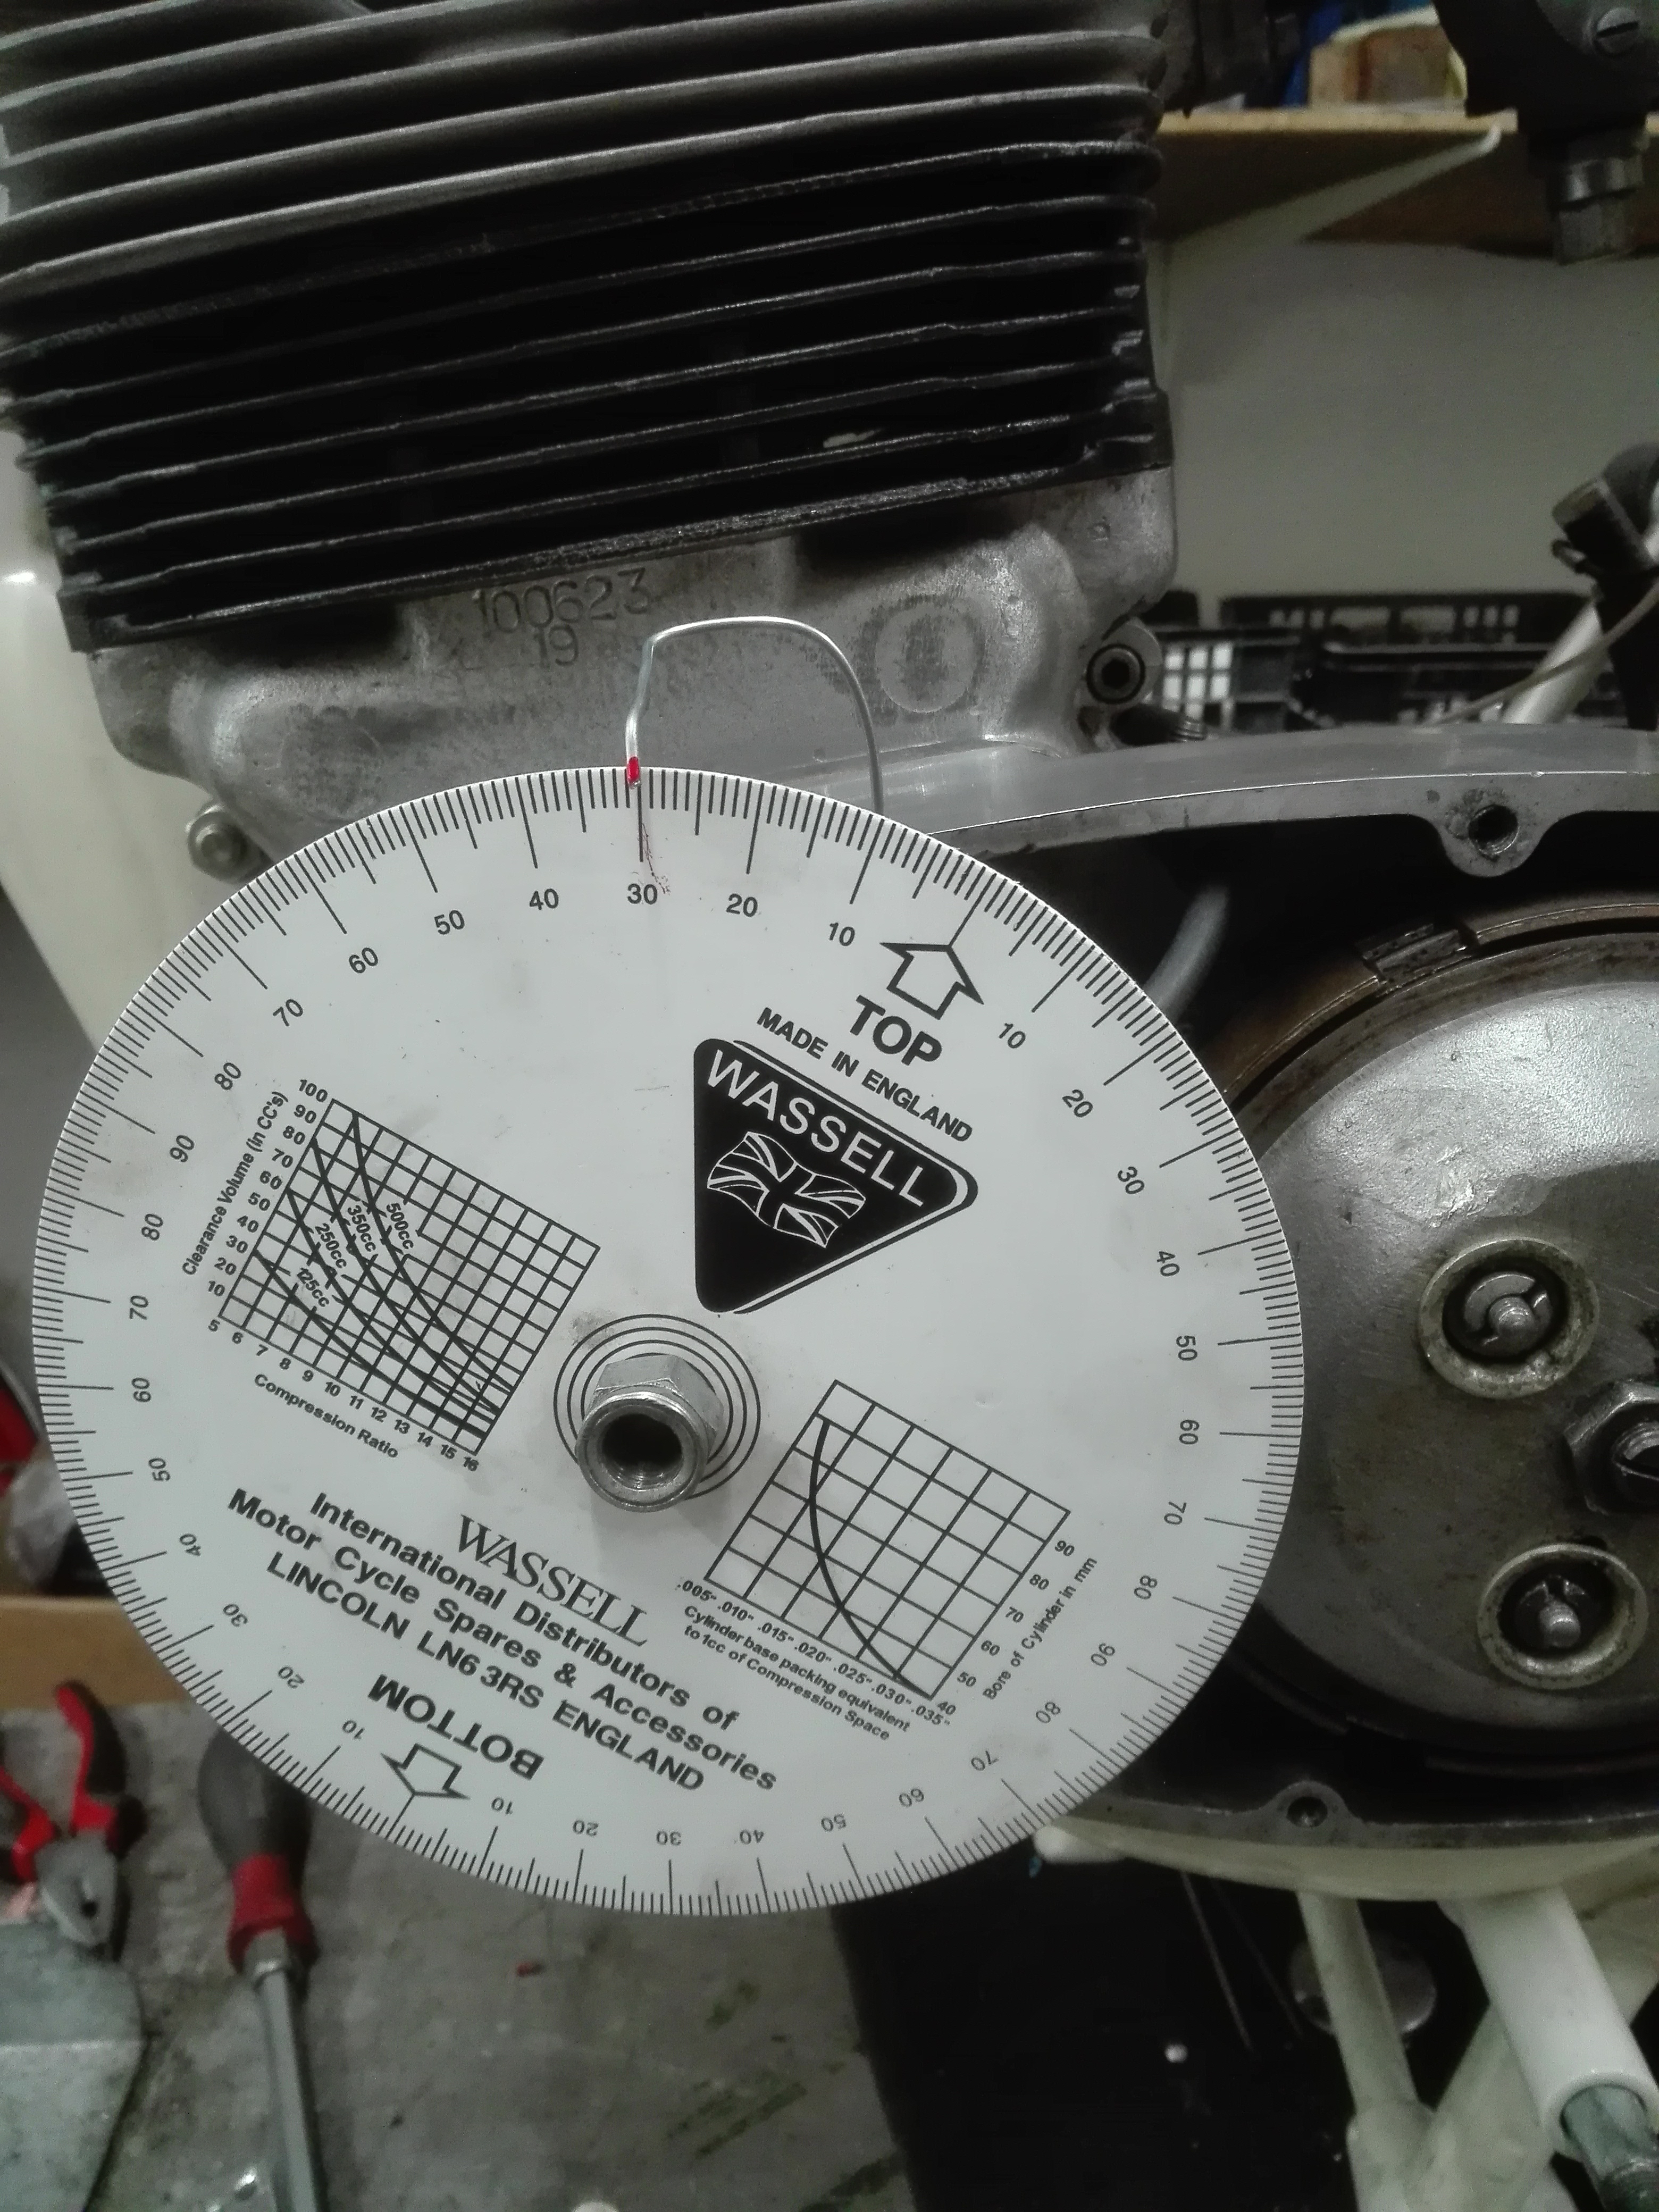
Then adjust the Boyer rotor an trigger plate. Right?
- Log in to post comments
I don't have the Boyer…
I don't have the Boyer system so the detail may difer Uli but yes the engine rotates anti clockwise as you look at it so once you have established TDC accurately set up a marker the way you have and then turn the engine back clockwise to the fully advanced position of 24 degrees (beware, you have the pointer at 30 deg in your photo which is for Electra timing!). Then follow the Boyer instruction manual to set up the rotor to time the engine statically. Once you have done that connect up your timing strobe, start the engine and point the strobe at your timing marker and increase the engine revs and you will see the ignition start advancing. Slowly increase the revs until the electronic ignition gets to fully advanced and make a note of how many degrees that is. Stop the engine and adjust the base plate accordingly, start the engine again, repeat the procedure until you have got the timing spot on. With my Pazon system the static timing is generally within 1 or 2 degrees so it only takes a very small adjustment to fine tune it. I have found that transforms the way the engine performs but do take care - with the engine running keep well clear of the primary drive and clutch. Good luck!
- Log in to post comments
These are the pics of the…
These are the pics of the first adjustment of the timing. Don´t know why I timed it at TDC.
- Log in to post comments
That’s right Uli, it’s…
That’s right Uli, it’s important to set the timing with a strobe. Note to self, must check mine!
- Log in to post comments
Ok, this is the actual pic…
Ok, this is the actual pic of the ignition timing setup.
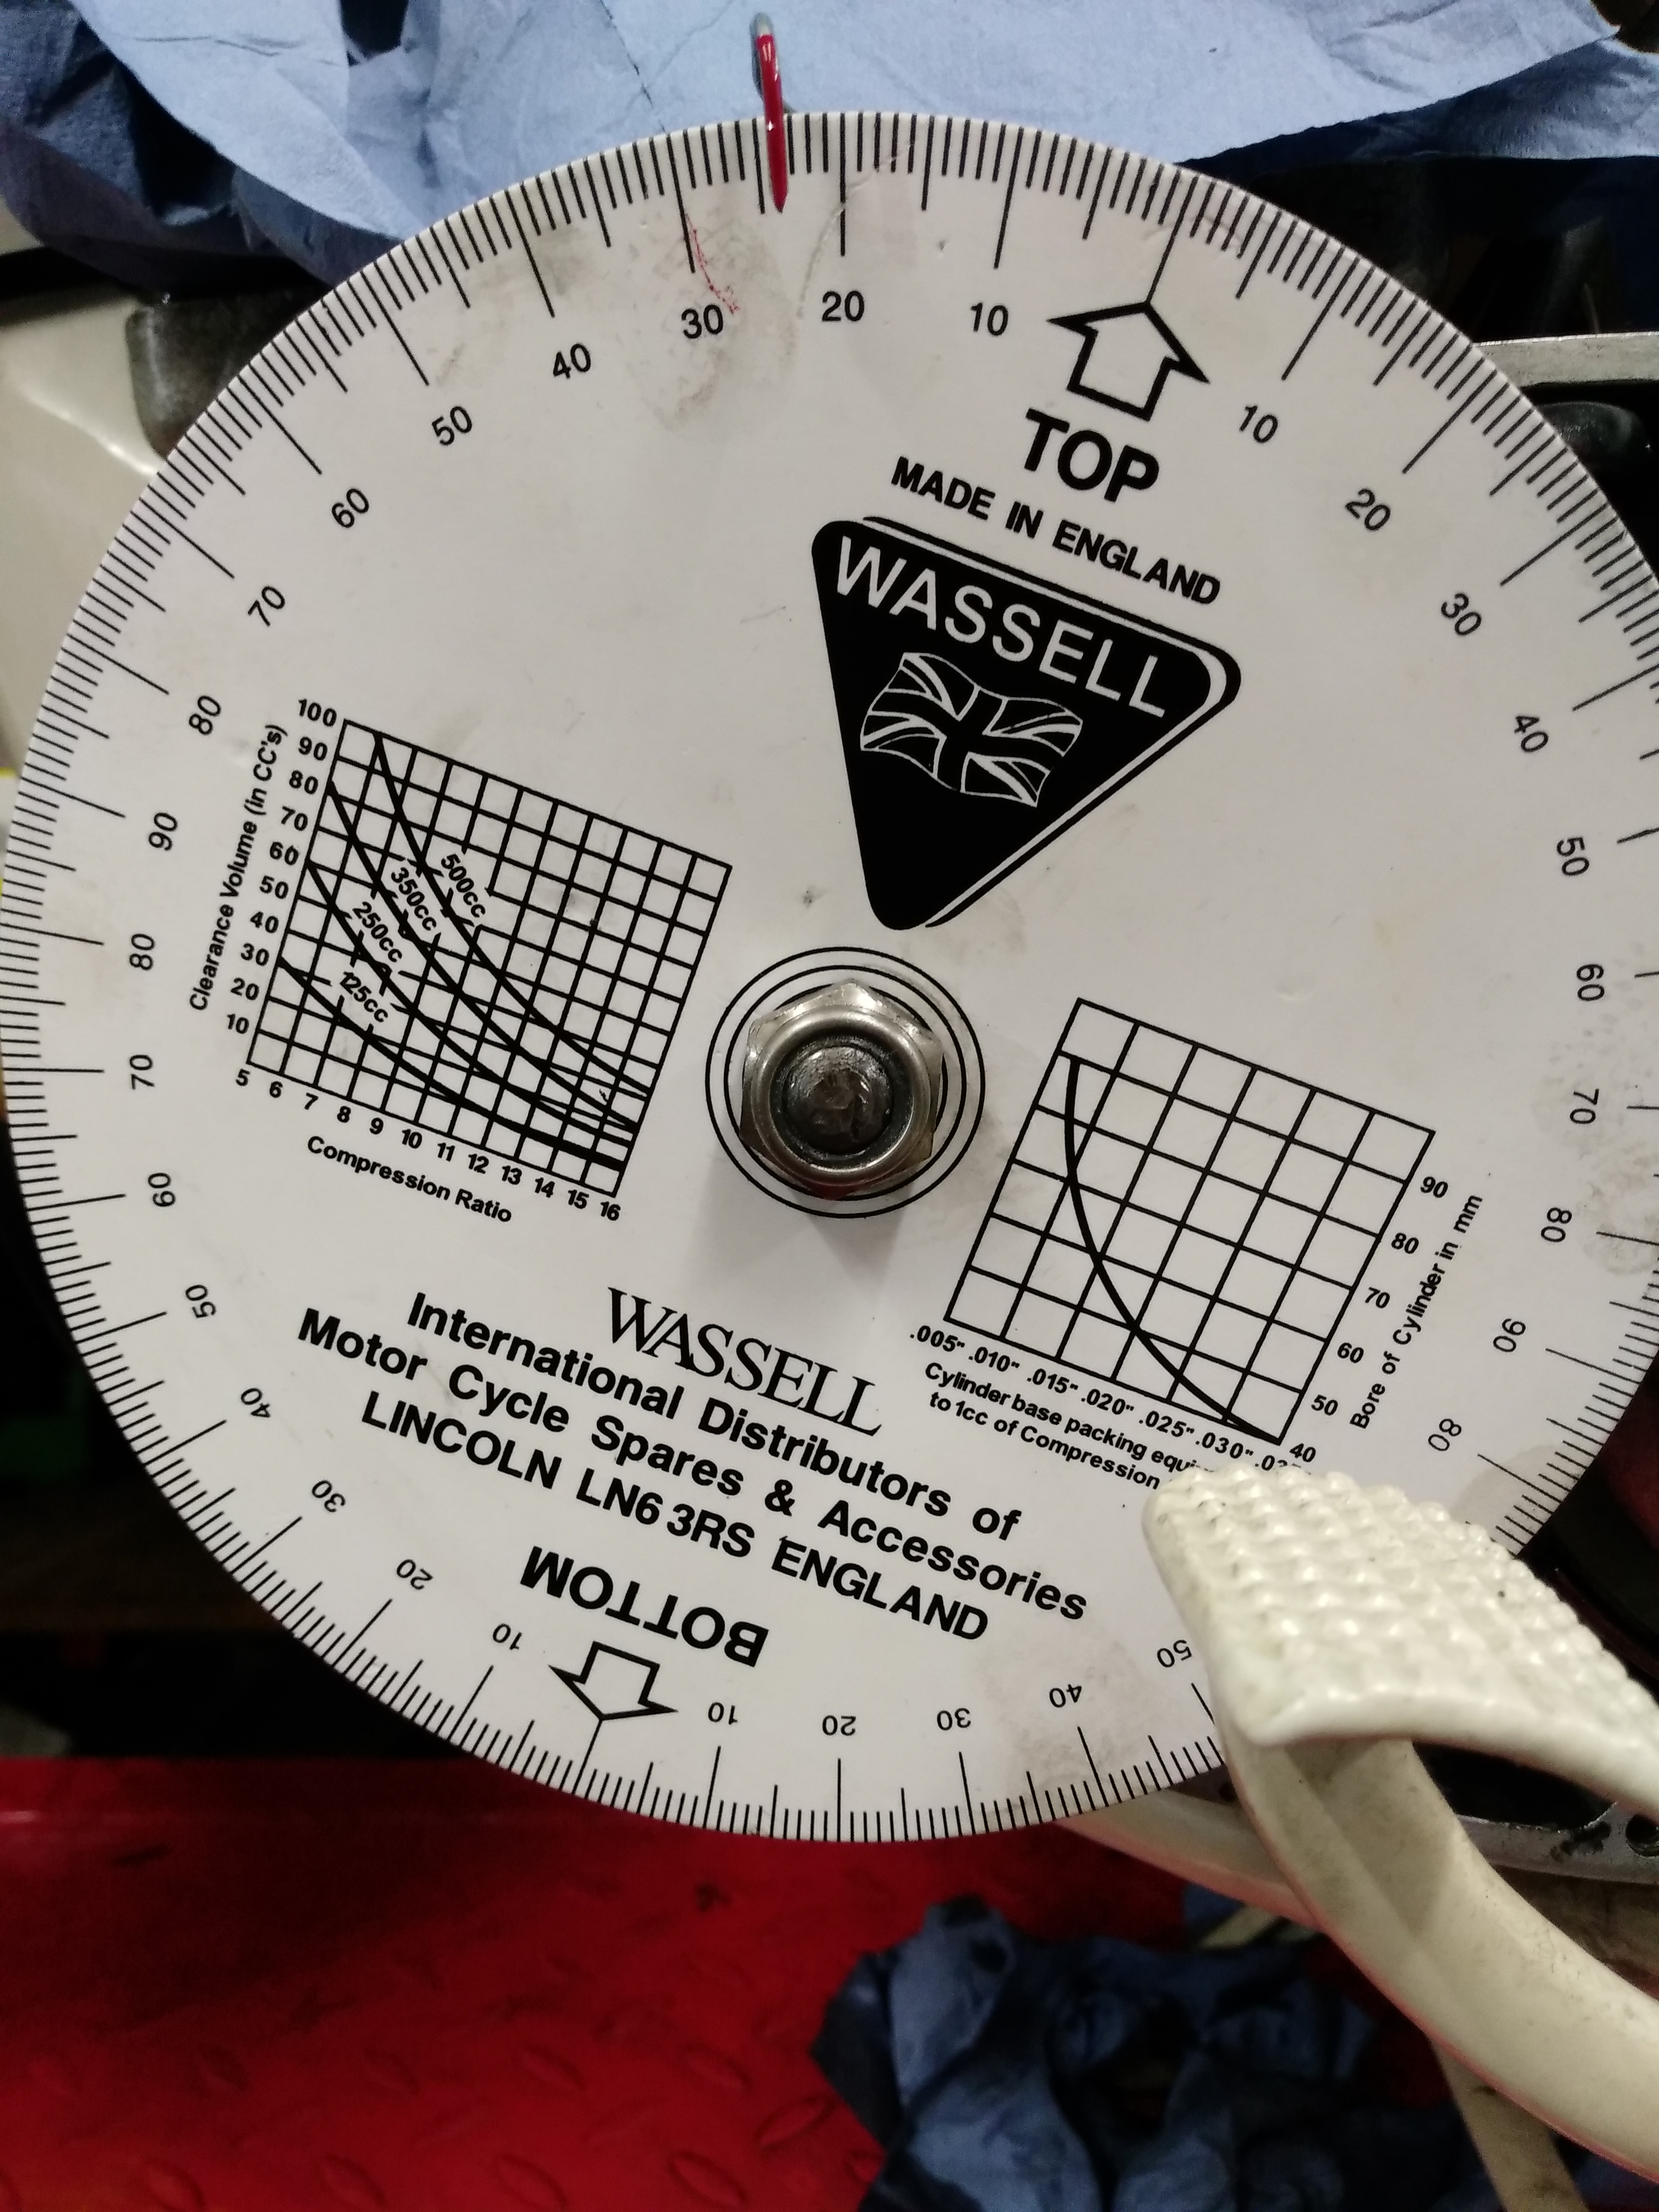
I have to check it when the engine is assembled . The cylinder is not honed yet.
I will make some marks on the rotor and stator. It is not possible to use that big timing disc on
a running engine because it interferes with the cables coming from the stator.
- Log in to post comments
Before TDC?
Uli,
I think I am correct in saying that the timing should be 24 degrees BEFORE TDC.
If the timing disc you show is in the correct position it looks to be AFTER TDC.
I am happy to be corrected if I am wrong.
With the Pazon you just set the 24 degree setting and the electronics take care of the rest. Not sure if that is the same with the Boyer.
Dennis
- Log in to post comments
Engine rotation
The engine turns anticlockwise when running ( to the left) when you look at it from this side .
So you have to turn it clockwise (to the right) back to 24 degrees.
- Log in to post comments
Correct Uli and your latest…
Correct Uli and your latest picture is spot on! As a suggestion so I could use the big (and therefore more easy to be accurate) timing disc I put several large washers behind it on the alternator retaining stud on the end of the crank shaft so it was clear of rotor and wiring. Good luck with getting the barrels honed, the rebuild and careful running in! Nick
- Log in to post comments
What clearance?
Did they use when reboring? I've found many workshops are far too optimistic and bore to clearances more appropriate for modern water cooled engines.
I prefer to allow a thou or two more than standard - let's face it, who wants to spend the rest of their life running the engine in? I know nothing about the lightweights but .007" or so for the singles is reasonable in my book.
- Log in to post comments
Ian, the clearance was 1…
Ian, the clearance was 1/10mm. After rehoning it will be a bit more.
When you look at he pics of the damaged pistons the damage is at the top around the rings because they got too hot due to the faulty ignition timing. There is no damage at the skirts, so the clearance should be ok.
- Log in to post comments
I see JP do Navigator…
I see JP do Navigator pistons, they don’t have a very good reputation but must be better than nothing!
Dan
- Log in to post comments
JP make a full range of over…
JP make a full range of over sizes too Dan, but like you I have seen some very mixed reviews on line, particularly over their pistons being significantly over weight and prone to seizure. That said I have also seen very positive reviews that suggest most of the problems are because the engineer reboring the barrels don't use the manufacturers tolerance guidance which is different from the original specifications. Interestingly when I enquired about Navigator pistons at Hamlins in Bridgewater they said they offer JP pistons and having experienced their engineering excellence I can't believe they would use sub standard pistons. I wonder if anyone in the Lightweight world has first hand experience to enlighten us?
Nick
- Log in to post comments
twins
hello from my engineering experiance they is a number of things that could of caused this failure one is the oil the 40 mono grade,as it gets hot it breaks down and its viscosity then get thinner,as I am seening, black burnt oil on the sides of the pistons, a 20/50 mulit-grade like Duckhams Classic will be better for small twins as the oil ways are smaller to the big twins and to time a twin you time from the left hand side cylinder and it runs anti-clock wise so you turn your timing disc back clock wise to 24 degrees, BTC and the piston to cylinder clearances are 3,thou and end gaps sholud be 6thou to8 thou and bronze valve guides are far better then cast iron ones and you reduse the timing by 2 degrees with electronic igintion systems So you have a number of issues to look at But I do feel your pain and angish after trying to do the right things in your rebuild, hope you sort things out this tie around, Yours Anna J
- Log in to post comments
Cylinder is back
Today I got the cylinder back from the engine shop. New pistons from NOC spares.
I checked the piston ring gaps an adjusted them to 0.20mm by careful filing. The man from the engine shop told me to use this gap size.
My first attempt to fit the pistons an the barrels ended in a bloddy mess. I fitted the pistons to the rods and tried to push the barrels on with some piston ring spanners. I had put on some sealant around the pushrod tunnels and smeared it everywhere while trying to get everything together.

So once more off with the pistons , loosing a piston rod circlip in the crankcase and slipping the pistons in the cylinder. I unscrewed the sump plug and was ablel to fish out the circlip with a telescopic magnet. Phew!
I supported the cylinder with some wooden blocks, aligned the pistons and conrods and connected them with the piston rods.
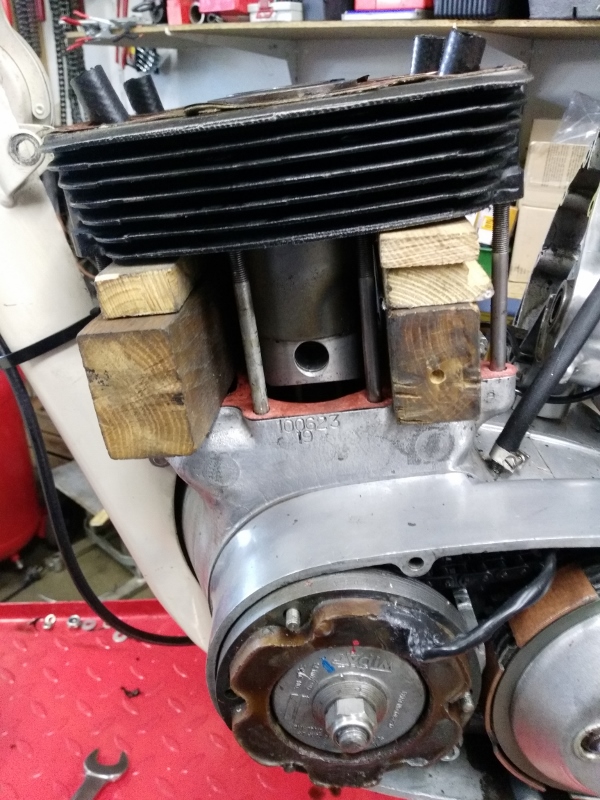
Next will be pulling the rockers from the heads, again putting some high temperature sealant on the surfaces an torque everything down. Then slipping in the pushrods, adjust the valve play etc, etc....
- Log in to post comments
Brings back bad memories of…
Brings back bad memories of juggling to get the barrels on the pistons on my Jubilee in the past without damaging the rings Uli, good luck, it looks like you are almost there! As for ring gap the Norton manual quotes it should be between 0.006" and 0.008" so 0.2mm is safely at the top end of that range. I'm sure you know but I thought I would mention in that last picture it looks like you haven't replaced the gudgeon pin circlip - not something you want to discover after you have lowered the barrels into place or worse still after you have started the engine with catastrophic results! Keep up the good work and hope the rest of the rebuild goes well.
Nick
- Log in to post comments
Critical circlips
Nicholas, the circlips are on.The pic was taken before I installed them . It was quite a challenge with my cheap circlip pliers. Either the circlips rocketed into orbit or as mentioned into the crankcase because someone in the workshop forgot to put a tissue under into the crankcase openings after the failed attempt ot get the barrels on .The curses were in German and I will not translate them into English..
- Log in to post comments
I share your pain Uli,…
I share your pain Uli, trying to slip them into place without them slipping from the grip of the circlip pliers to ricocheting across the workshop to fall in to a dark and impossible corner or as you found into the welcoming crankcases can take hours. But cursing in any language helps! Keep up the good work, it will be worth it.
- Log in to post comments
Everything is back together-almost
This is how a blown head gasket looks when you THINK you torqued down ALL the head bolts yesterday and you did not check them before letting the motor run.
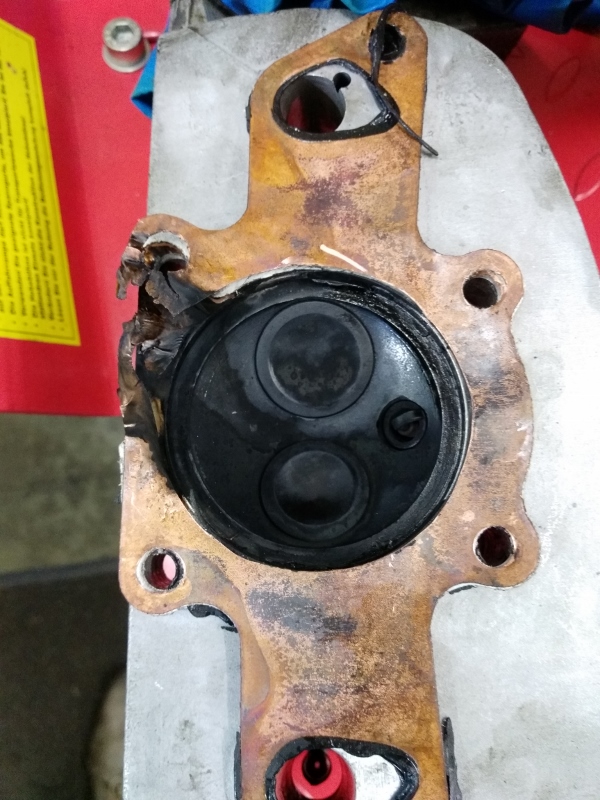
Some were only handtight obviously...
Well after that minor incident I ordered a gasket set for the Navvi from NOC spares and some alternator bolts with nuts and washers because one thread was damaged and could not be tightened.
Now everything is back together, engine idles steadily, ignition is spot on ( 24 degress BTDC!!!) I checked it with a strobe light.
You see the missing primary drive cover- one of the bottom screw threads is gone, I am in need of some helicoil inserts, hopefully will get one next weekend.
Bad weather and the missing cover prevented a testdrive.
- Log in to post comments
Well done, almost there Uli,…
Well done, almost there Uli, by the time you have finished it should run perfectly! My advice is to take it very steady running it in and re-torque the heads in accordance with the workshop manual order and torque settings after running the engine up to normal running temperature and again after 100 miles and 500 miles. That may seem over cautious but it should ensure an oil and gas tight head. For the first few runs I keep them short and take it very steady, not over reving the engine or letting it labour going up hills with several stops to check that the mixture is correct by checking the plugs (avoid a weak mixture, I let my newly rebuilt engines run a little rich to aid cooling until they are nicely run in), checking the engine isn't overheating and the oil is circulating to the top end nicely. If you think it is running hot again stop, recheck the timing, the tappets, oil circulation and the mixture - I have had something as simple as a poorly seated inlet manifold gasket cause an air leak and a weak mixture which over heated a freshly rebuilt engine causing a partial seizure. But all that said now you have the timing spot on and the engine idling steadily and not overheating all should be well. Let us know how the test runs go and good luck! Nick
- Log in to post comments
Head torque
Really good advice from Nicholas. I torqued my head gasket properly at rebuild and ran the bike, meaning to re-torque the head nuts later.
I forgot, and ended up with both head gaskets looking very similar to those in your photo.
Rebuilt, the bike runs fine now, but I'd just add that you must reset the tappet clearances at each re-torque. They close up significantly as the head gasket settles. Obvious, but easily overlooked.
Had the stripped thread at the lowest point of my Electra chaincase. Thread insert worked fine and worth checking the screw is the correct length, not shorter than it should be.
I hope all goes well for you.
Peter
- Log in to post comments
Running in
Thanks Nick and Peter for your advices for running in and re-tourqeing the heads.
Will keep that in mind . Riding season is over now, rainy weather and about 6 degrees Celcius over here. BRRRR..
Happy Halloween!
Uli
- Log in to post comments


Ulrich,
I share the agony having followed your thorough rebuild. I hope the engine shop might admit they left the fit of pistons in the bore too close. Better still if they can correct things at no cost to you.
You might consider a light cleaning of the pistons with a very fine file. Just to take off the high bits. Clean the ring grooves so the rings are free again. Hone out the bores and then run in with care.
Depends how bad the bores are of course.
How were the first 25 Km? Good I hope.
Peter