
Hi,
I am rebuilding a Mk3 Commando that I bought already disassembled and missing quite a few parts, I am trying to get some photo's of where items are fitted especially behind the L/H side panel, as I bought this bike in boxes I am really only guessing where items like the rectifier, warning light control box etc actually go on the bike and can't seem to find anything online that shows where these parts fit.
Also, I have bought a Mk2 air filter box which is similar to the Mk3 but again I am unsure as to where the oil tank breather pipe is fitted as my air box has no holes in it at all for pipes.
Any help would be greatly appreciated.
Kind Regards,
David
search final wiring
Hi David,
If you put "final wiring" in the search box at the top of this page, you should find some useful information previously posted.
Regards, Al.
- Log in to post comments
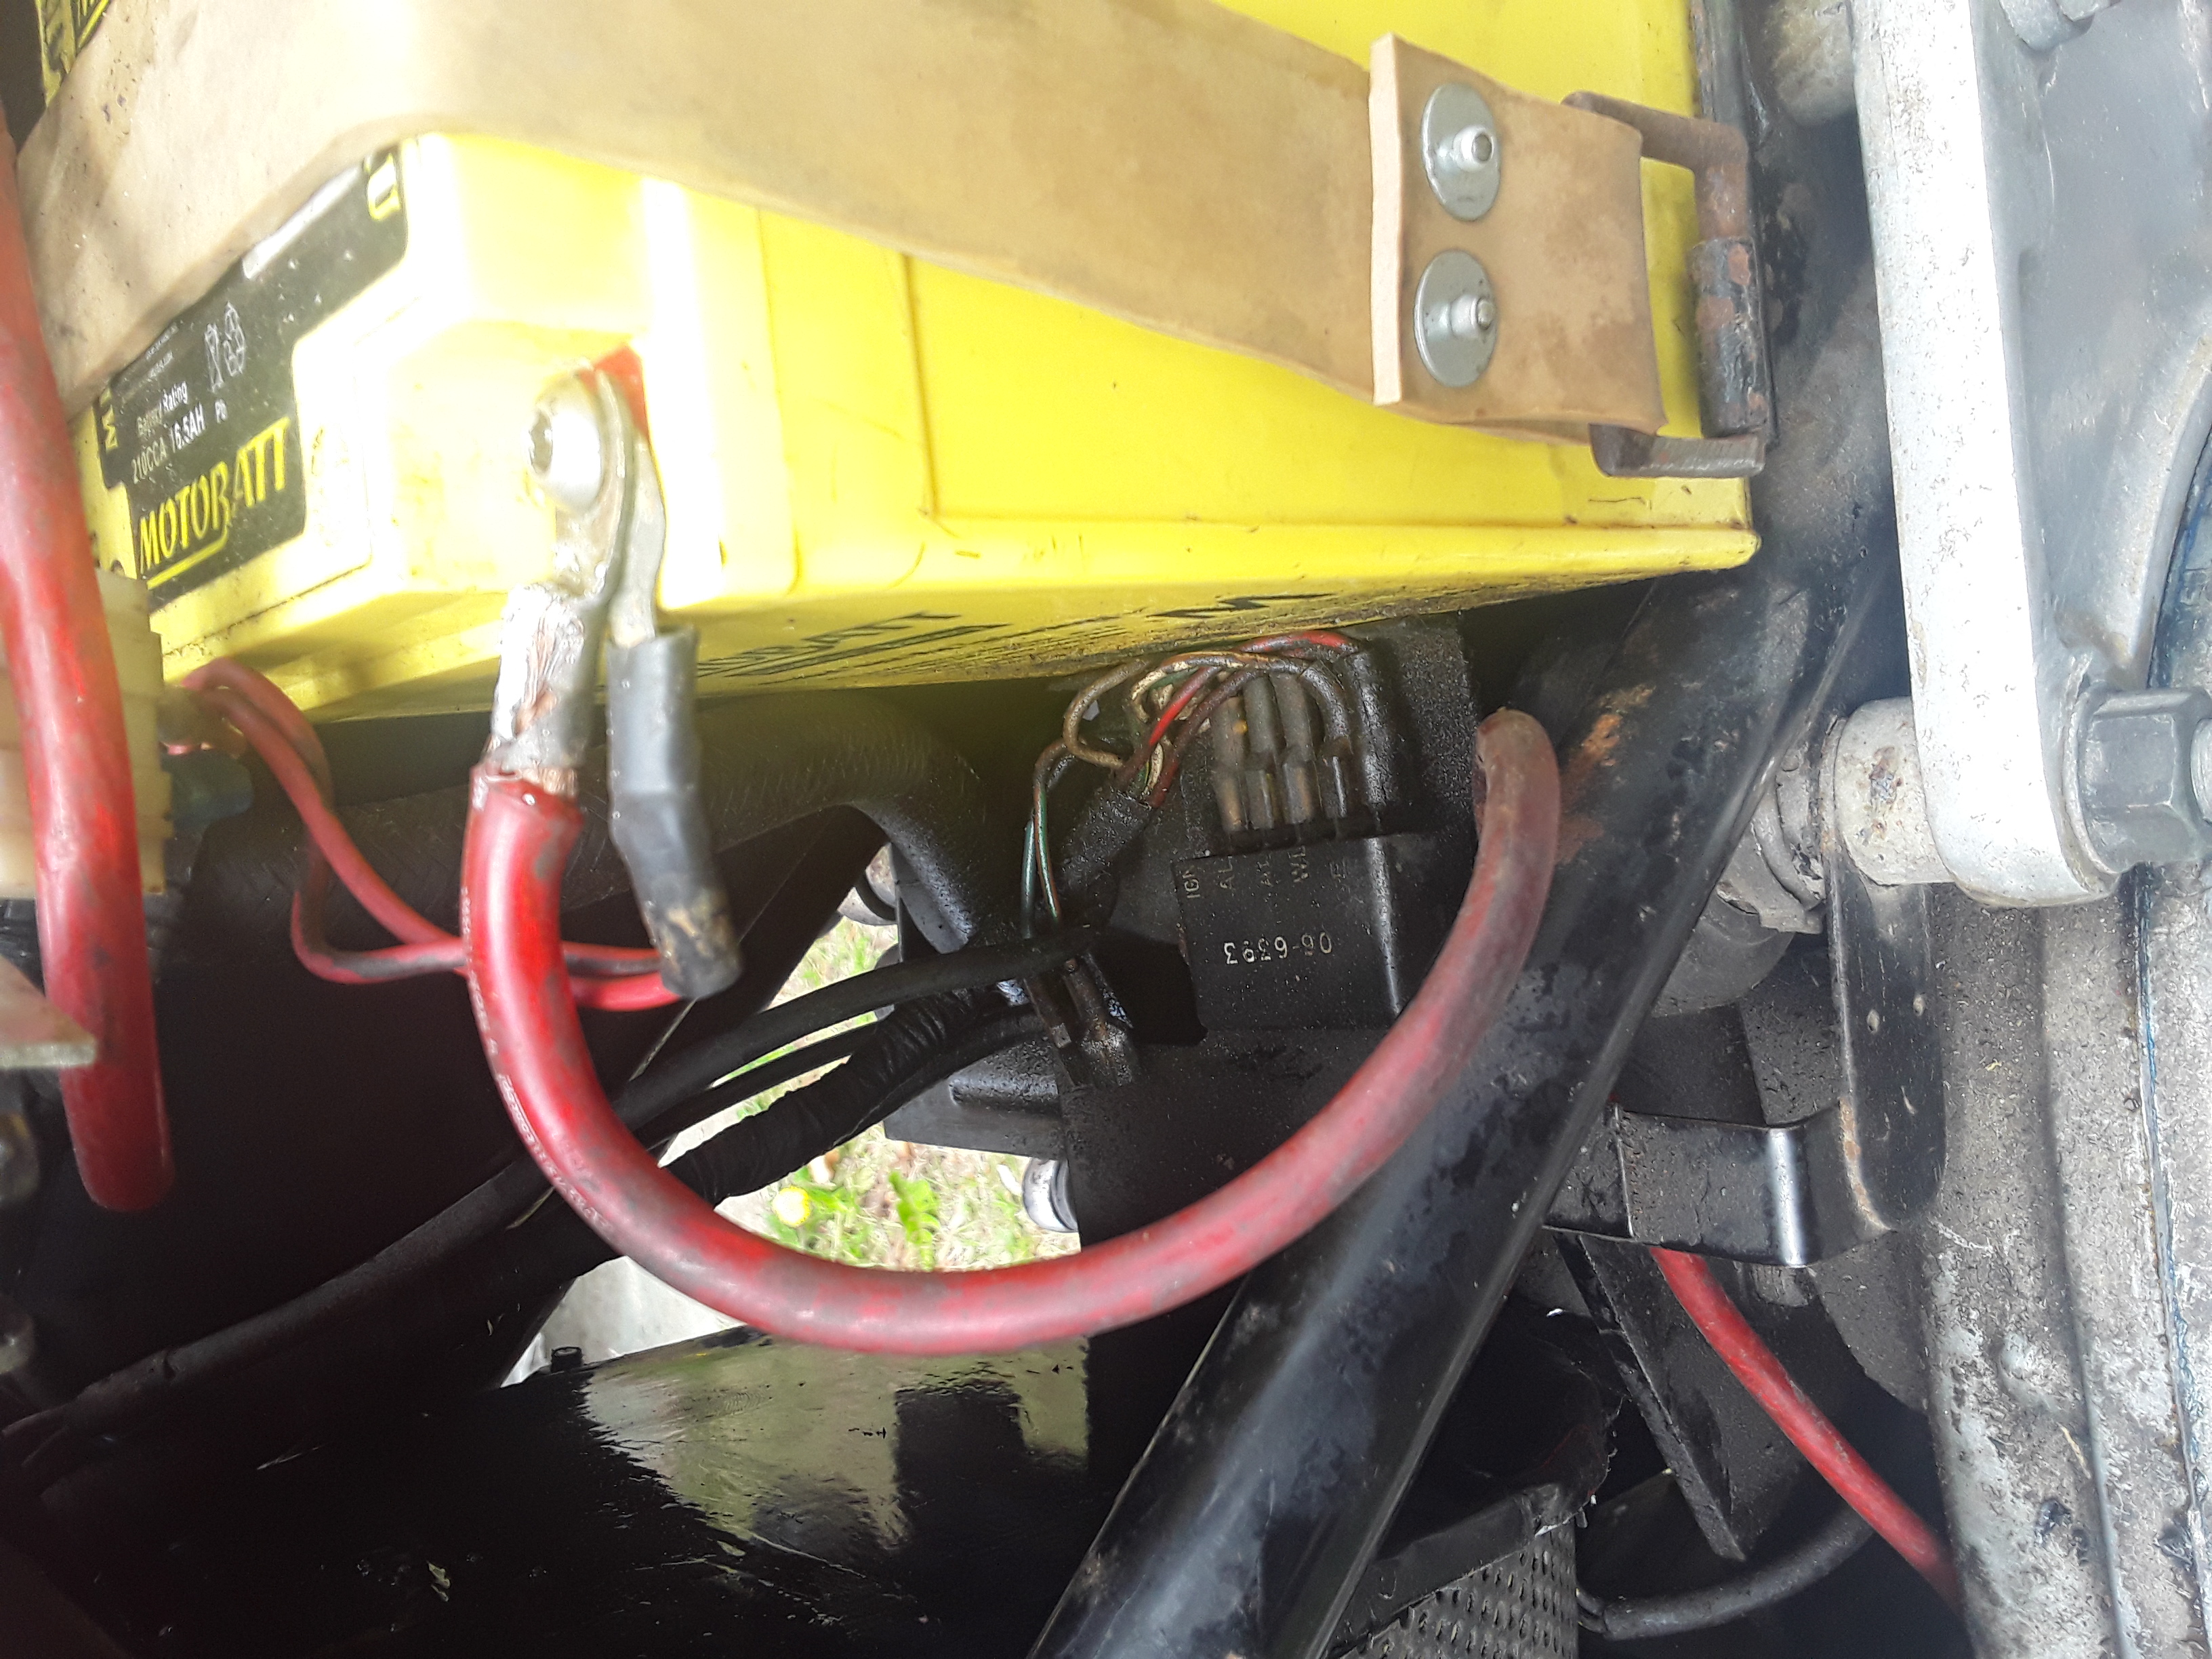
Rectifier etc
If you have the original '1/2 rectifier' Lucas item then it will plug into the original loom and have to be bolted down where ever the wires dictate. bear in mind you should have the original Zeners on the Z plates. IF Zeners are missing or failed (I can test) then the only answer is to fit a regulator rectifier, (I can sell). The latter has two bolt fixing so is up to you where you fit it. A supply of cool air being the most crucial part.
The MKIII warning light assimulator goes down onto an area just above the swinging arm. The two mounting screws should be a clue.
- Log in to post comments
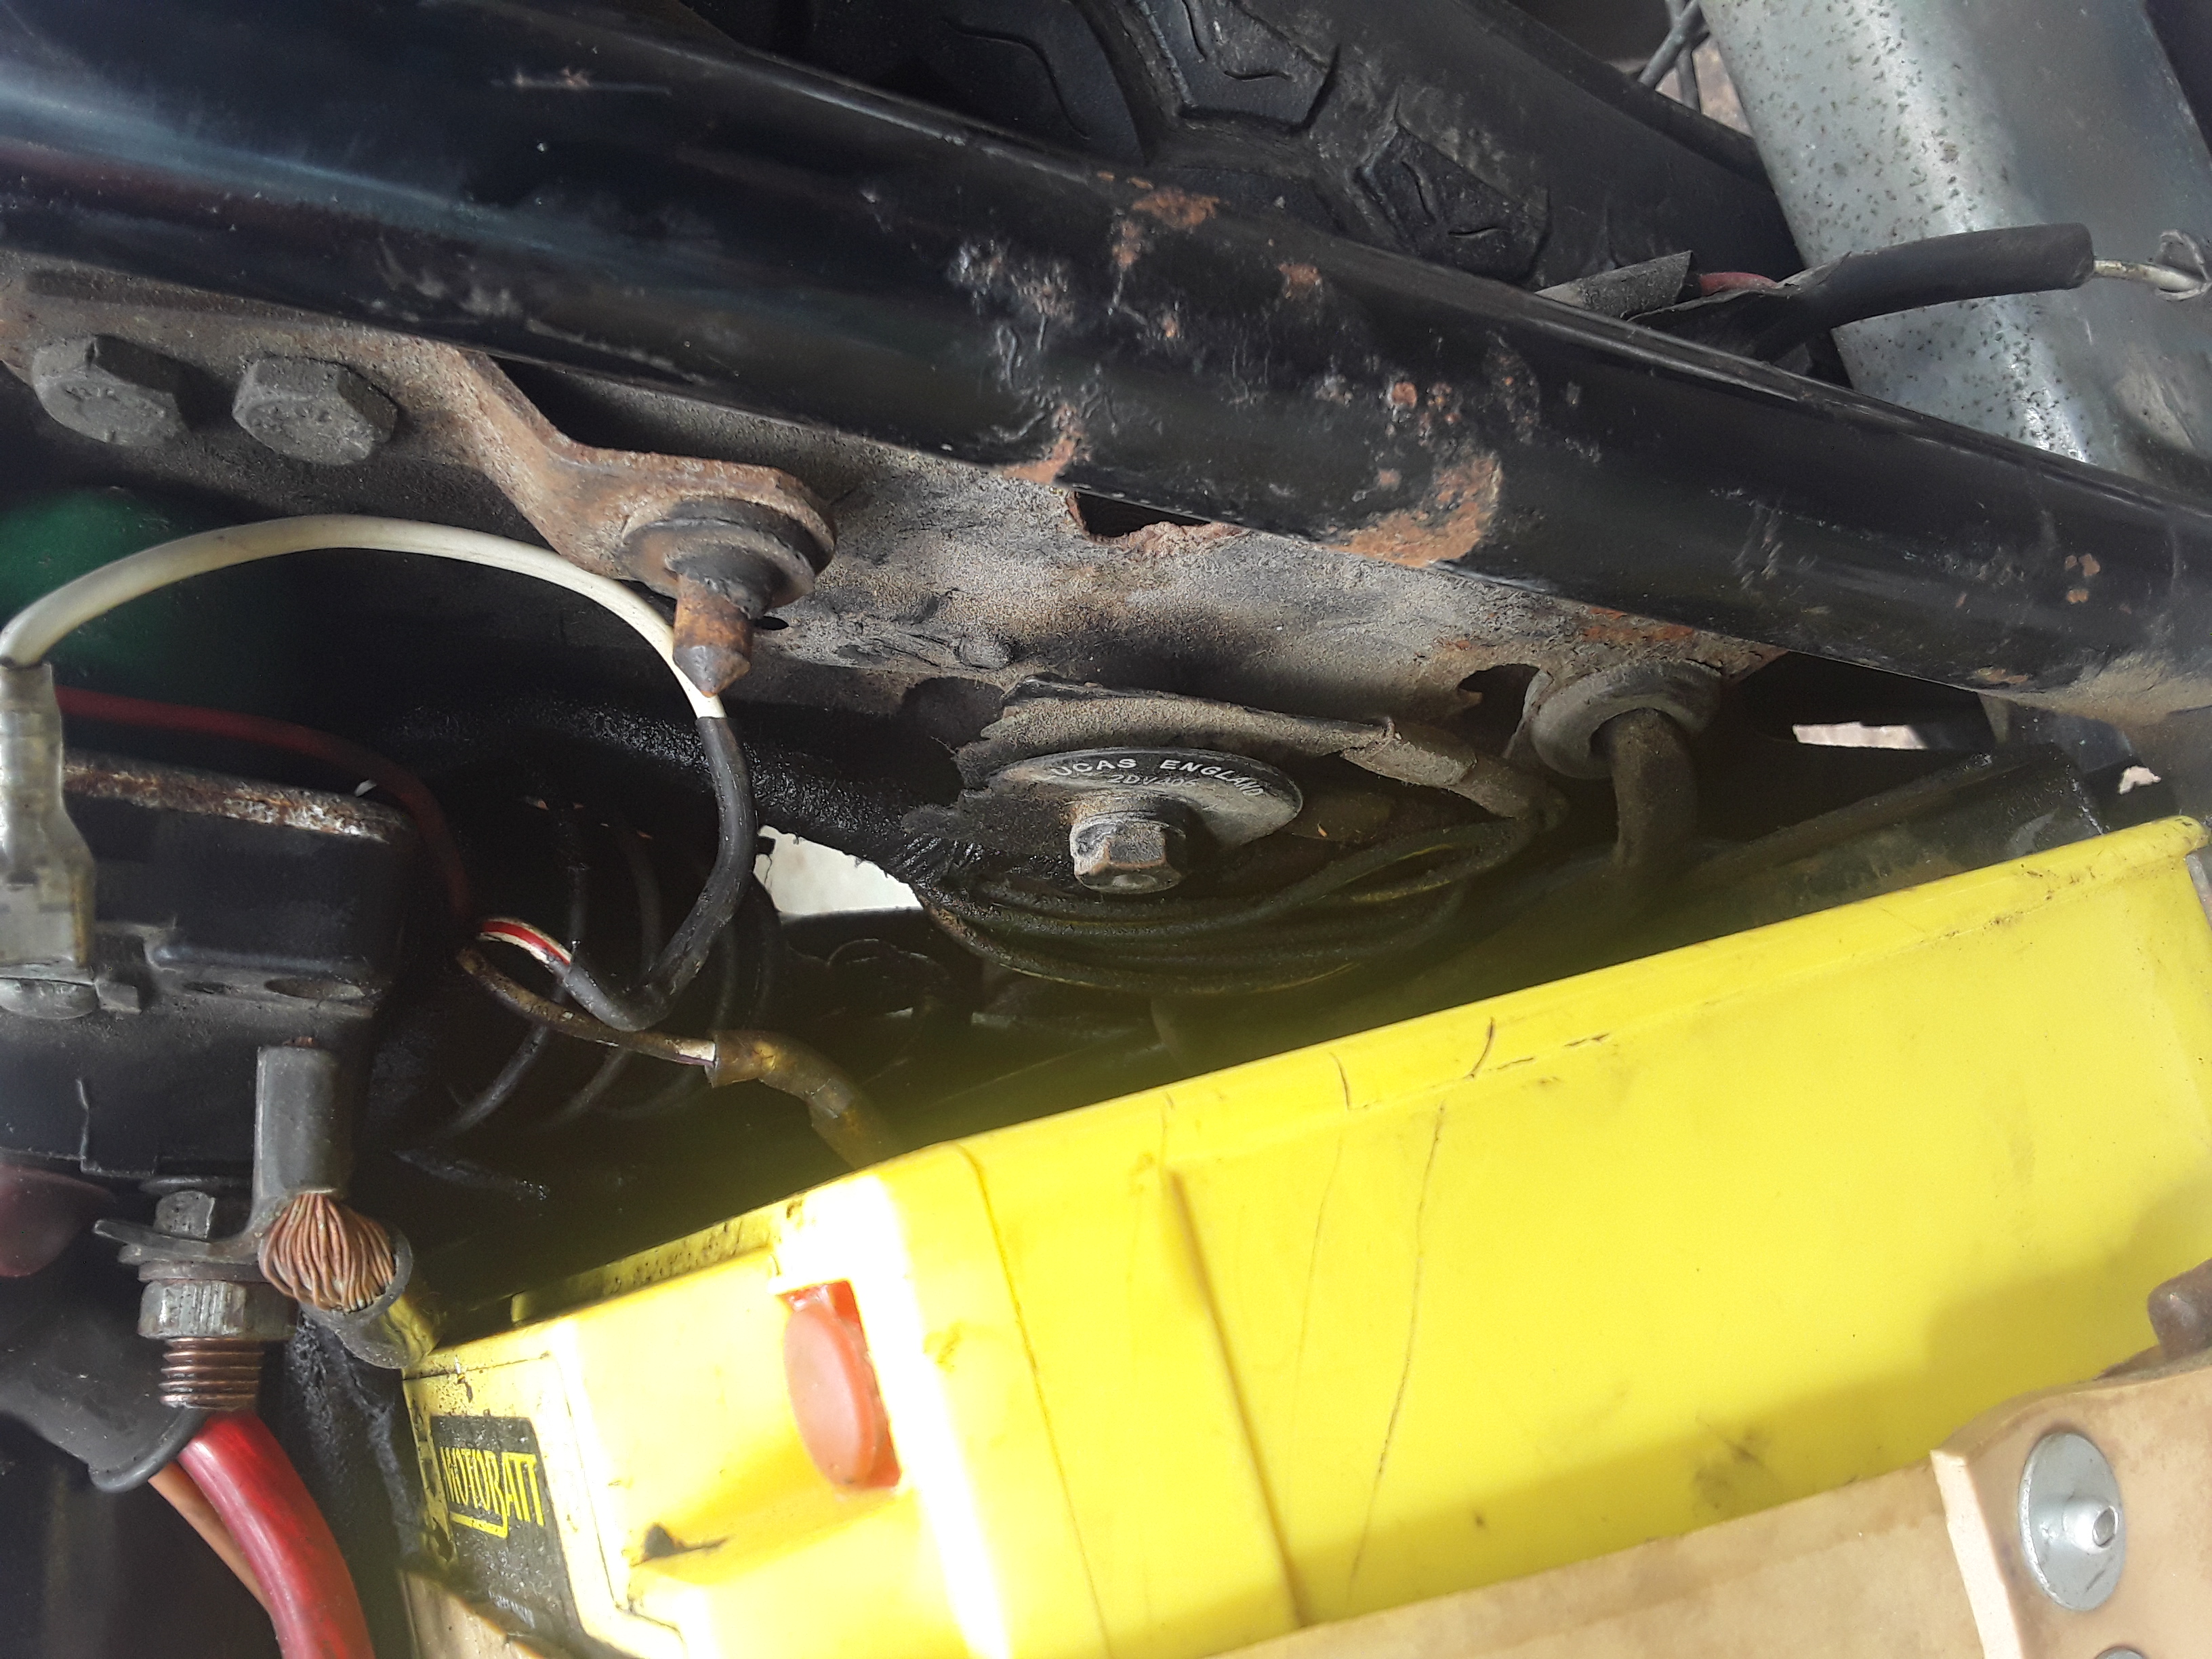
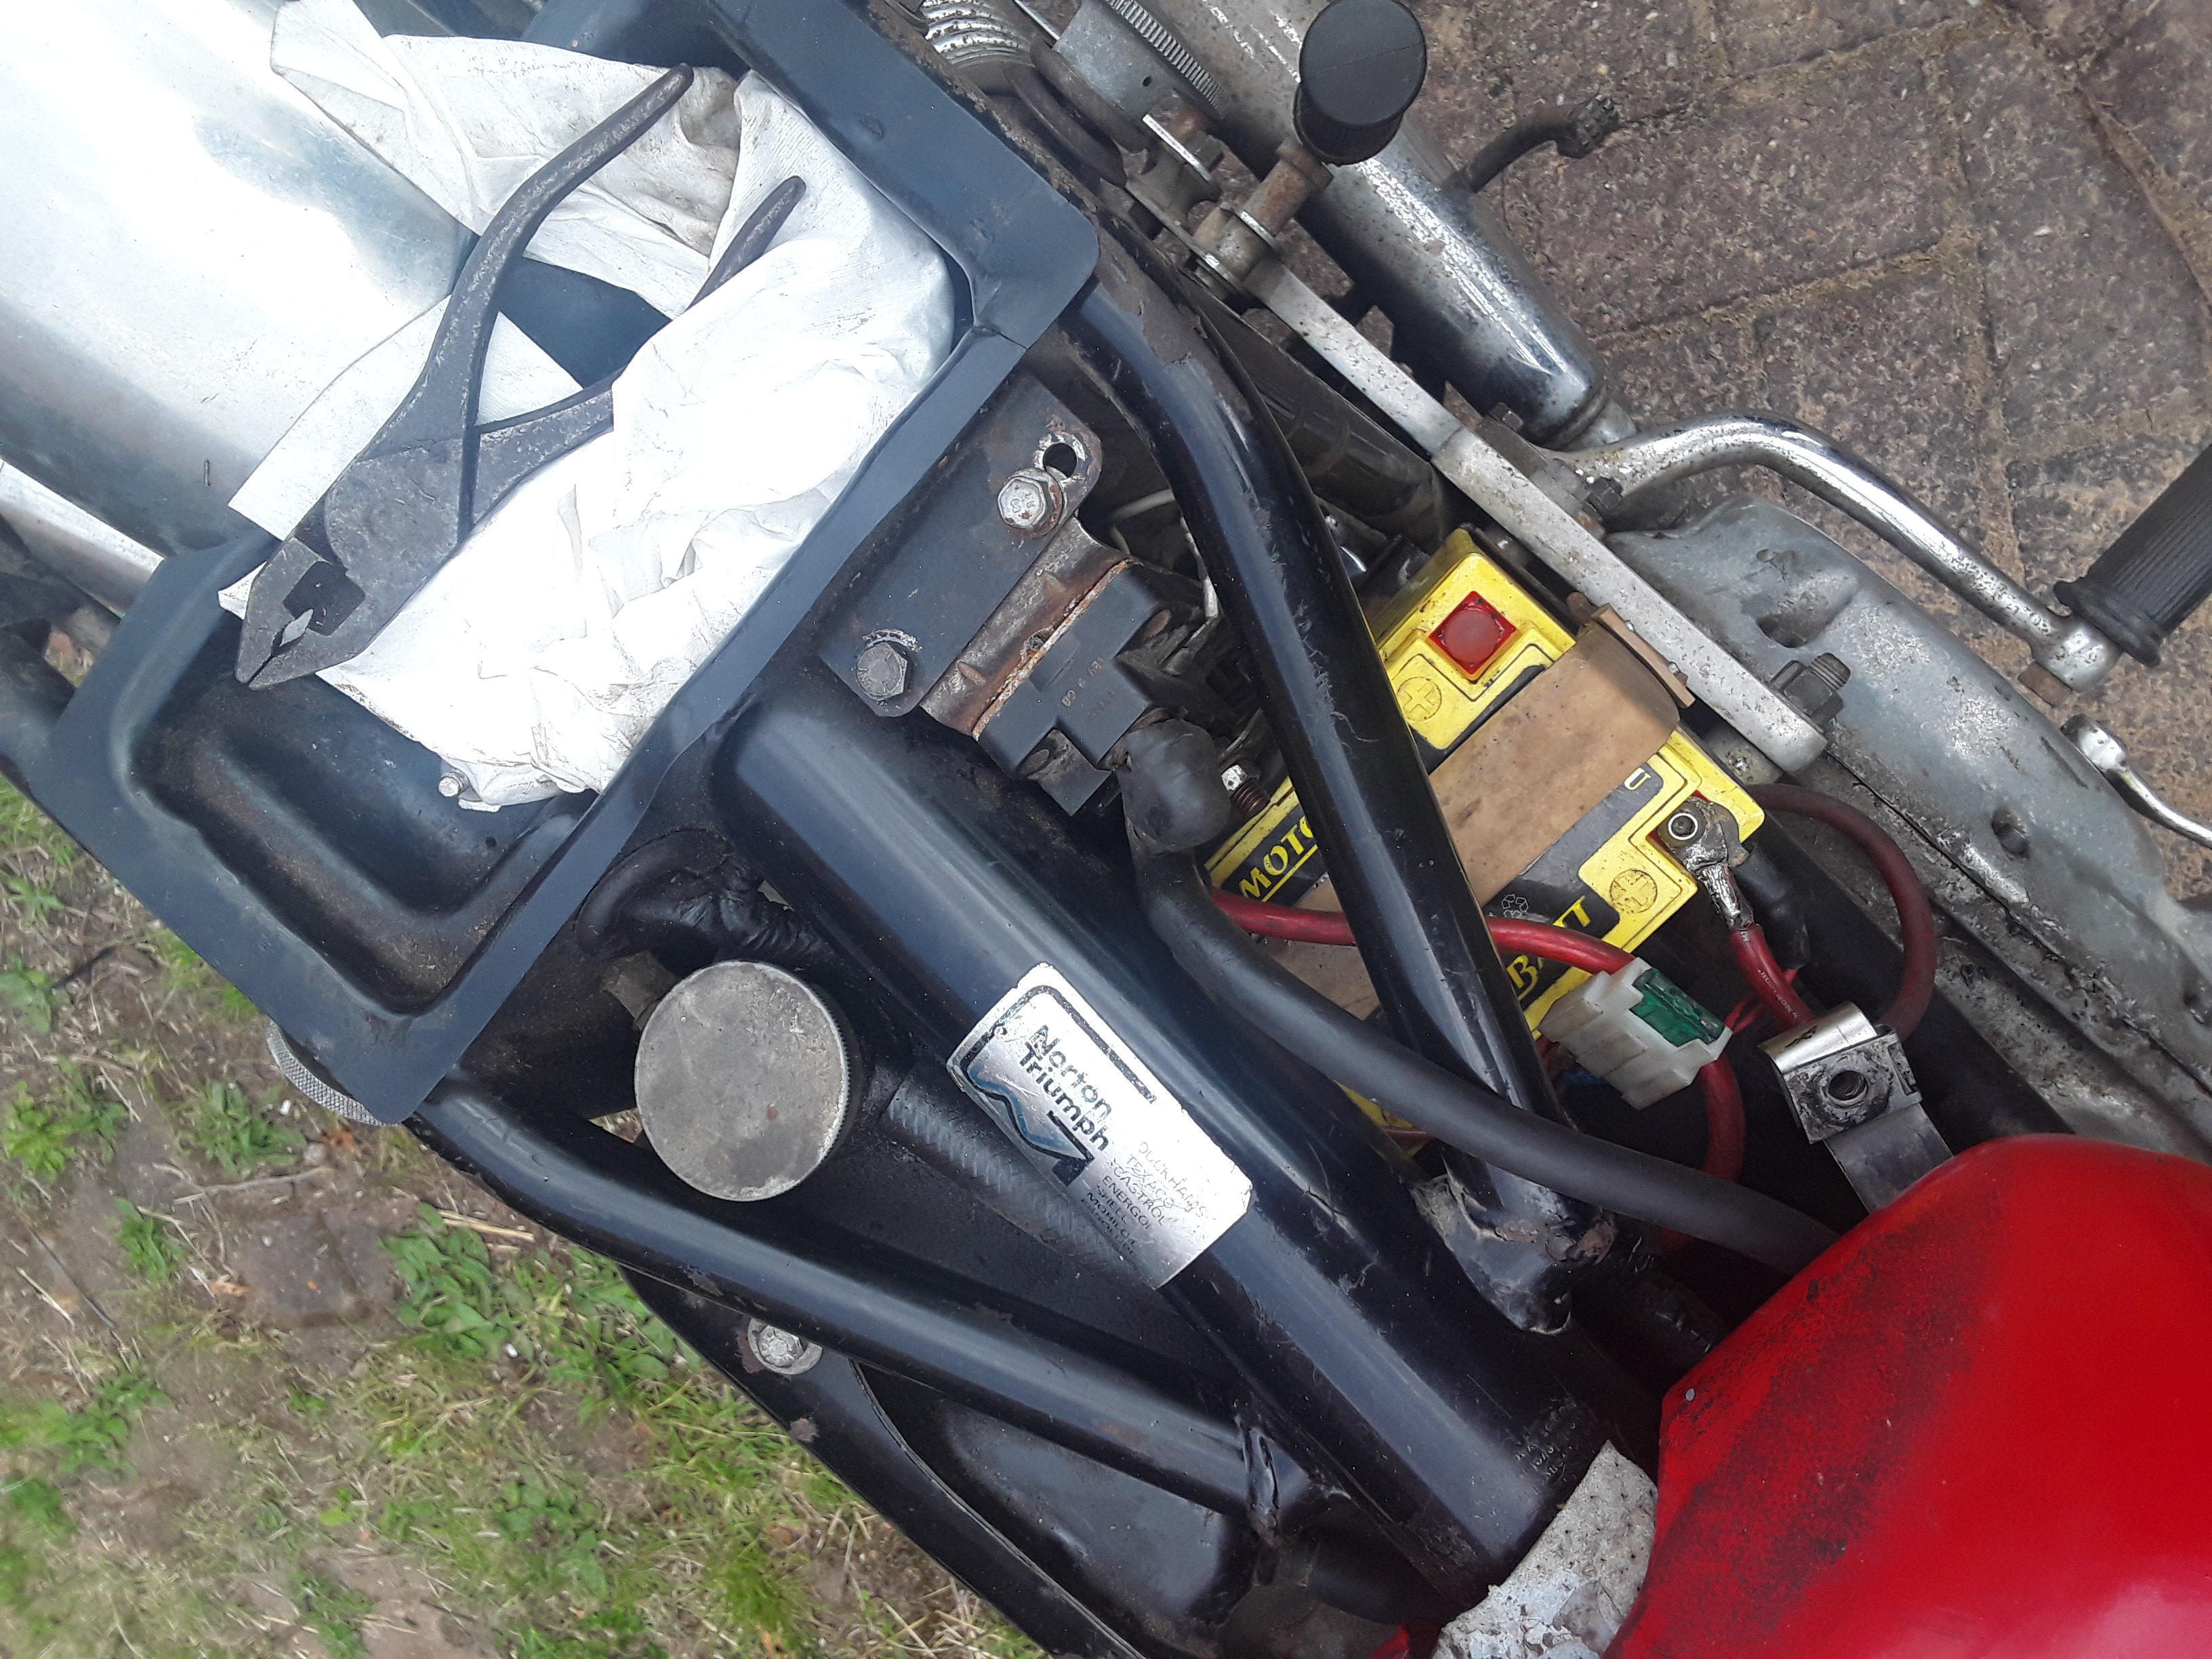
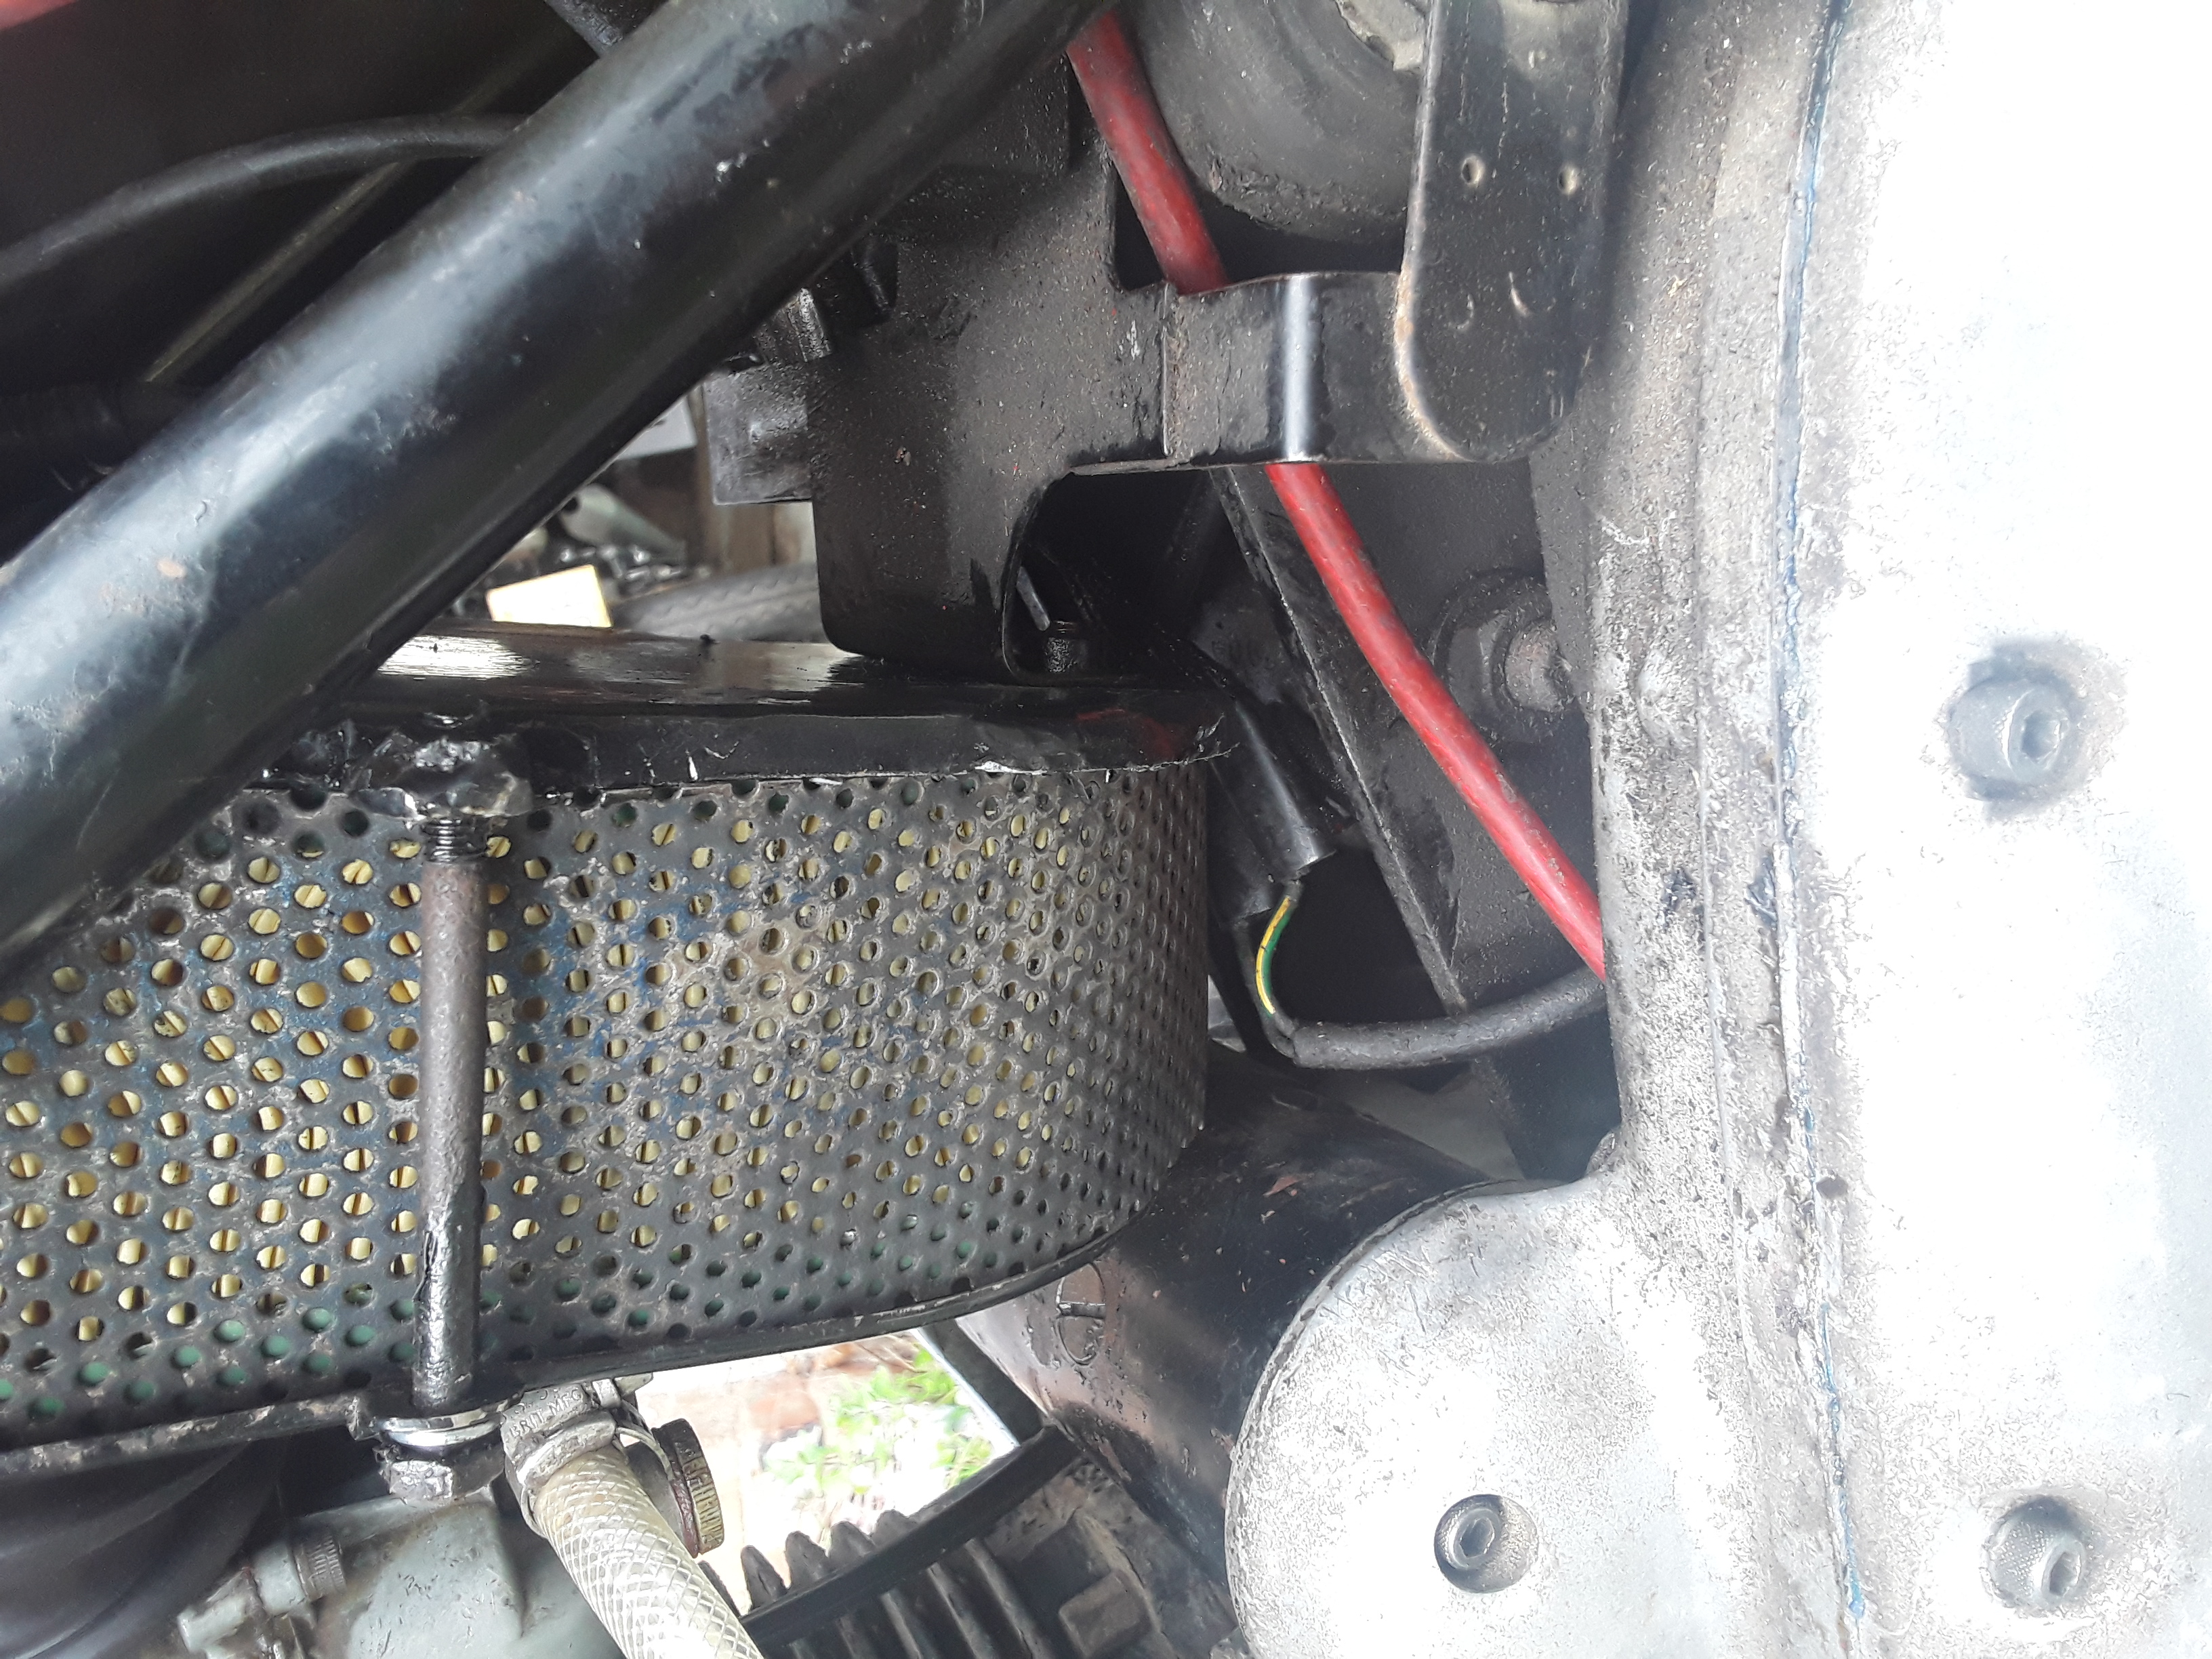
photos
Here are pics of mine, hope they are of use.
With regards fitting airbox, it is tight behind starter, if you have battery tray out now is time to straighten fold at front and fold it 3/8" further back. This would move holes for mounting airbox down, but you will have to drill new ones anyway as spacing is not same on mk3
Regards Martin
- Log in to post comments
Having never owned an…
Having never owned an unmolested Mk3, I too would be interested to see how the electrics and breather hoses were originally located in that crowded area around the battery and airbox. Pity I never thought to record it when I had my bum on a bike straight out of Elite Motors' showroom.
So, if anyone with an absolutley original Mk3 could post a few photographs of the area with seat, side panels and battery removed, I think it would be a very useful reference.
To the OP:
I've found breather hoses easier to route if you avoid the heavy, reinforced oil pipe that seems the easiest to find. I have no experience of the pipes Andover sell but it might be worth checking out : https://andover-norton.co.uk/en/shop-drawing/879/oil-tank-and-fittings-oils-lines-cartridge-filter . Should be the right length which is a useful clue.
The Mk2 airbox has the bracket for side panel and ignition switch bolted to the left side. The side panel fits over a vertical 'spike' on the bracket. The Mk3 airbox has the bracket rivited to it and the side panel is clipped to the bracket with a plastic dzus-type fitting, i.e. no spike and no ignition switch.
- Log in to post comments
Thanks
Thanks to everyone who took the time to post comments etc, the photo's are proving to be valuable in that they show where the parts are situated which is what I really need.
If anyone has other photo's I would be grateful if you could post these as there are still a few angles I need for some of the parts.
Again, thanks to everyone who posted information as I need as much as I can.
Many Thanks.
David
- Log in to post comments


The otherwise excellent Norman White book doesn’t seem to have any photos of that area, which would be useful in a revised edition!
General electrical info: have a look at gregmarsh.com under electrical sub headings. Lots of useful info!