
Hi All
I have an all matching model 88 (frame, and engine) that I bought many years ago in lots of pieces. It has all the tinware and I've decided that the time has finally come to gather it all together and assemble it into a complete bike. That will tell me, or show me, all the little bits and fixings I may be missing and will also show me how viable it is to then restore and get it all running nicely.
Because I did not take it apart, and I do not have a complete one sitting in the garage as a reference, I'm at a loss as to the best or easiest assembly method from lumps (engine is together, gearbox is together, fork legs are together) to avoid the "one step forward, ten steps back" trial and error method I know and love so well.
I have seen a similar guide for the Commando assembly and wondered if anyone has seen a guide like this, or has one written out?
It is not uber urgent, it has been sitting for ten years or more on shelves in the garage, luckily it is warm and dry. With winter approaching I'd like to get stuck into it as a project to while away the dark evenings and emerge in the spring, if not completed, at least well underway.
Thanks for reading and thanks in advance for any help I get
Paul
There are a few parts that…
- Log in to post comments
Just exactly the kind of…
Just exactly the kind of things I'm looking for a heads up on.
thanks
- Log in to post comments
2 small 5/16" ? bolts (not…
2 small 5/16" ? bolts (not shown on drawings ) that link engine plates to frame? and stop frame bending.under stand and kickstarting stresses.The big bolt fixing box to plates needs to be free to slide in plates to allow chain adjustment and can jam on thick paint or seize in box tunnel.Grease well.Clamp swing arm and Silentblock bush in mid stroke to reduce stress on it.Check shocks top bush mounts are clear of frame brackets. Check brackets (shocks) and silencer for cracks,also steering head bracing, Check frame for twist and front downtubes for curving back. Check and build up center stand abutments on bottom of frame if indented.Waxoil inside of lower rear main frame tubes.
- Log in to post comments
Huge thanks for the heads up…
Huge thanks for the heads up on these issues, I have a can of waxoil always to hand - and am often found squirting it down open frame tube ends - probably never for my benefit, but one day some unknown person may thanks me.
there is not fresh paint anywhere yet, I'm trying to get it all together and see what i have (and have not) and do all my assembling errors without messing up fresh paint - I've been down that road before!
Paul
- Log in to post comments
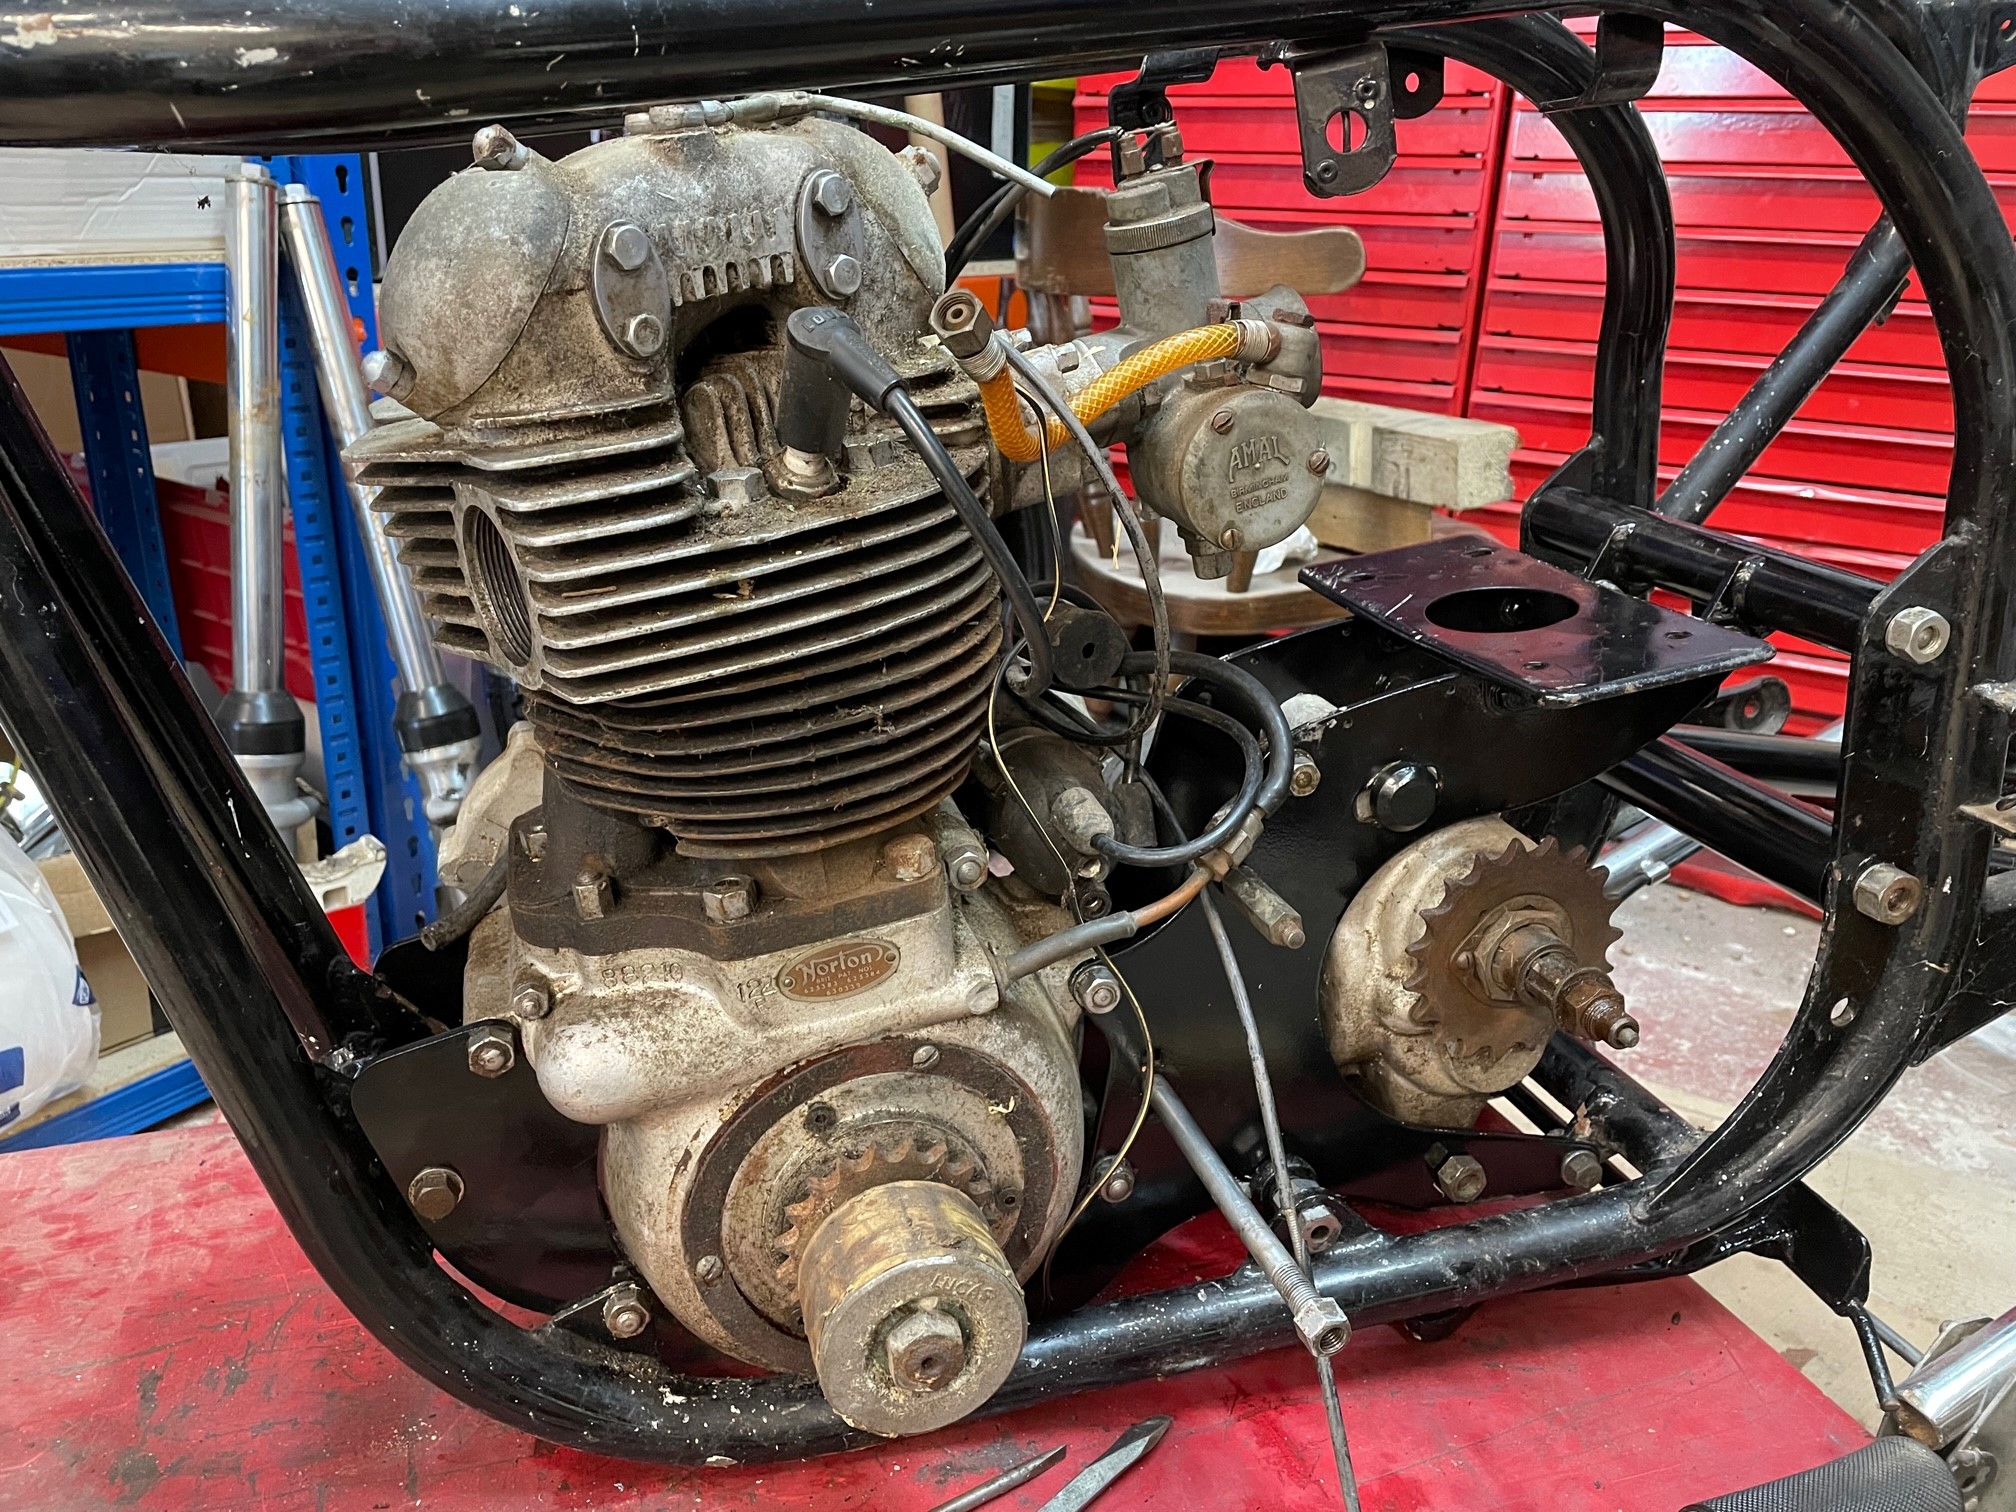
Engine and Gearbox are in, this is how I did it
Thanks for all the help thus far, this is the method I used to get the engine, gearbox and cradle into the frame.
I fitted the gearbox into the carrier first.
Then I lifted the carrier into the frame, attaching only the 2 x top rear bolts, finger tight at most, with the crosstube not tightened either. All bolts were just finger tight until i had the last ones in through this whole process.
Then I pivoted the carrier and gearbox up and fitted the mainstand and bolts while i had easy access and clearance. I should perhaps have done the mainstand before the gearbox carrier, but was confused by the strange fitting bolts and the unused corresponding holes through the gearbox carrier.
Then I lifted in the engine (you could just fit the crankcases, but I'm assembling it whole while finding what is missing) and bolted the rear to the gearbox cradle - important (I found) to fit the bottom, thinner bolt, through from right to left to have clearance for the thicker nut on the left side.
Then I bolted the front engine mounts to the frame.
At this point I gently levered the rear of the gearbox cradle forward to line up the front mounts, the crosstube rotates to align it all giving forward adjustment.
I fitted the front engine bolts and also the lower rear cradle bolts, and the head steady, and then tightened all in stages to ensure everything lined up and nothing stressed.
It seemed a simple way to complete the task, and avoided having to lift anything heavier than necessary in one go.
I'm sure many folk here will not need this info, but if it helps one person, one day, I'm happy to post here.
I have the forks in and have replaced wheel bearings so next step is to get it to a rolling chassis.
I can't find what the bolts that retain the headlamp should be - does anyone know?
- Log in to post comments
It’s possible that you have…
It’s possible that you have a Deluxe dommy there as I can see a dzus fastener also a distributor and a 1960 and onwards head .
- Log in to post comments
Best of luck with it Paul,…
Best of luck with it Paul, can't wait to see the progress, so exciting to see it all come together! Gives me more enthusiasm to continue with my 1960 99 Slimline project... I'm one of the very few young Norton owners on here (30)...
- Log in to post comments
"7" Lucas headlight shell…
"7" Lucas headlight shell fixing points try 7/16" UNF.
- Log in to post comments
Paul If you've got an…
Paul If you've got an original type of Lucas 7 inch headlamp shell as fitted to the De-Luxe Dominators the bolt and thread size that retains the headlamp to the top fork shrouds is more than likely 5/16 inch BSCycle thread X 1 inch long. There is usually a stepped spacer between the shroud and the shell with the step-down fitting neatly into the shroud. People often hang the tax disc holder from one of the bolts so if you do the bolt may need to be a little longer depending on the number and thickness of the washers used. Good to see it advancing. Regards, Howard
- Log in to post comments


There are a few parts that cannot be fitted out of sequence , center stand ,side stand , footrest spacer , the engine , gearbox and plates are fitted as one unit .