
Hi I am presently restoring a1966 Atlas which has been modified to look like a cafe racer. The problem I have is the wiring does not match up with any colour coded drawings and is missing the battery and horn circuit (which is no problem to sort out) and is fitted with a solid state rectifier and 3 position flick switch headlight switch, I have a new harness and would be grateful for any help with regards how to connect up the 3 position switch and rectifier..
Thanks
I thought that somebody more…
- Log in to post comments
Wiring=Electrical
Perhaps if this question had come up in Electrical I would have seen it sooner?
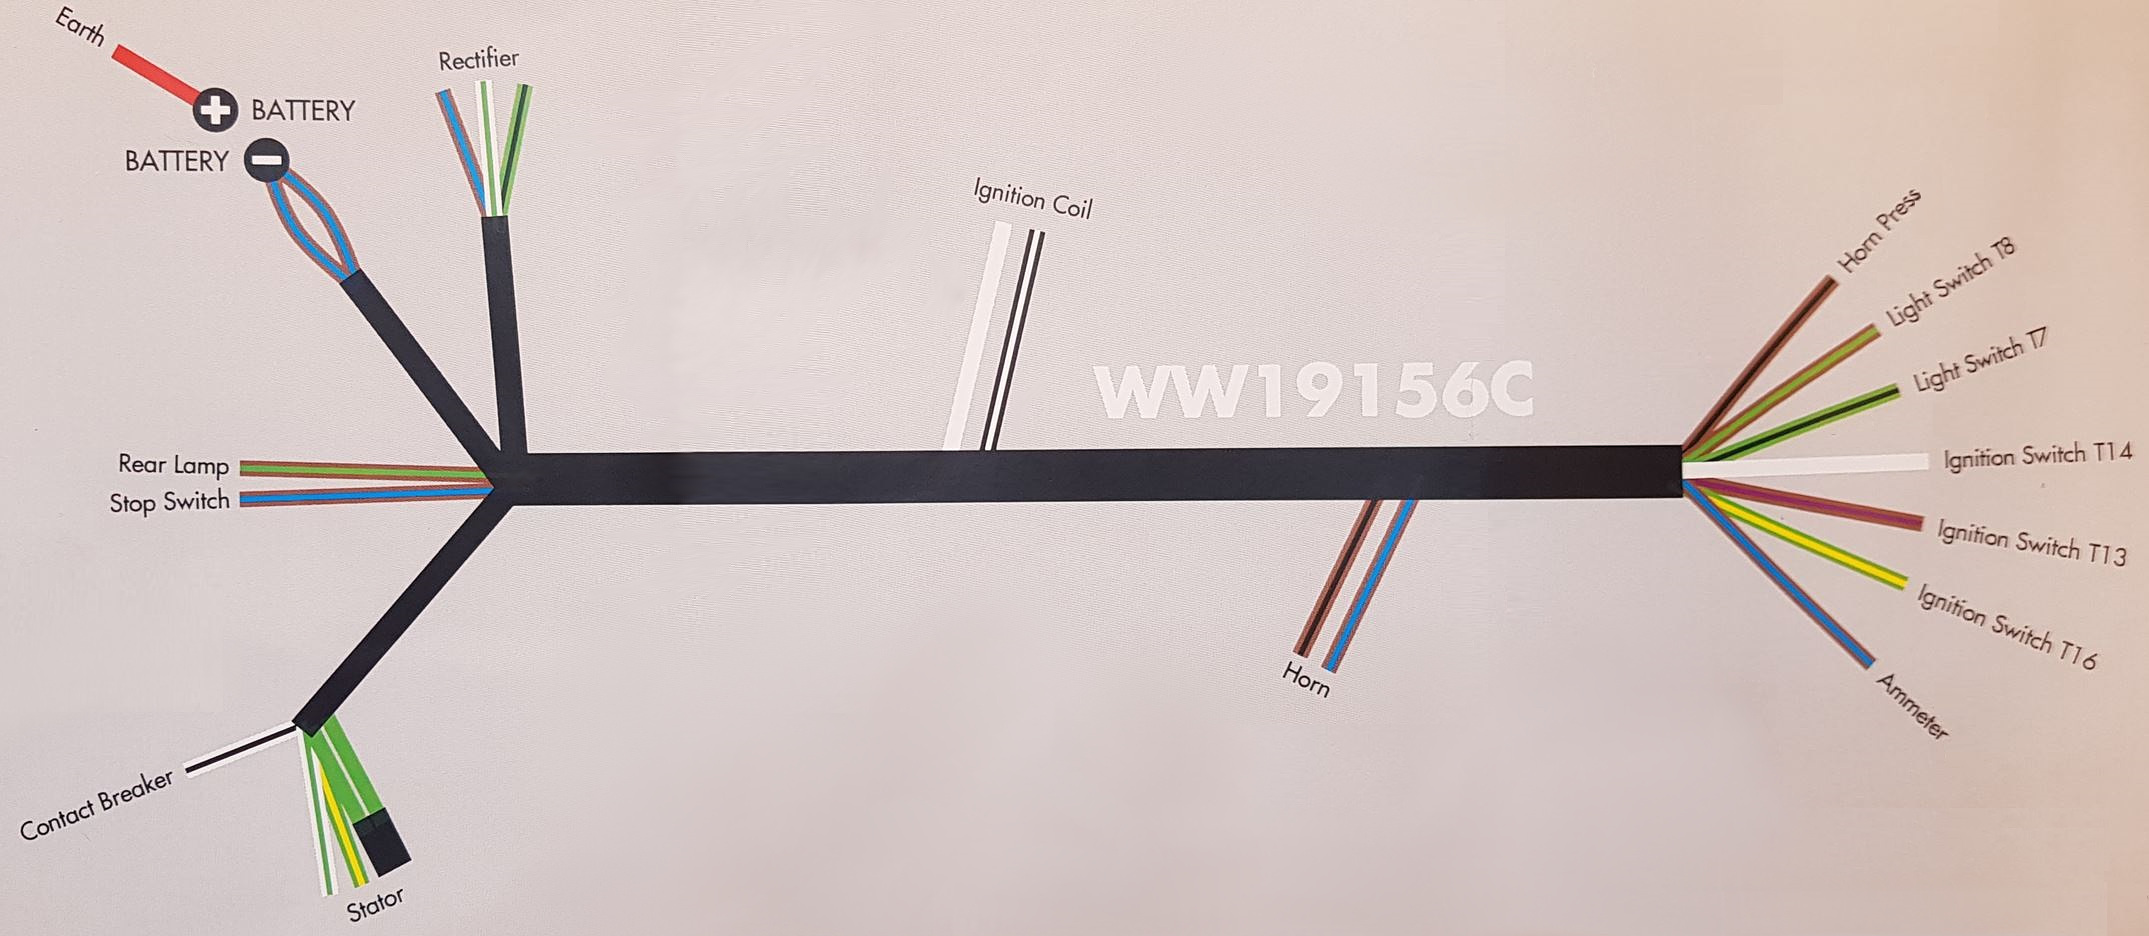
No need to use multimeter or continuity tester if you follow the colours that you have. A late Atlas should have very similar wiring to the early Commando. The three position flick switch-OFF/PARK(side)/HEAD as fitted to early Commandos is numbered -4 power feed BRN/BLU. 6 side light. RED/BLK. 1-3-5-7 rear/speedo BRN/GRN 8 head BLU. If you have a rectifier you will need a Zener diode (no longer made) but you might have a regulator/rectifier?
If you wire up the bike but leave the light switch to last, then (with a fuse in circuit) pit the power wire BRN/BLU to one switch wire, then in turn plug the other wires onto the switch till you get the right result.
If you still can't get it sorted please ring or email electrical ie AO Services.
- Log in to post comments
Neil I just bought a new…
Neil
I just bought a new Lucas harness from Norvil, and it came with the easiest wiring diagram you ever saw. This one is for a 1961 6V dommie, so no direct use for yours.
A no brainer really
- Log in to post comments


I thought that somebody more knowledgeable than me would have replied by now, but not, so here goes.
Normally these switches go PARK/OFF/LIGHTS.
I hope you have a multimeter or at least a continuity tester.
The rectifier should have two pins marked with a wavy line, these connect to your two alternator wires, if you have three it may just be a case of pairing two together, there is plenty of info about how to do it. The other two pins on the rectifier say +/-, these go to battery, and earth via zenor diode (polarity dependent), depending on how you are going to do it, I would always recommend running separate earth wires to a central earthing point, such as a bolt on the tool tray bracket and connect that to the battery rather than earthing through the frame and hoping to get good continuity through the head races etc, mount your Zenor close to it with good contact, preferably on the same plate or whatever. You may be able to persuade an earth wire through your harness sleeving if you are lucky, if not use a separate double insulated wire.
Find the common feed on your lamp switch. Try each pin, and write down what it is made to in each position, you should be able to work out from that which it is. Now find the pins which are live in both positions, they will be the pilot and tail lamps, the ones made in only one position will be the headlamp and speedo light.
Lay your harness out on the ground, from this you will see where the battery tags are, then you will see which end is the tail lamp, and headlamp ends, then you will easily see wires for alternator, horn and brake light switch. If your colours don't match,bell out each wire from where it goes, headlamp, battery, alternator etc, and number them at each end, write the numbers on to a photocopy of the wiring scheme for your bike, this should enable you to work out the others.
If this method doesn't work, buy a proper switch, which should fit the same hole and just follow the numbers on the diagram, Good luck, hopefully somebody else can tell you better.