
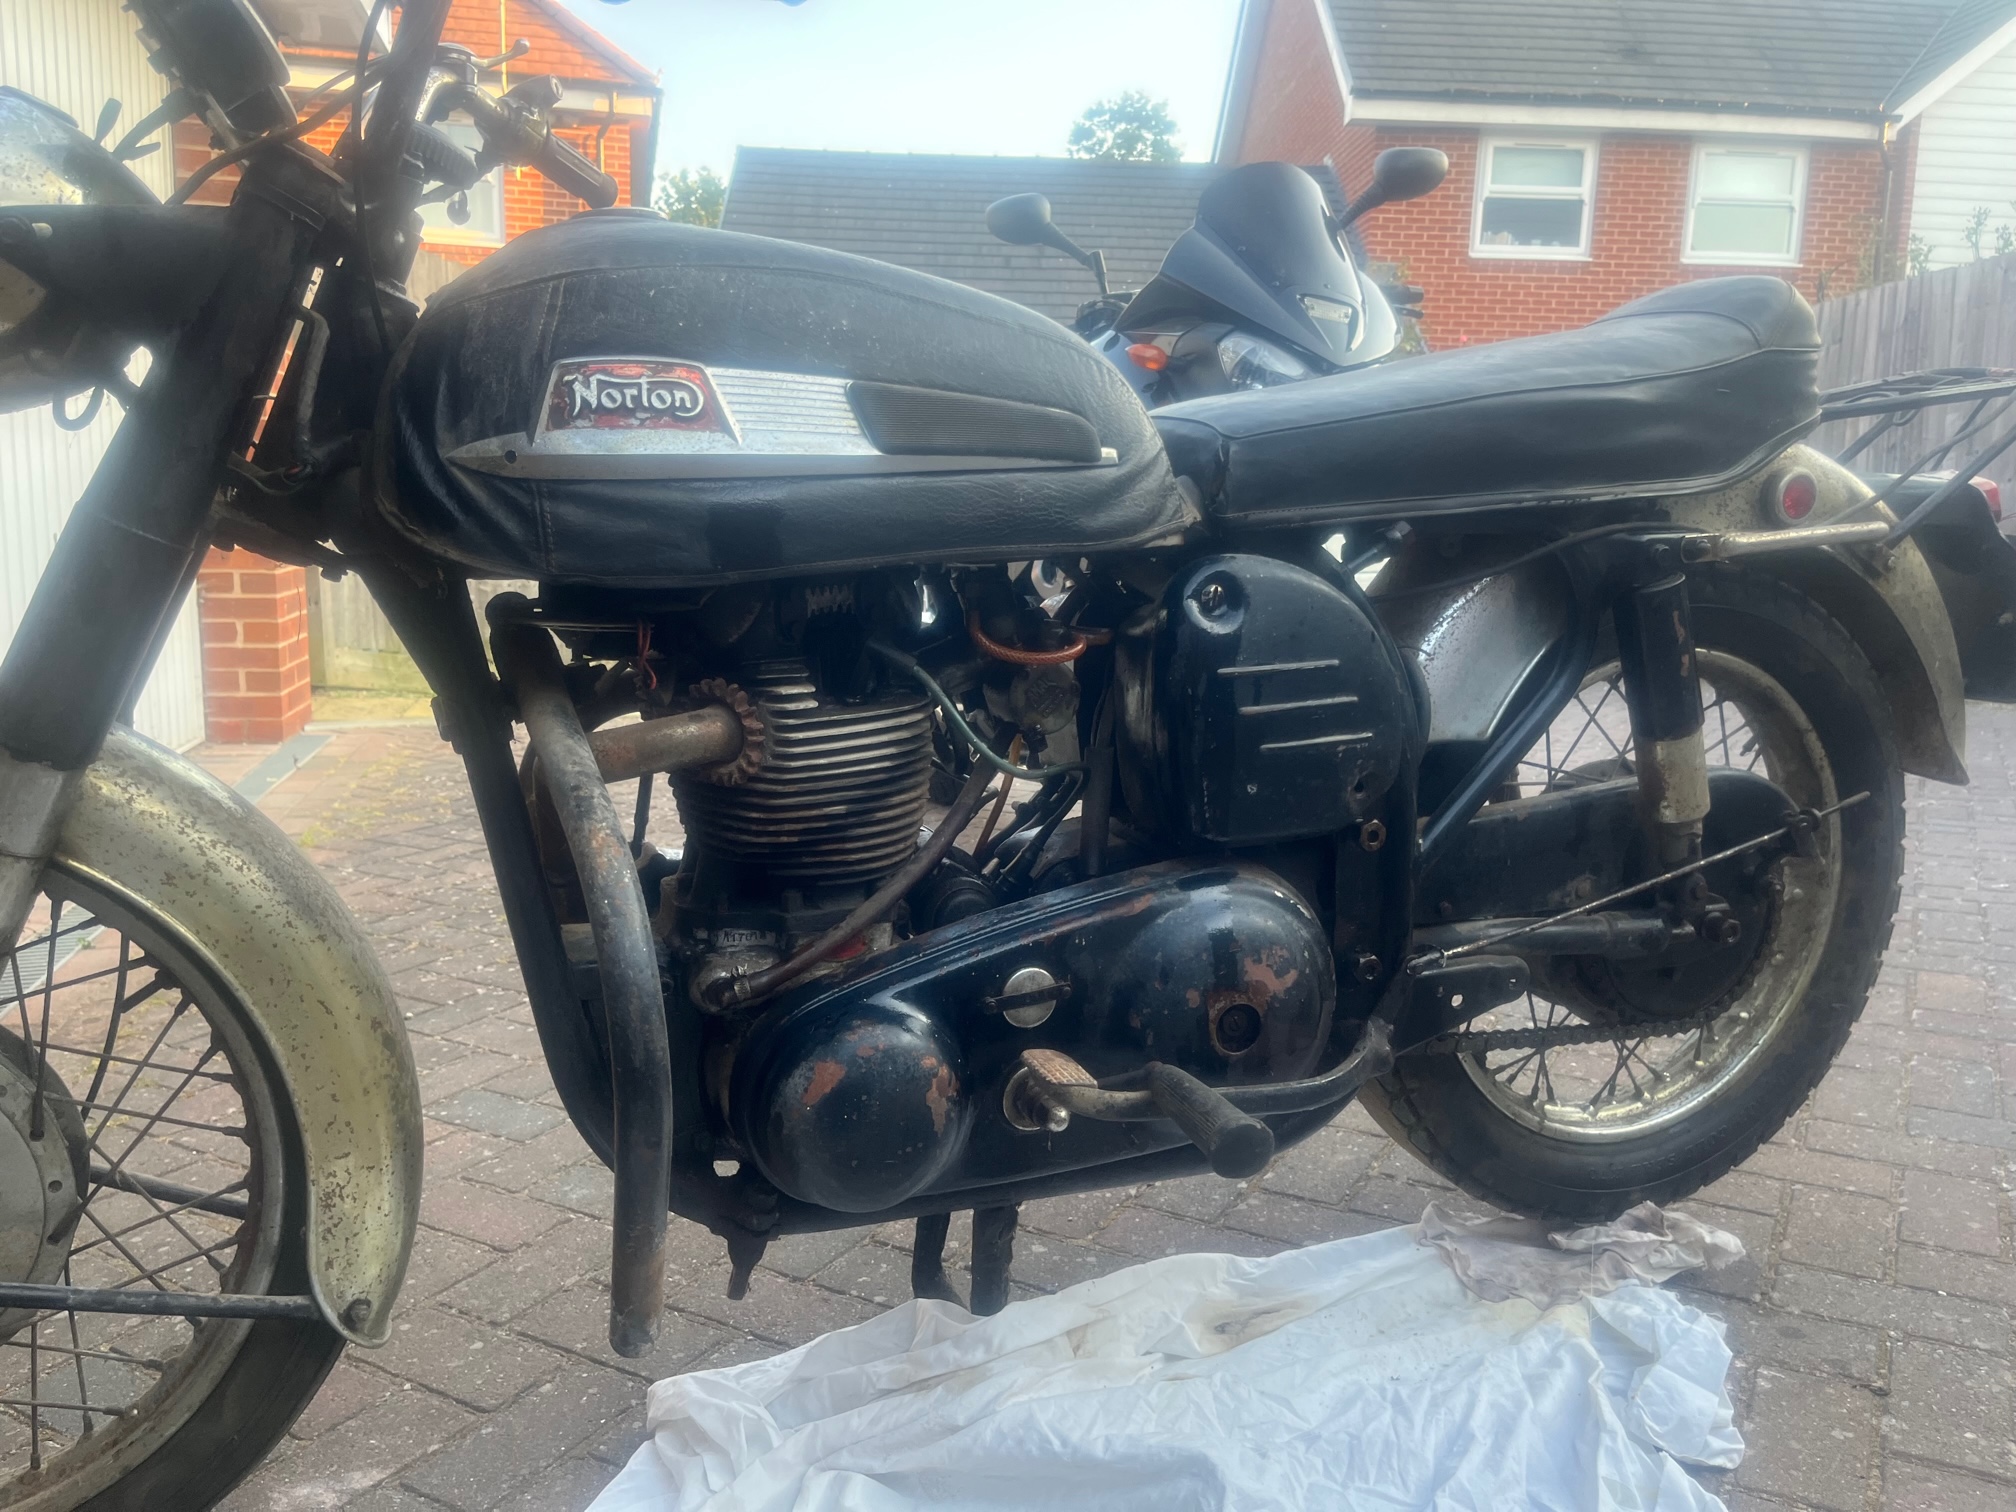
I went to pick up the old Atlas in mid June this year. It had sat for 50 years, untouched and unloved. I took my son with me and we managed to get it into the van without too much drama. Fortunately I managed to pump up the cracked and ancient tyres before we attempted that. The rear one was as bald as Jeff Bezos’s head and as square as Richie’s parents in the Fonz. The front was the old ribbed type. Amazingly they were still inflated when we arrived back home which helped with rolling it off the van and into my garage. I didn’t have time to look at it right then as I had other pressing commitments. Maybe I’d have a go at it during the winter, so a sheet was placed over it and I went on about my business.
A few weeks went by and one Saturday evening I was watching the film “The Worlds Fastest Indian” probably for about the third time. Anthony Hopkins did a stellar job of portraying New Zealand guru of speed, Burt Munroe. What a guy ol’ Burt was! Very inspiring.
I went to bed that night wondering ….. not sure about what, but something was brewing in my brain. The following day an advertisement for the Heritage Sprint at Betteshanger Park near Sandwich in Kent popped up on my iPhone. It caught my eye and looked like a fun thing to go to but I reckoned it’d be even more fun racing in it! I considered entering my TDM 900 which was a relatively fast bike but that just didn’t seem right somehow - too modern. The event was in mid August, just over two months away. Then I wondered if I could get the old Atlas up and running and enter that? The concept of running a 1966 Norton in the Sprint sounded like a blast. Not as ambitious as taking an old Indian across the World and trouncing the land speed record with it like ol’ Burt did, but fun nevertheless. Could I do it though?
I immediately went out to the garage, pulled the sheet off the poor ol’ thing and wheeled it out into the sunlight. The old tyres were still inflated. Blimey! I took a closer look. It was a bit of a mess to be honest. Would it be possible in just two months to achieve my goal? Now, I’m quite sure that if I was rudely woken up from a long slumber and forced to run my aged pins off at breakneck speed I wouldn’t personally find that very amusing but that’s exactly what I was thinking of doing with this ol’ Norton, and I wasn’t even considering rebuilding its engine!
Little voices began echoing around inside my head; “Madness!” barked the fat controller. “What about the sludge trap,” warned Thomas the train. But despite any misgivings I might have had, under all that crud I perceived a decent bike ready to burn rubber again and I convinced myself at that very moment that someway, somehow, I’d do my darndest to enter and run her in the Heritage Sprint. I figured that if I was going to blow it up hurtling down a strip of tarmac I’d do it with lots of people around and a St John’s Ambulance on hand!
After giving it a good brush with Gunk and a thorough jet wash it didn’t look much better but at least the cobwebs and surface grime were gone.
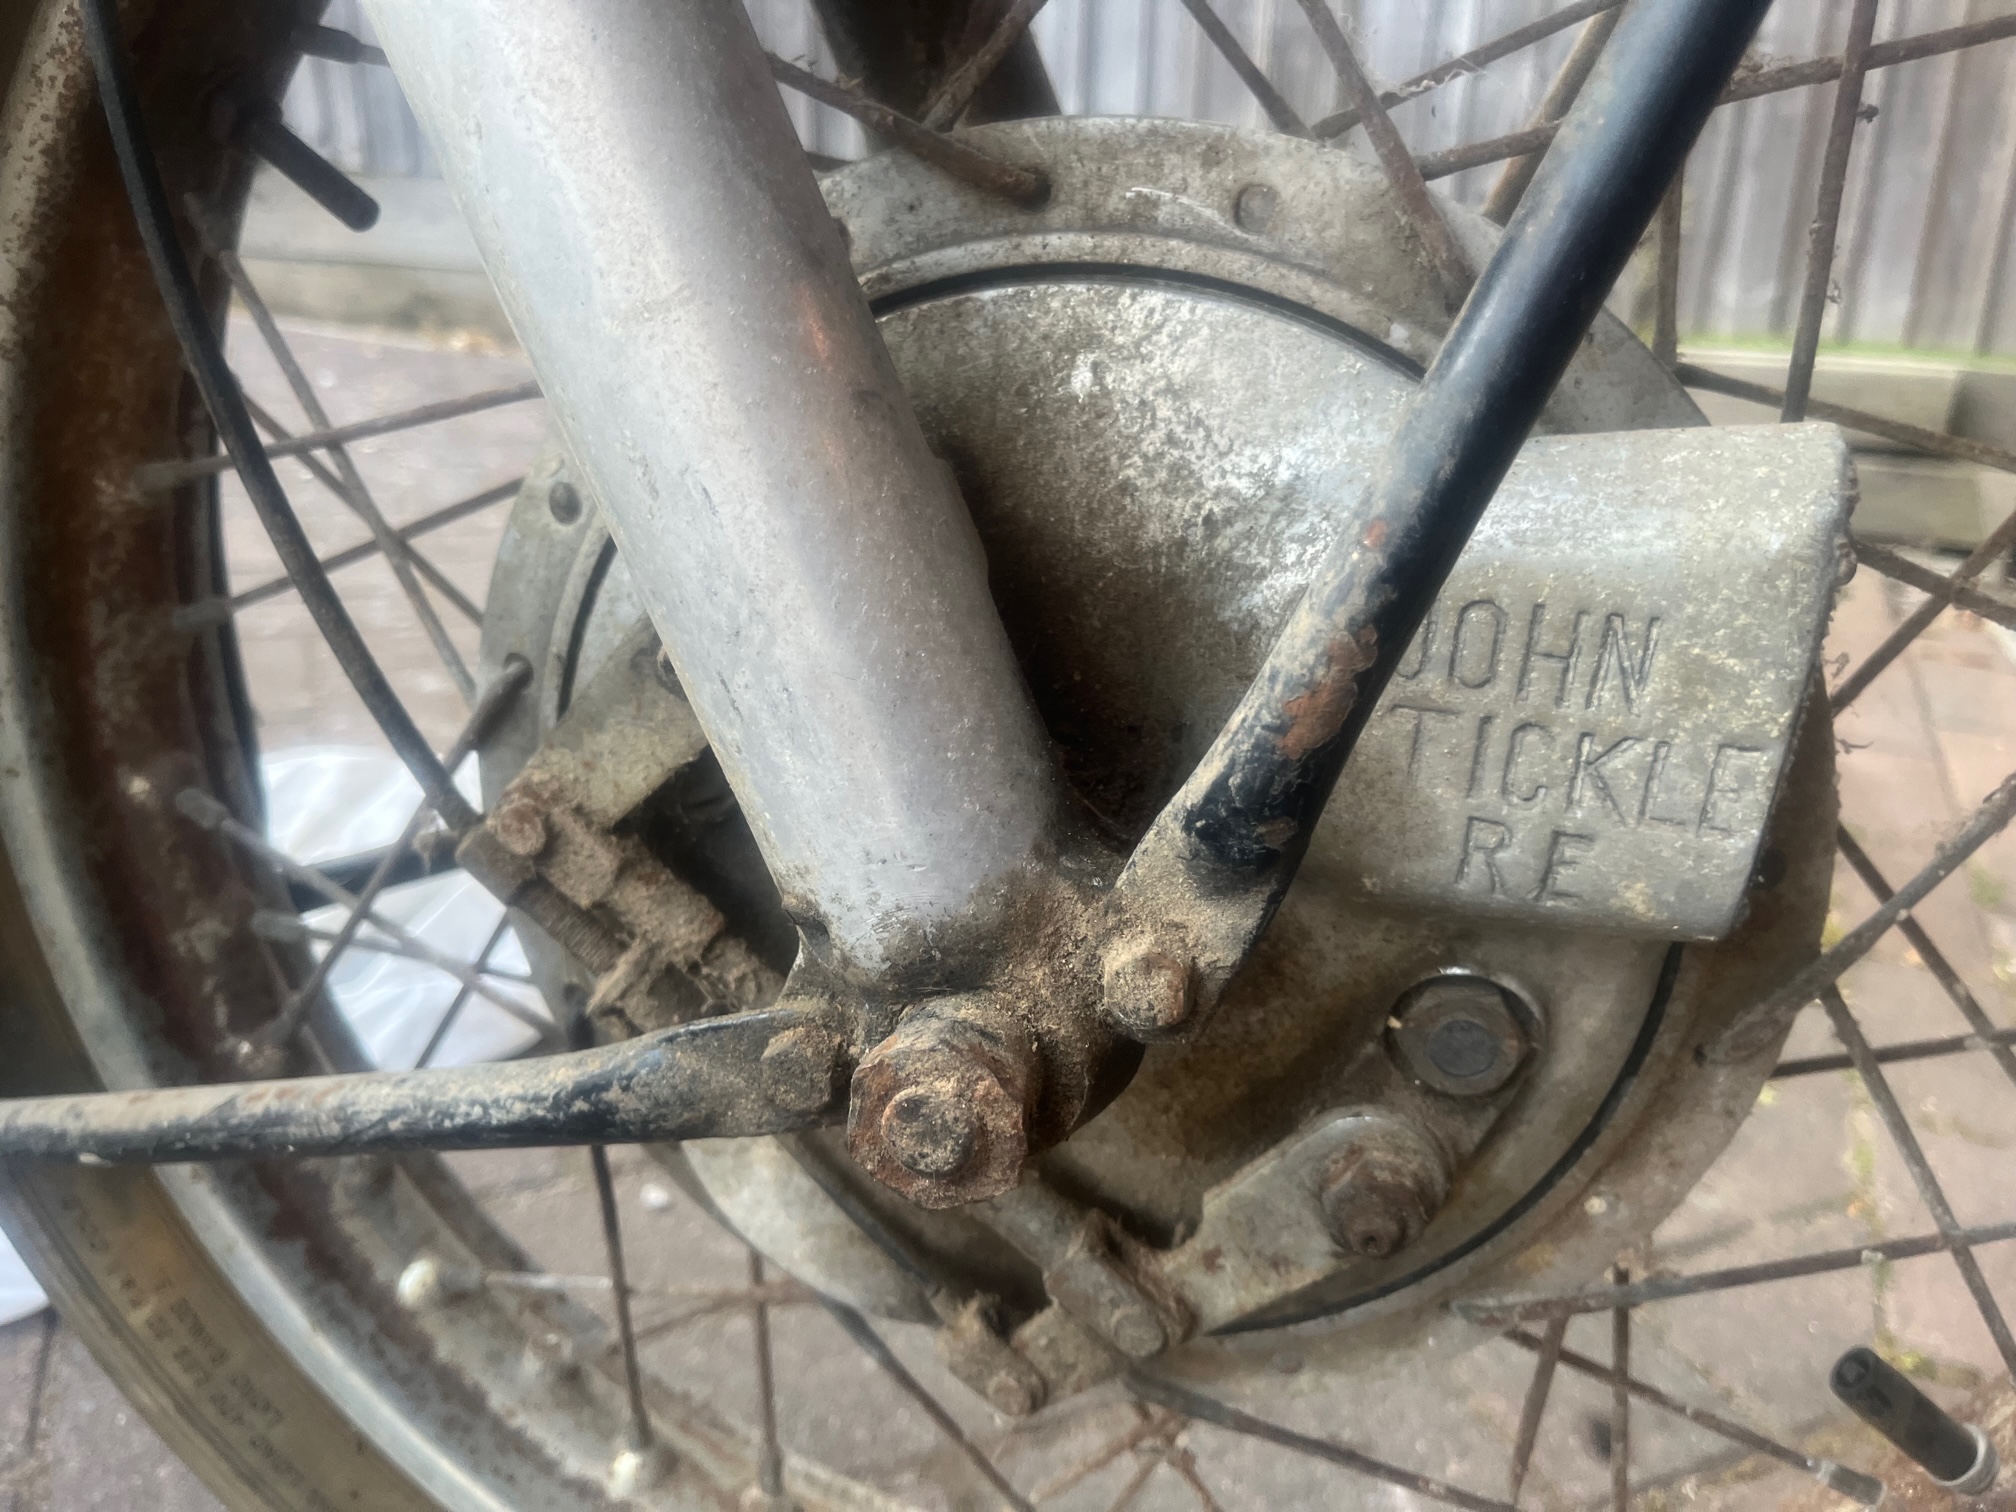
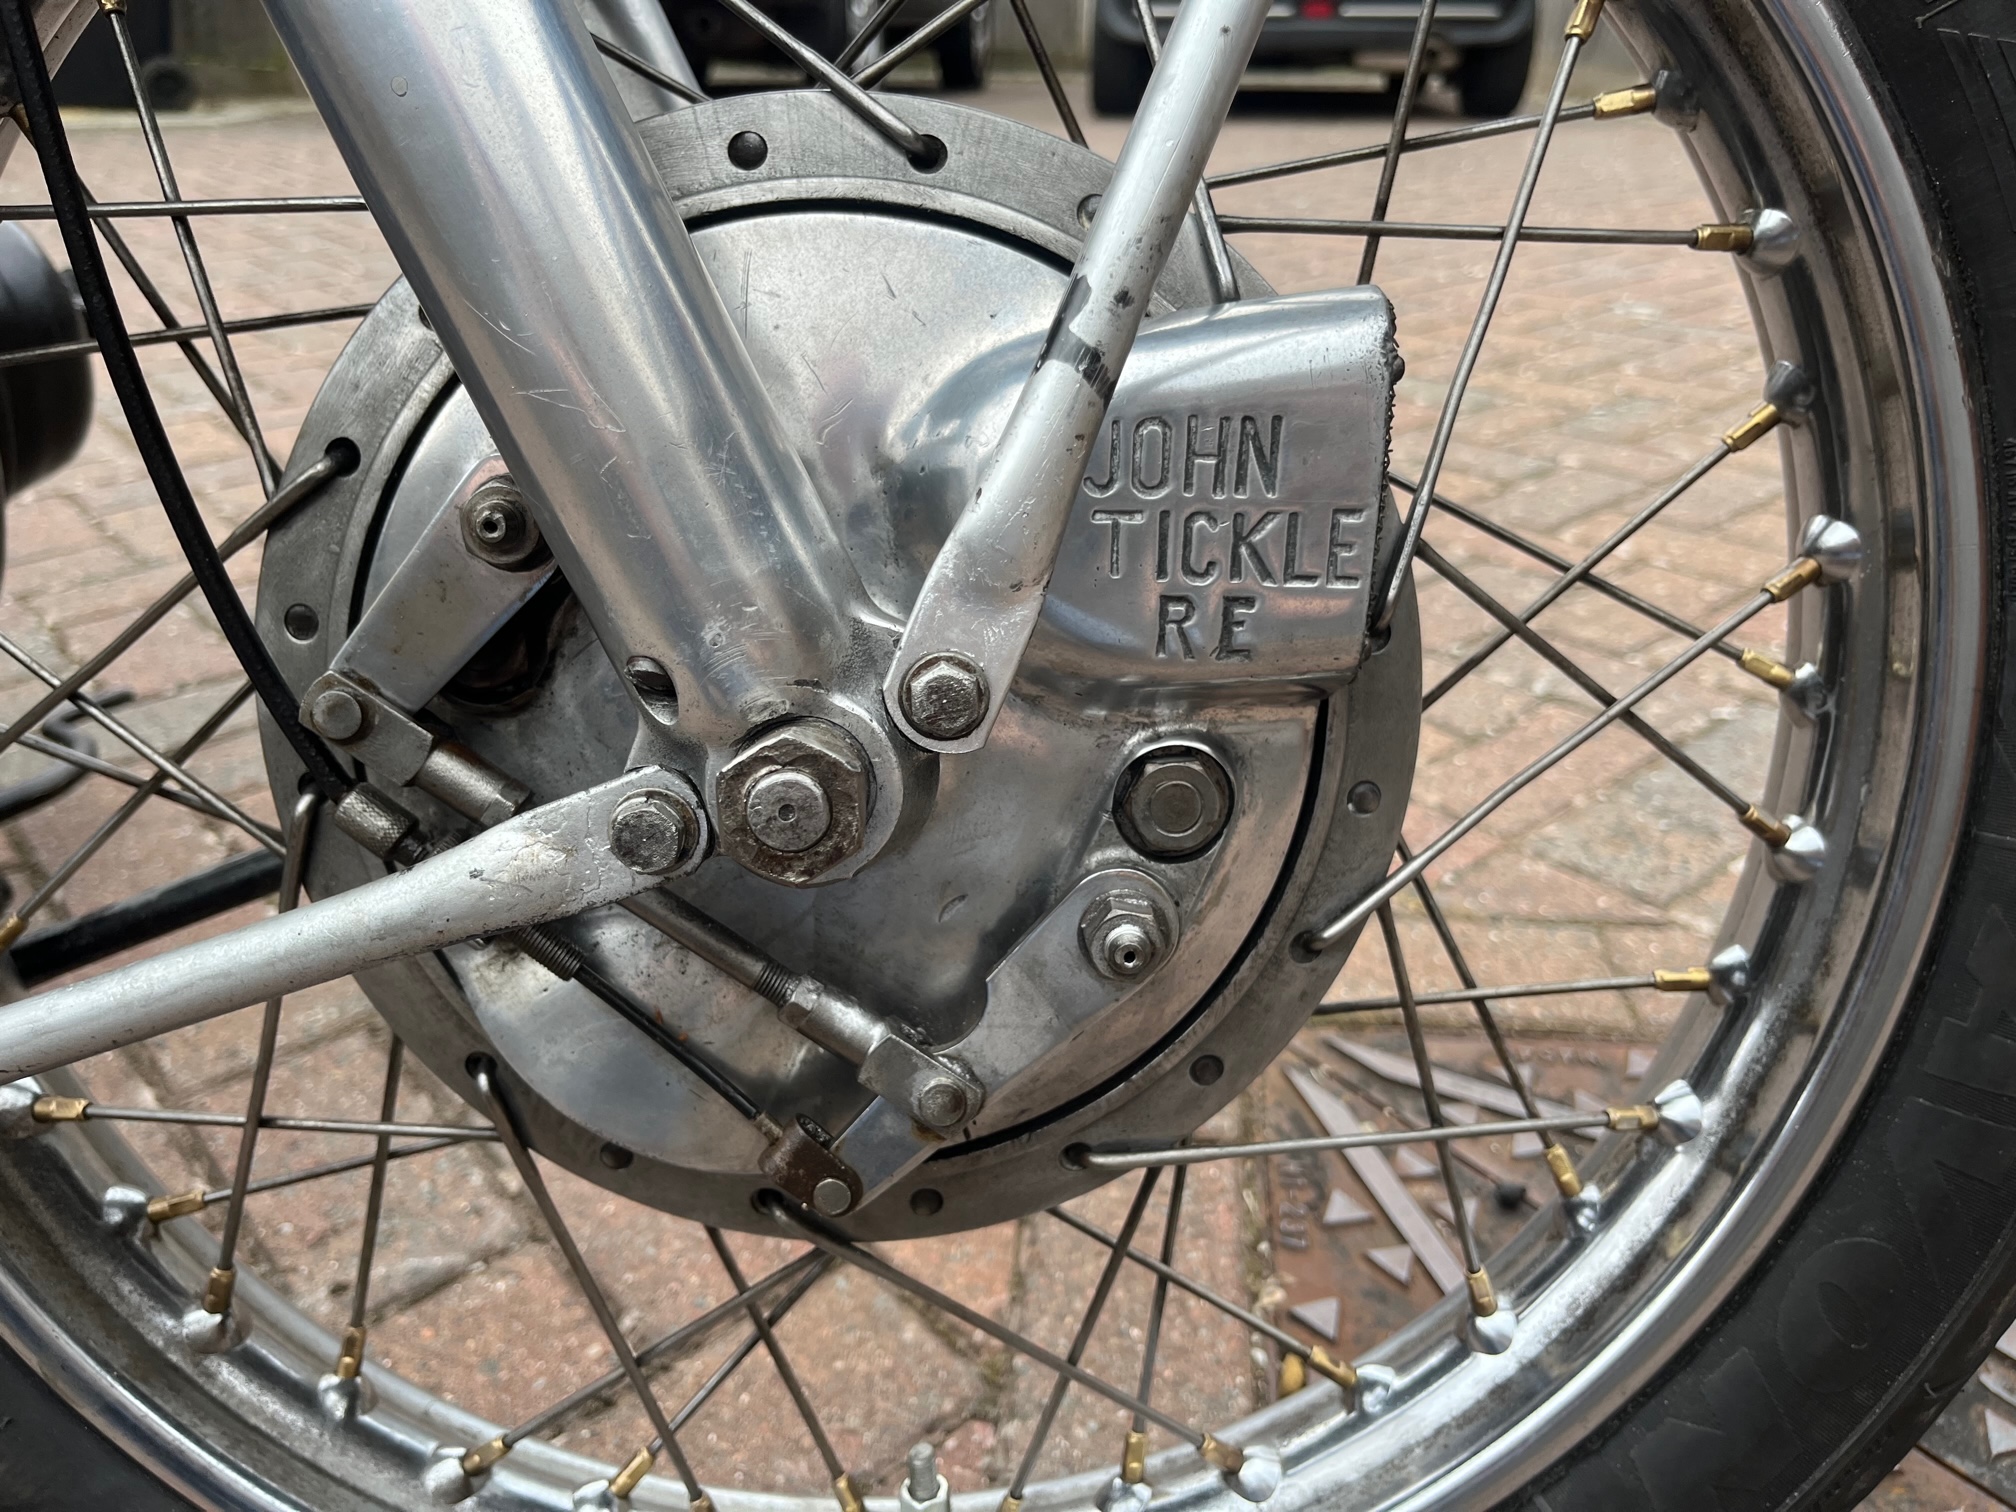
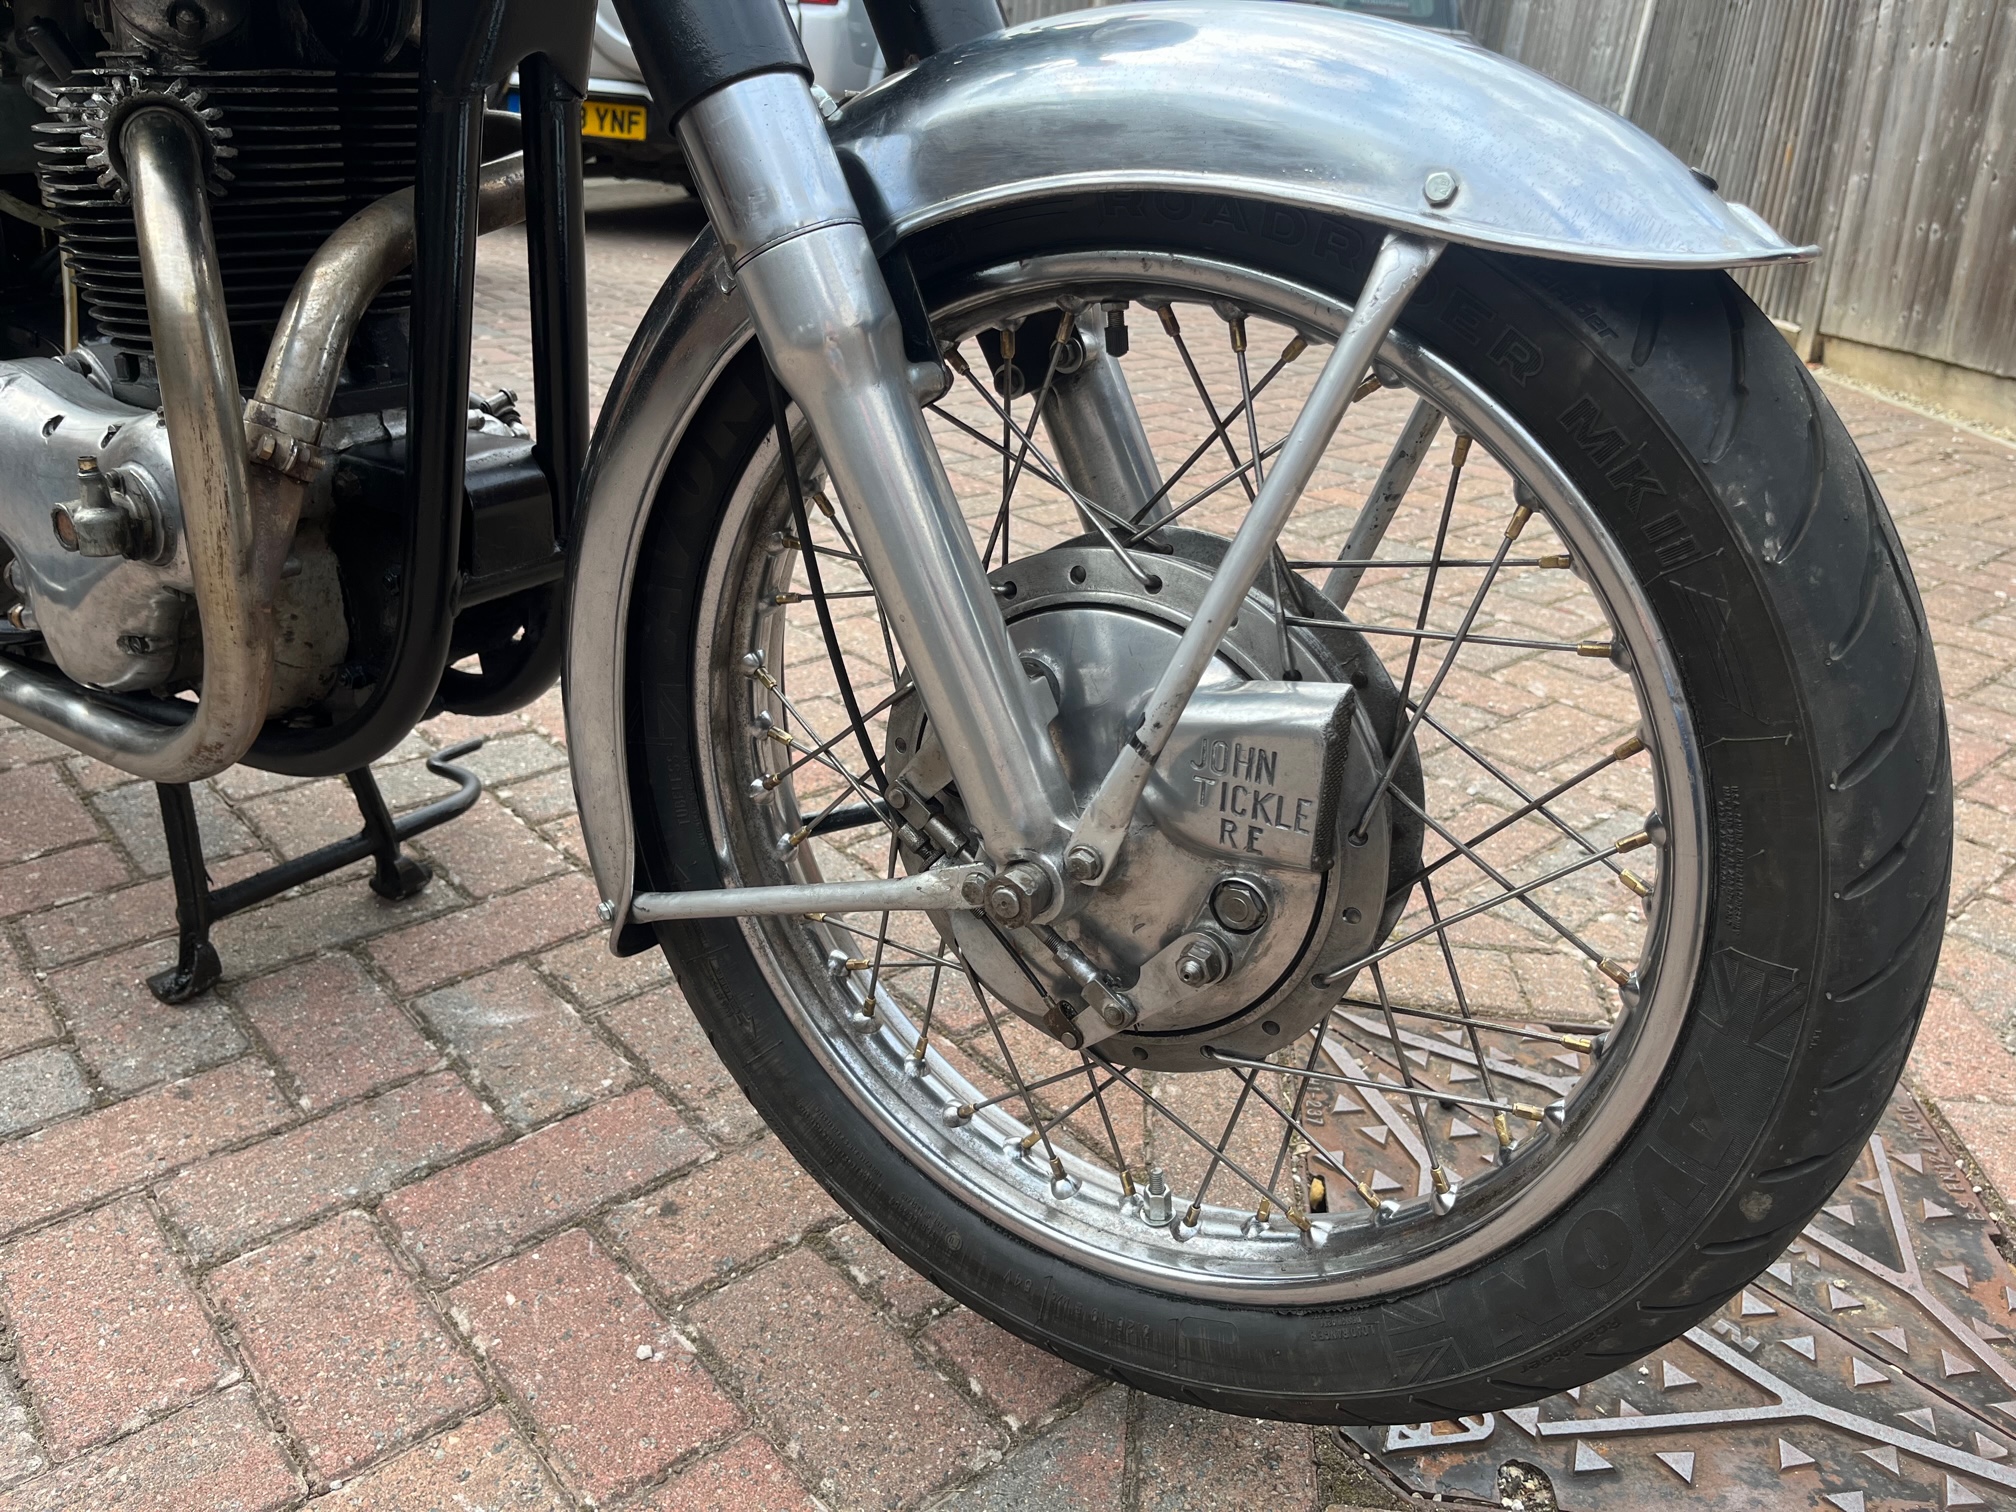
The front brake was a vented John Tickle TLS. That couldn’t be a bad thing. It was a snazzy looking piece of kit too!
Siamese exhausts ran into a single cigar muffler on the right side. I pulled out my DeWalt drill, fitted a brass wire wheel to it and started cleaning them up. The surface rust on the header pipes came off ok as did the external chrome of the cigar exhaust but the internals of it were basically corroded to the point of no return. I shook a bucket load of rust out of both ends, and what remained of the baffle was left rattling around inside somewhere. The chrome only had surface rust on it and there were no dents externally but internally it was toast. I envisioned a nice reverse cone megaphone in it’s place and the awesome sound it would make when those big British parallel twin cylinders came on song, so I ordered one on Ebay for £26.
The engine and frame numbers matched.
The rear shocks looked ok apart from some rusting of the chrome sleeves. Pattern replacements were £75 so I decided I’d repaint them and slap on some chrome tape instead. They’d be easy to replace with new ones at a later date.
The four sidecar brackets came off relatively easily. I figured someone would have a use for them so I set them aside. As I did so it dawned on me that this bike had probably never made proper use of its legendary slimline featherbed frame. Instead it had been used as a bloody cart horse, lugging all that added weight around. What a waste. Not any more though. It was time to unleash the beast!
The Dzus bolt holding the rear seat in place wouldn’t budge no matter how hard I tried so I eventually resorted to grinding it off. The “S” spring underneath the mudguard was snapped in half. The seat base however was solid and the hump backed rear foam intact. The vinyl cover had a couple of tears in the stitching at the front corners but otherwise it looked ok. Some careful gluing on the seams with contact adhesive and a thorough clean would get it shipshape.
The fuel tank had a black vinyl tank cover on it which could only be removed by unscrewing the tank badges either side. Thankfully, all the screws but one came out without shearing off. The cover had been on there so long it had virtually adhered itself to the tank but I managed to prise it off in one piece. To my amazement it cleaned up really well with some soap and water and looked like it would be totally reusable if I decided to refit it. The chrome badges were intact but badly pitted. I cleaned them up as best I could. The left side fuel tank bolt holding the Zener diode and heat sink came off easily. The other bolt had been sheared off. The tank itself looked straight and sound externally with just a couple of minor dents in it. Internally it was very clean. Even the petrol cap which was coated in surface rust cleaned up to bright un-pitted chrome. The pull out and twist main/reserve petrol tap was all there but the cork sealing washer was past its sell by date.
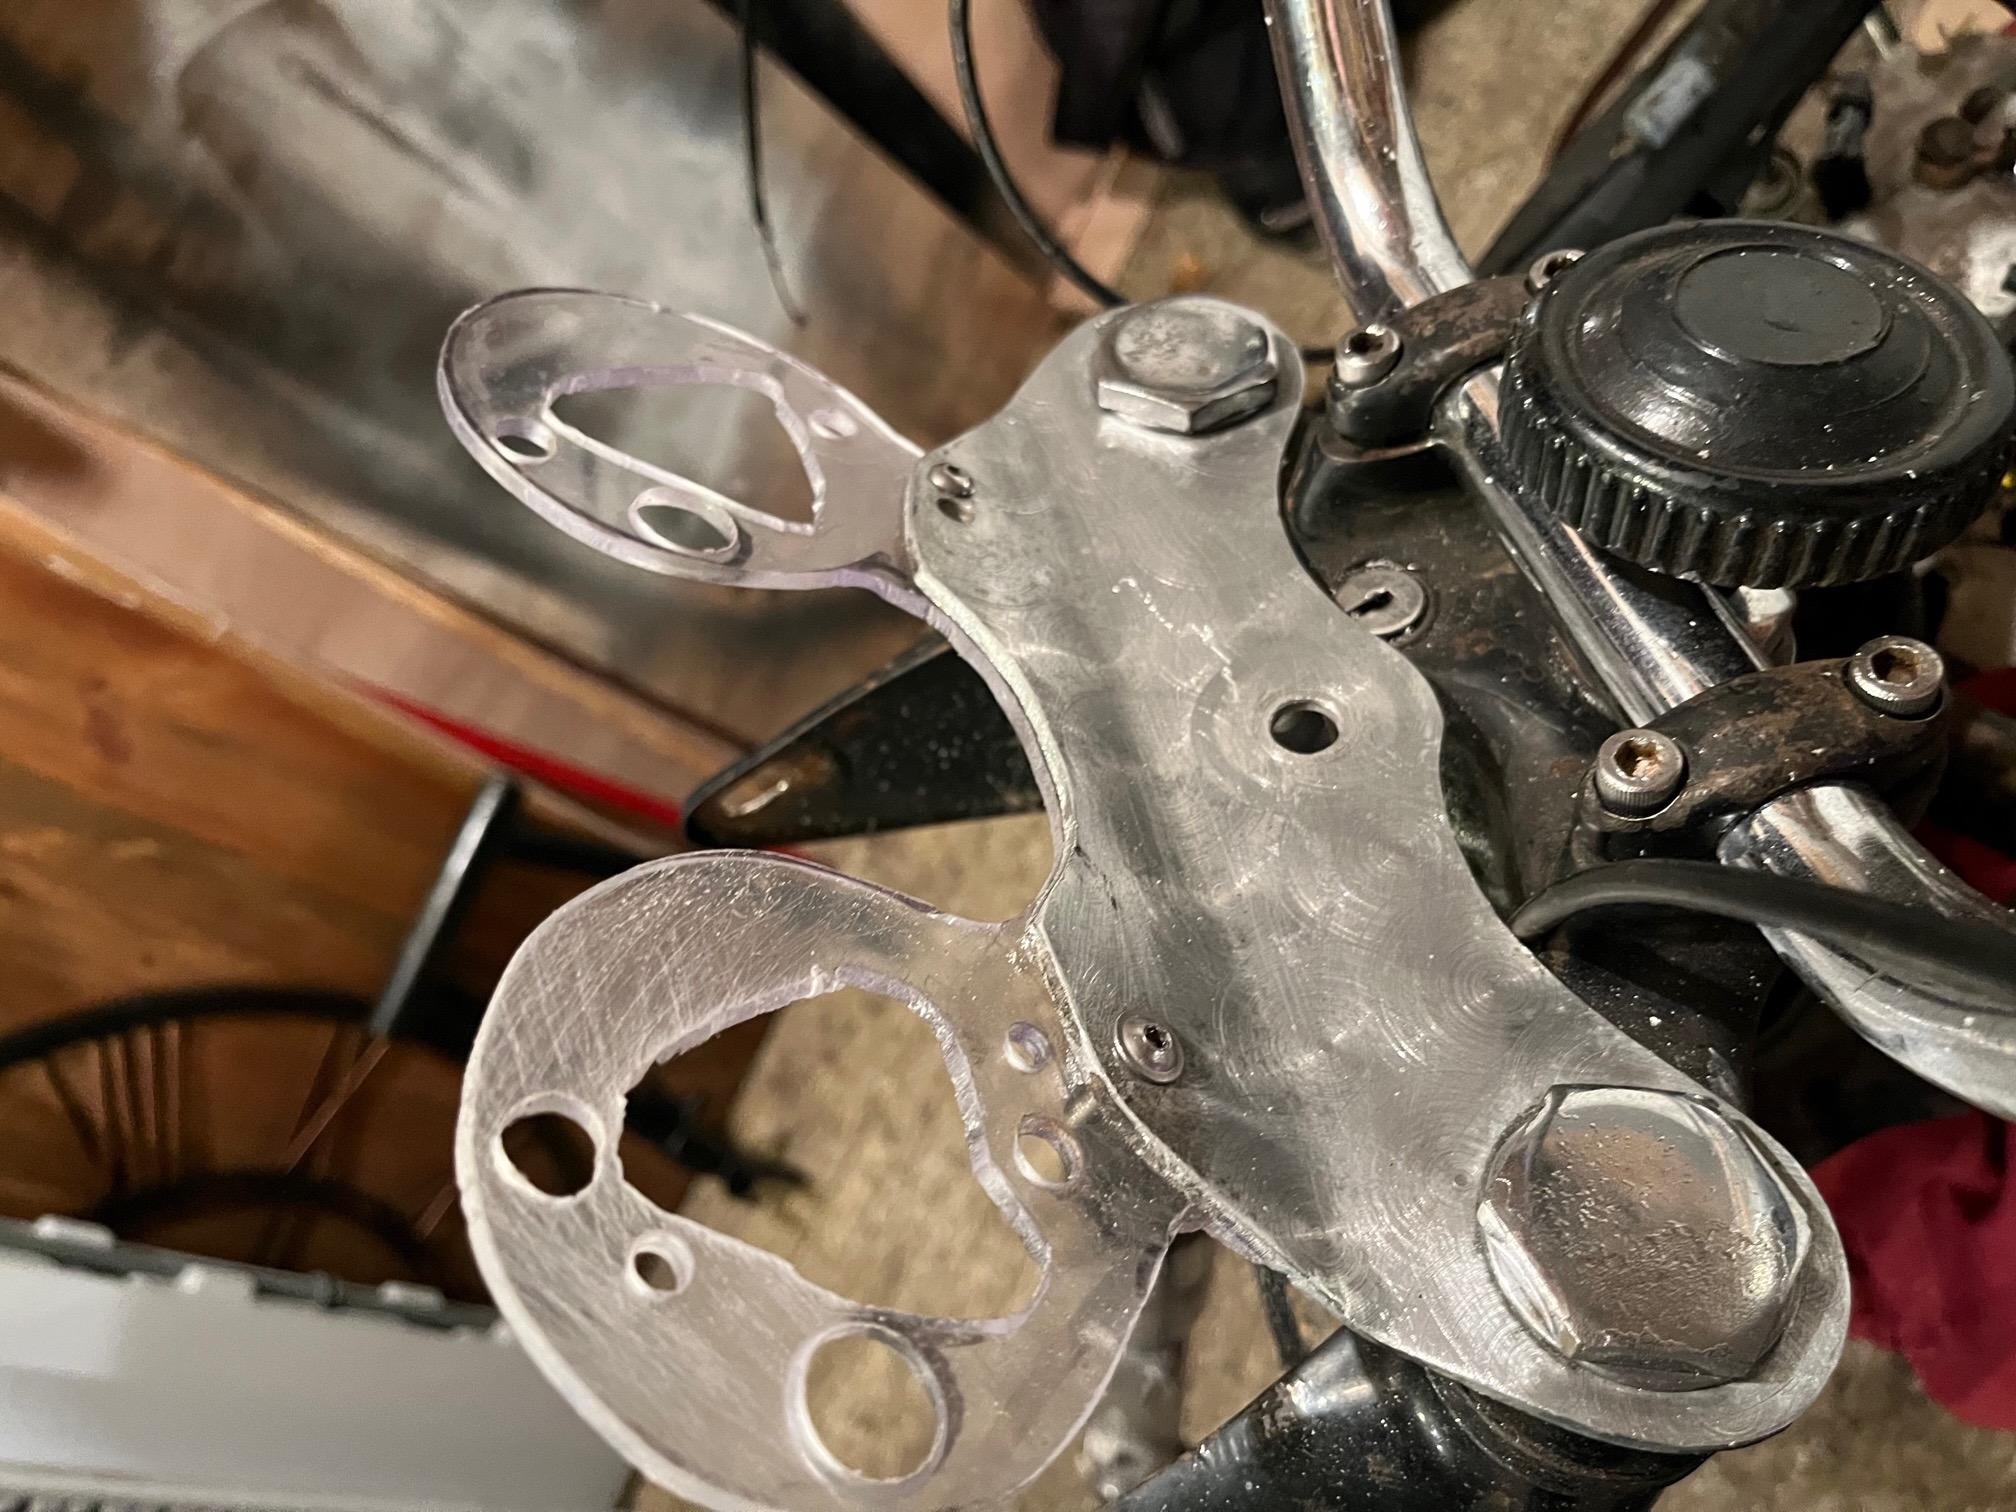
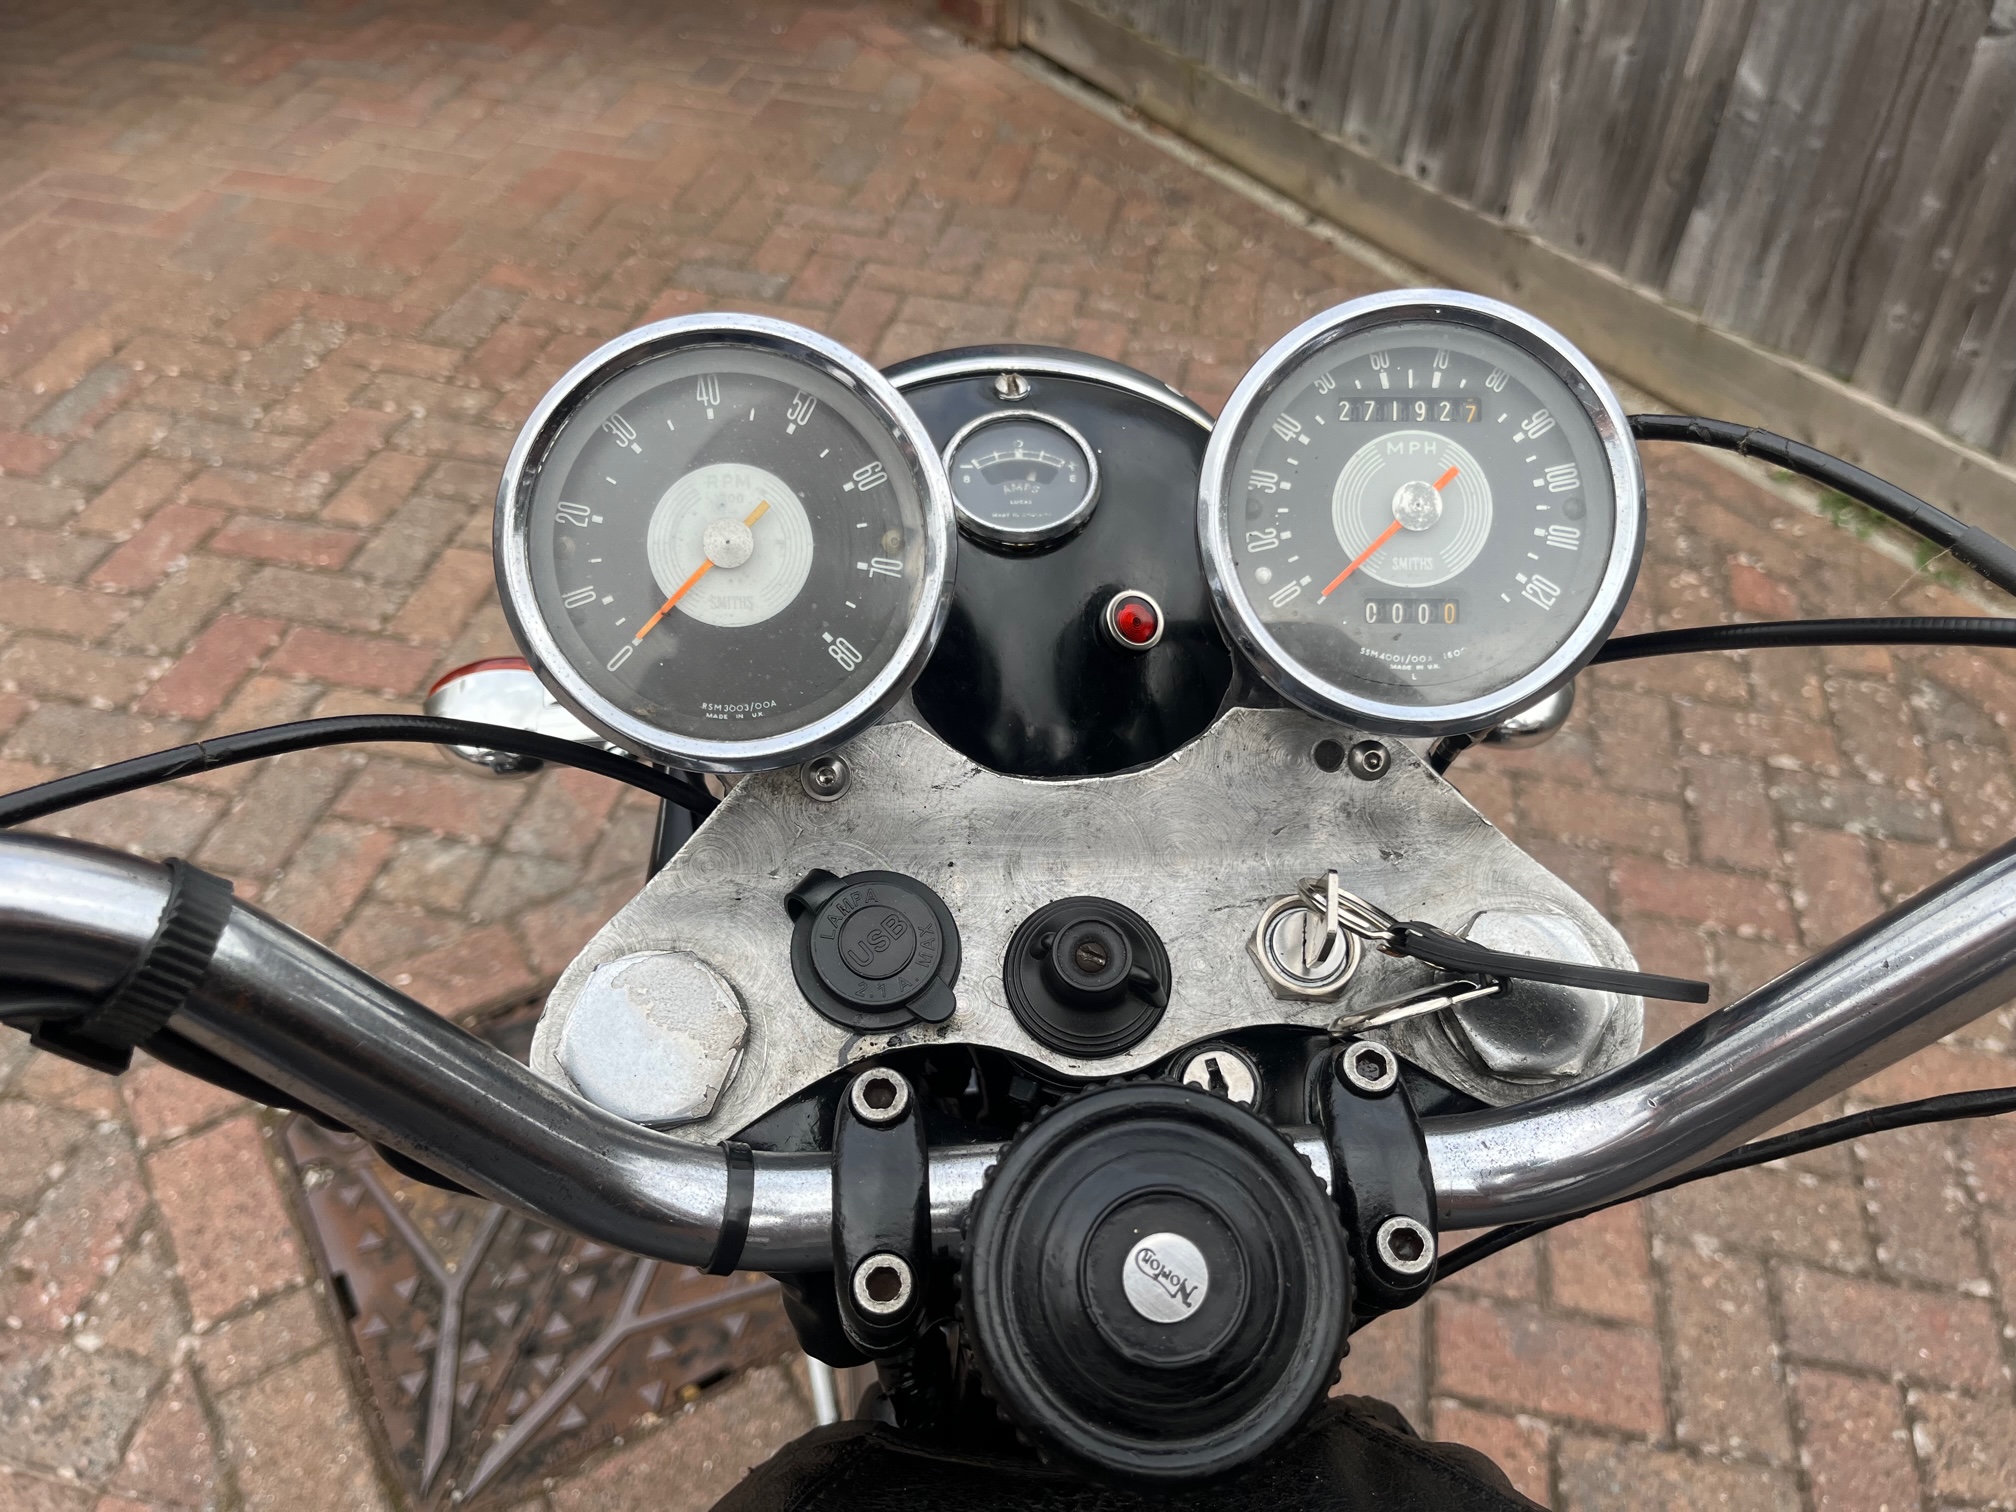
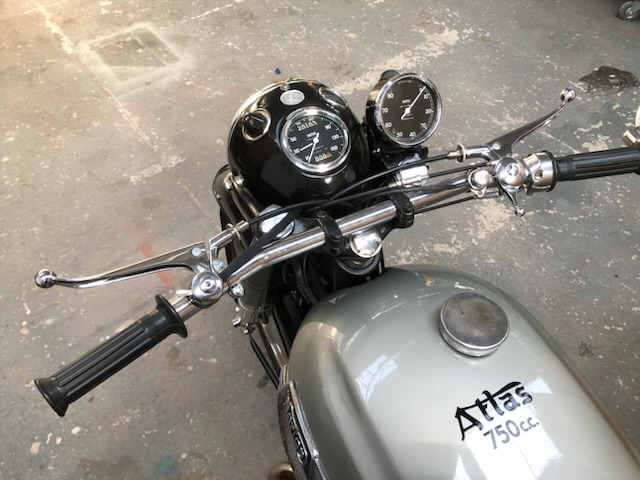
A makeshift alloy sheet bracket which was held on by the fork stanchion filler bolts just barely held the speedo and tacho in place. It had a bend in it which allowed the instruments to face toward the rider but it was poorly made. However, the Smiths instruments looked original. Under the glass they were in good condition and looked like they’d probably work ok. The odometer read 27,150 miles. The chrome clock bezels were badly tarnished but polished up like new with no pitting in the chrome at all. Solvol Autosol is truly amazing stuff! The speedo cable was missing. I sourced a new one from Feked.com for £16. There were no light bulb holders but a quick sort through my electrical box produced two rubber mounted push in rubber instrument light plugs off some or other bike which fitted nice and snug.
The front forks were complete and looked to be in good condition bar some peeling paint. The chrome on the left side fork stanchion top nut had partially peeled which was a shame cos the right side one came up lovely. It had a steering lock which indicated that these were the wide forks, but of course there was no key. The yoke bearings felt clean and tight with no play in them. There was NO oil in either leg evidenced by the fact that nothing dribbled out when I released the lower stanchion drain plug screws. No surprises there. I decided to refill the forks with w30 oil and see if the seals were scuppered before going to the trouble of pulling the forks off and rebuilding them. After a few pumps up and down there was just a very minor weep from the left side stanchion but it was minimal, so I decided that unless it worsened during the first shakedown a fork rebuild could wait till the winter.
The chrome headlamp shell which housed an ammeter and a toggle switch was badly rusted. It cleaned up ok with the brass wire wheel but it was pitted so would probably need prepping and painting or replacing. The rim was in good condition though. The sealed beam headlight lens and the 12V bulb inside it were intact.
Removing the front and rear wheel spindles was a bit of a mission but they eventually came out with several hard taps using a rubber mallet. The wheels came off after that with no further issues. The front pinch bolt was in good condition with no cracks in it. The rear wheel spindle nut was really tight and badly gnarled up so I got a stainless steel replacement one from Norton Bits. Wheel bearings felt good, turned over smoothly and had no play in them. The teeth on the rear sprocket looked good too. The chain had a few rusty links in it so I laid it into a metal tray, covered it with engine oil and heated it up over a camping gas hob till it was fairly hot and bubbling, then a bit of twisting and tapping in the vice with a rubber mallet got the stuck links moving again and made the chain usable once more. The teeth on the gearbox sprocket, from what I could see of it, were pretty worn out. Removing the primary chain case would expose it properly.
Front and rear mudguards came off relatively easily and had no dents in them, only some surface rust under which appeared to be old yellowed lacquer which eventually cleaned off using the brass wire wheel attached to my trusty DeWalt drill. I think it was that old lacquer that saved them because after a final polish the end result was nothing short of amazing. This old British chrome was tough as old boots; they just don’t make ‘em like that any more!
The wheels were the only chrome items that really needed some serious attention. They were quite rusty and pitted when I started on them and I almost decided to give it a miss and go for new rims and spokes but found that a good dose of Jenolite rust remover, a bigger brass wire wheel and some diamond tipped Dremel grinder pods eventually tackled the pitting and rust and brought them up nicely. Some of the chrome was peeled but I managed to grind those areas back to shiny base metal with the Dremel. The spokes were in exceptionally good nick. Not a single one was loose or bent, they were just very dirty with lots of surface corrosion. I cleaned them and the alloy hubs up with the brass wire wheel, alloy-bright and solvol utosol and then polished up the rims and spokes a second time using the wire wheel and Dremel again till they shone. It was a tedious and time consuming procedure getting into all the nooks and crannies but I eventually got both wheels to a point where I was happy with them. To ensure the polished metal/chrome stayed bright and shiny I masked up the hubs and clear lacquered the rims and spokes. They looked pretty good! Not exactly the standard way to do it and not perfect either but it cost me virtually nothing, just some aching wrists!
The ancient tyres were FUBAR so I replaced them with Avon Roadriders plus new inner tubes and overall, considering what the wheels looked like originally I was pretty pleased with the end result.
One of the battery box cover screws was missing - easily replaceable. The inner box section was held in with rusty bolts but it came out ok, as did the chain guard. It even still had the battery tray which though a little rusty was totally usable. The thing I began to notice as I took the bike apart was there was virtually no damage to the tinware at all. Everything was straight and as it should be, just dirty, a little surface rust and caked with crud. Then again, what can you expect with a bike that had languished this long in an unheated shed?
The wheel adjuster bolts on the swingarm were both sheared off, probably the reason why someone had overtightened the rear spindle nut, so I drilled them out and re-tapped them. I opted to use 6mm bolts instead of imperial, mainly because I didn’t have any imperial taps and dies.
There didn’t feel like there was any play in the swinging arm but I removed it and greased it all up anyway. I found it interesting how simplistic it was considering the legendary handling characteristics of the featherbed frame. No fancy bronze bushes or bearings, just a metal bar inside a hollow tube with some rubber seals either end. Less is more I guess.
Overall, the wiring was a bit of a mess but I could already see that the electrics on this bike were so basic they’d be a doddle to redo. The rectifier and zener diode looked intact and serviceable. It was a 12V system which was a relief. I sourced two pairs of snazzy classic style chrome indicators which would look just right on a bike of this age plus a three pin LED flasher relay. The flashers had 10mm metric bolts so I had to drill out the existing headlamp shell’s imperial threaded holes and re tap them to 10mm metric plus drill out the spacers so the indicators would screw in. The rear indicators were a bit more fiddly to install. I opted to fit them either side of the rear mudguard using one of the bolt holes for the grab rails which had to be drilled out to 10mm and mounted them on 75mm extended shafts so they would be visible from behind. There was one toggle switch in the headlamp shell which I figured must have been the Magneto cutoff switch. There were no idiot lights so I got a couple that would fit into the 12mm holes; red for ignition - on/off, and blue for main beam. The main Lucas lights switch was intact but the pole connectors were corroded. Finding the correct diameter wire connectors for it was tricky but I got there in the end.
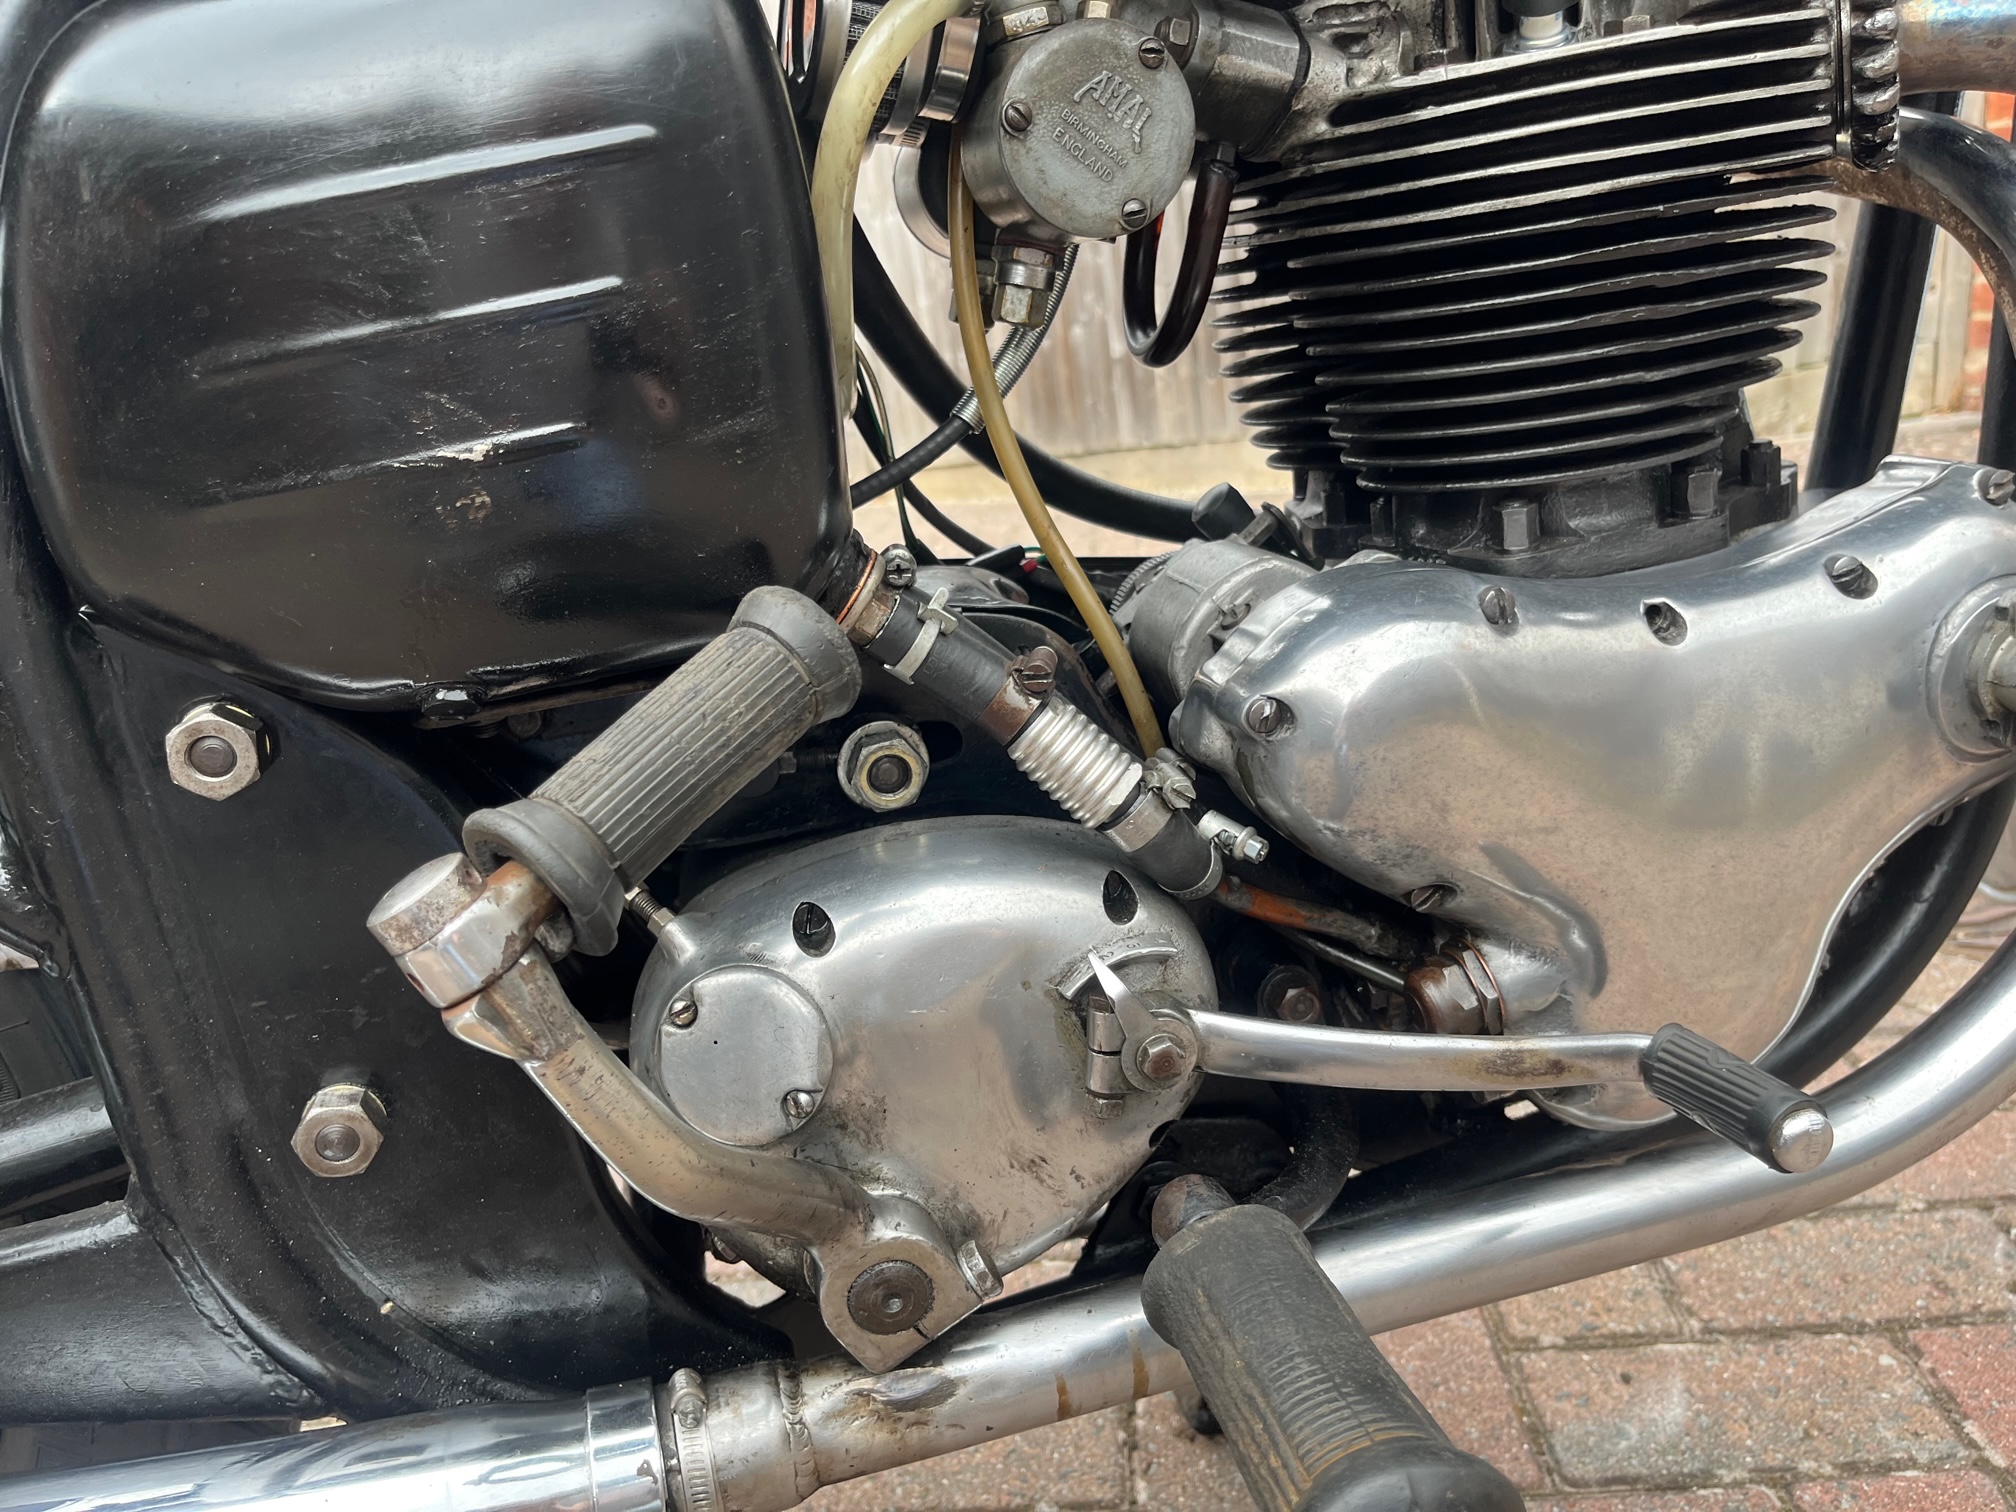
I then removed the two 389 Monobloc carbs which were the reverse type with the float bowls facing outward respectively. The left side cap screw was half stripped and wouldn’t tighten down so I ordered a new cap screw from Feked.com. The original air filter box was missing. A couple of the flange bolts were loose and one of the studs had been replaced with an Allen bolt. As I dismantled the first carb I was expecting the worst but to my amazement it was really clean inside. There was no crusty residue or corrosion of the inner bodies on either of them. Result! After a thorough ultrasonic clean they came up looking like new, both on the inside and out. Obviously, whatever fuel had been in them and in the fuel tank had long ago evaporated and must have been old school high octane stuff with none of that disgusting ethanol crap in it.
I decided to leave the engine and gearbox in the frame until I’d had a go at starting her up. Always worth a try! The head in particular was really grimy and dirty. I used Alloy-Bright, working it in with a small stiff brush and repeated the procedure several times. After a good rinse off it came up looking pretty damn good; not vapour-blast clean but definitely presentable. All the fins were intact with no cracks visible anywhere. With the majority of the crud gone I could now see the gearbox serial number which was NA12126 indicating that it was one of the later Norton AMC boxes with the stronger spring. I could also get a better look at the magneto, and other than no earth wire present it looked intact. The spark plugs bothered me a bit though; they were so tight they felt like they’d been welded in. I was extremely careful to remove them very slowly and with great care as I didn’t want to shear them off in the head. Eventually, with a lot of gentle to-ing and fro-ing with a good plug socket aided by a 3ft long extension bar and Plus Gas I eventually got them both out in one piece. Both of them were Champion N4’s with no gap whatsoever. I wondered why that would be? I then sprayed copious amounts of Plus Gas into the plug holes and gently turned the engine over with the kickstart but the way it sat skew-tiff on the spline made me cautious when using it. That’d need sorting.
Releasing the sump plug/filter produced about half a litre of dirty black oil. Well, at least there was something in there. Better than it being empty! The innards of the sump plug filter were interesting though. The wire gauze filter had some metal filings in it and was full of sludge. I happened to have a digital borescope, so I had a little poke around through the sump plug hole with that but couldn’t see anything untoward. It all looked intact. I also used the borescope to look into the spark plug holes and the tappet cover openings too. The tappet clearances were a few thou off but nothing excessive. The piston crowns looked ok with just a coating of carbon on them and the bores weren’t scored. They were domed pistons which I found interesting. Atlas pistons should be convex so these were obviously higher compression ones. A compression test showed 87p.s.i. on the right cylinder but only 50p.s.i. on the left one, so something definitely wasn’t right there. Stuck piston rings maybe?
The outer primary chain case came off relatively easily and didn’t look like it had been distorted. The only missing item was the rubber grommet bung for the clutch adjuster bolt, an easily findable item on Ebay. There was virtually no oil inside, just some gummy muck at the bottom. The rubber sealing band was intact and in good condition. The primary chain was dry as a bone and worn out but the sprockets looked ok. The generator stator was a different story however. It was an old exposed coils type unit, serial number 47162A 566, which I discovered was a 6V, three wire unit that had been jerry rigged into a 12V one. It had partially disintegrated having obviously been bodged up at some point in time. The wiring on a couple of the coils had been reconnected here and there and insulating tape had been stuffed in between the body of the stator and inner transmission cover. It was a bit of a mess and virtually fell apart as I removed it. The only place that would be going was in the bin! I soon found a replacement 10 amp 12V two wire stator at Monty’s Classic Motorcycles. The clutch had a bit of side play in it which didn’t bode well. Not excessive but definitely something that would need further investigation.
The oil tank came off with just two bolts holding it on the underside. The top bracket had obviously snapped off at some point & was missing so I made up a new one out of some old sheet steel that I had hanging around and welded it on. The oil pipes were old and would need renewing but the metal screw-in spigots were all clean. The tank had a layer of sludge at the bottom which washed out with petrol. I noticed some metal bits stuck to the wire gauze filter on the inlet spigot. Using a telescopic magnet I scoured around inside the tank, pulling out several small clumps of tiny mucky metal filings, then washed it out again. I decided that I’d use some engine flush and cleaner on the first refill and drain it out soon as the engine had warmed up a bit.
Both the front and rear brake shoes were approx half worn but still looked solid and usable.
All the alloy engine casings polished up nicely with some Solvol Autosol, as did the lower fork stanchions, wheel hubs and covers. The TLS John Tickle front brake unit in particular polished up real nice. The rear wheel hub cover was missing but I found a a nice shiny new one complete with 6 self tapping s/s screws on Ebay for £20. When it arrived I realised it wasn’t the quick release type with the three access holes for the hub bolts. Rather than return it I simply drilled 3 holes in it using a conical hole cutter and bought some rubber grommets off Ebay; not very hard to do and £15 cheaper.
This bike had for sure been a US export model as it had Western style handlebars and red side reflectors on the rear mudguard. I considered changing the bars to flat’s seeing as I’d be racing it but decided that was overkill really; better to leave it as it was. After all, the Heritage Sprint was just going to be a one off bit of fun and I kinda liked the riding position anyway.
The handlebars and reflectors all cleaned up pretty well, as did the clutch and brake levers; just some surface rust and minor pitting. Even the horn/dip switch was intact and cleaned up okay but it was a bit too basic for my liking. It also sported an original Feridax locking throttle which fortunately was unlocked, albeit no key. The aluminium bracket holding the speedo and tacho had to be modified somewhat to make it stable and presentable and also to make the ammeter on the headlamp shell visible to the rider but that just involved some cutting and trimming. I used 3mm thick polycarbonate to get the bracket just right. Polycarbonate is extremely strong material, cuts easily and has some flexibility which would help with vibration. I replaced the handlebar grips with Shak-de-la softie grips. I always liked the look and feel of those on old classic bikes and they’d also help to reduce vibration hopefully.
Overall, there was none of the heavy corrosion and rust associated with being exposed to the elements, just dirt and grime and decades of storage dust that had accumulated in a dry but unheated garage.
It already had a number plate but apparently that had expired, so with the assistance of the NOC I obtained a dating certificate for the bike and then filled out the V55/4 form needed to get a new age related number plate & V5C along with a V112 for tax and MOT exemption from DVLA.
My intention all along had been to NOT take the engine out and strip it down unless it was absolutely necessary. If I had to do that my chances of racing it in the Heritage Sprint would be gone. There just wouldn’t be enough time. I’m a firm believer in that ol’ saying ‘if it ain’t broke - don’t fix it.’ Well, the truth is, I didn’t know if it was broke yet so I wasn’t going to fix it till I was sure it was! Initially, all I wanted to do was see if it’d actually start and run. I hadn’t bargained on having to purchase a new stator and primary chain, but if that was all that was needed I wasn’t going to complain. You could say I was probably being a bit over optimistic there seeing as this bike had sat for 50 years and I didn’t even know why. The odometer only read 27,000 miles so I wasn’t too worried about the dreaded sludge trap being blocked up. It had quite a low p.s.i. reading on the left cylinder which would require attention though, so I turned the engine so the pistons were halfway up the bore then sprayed a LOT of ‘WURTH - ROST OFF BLACK’, the modern version of Plus Gas, into the spark plug holes and let it sit there for 24 hours in the hope that if the rings were stuck it might help to free them up.
The next day I checked the compression again. The right side remained at 87psi. The left side had risen, but only to 75psi, a discrepancy of 12psi. Not exactly what I was hoping for but an improvement nevertheless. I sprayed more releasing fluid into the left cylinder and left it while I carried on with other things.
One thing I’d omitted to check up to that point was did it actually have a spark? A minor point! As it turned out it didn’t, the magneto wasn’t playing ball at all. That was a bummer. It crossed my mind that this was possibly the missing link to the untold story of why it had been parked up many moons ago. Either that or the mag had simply expired during its 50 year sleep. Whatever the reason, I was now stumped. Taking the magneto out appeared to be quite an operation involving removing the timing side casing etc, etc. and even then, once it was off I’d still have to get the damn thing fixed! I really didn’t want to have to do all that. So, first I cleaned up the HT lead connections and pulled out the brushes, which had plenty of life left in them. All seemed to be in good order with no corrosion at all. I concluded it must be a dud condenser then, which apparently was buried deep inside the armature. Oh Jeez! I posted a plea for help on the NOC forum and Andrew Bolton highly recommended me to Paul Wolf who I was told does an amazing job of reconditioning these units.
I was about to dig in and hoik the little sucker out, ruminating on the distinct possibility that I’d never get this bike to the Sprint in time now, when another reply to my post appeared from Paul Hudson, advising me to first close the plug gaps to zero gap and kick the bike over several times. He’d done that previously on a bike that had no spark and it had worked, at least for him it had. Sounded like an easy fix! I then remembered that the old plugs I’d taken out had zero gaps. Maybe someone had tried this method in the past? Anyway, I did as Paul advised but unfortunately I didn’t have the same luck as him. Still no spark - Grumph!
So, just as I was about to pick up the spanners for a second time and start removing the timing cover I had another thought. I wondered if my old mate Pete who used to live across the road from me might have any ideas. He was always messing around with old single cylinder pre-war bikes and those old thumpers must have had magnetos. Sure enough he did! He highly recommended Sussex Motorcycles who he assured me would be able to help. I immediately phoned them up and a really cool old-school dude called Chris offered me just what the doctor ordered; an electronic ignition system for the KF2 Mag called a Thorspark which they actually make. It’s virtually a plug-and-play system, replacing the points assembly without the need to remove the Mag itself, and even better, it only cost £150 + p&p. I ordered one immediately. It arrived three days later in the post and I have to say it was a natty little piece of kit with incredibly detailed fitment instructions that were easy to understand. The only downside with it was that I’d have to remove the inner primary chain case in order to be able to access the front end of the mag to be able to fit the gizmo and also set the timing with a strobe light but I figured that I was going to have to do that anyway to check the clutch and get at the gearbox sprocket.
Removing the clutch bolts, springs and cups was easy enough but prizing out the clutch plates wasn’t. The inner drum and plates were gummed up and stuck together with a mixture of thick black semi-hard goo and rust. They were a pig to remove but eventually I got them all out and then pulled the housing off. To remove the inner drum I used a rubber band oil filter clamp while I undid the nut; a lot easier (and cheaper) than using a special clutch tool, especially seeing as I didn’t have one! There were two centre nuts, one of them must have been a locknut but neither of them were very tight anyway. A bath in some petrol and use of a stiff brush cleaned all the goo off the plates and I was relieved to find that they were all flat and intact. The plain ones got the brass wire wheel treatment and came up looking like new while the bonded plates just needed a detailed scrub and cleanup. The inner drum splines were distorted in a few places and required careful grinding with a diamond tipped Dremel bit. Eventually, I got it to the point where all the clutch plates slid on and off with no resistance. It was a dirty, messy and tedious job doing all that but the end result was worth it.
The badly worn primary chain was binned and a new one procured.
Up front, the genny rotor came off easily enough but the front sprocket behind it was really tight on the crank pin. Heating it up with a blowtorch, a half inch drive socket and 3ft long hollow ‘Schwarzenneger bar’ as I nicknamed it finally did the trick and it pinged off with a mighty crack! Removing the inner primary case after that was easy, six cheesehead screws and a nut and it was off. The lower gearbox pivot stud nut should have also needed to come off but it was missing. The gearbox sprocket was then clearly visible, or rather what was left of it. It was also quite loose! The reverse thread nut holding it on to the spline was only finger tight. Blimey! The teeth were completely worn out so I replaced it, courtesy of Feked.com.
As I mentioned earlier, the gearbox lower pivot stud nut on the primary drive side was missing. At first I thought, no problem; I’d find one of them easy enough. Er, not so easy actually! Measuring the size and type of thread was difficult because of where it was and taking the stud out wasn’t really an option as the engine plates would need to be removed to do that. Many people tried to help on the NOC forum and there appeared to be several possible variations as to what size and thread this elusive nut might be. Robert Tuck brought a couple of old nuts along to the Ardingly auto jumble for me which was nice of him but it was the wrong size. It had to be a slim nut so it could be slipped onto the thread without jamming against the lower frame tube. Eventually, I found one on Ebay, a slim half inch 20 tpi nyloc nut, and it fitted perfectly!
The kickstart was a bit wobbly on the splines so I removed it and found that some of the inner splines were eaten away. The outer ones were ok though. Careful cleaning and de-burring enabled me to refit it but the bolt wouldn’t hold it fully tight. I had to resort to grinding a millimetre out of the clamp edges but it still slipped sideways after several kicks. In the end I resorted to thoroughly cleaning the splines then applying some JB Weld, tapping it back on and bolting it up tight. I then left it to cure overnight.
The kickstart bodge with the JB weld worked a treat. It now stayed straight and didn’t move on the splines anymore. I refitted the clutch, front sprocket and primary chain without first fitting the inner primary chaincase cover; the reason being that I needed to be able to kick the engine over to check for a spark but still have the front of the magneto fully accessible. Obviously, once I’d got the engine running - IF I got it running, I’d have to remove it all and start again with the inner chaincase going on first.
The clutch went together easily (and so it bloody should, considering the amount of work that went into refurbishing it!) and once the inner hub had been tightened up I found there was minimal play in the clutch body. That was a relief! But when I tried fitting the new primary chain I realised it was too long. It looked like it needed a half link. Then I discovered from the vendor who I’d bought the chain from that sidecar models actually do require a half link to shorten them, and of course my bike used to have a sidecar on it - duh! Well, ya learn sumfink new every day, eh? I’d purchased the chain on Ebay but I noticed that the seller was located only a few miles from me so I whipped round there and he was good enough to fit the correct half link on it for me for the princely sum of £3. Great guy - Mark from MEV Spares, located in the backwoods of Hawkhurst, Kent.
Now that the primary chain, replete with the half link, was installed and correctly adjusted the next problem reared its ugly head; the rear wheel now sat further forward which normally wouldn’t be a problem but the new Avon Roadmaster tyres I’d fitted were wider than the originals so the rear tyre was now chafing on the swinging arm, only a little bit, but just enough to prevent it from spinning freely. I managed to adjust the wheel back just enough without over tightening the chain, leaving only micro millimetres gap between the edges of the tyre and the swinging arm. Phew, that was close!
That wasn’t the end of it though. Now that all the transmission parts were in place I noticed there was a fair bit of lash in the transmission. The gears all selected okay so no problem there. But selecting top gear and moving the rear wheel back and forth there was about 3 inches of play before any take up either way. I tried it in the lower gears. Third gear produced slightly less lash and second gear even less than that. In first gear there was only about an inch of free play, which is still more than the maximum you’d want really. Both chains were correctly adjusted so it could only be the rubber cush pads in the clutch, which I hadn’t yet checked, nor the gearbox. My experience with old British bikes was that there was always some free play and lash in the transmission but this seemed more than a bit excessive. If it was in the gearbox it was probably caused by severely worn selector dogs. I knew that if it had to come out the engine would have to come out with it so I decided to carry on with other stuff while I considered my options.
The fiddly job of installing the electronic ignition unit into the magneto was actually a lot simpler to do than I envisaged. The written instructions that came with the kit were easy to follow - just remove the points and the circular cam plate and fit the electronic unit in its place. The unit was a perfect fit and slid into the mag easily. There were notches on the back of it that slot onto a small protruding screw bolt in the mag body. These notches have different widths so you can use the one that slots over the screw best and holds it firmly in position. I used the smallest notch but found it still required a little filing to open it out, just enough so it’d fit exactly over the screw which is important as he unit has to be held tightly in position or it’ll rotate. You also have to ensure it goes fully in and sits fully against the wall of the mag. Sounds very tricky but it’s actually a very simple procedure to do. And that’s all there is to it really. There were only three wires which needed to be fed through the screw-on cap on the magneto and then to the battery and an on/off switch. The central nut in the plastic mag cover had to be removed to do that. There’s also a 3mm thick aluminium ring supplied that goes on before you screw the mag cover back on which acts as a spacer and firmly locks the electronics unit in place but also prevents the cover from shorting out the electrics. They’d thought of everything! The kit included a single coil which I placed in the gap between the oil tank and battery box and once done it all looked very neat and tidy. I also refitted the original HT leads from the mag and routed them up under the tank to nowhere in particular to retain the original appearance.
Laying the plugs onto the cylinder head and kicking her over produced a bright spark on both plugs. Woop - woop! Good ol’ Chris at Sussex Motorcycles and many thanks to Pete Nash for pointing me in his direction.
As I was working on installing the electronic ignition I realised that time was moving on. It was only two weeks to the Heritage Sprint and I’d only just gotten the bike to produce a spark and there was still a fair bit to do. I’d need to pull my finger out. The good thing was I had pretty much everything I needed parts wise to finish the rebuild.
After checking the compression for the third time the left cylinder now read 79 psi. I was a bit getting despondent at this point. That double soaking of the pistons with releasing fluid had obviously done something but it was still way too low, so, using a small funnel I poured some thicker engine oil into both plug holes and let it sit there for 15 minutes. I then checked the compression again. Of course, as soon as I kicked it over a plume of oil spurted out of both plug holes. Oops, forgot about that! Luckily it missed me but left two shiny slug trails splurged across the garage floor. After cleaning that up I checked the compression on the left cylinder. Holy Kaschmoly! It now read 175psi and the right one was exactly the same. Okay, there was probably some excess oil in the bores which would have increased it a bit, but even so, the compression was more than adequate - for both cylinders; enough to give me a fighting chance of starting the engine at least! Why the hell didn’t I just do that in the first place?
I wanted to fit a side-stand to the bike so figured that now would be the time to do it while the primary chain case was off and the lower frame tubes were easily accessible. I was aware of the possibility that leaving this old bike sitting on a side stand could have repercussions with oil leaks from the crank or gearbox but it’d be nice to have one on there, and anyway, if there were leaks or it didn’t hold its position I’d revert to using the centre stand. I’d already bought a really good quality one off Ebay for £36 and clamped it on just in front of the centre stand pivot, but there was a problem, the top clamp bolt sat just proud enough to prevent the primary chain case from seating correctly onto the crankcase; it was only out by a couple of millimetres but it was enough. I suppose I could have ground down the top nut but that’d weaken it and probably make it impossible to undo so that meant I either had to remove the side stand completely and make do without one or somehow modify the inner chain case cover so it would seat properly. I opted for the latter.
Looking at the primary chain case oil seal arrangement I have to admit I couldn’t quite fathom how it was supposed to remain oil tight. One central bolt holding a fairly large flimsy metal case to another flimsy metal case with only a rubber band to seal it - how the hell was that ever s’posed to work! The outer cover wasn’t distorted but I’d heard horror stories about how the standard setup leaks and judging by the state of the original primary chain and lack of oil in the chain case when I dismantled it I figured that this one hadn’t done so well either.
All that was needed now was to adjust the tappets, refit the carbs, reinstall the oil tank and pipes, fill up with oil & some flushing cleaner fluid, fit the battery and get some fuel down its throat. I opted to use an umbilical fuel line instead of the tank so I had better access to the carbs for balancing and tuning them.
With all that all done it was now time for the piece-de-resistance - starting the engine. Would it, wouldn’t it? Would it sound like a bag of nails and self destruct, shattering my dream of racing it in the Heritage Sprint, along with the crankcase as a conrod smashed through it? Would it even start at all?There was only one way to find out!
It’s always a tense moment just before you fire up an engine for the first time and even more so with this one based on the fact that it hadn’t run for fifty years or so, and to be honest I hadn’t really done much to it. Anyway, chocks away!
Open the fuel tap and tickle the carbs. Flick the temporary electronic ignition toggle switch to ‘on.’ Check the choke lever works - ping! The bloody cable snapped. I wasn’t going to let that stop me so I clamped the split end with some small molegrips so I could open it up once it got going.
First kick - whoah! Some serious compression there! Second kick - the engine spluttered and spat back. Then I noticed petrol was leaking heavily out of the right hand carb. The float needle wasn’t sealing properly. Dammit! I knew I should have replaced those old plastic float needles with a couple of viton tipped ones. I immediately ordered a couple along with a choke cable and did some work on the wiring while I waited for them to arrive.
A few days later, with the new choke cable in place and the carbs now not pissing fuel all over the garage floor I kicked her over. First kick - it spluttered. Second kick - chug, chug, chug, then the second cylinder caught - and vroom! After a fifty year hiatus the ol’ gal was a living, breathing fire dragon, and that exhaust note - oh yeah! Smoke was pumping out of the reverse cone mega and wafting over the neighbours fence and their dog was going berserk, but to be honest I didn’t really notice nor care. That scraggy mutt needed a bit of its own medicine anyway. I was too busy peering inside the oil tank for signs of returning oil to worry about him. Eventually, oil started dribbling through, then began flowing nicely. That was a relief. The engine wasn’t going to seize up, at least not yet. The rocker oil pipes were translucent so I could also see that oil was flowing through them too and there was no excessive tappet clatter either. Everything looked, and sounded good! Two of the rocker spindle gaskets were weeping oil onto the head fins. I tightened them up a tad and a quick adjustment of the tickover screws got it idling on its own. Interestingly, the exhaust was relatively quiet on tickover but a blip of the throttle had it roaring like Mufassa.
As soon as the engine was hot I shut it off then drained the oil which came out thin and quite dirty but then again I’d added flushing and cleaning fluid in with it so I guess it had done it’s job. I then cleaned the gauze filters of the oil tank and sump plug a second time. There was a little sludge in them but nothing else really. I’d drained the oil into a clean receptacle and ran it through a fine filter (an old bra that my wife gave me, the cup of which was big enough to fit neatly over a 5” diameter funnel - go figure!) Once it had all filtered through there were some tiny pieces of metal, sludge and what looked like part of a fibre washer in there but that was all. I refilled the oil tank with straight 20w-50 mineral oil. The gearbox oil was drained and refilled with EP 80w90 and I also made sure the tiny breather hole in the inspection cover was clear.
With the engine fully cold again I rechecked the compression on both cylinders. The right cylinder was now reading 120psi and the left 124psi, only out of sync by a measly 4psi - good enough! And that’d probably increase once the engine was warm.
It wasn’t lost on me that I hadn’t checked the sludge traps nor isolated what was causing the excessive lash in the final drive but with that substantial flow of return oil into the tank it definitely wasn’t blocked up that was for sure. A road test would determine if the gearbox needed further attention (I certainly hoped that wouldn’t be the case - at least not yet!).
Tweaking the timing with a strobe light plus balancing the carbs smoothed out the rough tickover and it was soon running pretty good. I set the ignition timing to exactly 30 degrees btdc based on my previous inspection of the top of the pistons with the borescope and a few comments from guys on the NOC forum. Those slightly domed pistons were almost certainly Commando 9:1’s. Anyway, it seemed to like it and was running well.
With the critical timing sorted and the oil flowing back into the tank I could now get to work and put everything back together. It was now only three days to the Heritage Sprint so I had to work fast. First off, I finished off the wiring and electrics which included a ‘Not Charging’ Lamp driver (NCLD) so I’d know if there was a problem with the charging system, courtesy of Paul Goff at Classic Motorcycle Parts who I met at the Ardingly bike Autojumble. A very knowledgable chap is ol’ Paul. He also sold me a Lucas keyed ignition switch which I fitted onto the instruments bracket. Two idiot lights slotted into the holes in the headlamp shell, one for the ignition light and the other for main beam. I bought a black L/H switch unit on Ebay for the dip/main beam, horn and indicators. It fitted perfectly and didn’t look at all out of place on an ol’ British Norton and being matt black fitted right in with the colour scheme overall. I also fitted a USB charging port, so I could charge a SatNav or iPhone, by drilling a 29mm hole into the instrument bracket and slotting one in. It had a blue light that lit up when the ignition was switched on.
The original air filter box was missing so I fitted a couple of aftermarket units which were a tight fit but there was just enough room to wriggle them on. The reverse cone Mega that replaced the cigar exhaust looked the business and the sound it produced when the engine was revved was music to my ears. Not so sure if the neighbours or their dog thought the same though!
I then disassembled the primary drive side and pulled out the inner clutch drum, at which point the cold hard truth of why there was tons of lash in the transmission became clear. It was devoid of cush drive rubbers! In my haste to refurbish the plates I hadn’t checked if the rubbers were ok. Then I remembered why I’d omitted to check them; I didn’t actually have the correct imperial Allen key to get the front plate off. In fact, the only imperial Allen key I had in my possession was for the handlebar clamps and that was too big for these clutch plate bolts. I’d fitted it all back in so I could kick it over to check that the electronic ignition worked and made a mental note to get an Allen key that fitted but I just plain forgot to do it! Damn! It was now Wednesday evening at just after 5pm. The Heritage Sprint test runs started on Saturday - three days away! I hastily tried to phone as many vendors that I knew of to see if I could get some cush rubbers and an Allen key to get the plate off but they’d all finished work - no answer. I then phoned Tim Eade who I’d recently met at the Ardingly auto jumble. He suggested contacting RGM, who he highly recommended and who, he said, could most likely get me what I wanted by Friday if I phoned them first thing in the morning. I did just that and spoke to a no nonsense northern chap called Roger who was extremely helpful and the goods were dispatched by midday.
RGM came through just like Tim said they would. The cush rubbers and an Allen key were delivered Friday noon. I’d also ordered a new speedo gearbox from them as the one on the bike had a dodgy spacer inside. The only problem was the Allen key for the clutch plate was the wrong size. Ugh! No problem, out with the molegrips and fortunately there was enough of the Allen bolt heads to get a good grasp on them and off they came. Then it was off with the top plate and ……. oh no! One of the arms on the spider had snapped off and there were literally no rubbers in there at all. Now I really was screwed. It was1pm on Friday. Not a chance of getting a replacement spider here in time, so there was only one thing for it - weld the broken arm back on. Now, I’m not the tidiest welder but I got it attached and either through luck or skill (probably the former) I also managed to get it located in the exact right position. After some serious yanking and bashing with a large pipe wrench and a hammer I was satisfied it was on there good and solid! After filing off the weld spatter it slotted neatly back into the clutch housing. I had to trim the rubbers a bit to get them to fit due to the excess metal caused by the weld but they all went in eventually.
I’d already refitted the inner chaincase cover. To get around the side stand clamp protrusion I’d cut a small half inch section out of the lower lip of it (not into the flat section where the rubber band sits) - just the outer lip. The inner cover then slipped on and sat snugly against the side of the engine. For good measure I made up a slightly thicker circular gasket where it connects to the crankcase so it’d sit out just a tad more. The clutch (now fitted with new cush drive rubbers), engine sprocket, rotor, stator and chain went on next. Unfortunately the rubber seal leaked! No surprises there and no time to worry about it either.
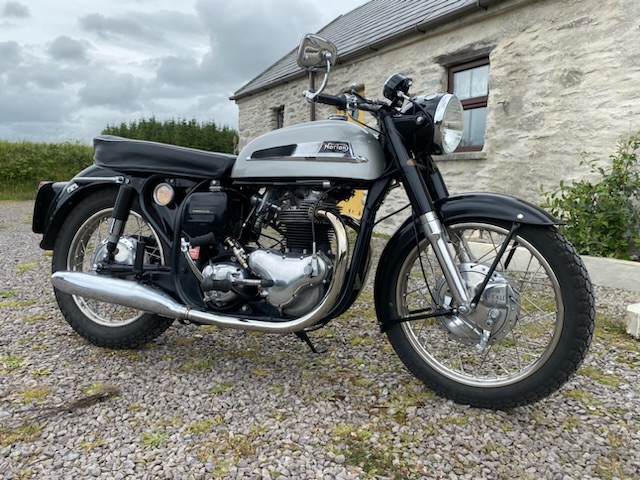
Prior to this point I’d managed to get pretty much everything else done along the way: The fuel tank had been painted silver many moons ago but the paint was faded and in poor condition. The underside was red which is how it would have been originally when it was new, but that colour scheme didn’t appeal to me. In the pictures I looked at online it made the bike appear almost toy-like somehow (just my personal opinion) so I decided to paint the edges of the tank black and refit the black leatherette tank cover over it. The tank badges were then screwed down onto it keeping it in place. Once fitted, the cover still looked a bit tardy so I rubbed on a couple of coats of “Back to Black” trim cleaner & recolouring fluid with a clean cloth, the stuff normally used on car bumpers and dashboards, etc. It came up looking like new! I’d never seen a tank cover on an old classic before but it was a well made item with all the stitching intact and it really looked the part. The tank badges still had pitting in the chrome but they were presentable (a little bit of patina never hurts) and I kinda liked the way it all looked - a bit mean and growly! It also meant I didn’t have to do a professional paint job on the tank which would save time and money - time being of the essence!
The pitted chrome headlamp shell was never going to look right so rather than go to the expense of buying a repro one which was retailing at around £45 I ground off the pits, sanded it down then painted it black along with pretty much everything else on the bike, i.e. frame, rear shocks, forks, oil tank, battery box, chain guard, rear wheel hub and all the other various bits and pieces. I used rattle can aerosol paint. I didn’t have a spray booth and DIY painting in the garden is a risky business. Wind, flies, particles of dust, not to mention the wife hanging washing out; they all have a detrimental effect on getting a decent finish so I have a technique when doing old bikes which involves applying three coats of paint with a sand down between each coat then letting it dry for a few days, then T-cut it. This eradicates that bright gloss look which IMHO just doesn’t look right on a classic anyway unless you’re going for museum quality. It also removes any dust particles in the paint and results in a nice smooth sheen which actually looks like old original paintwork that’s weathered well. It took me a couple of days to prep and paint everything then a few days later T-cut it and even though it wasn’t a professional ‘engine out paint job’ or powder coat, with careful masking up I have to say I was pretty pleased with the end result.
The barrels were caked in old paint and rust. Using a small wire brush on a dremel bit I managed to get in-between all the fins and then hand painted on some ‘cylinder black’. The front mudguard stays were black which didn’t look right to me and I wasn’t going to go down the re-chroming route so I rubbed them down and sprayed them with chrome paint then lacquered them. They looked like bright nickel when finished and almost as good as the chrome! The exhaust header fins were a bit rusted so I cleaned that off with a small wire wheel then hand painted them with heat resistant aluminium paint. For the rocker spindle caps & bolts, a polish up with the wire wheel then spray with high temp clear lacquer had them looking like new.
All the original imperial nuts and bolts that I took off off the bike were also cleaned up to bare shiny metal with the brass wire wheel and then sprayed with clear petrol resistant lacquer to retain the shine and prevent them from rusting. I only went to the trouble of doing that because I have virtually no imperial stuff, only metric. I was going to nickel plate them using a basic DIY plater I’d bought years ago but decided not to. I then gave all the alloy parts another once over with Solvol Autosol to bring them up nice and shiny. Probably the most useful tool I used throughout this whole refurbishment process was the set of brass wire wheels I bought off Ebay for £7. I used them constantly and to great effect.
DVLA had previously sent a nice chap round who’d inspected it, took a few pics and then left within ten minutes. Literally a few days later the V5C had arrived in the post with a new age related registration number. It was registered as a historic vehicle so no tax to pay and no MOT needed either. Happy days!
To add a few final touches I sourced some snazzy “Roadholder” decals for the forks that I sourced online from a company called, of all things, ‘I Say, Ding Dong!’ plus some ‘High level - Low level’ decals for the oil tank and a neat little circular ‘Norton’ Logo for the top of the steering damper adjuster. I also got a pair of “Made In England” decals for the front frame down tubes. Another really neat little add-on was a pair of Norton emblem spark plug cap decals that were sized to perfectly to affix to the NGK caps.
The TLS John Tickle front brake seemed to work ok though how effective it’d be at stopping the ol’ gal out on the road with those half worn shoes remained to be seen.
The bike was now finished. After a quick clean off of any excess oil stains and a bit of spit and polish she was ready to rock-n-roll.
The engine started up ok but only with the throttle pulled back. Not sure why that was but anyway, it started, and with that single reverse cone mega fed by those siamese pipes it sounded like rolling thunder, just what the doctor ordered. More importantly, it hadn’t blown itself to smithereens (yet) - always a good thing that! The primary chaincase appeared to have divulged itself of the oil I’d poured in but I figured a few miles without it wouldn’t hurt much. I figured could always oil it every so often through the chain case orifice. After a final once over to check that all the nuts and bolts were nice and tight it was now ready for its first shakedown.
Pulling away for the first time the clutch felt a little notchy at first but it didn’t slip. Changing up into second I opened her up a bit. The low down torque was impressive and the acceleration better than I expected, perhaps due to the electronic ignition and the two fat sparks it produced on new plugs. Possibly also the gearing, a legacy from the bike’s sidecar days when it would have required slightly lower ratios to lug all that extra weight around. I’d fitted a new 19 tooth gearbox sprocket, the same as came off it so I hadn’t changed anything ratio wise. Anyway, whatever the reason, she felt pretty lively.
Selecting first gear from standstill was a bit of a crunchy affair but once underway the higher gear changes were relatively smooth and noiseless though initially I had to really concentrate on remembering it had a right hand side gear change having ridden left handers most of my life! The brakes needed adjusting a few times so I took it easy at first but they soon bedded in. The John Tickle TLS brake up front seemed to be doing its job and the feedback from it was surprisingly good. Once the engine had fully warmed up there was a little bit of tappet clatter but not excessive and I could hardly hear it anyway with that intoxicating exhaust note belting out behind me.
The handling was a revelation. The bike just seemed to go wherever I wanted it to with very little effort on my part, inspiring me to up the ante and give it more beans through the twisties. The tacho and the ammeter appeared to be functioning properly and the lights, indicators and horn all worked too. The only instrument that didn’t work was the speedo. When I got back I was pretty chuffed. It was better than I expected and more importantly - I got home without any issues. Not bad for a first ride after fifty years!
Now it was time for the ultimate test, the reason why I’d pushed the boat out to get it done in the first place - The Heritage Sprint! After checking that nothing had fallen off and there was sufficient oil in the tank I set off the next morning and for the first ten miles the bike was running like a top. Flicking it through the Kent countryside lanes and accelerating off along the straights was pure joy. However, I noticed that my eyesight wasn’t so good that morning, kind of blurry, then I realised why; it was the vibration! That old Atlas seat was hard as nails and didn’t give any real barrier between my bum and those twin cylinder vibes. I made a mental note to get some more padding in it and forged onward. What I didn’t quite realise at the time was that the engine sprocket had 19 teeth, which of course was designed for sidecar use in order to create lower gearing, i.e. higher revs for takeoff and acceleration but that also meant higher revs top end, hence the vibes!
Despite the fact that my teeth were vibrating loose and I could hardly read the road signs, I was really enjoying myself. This ol gal had some serious horses in her! Then, as I neared Ashford the engine started spluttering and going onto one cylinder so I stopped in the nearest lay-by, let the engine cool for a bit then checked the plugs. The left cylinder plug was as black as the ace of spades. The right one was a perfect brown. Oh oh! Carb trouble. I cleaned up the sooty plug and set off again but the problem persisted. The bike just wouldn’t come on song again. I knew I’d never get to my destination with it running like that so I reluctantly turned around and limped back towards home on one cylinder. It was a good job I did. About five miles down the road I could smell something odd so I pulled over in the next available off road area. The smell was coming from the clutch side but I couldn’t determine what it was. I was now only four miles from home so I let the bike cool down for about fifteen minutes then started her up again and continued to chug home on one cylinder. Then the clutch started playing up. Oh man, this just wasn’t going to be my day. There was literally no clutch lever action any more. To keep going I now had to change gears without it. Not the easiest thing to do with only one pot firing, lots of Saturday morning Sainsbury’s shoppers meandering about and traffic lights to contend with. Anyway, to cut a long story short I got her home eventually. Phew!
Once the engine had cooled down I removed the primary chain case only to find the clutch nut had come off. Holy smoke! No wonder there was no clutch lever action. I’d torqued that nut up to 70lb/ft like it said in the manual so how come it had come loose? Then I remembered there was an additional locknut that came off prior to the main one when I took the clutch apart. It wasn’t shown in the manual so I hadn’t refitted it. It was obviously on there for a reason. Big mistake - huge! Also, the brand new stator I’d just fitted had taken a bashing. I guess with the clutch coming loose the primary chain had moved over enough to cause it to to come into contact with the back side of the rotor. How that clutch stayed on the gearbox splines is a mystery to me. Probably the primary chain held it on. Anyway, it did and it wasn’t damaged at all so I refitted it using locktite on both the centre nuts, torquing them both down to 75lb/ft this time. The stator actually cleaned up ok. Some of the resin coating on the coils had been shaved off the back of it but the coils hadn’t been damaged so I refitted it. The rotor didn’t look worse for wear and also cleaned up ok. The chain was of course dry but looked functional so I oiled it up and replaced the cover using silicone sealant either side of the rubber band. Whether that was going to seal it was anyone’s guess. I’d attempt fill it with oil the next morning.
I then removed the tank and pulled the carb slides out. The left carb needle was set at three notches from the top while the other was set at two which of course would make it run richer on the left cylinder. I’d checked both before I refitted them but I obviously hadn’t spotted the difference. It’s easy to do and I was probably tired and in a rush when I did it. I set it back to two notches from the top because that seemed to produce a good colour on the right plug and that cylinder was firing no problem. I then checked the synchronicity of the two carbs again and refitted the tank. Bloody hell, two silly mistakes and the bike was virtually crippled!
The next morning I put some oil in the primary chaincase and it stayed in there this time. Fingers crossed! I also found a bit of old foam, tucked it into a waterproof black bag and strapped it to the seat to give it a bit more padding. Then I started the bike up and headed off to the Sprint again. This time it performed faultlessly (for about twenty miles) then just after Canterbury it started chugging and went on to one cylinder, just like it had previously. Jeez! I pulled into a garage & quickly removed the plugs. Both were sooty, one more than the other. I took the fuel tank off, pulled out the carb slides and set both needles to the top notch, i.e. the weakest setting. I also changed the right plug. To my relief the bike started easily and was now running on both cylinders. Setting off again it misfired a few times as the plugs cleaned themselves off, then for the next ten miles or so it really had a jump in it’s stride. I was soon overtaking everything in sight and leaning it way over into bends like Valentino Rossi.
I arrived at the sprint with a big fat grin on my face and went straight to the Marshalls to book the bike in. They just looked at me like I was on drugs and told me in no uncertain terms that I couldn’t enter it because I wasn’t even there yesterday for the test runs! I tried to argue my case, how I’d had trouble getting here, carb problems, etc. etc. but they weren’t having it. I remembered ol’ Burt Monroe having the exact same problem at Bonneville so I didn’t let up. I got into a heated exchange with one of the Marshalls which ended up with me losing my cool and calling him a prick. In response he told me to f*** off! No coming back from that I guess. So that was that. I was well and truly stumped.
After all that hassle of getting it all done, breaking down twice and finally getting there I couldn’t race, but you know what, I didn’t actually care. The ol’ Atlas had come through for me at last. It was now a pleasure to ride. The clutch had stayed put, the engine was superb, the handling top notch and it started first kick.
I had a great day at the Heritage Sprint. It was a really cool place. I even sought out and apologised to the Marshal who I’d sworn at but he’d been so preoccupied at the time he hardly remembered me. I also met up with the Kent branch of the Norton Owners Club where I was given a nice cuppa and a piece of home made cake courtesy of the lovely Varta.
During the 36 mile ride home the engine never missed a beat, it was also smoother and faster than it had ever been and to make it even more interesting I had a great race for several miles with a guy on a BSA Gold Flash who was also on his way back from the Sprint. To cap it all off, as I pulled up into my driveway I looked up to see two Spitfires heading back to Headcorn Aerodrome as they do quite often in the summer months. Roaring overhead the lead plane performed a faultless victory roll. What a day!
I left the bike in the garage for a couple of days while I recuperated. I was aching all over from the late nights, early mornings and then test rides culminating in a day at the Sprint then the ride/race home on the ol’ boneshaker. I hadn’t been able to run her in the Sprint but I was still a happy bunny. I felt I’d achieved what I set out to do (well, almost) and there were always other sprints and races to attend anyway.
When I next checked the bike over the first thing I noticed was that the oil tank was empty. My god, all that oil I’d poured in there two days ago was either languishing in the sump or worse still it had been burnt away! I hoped it wasn’t the latter. I poured in another litre to make sure the mesh outlet was covered and kicked her over. She started first kick and this time without the throttle yanked open. Impressive! Something was going right at least. Oil soon started flowing back into the tank so I knew the pump was working okay.
I then attended to the speedo which hadn’t worked since day one, even with the new speedo gearbox and cable I’d fitted, so I phoned up Phil Woods who I’d been told is the Norton instrument specialist. He advised me to first check that the speedo gearbox was the right, that it had the correct spacer inside one and also that the cable was locating properly. He also said to check the speedo itself by running it in reverse and if it worked it was ok. Well, I did all that and indeed the speedo was ok but the top hat spacer on the gearbox was non existent! I also discovered that the brand new cable I’d only just bought had snapped at the top and the tacho cable had broken too. It then became obvious why both cables had broken. It was because the DIY instrument bracket positioned the tacho and speedo too far upright requiring them to bend too much at the top. I’d need to bend that bracket down about 30 degrees to allow both the cables to route into the rear of both instruments without bending so much.
The wet sumping would definitely need a ball/spring oil valve on the outlet pipe poste-haste.
Another call to Roger at RGM resulted in him dispatching new parts that would hopefully sort everything out. The ol’ credit card was taking a bashing with all this malarkey and I probably wasn’t finished yet but for now though I just wanted to prevent the overnight oil loss as a priority and also get the speedo working. This bike had some real go in her and I’d need to watch my speed and hopefully have some more fun riding it while we still had some decent weather. A detailed look inside the timing case was on the cards but that could wait until the winter.
When the parts from RGM arrived the wet sump ball/spring valve went on which did the trick of preventing the oil in the tank from disappearing into the engine overnight. I’d already managed to bend the instrument bracket downwards so the tacho cable fitted nicely and it now worked again. It didn’t flicker either. I then removed the speedo gearbox, fitted the top hat spacer and put it all back together and the speedo now worked too!
So that was it, all done and dusted. It hadn’t cost me a fortune to do it either; the most expensive purchase being the tyres! Not sure how long I spent actually working on it but it was only evenings and part of the weekends over an eight week period. I wouldn’t say any of it was really difficult and a lot of it was researching for the required parts and working out what goes where on a bike that was new to me. Anyway, time flies when you’re enjoying yourself and I have to admit this had so far been an interesting and fun project. I don’t think you could call it a ‘sympathetic restoration,’ it was a bit more than that, and considering the dire state it was in when I started it now looked the business, started first kick and ran pretty good. I hadn’t really touched the internals of the engine or gearbox either!
I guess that ol’ saying, ‘If it ain’t broke, don’t fix it’ rings true sometimes.
...............................
I really got to enjoy riding this bike over the next few weeks but as you’d expect there were still some things that still required attention.
The ancient fork seals didn’t last. Then again, I suppose I really was expecting a lot considering how long they’d been in there. They soon started to leak and oil was spraying onto the front fins of the engine and also my legs when riding! So it was off with the forks and a thorough check over of the bushes, seals etc. The stanchions were rusted into the yokes but they came out eventually after a cleanup with the circular wire wheel. The springs were different lengths so I chucked them and got some new ones plus a set of new oil seals and the bronze top bushes. The steering bearings were tapered and looked in good nick with plenty of grease still on them. After a thorough clean the forks went back together no problem and this time they didn’t leak.
For good measure, the rusty ol’ 57 year old Girling rear shocks I’d tarted up were replaced with a pair of new shrouded Hagons, and if I thought the handling on this bike was pretty good before, with the suspension fully sorted it was now superlative.
The clutch and brake levers were the old type chrome ones. I tried my best to live with them but I just couldn’t so I replaced both with a new set of classic polished alloy dog leg leg levers. Made a big difference!
The plug sooting kept rearing its ugly head but I discovered this was due to several things; primarily worn slide needles and needle jets. Once they were replaced with new ones and the float levels adjusted correctly it started to run a lot better. Fine tuning the carbs using a Gunson Colortune and then synchronising them with new vacuum gauges got the mixtures spot on and finally released the full potential of the engine with no fouled plugs anymore.
The excessive vibes coming up through the seat was due to the securing bolts on the underside not seating in their respective holes on the frame. Those two bolts weren’t actually needed because the Dzus bolt held the seat in place really well so I cut them off and glued some neoprene rubber pads onto the flat plates where the bolts would normally seat. When the Dzus bolt was secured they compressed and formed a cushion instead of the jackhammer effect those bolts were producing. Just for good measure, I bought a gel padded seat cushion and strapped it onto the top of the seat. Those two mods, along with the softie grips made a big difference!
The bike didn’t have a tool box so I strapped a small magnetic Givi tank bag onto the fuel tank so I had somewhere I could quickly and easily access tools, fuses and spare plugs when and if they were needed.
A couple of the indicator bulbs had blown/broken, probably due to vibration, so I made up four Flexi rubber stalks using some rubber tube I had and bolted them all back on. Seems to have done the trick.
The primary chain case still had a very minor leak but I decided I’d leave it as it was for now. The black silicone I’d sealed it with had almost done the trick and it only required a few squirts of oil to top it up every other week or so. With the increased power the clutch started slipping a bit, but only when it was cold. Once it had warmed up the slipping went away so I released a little bit of oil from the chain case so the chain was just skimming the top of it and left it at that; seemed to help. During the winter I would try the idea that Anthony Westwood came up with, i.e. a 16” inner tube adhered to the inner case lip and then pump it up slightly once the outer case had been fitted, but for now it was good enough.
The half worn brake shoes (now three quarters worn) had to be renewed so I hoiked them both out and sent them off to Villiers for a re-shod. I’ve used Villiers before and they do a good job. Adjusting the TLS John Tickle front brake was a bit tricky but once bedded in the brakes were superb.
The bike was now a real rider and was proving to be quite reliable. It pulled like a train, started first kick most of the time and was virtually free of oil leaks (well, it’s never going to be 100% leak free is it) and it didn’t shake my eyeballs out of their sockets when I let her rip either. Everything worked and it was an absolute blast to ride, handled exceptionally well and had more than adequate stopping power. Interestingly, the cheapo bar end mirrors that I bought on Ebay for about eight quid worked a treat and remain clear and usable virtually all the time, except at very high revs, and I rarely look in them when I’m gunning it anyway.
The only non original parts I fitted were the Thorspark electronic ignition, reverse cone mega exhaust, twin air filters, indicators, dip-main lights/horn/flasher switch, Shak-de-la handlebar grips, alloy levers and the tyres, oh, and the tank cover. I guess the bar end mirrors don’t count.
I completely messed up the paintwork while getting the bike up and running but I'll get round to doing a proper job on it during the winter.
I opted to leave that 19 tooth sidecar engine sprocket on, so no, I wouldn’t want to go long distance touring on it nor thrash the nuts of it in search of the magical ‘ton’ like rockers of old were desperate to do. 80mph max on a naked bike with high rise bars is enough for me anyway. Due to the high gearing you can leave it in fourth most of the time, only changing down for a fast takeover and it’s good for jaunts of up to 100 miles or so, or to go out hunting boy racers on their Super-Motards on a Sunday afternoon, or if I just want to feel like an eighteen year old hooligan again. Nothing else quite gives that feeling of involvement, adrenaline and grin factor that a torquey British parallel twin tucked into a featherbed frame and a reverse cone mega blasting out behind you does.
To add a final touch of nostalgia I mix a teaspoon of Castrol R into the fuel tank on fill ups. I just love that smell!
I named the bike El.
Long may it wear! Nice to…
Long may it wear! Nice to see another Atlas with a John Tickle brake. I had mine for thirty years now and have done many long distance journeys with it. Fabulous bikes when set-up properly. Just make sure you use 2-stroke castor-based oil, as the modern four stroke stuff goos’ the carbs up…
- Log in to post comments
An article for Road Holder?
Maybe submit the post as an artical for the Road Holder magazine.
- Log in to post comments
Engine sprocket
I think you will want to replace the 19T engine sprocket with a 21T one pretty soon. The Atlas is a splendid mile-eating machine, still able to hold its own at Motorway speeds as well as potter around country lanes. Have fun!
- Log in to post comments
Maybe I'll change the…
Maybe I'll change the sprocket during the winter, amongst other things. For now though I'm just having a bit of fun with it while the weather is still good. Getting it running right has been my priority.
- Log in to post comments
There is a question in my…
There is a question in my mind as to the compression ratio , ignition timing and lack of plug gap , I once had a similar situation with a Healey Frogeye . A very lively motor that would run well and fast but then would act up and plug gaps disappear. When investigated I found the comp was very high and at certain revs the pistons could hit the plugs!! Commando pistons are normally flat top , so yours are EXTRA high comp ,probably 10 to one. Don’t fit extended nose plugs, maybe fit some new plug washers and be prepared to back the timing off to say 28 degrees ?.
- Log in to post comments
In a similar situation my…
In a similar situation my 250 Ducati tried to nibble small holes in the piston ! , mind you it was showing it’s heels to the 99 and Atlas and revving to 10 k at the time . 104 mph !
- Log in to post comments


Looks a bit better now.