
Hi Everybody, Seasons Greetings!
Getting on well with restoring my 62 Navigator De luxe but cannot for the life of me figure out how to attach the lifting handle. I cannot locate two holes/bolt/stud ends which match the holes in the lifting handle. Can anyone help please?
Cheers, John B
Lifting handle location
- Log in to post comments
Lifting handles
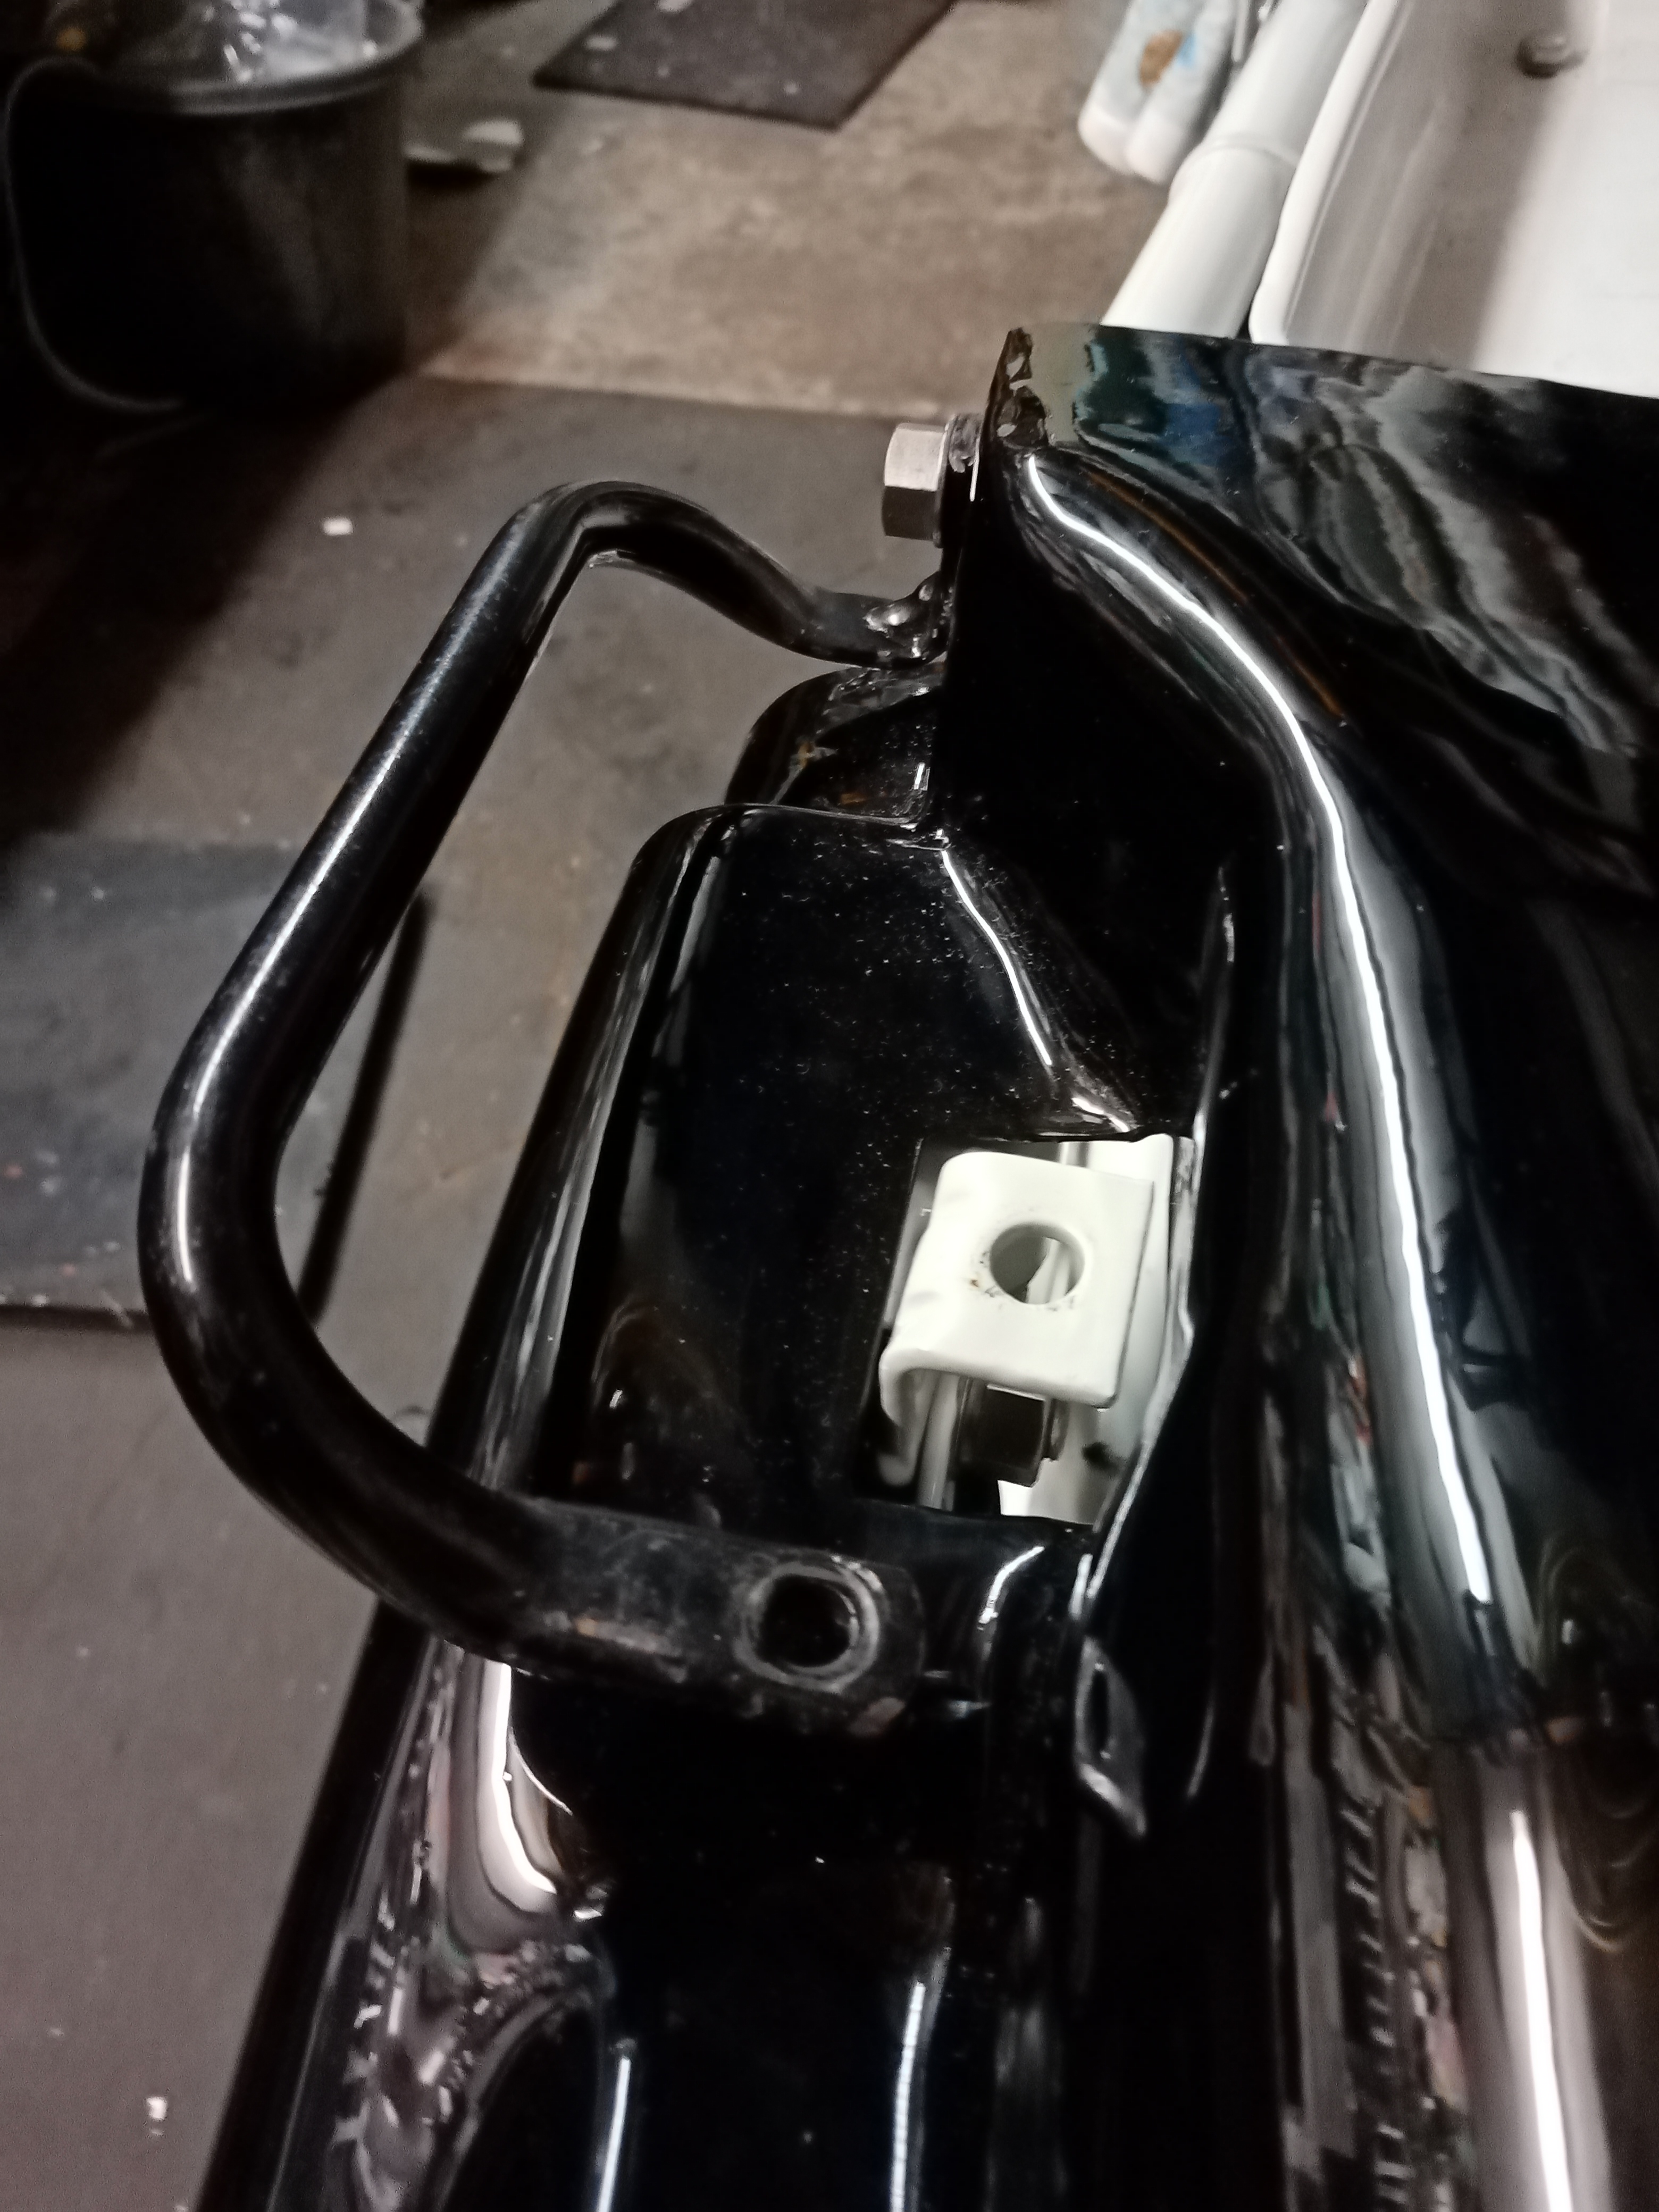
Hi Simon, thanks for the pic, I have seen other pics showing the position but not of the actual fixing points. I can hold the handle in the shown position but can only connect with one bolt/stud not two. (see pics). I don't really want to drill my newly refurbished styling panels to provide a second fixing point, but it looks like I may have to. Was this item an aftermarket option I wonder? I did wonder whether the handle was connected to the seat in some way, but I don't have an original seat to check.
Cheers, John
- Log in to post comments
It was a std fitting on all…
It was a std fitting on all the DL bikes. Same on the 88/99/650 .
- Log in to post comments
lifting handle
Ok Robert, thanks. Looks like I need to drill a hole in the styling panel after all.
Cheers, John
- Log in to post comments
Don't drill the panel . …
Don't drill the panel . Somethings wrong. I will do some research.
- Log in to post comments
Thanks Dan...
Thanks Dan... The details are in your RoadHolder
I do wish people would write to me. Its so much easier - & a chance of getting the right answer.
I do have a lot of the answers - but here on the forum, I can't keep up. I also find the forum clunky at best, and bl**dy horrid if I want to add pictures. Much prefer email....
John B - while I put some answers together for you - your first picture looks fine - thats the correct handle location.
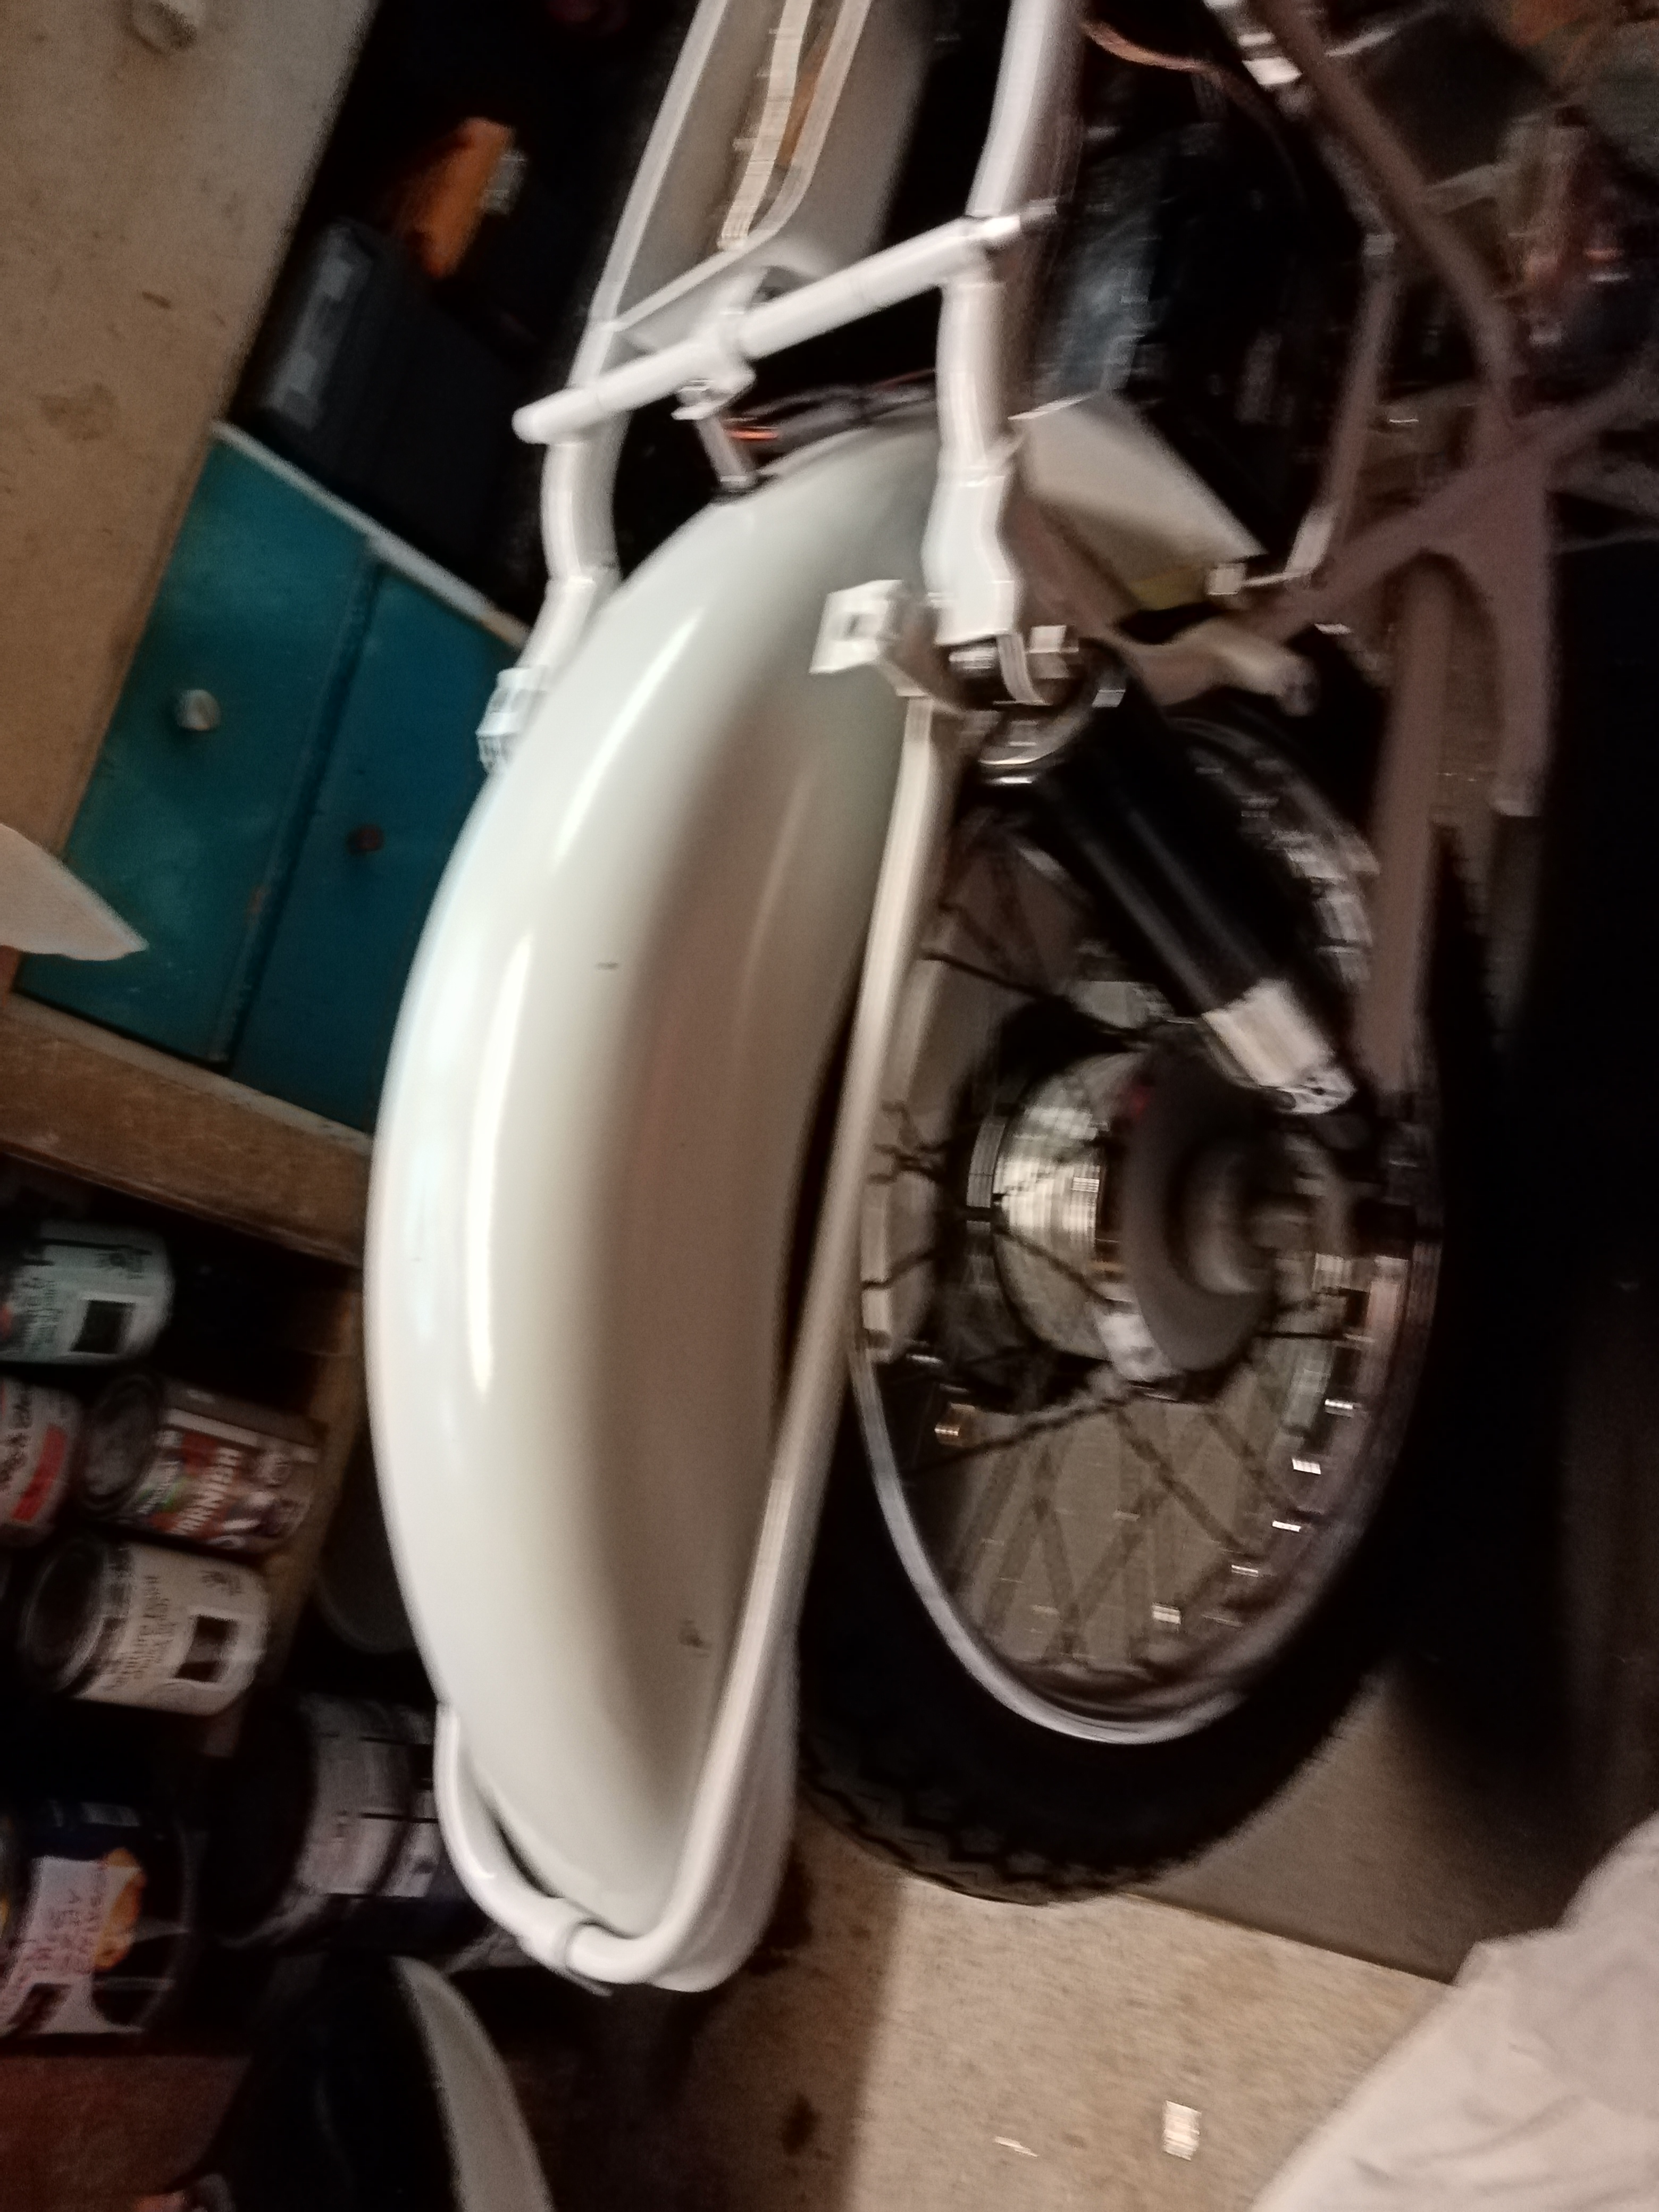
However - your picture 2 is all wrong. Basically there is no full back mudguard fitted originally. What you did have was a 1/4 circle's worth of mudguard, from the swing arm up to the back of the tool box (where you created a mounting for your mudguard). You have the (correct?) loop and 'P' clip, however. They form the support for the rear of the 'tail' part of the full encosure.
Under the tail lamp fitting on the tail portion, and hidden by the number plate, is a recessed hole. That is where the frame loop is connected by the 'P' clip.
The whole thing was a poor design, as all the mud flung up by the back wheel adhered under the tail portion, and especially over the tail light - and like all car wings (esp. around the headlight ) of the period rotted out for a pastime. Nowadays, cars have plastic valances to keep mud away. What the Navi (& Jubilee) had was a hardboard valance under the seat to prevent mud coming forwards. There was another splash guard under the swing arm & behind the gearbox, to prevent mud being flung up onto the engine. Very few of these have survived, but I do have an example of each if anyone is interested.
More to follow.....
- Log in to post comments
Lifting Handles
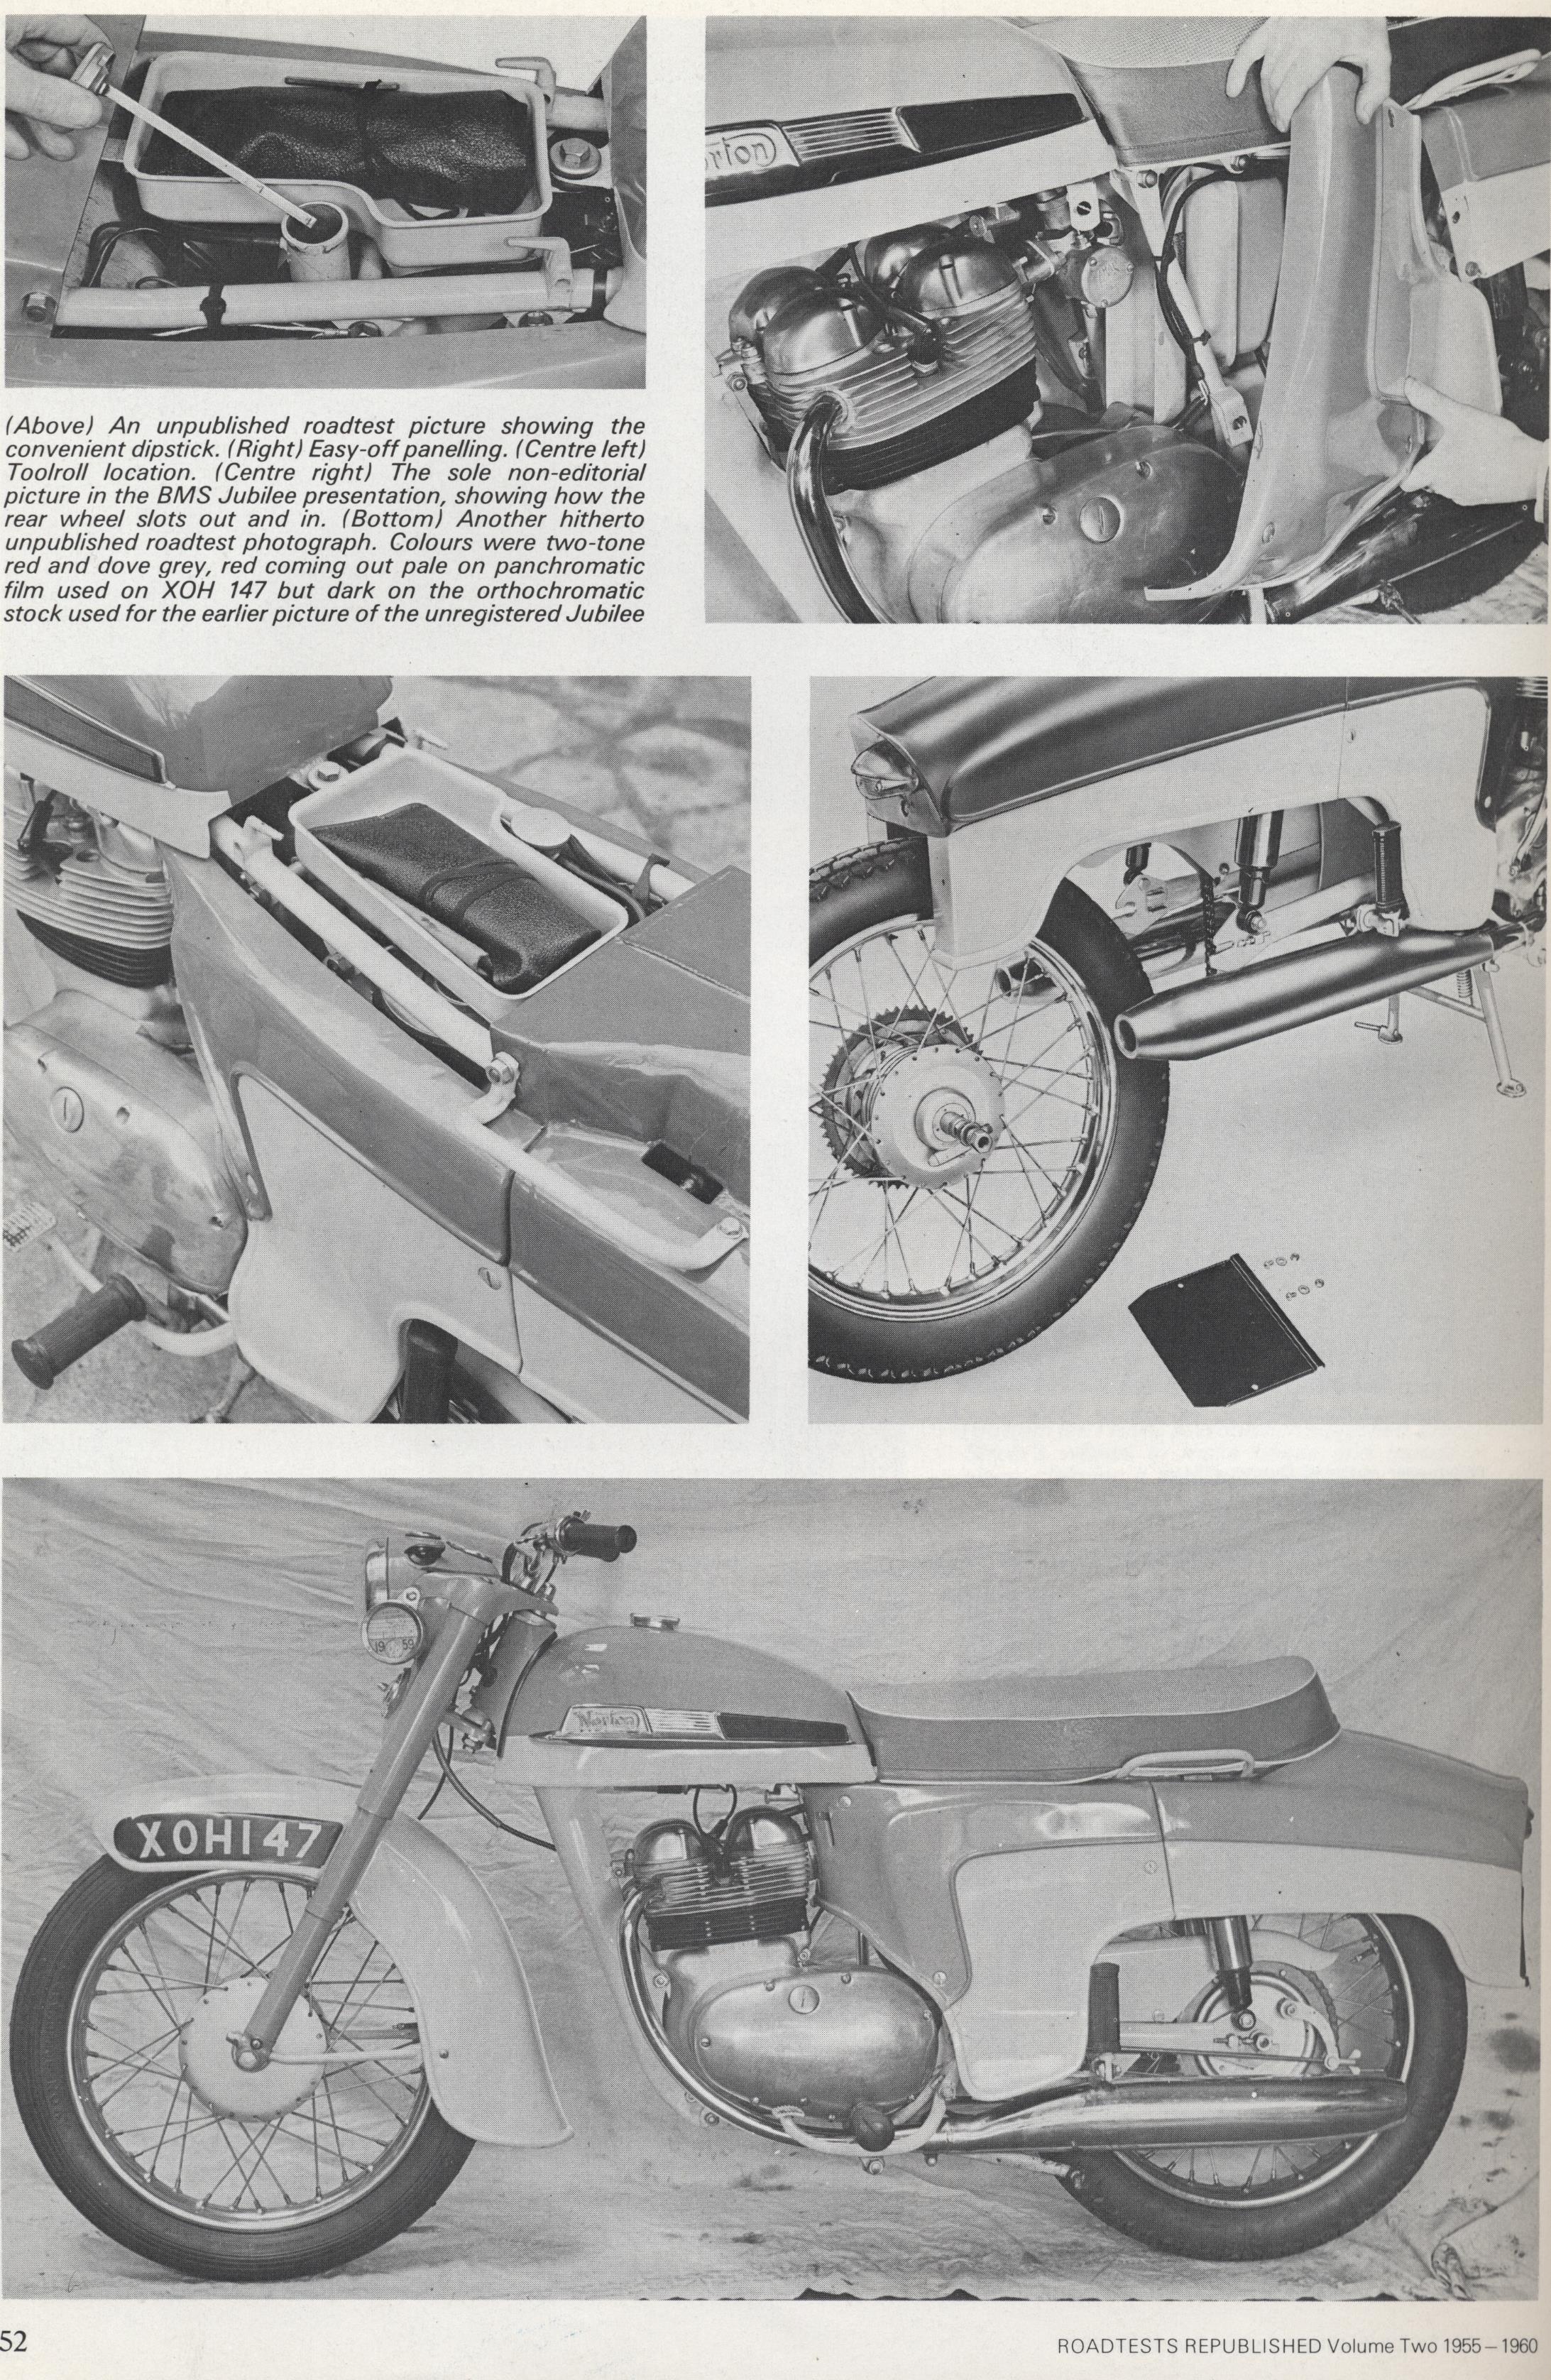
Heres a few pictures from "RoadTests Republished 1955-60".
You can see the lifting handle is positioned as you have it. Sadly, the r/hand bolt was fitted direct to the panel, with no strengthening underneath - so a lot of them tore out.
The left side is mounted to the main frame stud that passes right through the frame - its a strong mounting point - but the handle itself can bend at that point - esp if the other end lets go.
You can also see in one of the pictures, that under the 1959-only Wipac tail light is the fastener for the 'P' clip - that holds the frame loop.
- Log in to post comments
Looking at your picture 2,…
Looking at your picture 2, with a full mudguard ,if you can make it work with the rear enclosure ,it has to be better than the std detail.
- Log in to post comments

Delux short mud gard
Happy new year to you all, If you fit a long inner mud guard you will not be able to withdraw the rear wheel through the tail of the rear paneling when you remove the number plate, this is the reason for the short guard. You may be able to fit a slightly longer one but be careful of clearances. I would suggest a coat of car underseal might pay dividends.
all the best peter F.
- Log in to post comments
Lifting handle
Thanks everyone for your comments. Sorry it's taken so long to get round to checking out the thread but I've been refitting our kitchen for these last few weeks.
Andy, when I saw the original short mudguard I realised that there would be lots of mud dust water etc being sprayed about and so I decided to try and fit a deep full mudguard. I found a GRP unpainted one on RGM Norton website and cut it to shape as you can see on the jpg. I do have the standard short mudguard and all the original fittings for any future owner. I still have to fettle it around the number plate fixing and tail light but with the shape it is now, there is no problem getting the wheel in and out. I had also decided that a good coat of stonechip might help preserve my newly and expensively-painted tinwear. from the pics that you posted it is obvious that I need to drill a hole in the fairing to mount the lifting handle; I'll have to sort some reinforcing. Thanks for all your effort.
Robert, re pic2, full mudguard, that's what I thought!
So now....on with the show!
Cheers,
John Braithwaite
- Log in to post comments


This should fit between the seat and the top of the de-luxe panel. Therefore there should be holes here for bolts. Attached is a picture from the Roy Bacon Twins resto book showing the location. Hopefully it helps a little.