
Dear All,
I have almost finished the re-wire part of the restoration of my 99-engined 650SS-framed mongrel and have a question about the rear brake light switch.
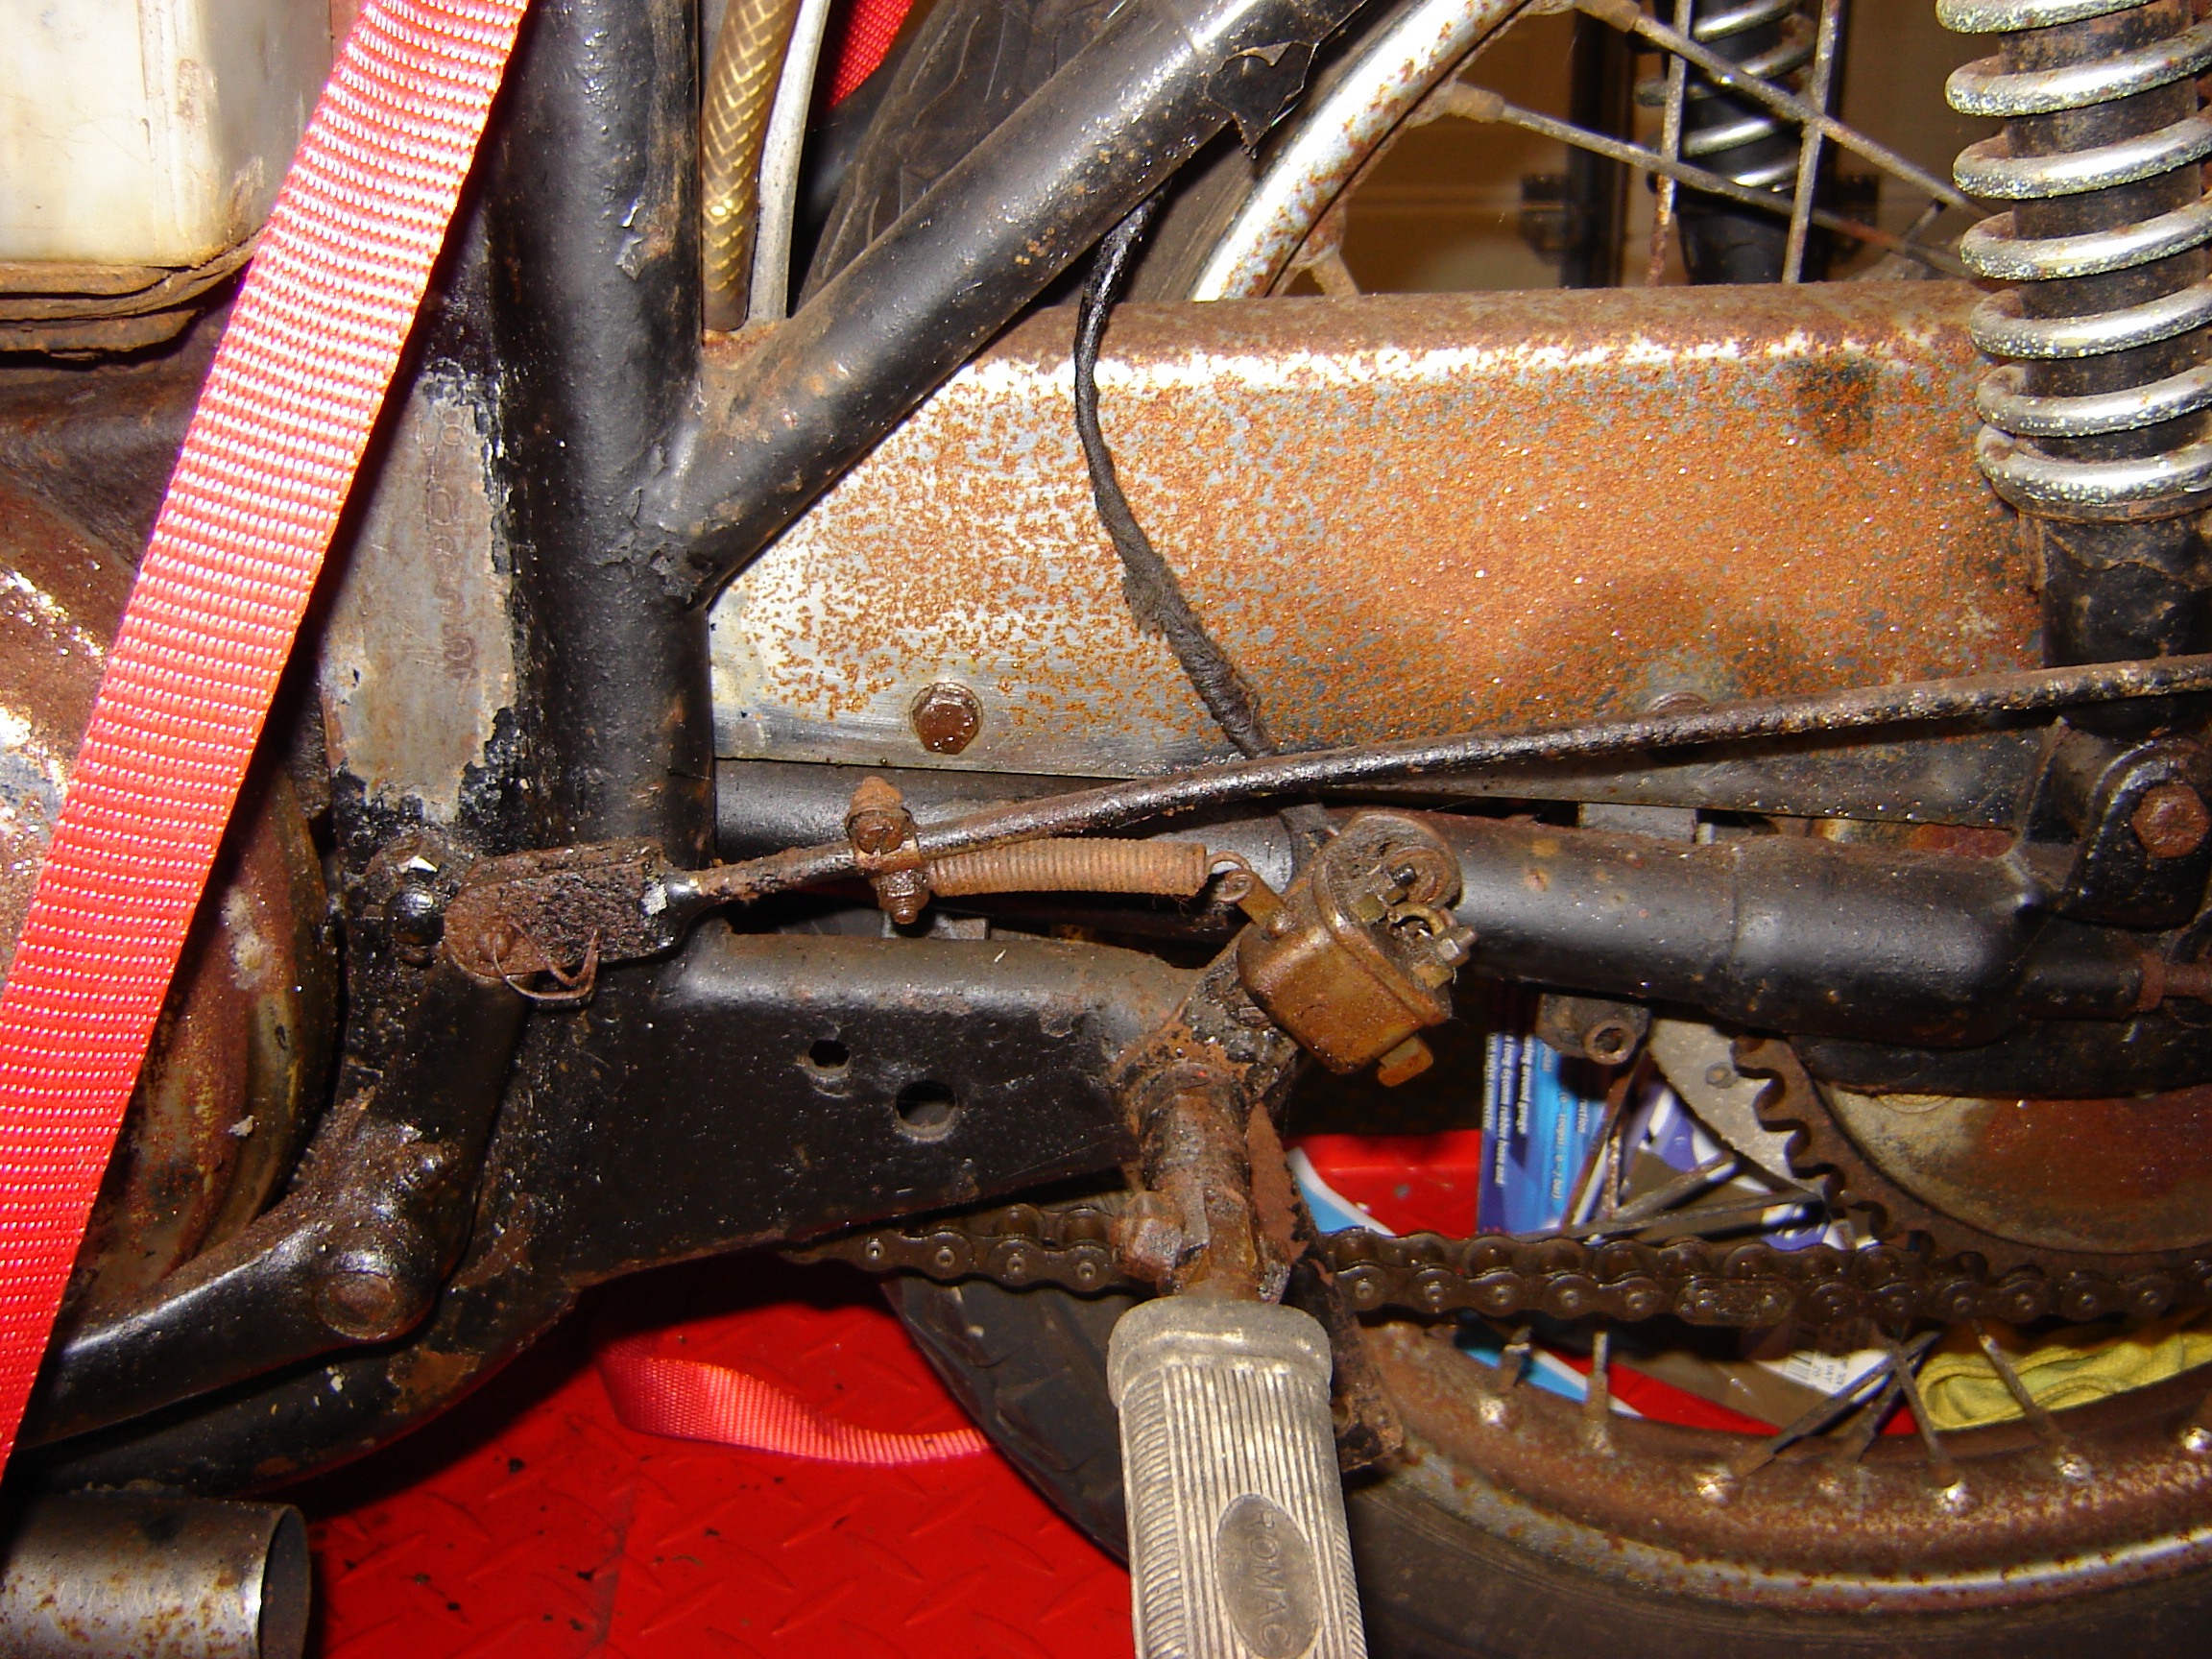
The pictures hopefully appearing below show the state of the switch before and after cleaning. Amazingly the switch still works well. However with the terminals facing upward, some protection from the elements/mud thrown by rear wheel would be useful.
I have failed to find an available cover/boot from the usual suspects. Are there any suitable covers about or do I have to fashion something from old inner tube and cable ties? I am pretty sure the switch should be that way up as there is a drain hole in the current bottom end. Please ignore the incorrect wire colour as it was what I had left of a suitable length.
Many thanks in anticipation.
Alan
the brake rod and switch are…
- Log in to post comments
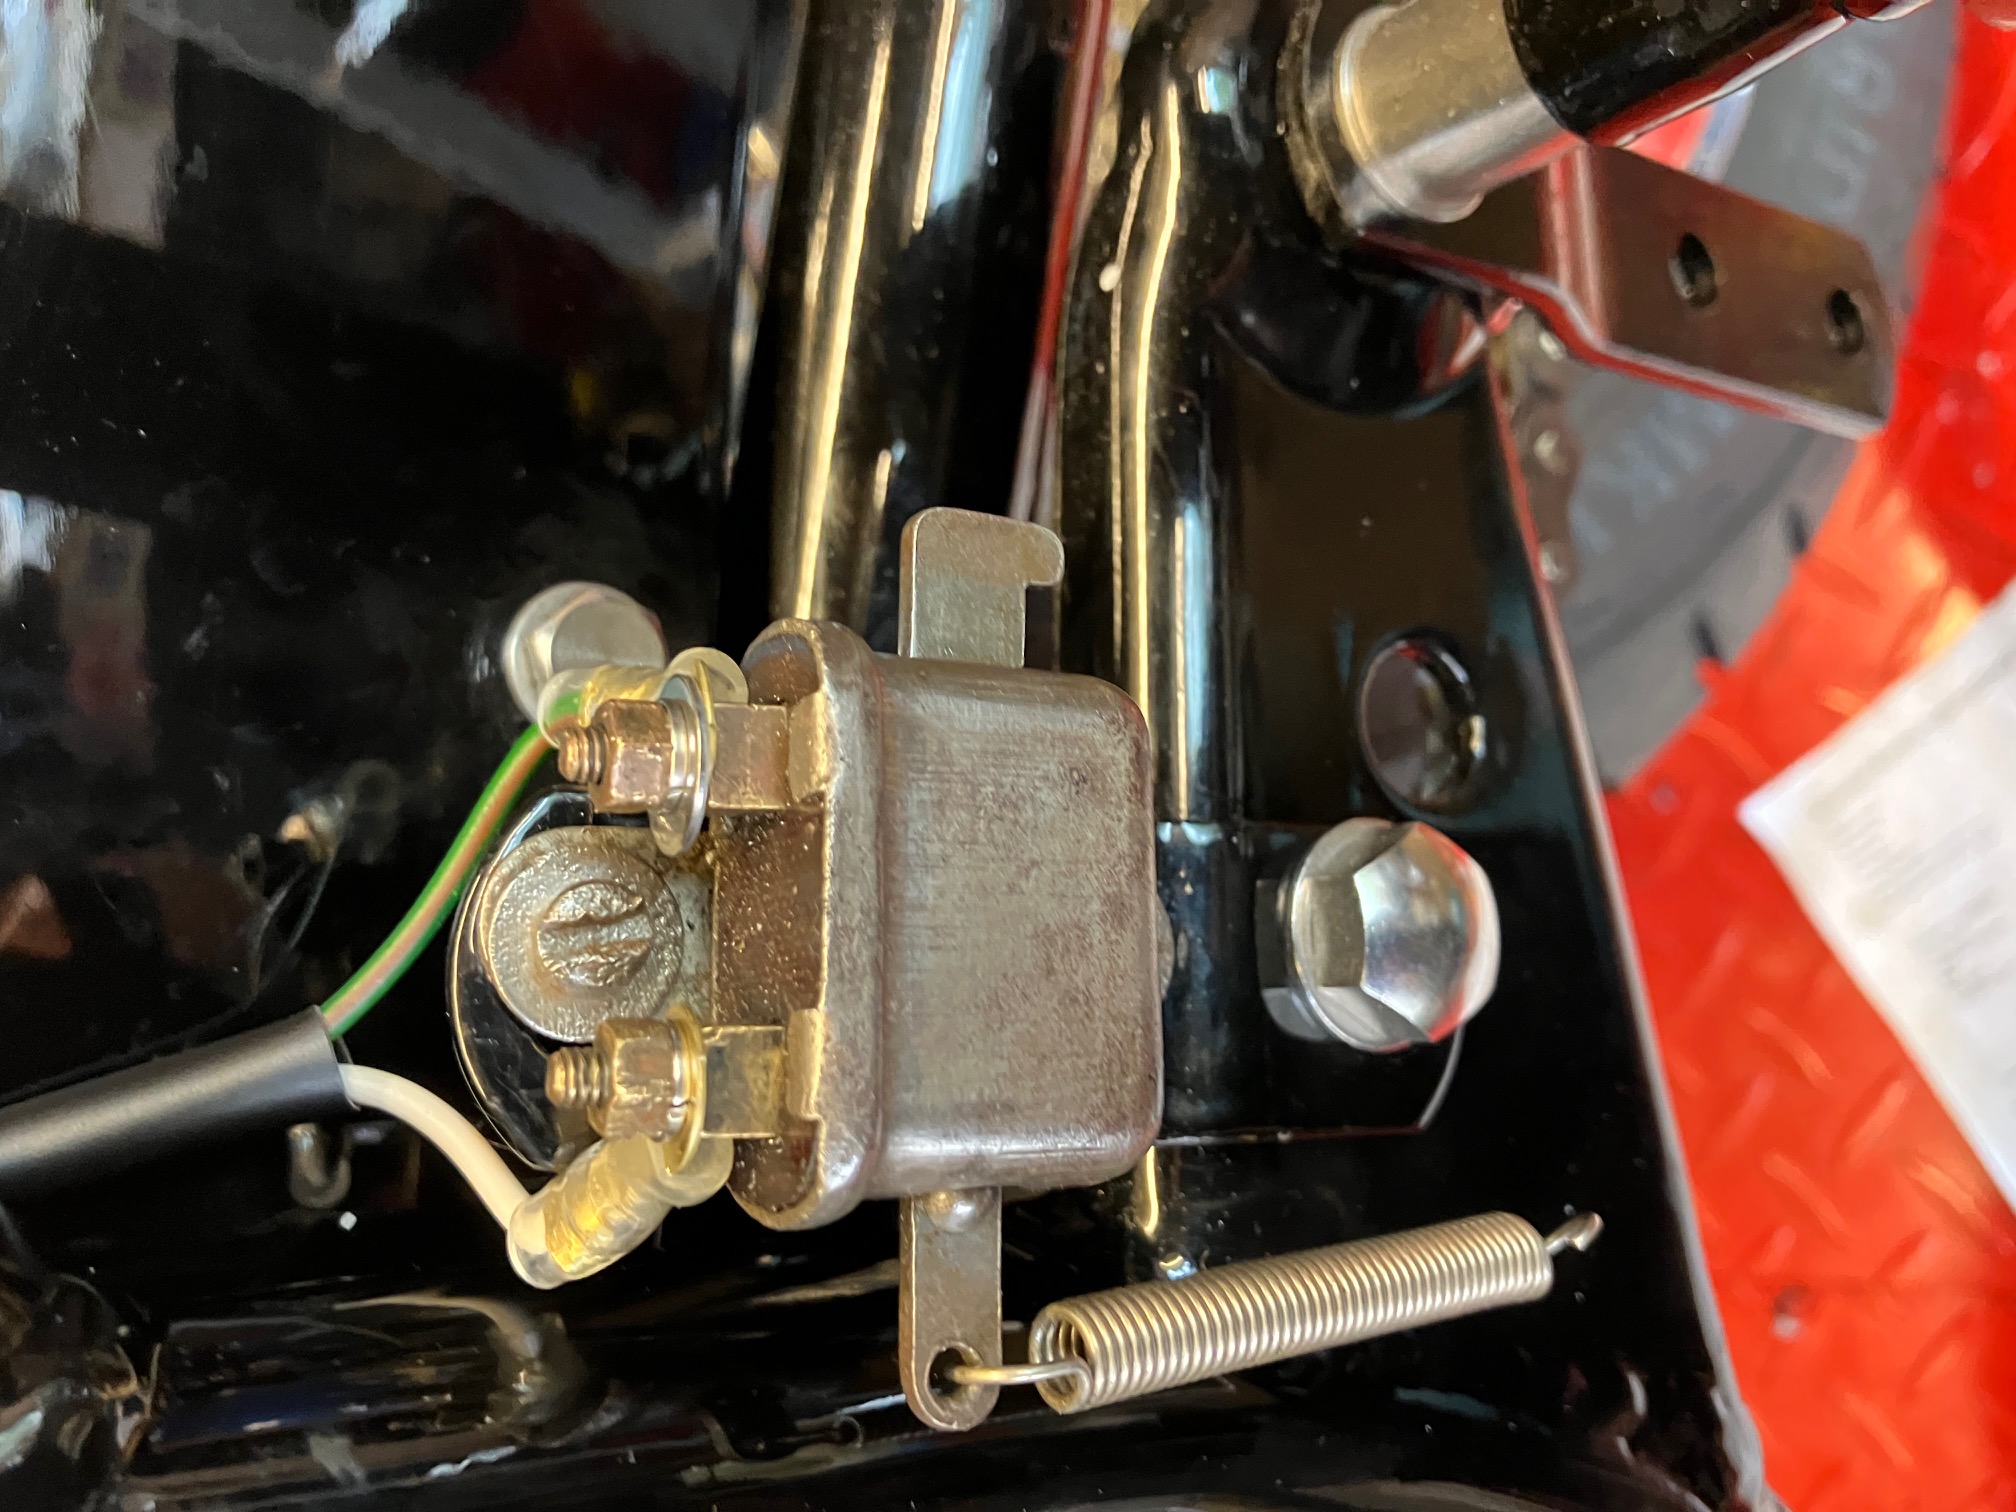
Here is a picture of what it…
Here is a picture of what it should look like on someone else's bike. But I haven't worked out which switch this is. It is on when relaxed by moving the tab on the brake rod.
I think it might be what Paul Goff sells as Lucas 22B.
Part SW11031L. Probably.
- Log in to post comments
CABLE COLOUR
The cable colour from the switch to the stop light is BRN, as supplied in my kit! No wonder you need extra cables!
- Log in to post comments
For The Record
Returning after a few days away, I was disappointed to find AO has had a pop at me (one of his customers) on the forum.
The photo in my original post contained the wrong cable colour (I did ask for that to be ignored) for circuit testing purposes only (having apparently run out of the correct cable) while the correct cable was to be ordered. As it happened, I had forgotten that I had already made up the rear brake light switch pair when I was wiring the rear light and indicators through the mudguard and I had put them "in a safe place". This has now been installed and I am now back to "correct" Photos to prove are available on request!!
For the record, the only "extra cable" ordered from Mr Osborn was additional earth cable (as I am running cable earths from all components and bulb holders rather than relying on the thickly painted frame). Having ordered extra cabling for indicators, the kit supplied by AO DID NOT include a cable to run between the flasher unit and the indicator switch. I asked for and have paid for that "extra cable"
AO has made plain his disdain for my rewiring plans in private. I don't think it reflects well taking that disdain onto the NOC Forum. My view is that it is my bike and I'll wire it to my standard rather than the traditional method if I want to. If it turns out to be a fiasco, it will be MY fiasco.
- Log in to post comments
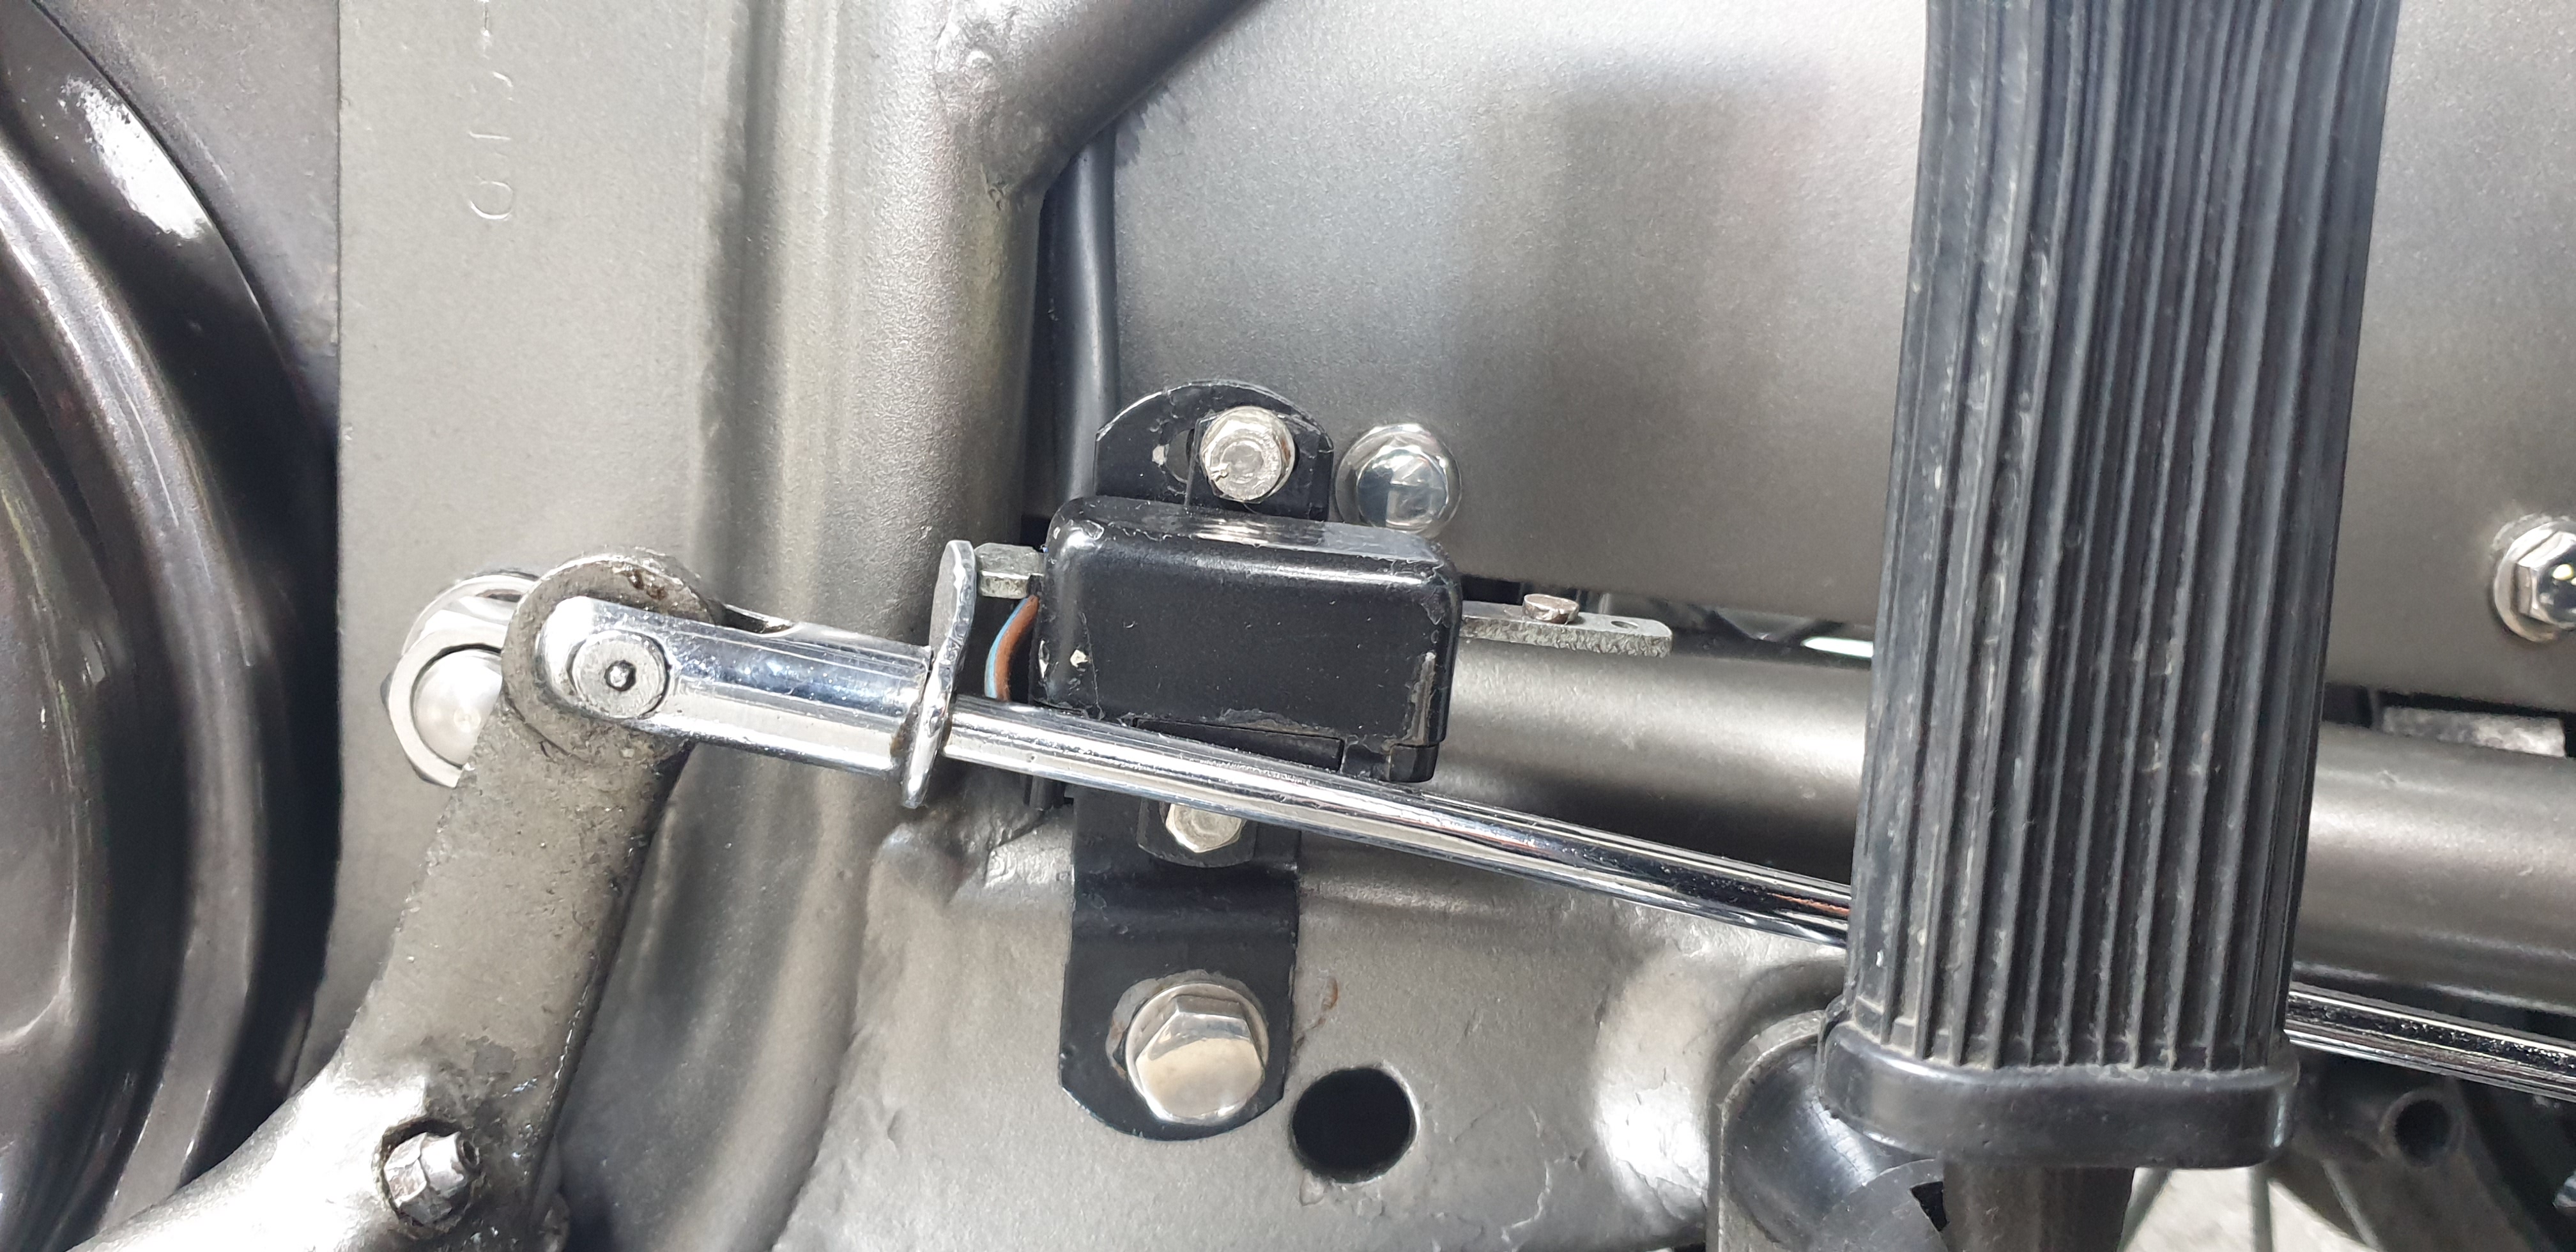
You can open the switch by…
You can open the switch by bending the little lugs back and reverse the action of the push/pull rod. The rivet has to come out and be replaced after re-assembly. That way your connections will be at the base of the switch and a little more protected. The NOC shop sells genuine Lucas for £12 and patterns for £10, btw.
My ‘63 Atlas one looks the same as David’s…
- Log in to post comments
Thanks David and Holger
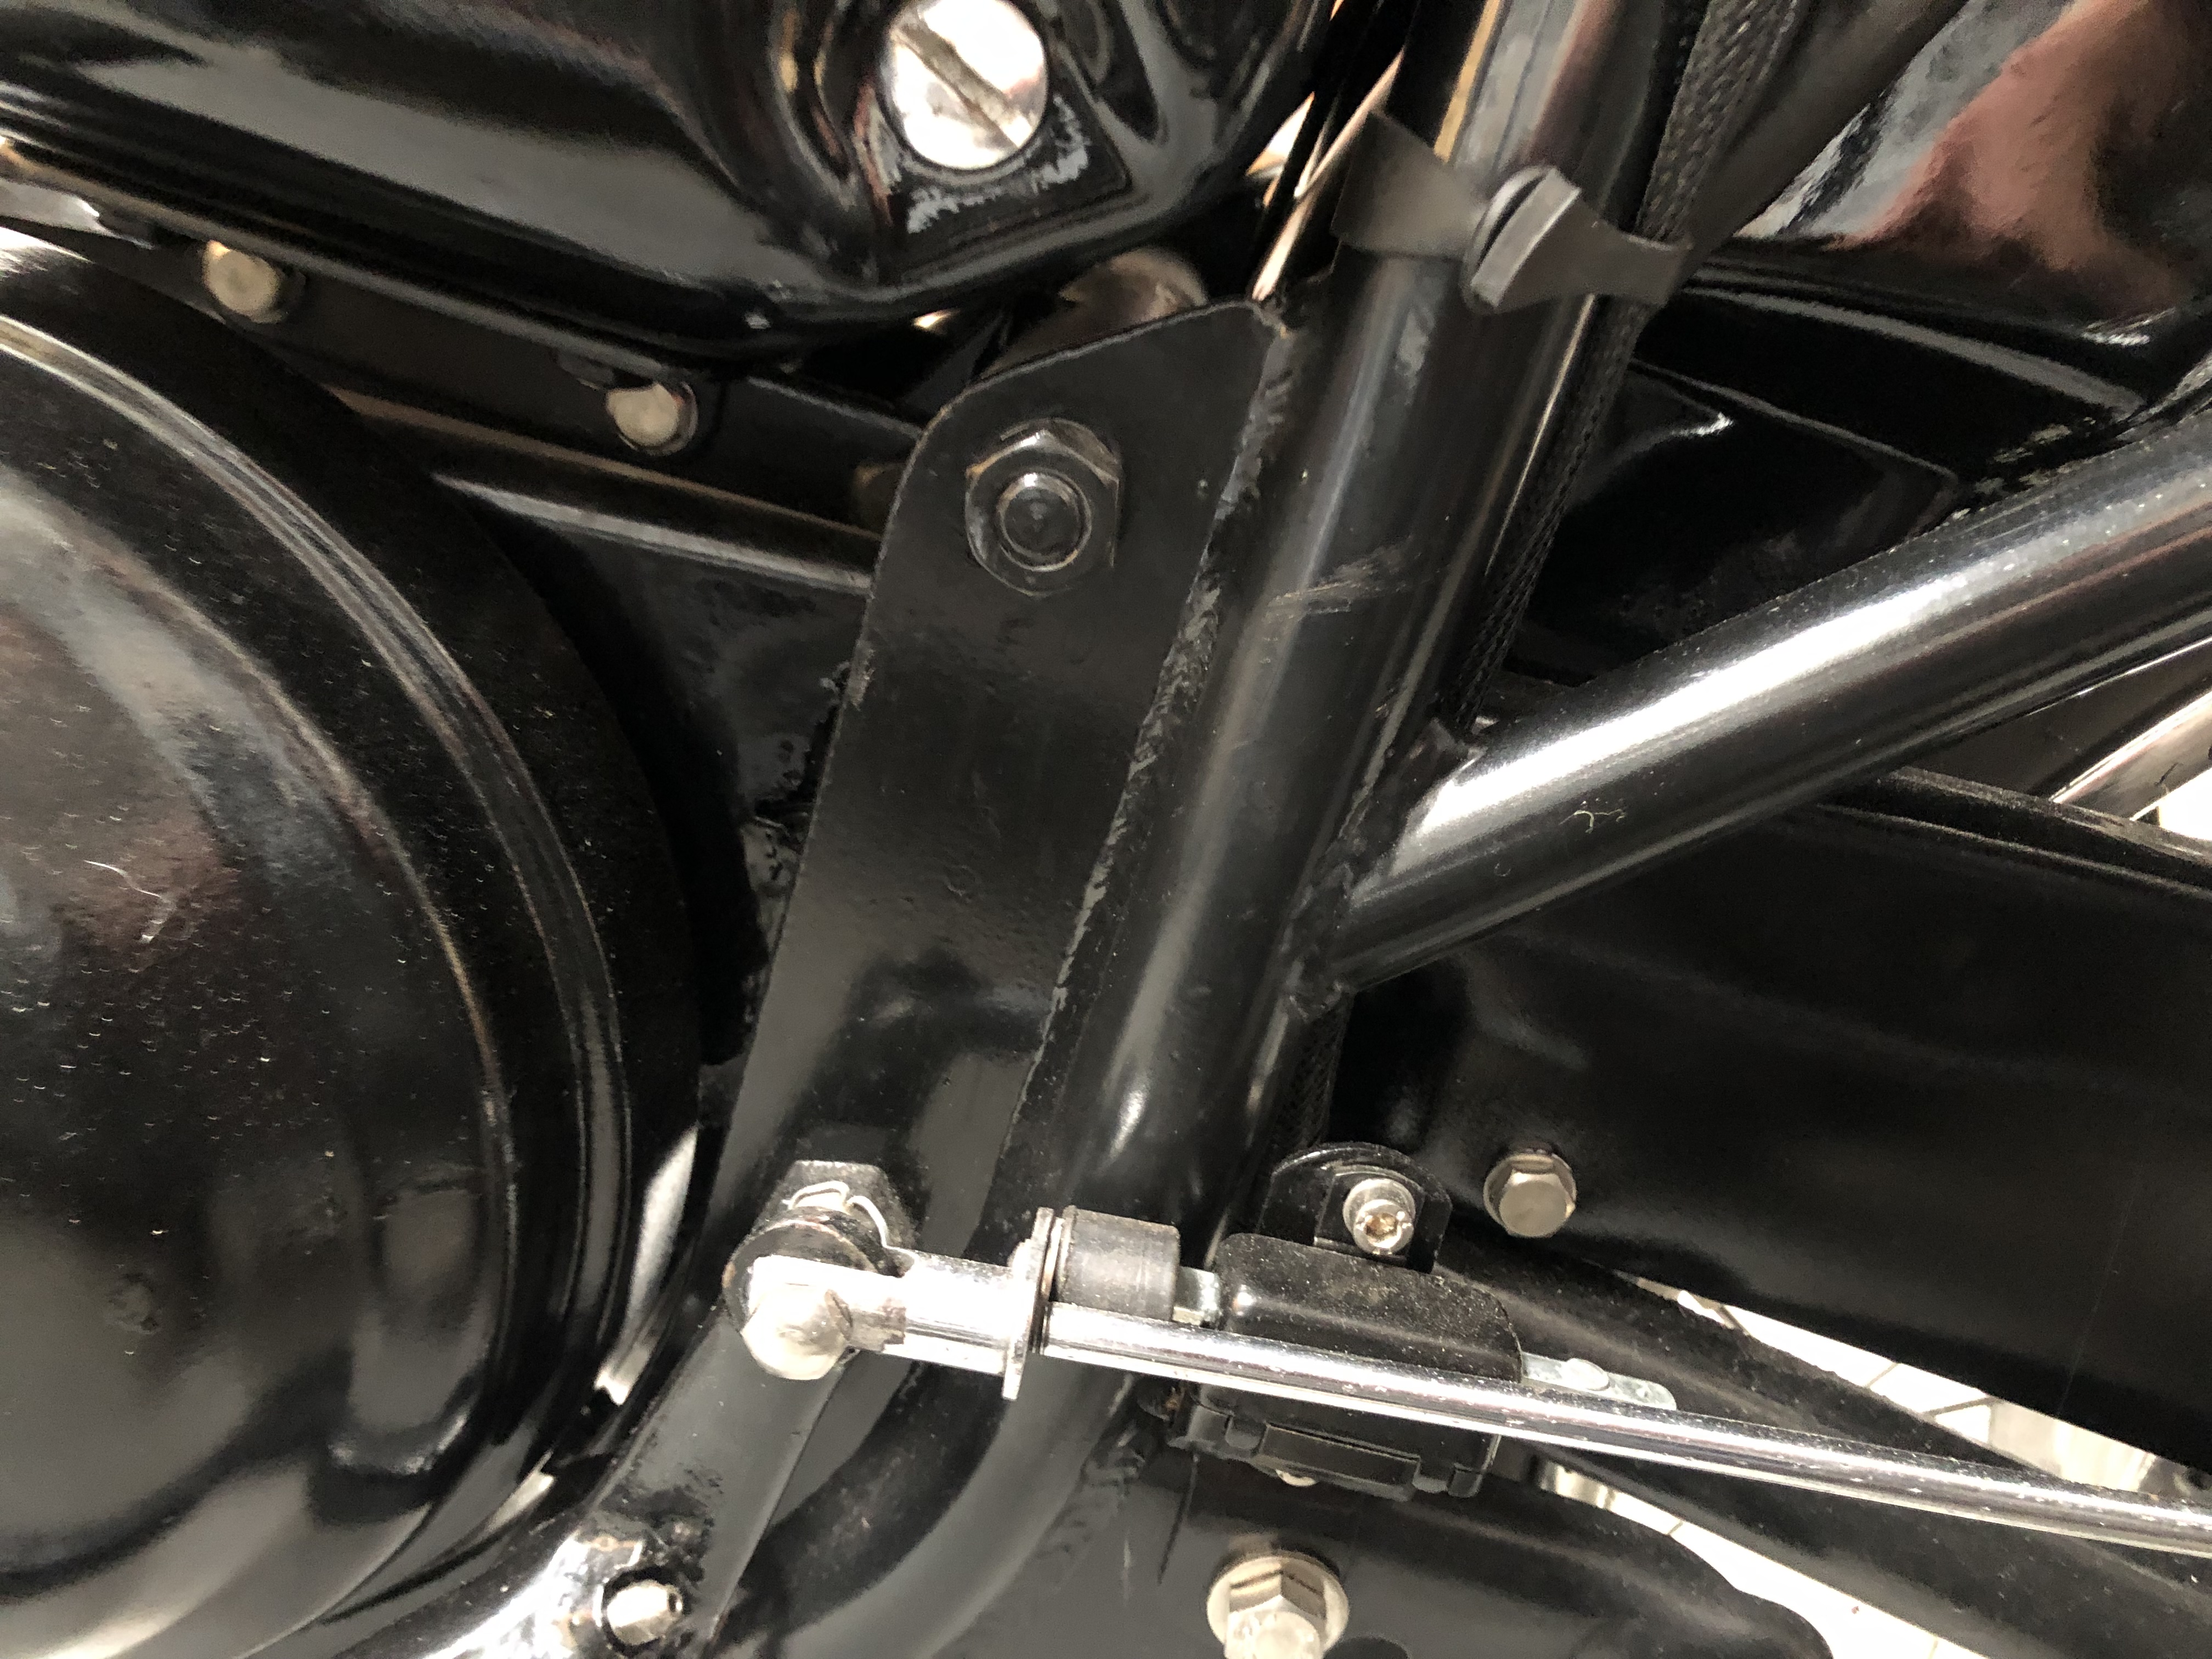
I opened up the switch and found it was more simple than I expected.
The mechanism needed a good clean/lubricate and simply by reversing the base/contact plate, I was able to convert to push off operation. A tab did break off on reassembly despite being very careful, but the switch now operates well in the peculiar way that Norton decided to adopt.
Now to set up the ignition!
BTW The rewire was a complete success, with all components working well including an indicator warning light taking up a random additional hole in the headlamp shell.
- Log in to post comments


the brake rod and switch are not normal items although working in a similar way. You will have to make a rubber sheath as suggested .