
I've been unsuccessfully attempting to eliminate the probably not quite 2 drips per second petrol leak from my carburettor. The float bowl is positioned level. The factory metal float has no leaks.
As i understand it, there is no float level setting; only the single notch in the float needle the clip positions itself around. Is my understanding correct?
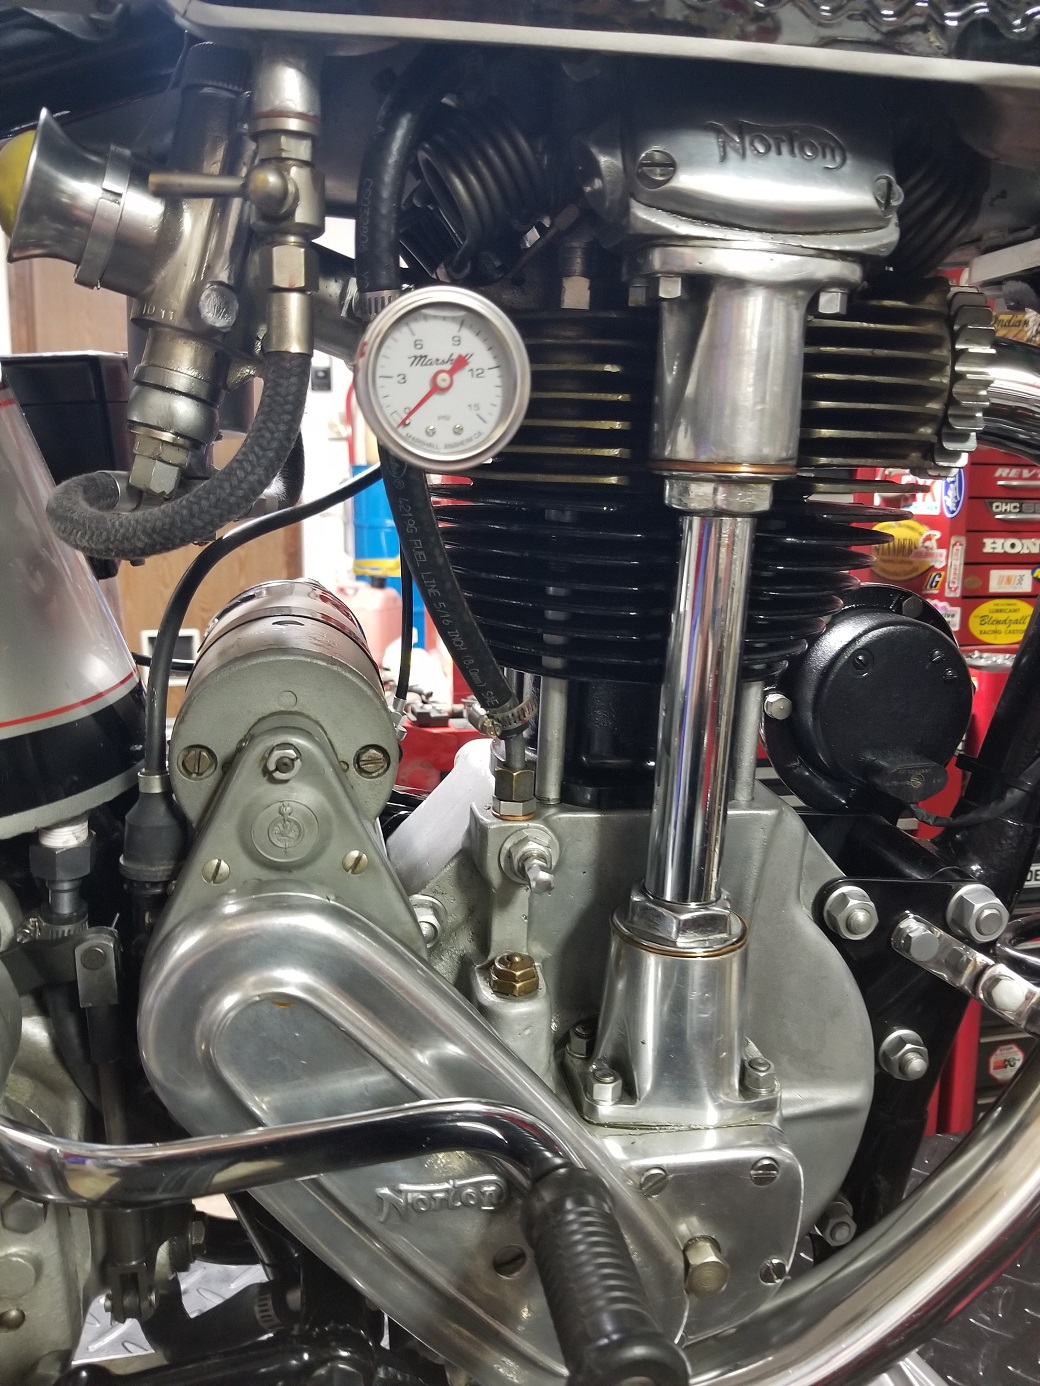
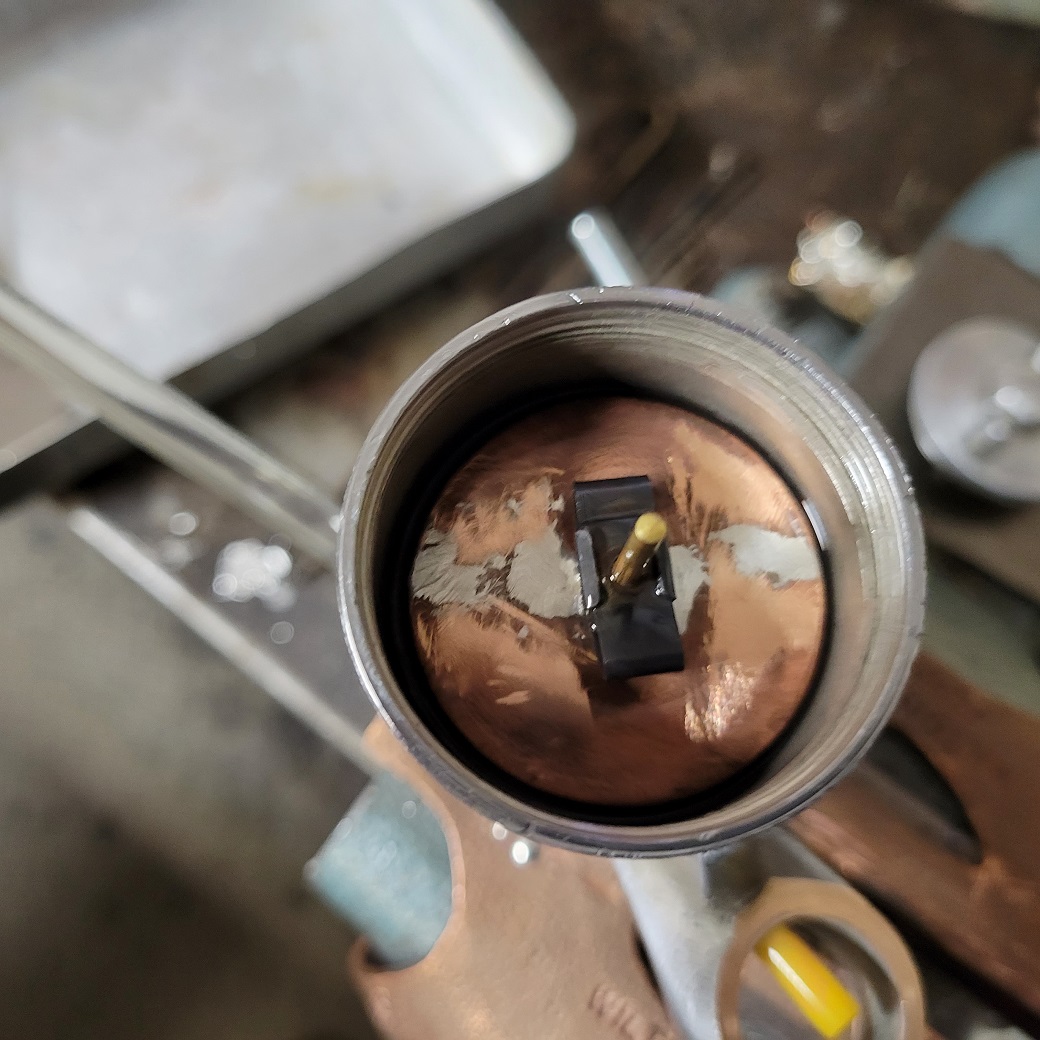
I have determined petrol leaks (and no place else) through these holes, in particular the one hole just below and behind the pilot needle. Logic suggests the cause of the leak is that the float valve, i.e., the float needle is not making a perfect fit in the seat and therefore petrol leaks past this float valve.
It would seem my next step is to bench test the float chamber to rule out petrol is not passing through the float valve when the float chamber is filled with petrol.
Is it worth a try to move the float bowl one direction or another to see if a change in the float position might make the leak stop? If after trying/troubleshooting what I have mentioned, is it reasonable to consider using a modern plastic float which might have more buoyancy that the factory float?
Will appreciate hearing your thoughts.
What is the function of the 3 holes near the base of the carburettor?
Thanks in advance and kind regards.
I can't pretend to know all…
- Log in to post comments
I agree with David. I have…
I agree with David. I have several older type carbs and worn float needle seatings can sometimes be helped with a little metal polish /brasso etc but a replacement seat is a much better bet. These carbs are a bit of a fire hazzard at the best of times so well worth getting it properly sorted.
- Log in to post comments
I've used...
... T-cut to lap in a leaking brass fuel tap (the taper type) and it worked well. I'd guess the same would be true of the float needle and seat. I think it may be slightly more abeasive than brasso etc.
- Log in to post comments
You’re on the right track..
The 15 degree inclination to keep it level can be varied by axial location on the carb. Make sure you position the float chamber on the carb to give you the lowest level to stop the leak then work it forward till it leaks again. If at the lowest point it still leaks refer to above …
common issue float valve leak. Are you top feed or bottom feed? Three holes around the base of mixing chamber are for air feed to emulsify the mixture as it heads up the main choke. Remember the machine is riding at a different posture when you ride it. You may be trying to overcome an issue that isn’t when your on the move.
Mine is bottom feed, lapped with collar Chuck mounted on oscillating valve seating tool connected to 8BA drilled and threaded into bell end of the needle. TCut, Brasso, Silvio and rouge …. Improved but still the fire hazard Robert mentioned. Now I’m experimenting with a lower clip groove to get some control the lapping may have it seated a bit deep…
Have you checked out your spam ? Package left two weeks ago…
Jon
- Log in to post comments
...on the right track, Jon!
Hi Jon,
Yes! just found your personal email in my spam bucket, and replied!
Before i take another step, i will move the float bowl as you suggest.
The bowl is bottom feed. Once I've moved the bowl to see if i can eliminate the leak, regardless, i'll test ride to see of the leak goes away during operation.
I'll stop by the hardware store to pick up Brasso. What are your thoughts on Simichrome paste to lap in the needle to seat. I've used that in the past with good luck, but am asking your thoughts in the case Brasso might bit a finer grit and less abrasive.
Kind regards
- Log in to post comments
I had to cut a new groove…
I had to cut a new groove for the float clip to adjust the fuel level. All done by hand tools and a mini hacksaw, but it worked. I had the opposite problem ,a low fuel level due to incorect parts.
- Log in to post comments
float bowl axial position
hi
been caught out with this one on the 15TT on my Inter. Agree with Jonathan, turn float bowl to lowest point....remember, carb is inclined. If no joy, then i would suspect float level.
Dave
- Log in to post comments
update on petrol leaking #1
Tried moving the float bowl forward/downward to eliminate leak, drip persists.
Currently bench testing float valve before any polishing. Since last evening, have accumulated less than 2 cc in container after bench tested more than 12 hours. Will put some Brasso to the needle taper and lap taper to seat and continue bench test.
Once no gas leaks past the float valve, will reinstall float bowl and put a small machinist's level to the top of float chamber sans float cap to adjust bowl level. Install float cap, turn petcock on and see what happens.
What doesn't make sense at this point in the adventure is why there is only a negligible amount of gas passing through the float valve and when float bowl is installed there is a 2 drops/second leakage.
My logic tells me since there is negligible leakage during bench test, there should be no reason why i am having a 2 drop/second leakage when float bowl is fixed to carburettor... Thoughts?
To recap: The spring clip resting in the tiny groove on needle holds float in a fixed position is what sets fuel level. Float bowl position is fixed by attaching bowl to carb and should have nothing to do with fuel level because the groove on needle is what sets fuel level in bowl. Correct?
- Log in to post comments
Relative to your mixing chamber…
The first part of recap correct but that closed position shuts the fuel off but at a level that allows the fuel to leak out of the mixing chamber. By rotating the bowl around the fixing point under the mixing chamber that shut off point changes… don’t forget the carb is angled up (downdraught) and the connection flange set at 15 degrees. What ever that closed point is it moves as you rotate the connection.
J
PS: mail received, package posted on 18th
- Log in to post comments
...and it follows from what…
...and it follows from what Jonathan says that since you have it on the bench you can now measure the static fuel level accurately, and see exactly how far it is above the holes. Then you could turn a new groove on the needle to change the clip height so it stays just below the holes.
- Log in to post comments
David, what i am having..
..trouble understanding is how float bowl position affects the carb leaking fuel when the float valve does not leak on bench test.
I think my questions should be:
1. What part on carb should the fuel level in bowl be aligned with?
- Log in to post comments
My own personal experience…
My own personal experience and that of others with Inters I know is that when you tickle the carb you end up with a continuous dripping. When you start the machine the the dripping stops and does not resume until the next time you tickle the carb.
I agree this is not ideal but it does seem to be pretty commonplace as far as I can ascertain and is generally regarded as just another characteristic of TT carbs. A bit like the absence of a tick over.
- Log in to post comments
The amount of fuel head …
The amount of fuel head above the carb will give a varying amount of leakage ,especially if the needle seating is a bit marginal , thats why a new seating and needle is a good move. If after getting that right it still drips its also possible to have a missmatch of parts at the bottom of the carb.I had this on a Rudge ulster which needed an extra needle groove. A Ducati with a Dellorto SSI (TT type) gave me years of trouble till I fitted a new old stock remote racing float chamber,which of course had a new seating. Looked pretty trick too !!.
- Log in to post comments
As I understand it, the…
As I understand it, the correct float level is when the fuel is just below the lowest hole so it does not leak. If you leave it long enough without the engine running, the level will creep up anyway, and will leak. But if you open the fuel tap and let the chamber fill by itself, it should not leak immediately. It should then start to drip if you push the tickler down for a moment. If you hold the tickler down, the level will rise above the small holes and it will carrying on leaking fuel until the fuel used by the running engine lowers it back again. It should of course not leak when running. When mine was giving starting problems (now sorted I believe), I put a piece of rag under the carb to collect the drips while fighting the kick start, and turned off the fuel tap if it was leaking. Then try to remember to turn it back on after it finally got going!
Mine leaked from the banjo - which was also confusing. The bore hole in the banjo was eccentric (badly made) and one edge is a bit narrow. Eventually it's been sorted with Wellseal on the banjo flanges.
If the float cuts off the fuel at a level above the holes, it will of course carry on leaking all the time.
I only use the tickler now to check that the chamber is full.
- Log in to post comments
Thanks David,
Your "as i understand it post" helps clarify what i am dealing with. This carb is not a complex design, so it should be straight forward to sort through... (Barring wrong parts, etc)
A question i forgot to ask: "What is the distance from top of the float valve needle to the groove that the factory clip fits into?"
Back to your post, i have determined the leak was coming out the forward most of the 3 emulsion holes and not from any banjo joints.
I'm going to lap the needle into the seat until it does not leak gas. Then i will visualize (approximate in my mind's eye) where the fuel level is in respect to the emulsion holes...
As things are, fuel leaks while engine running. after lapping and adjusting the float bowl position, if i have no leak when the engine is running, i'll be happy.
- Log in to post comments
Sorry I don't have it apart…
Sorry I don't have it apart and it should be out in the sunshine tomorrow. And Amal (Burlen) can't help as they don't sell float chambers nowadays. If you buy a new TT carb you must buy a separate "matchbox" float chamber to go with it.
Is there a way you can rig up a polyethylene tube alongside it to compare the fuel level (with the hole blocked) with the height of the holes?
If it is now leaking from the front (lowest) hole, you could block that one and see if it comes from the others which are higher. If it doesn't leak from them, you will know to within 1/8" what the level is.
- Log in to post comments
Float valve leakage update #2
Update:
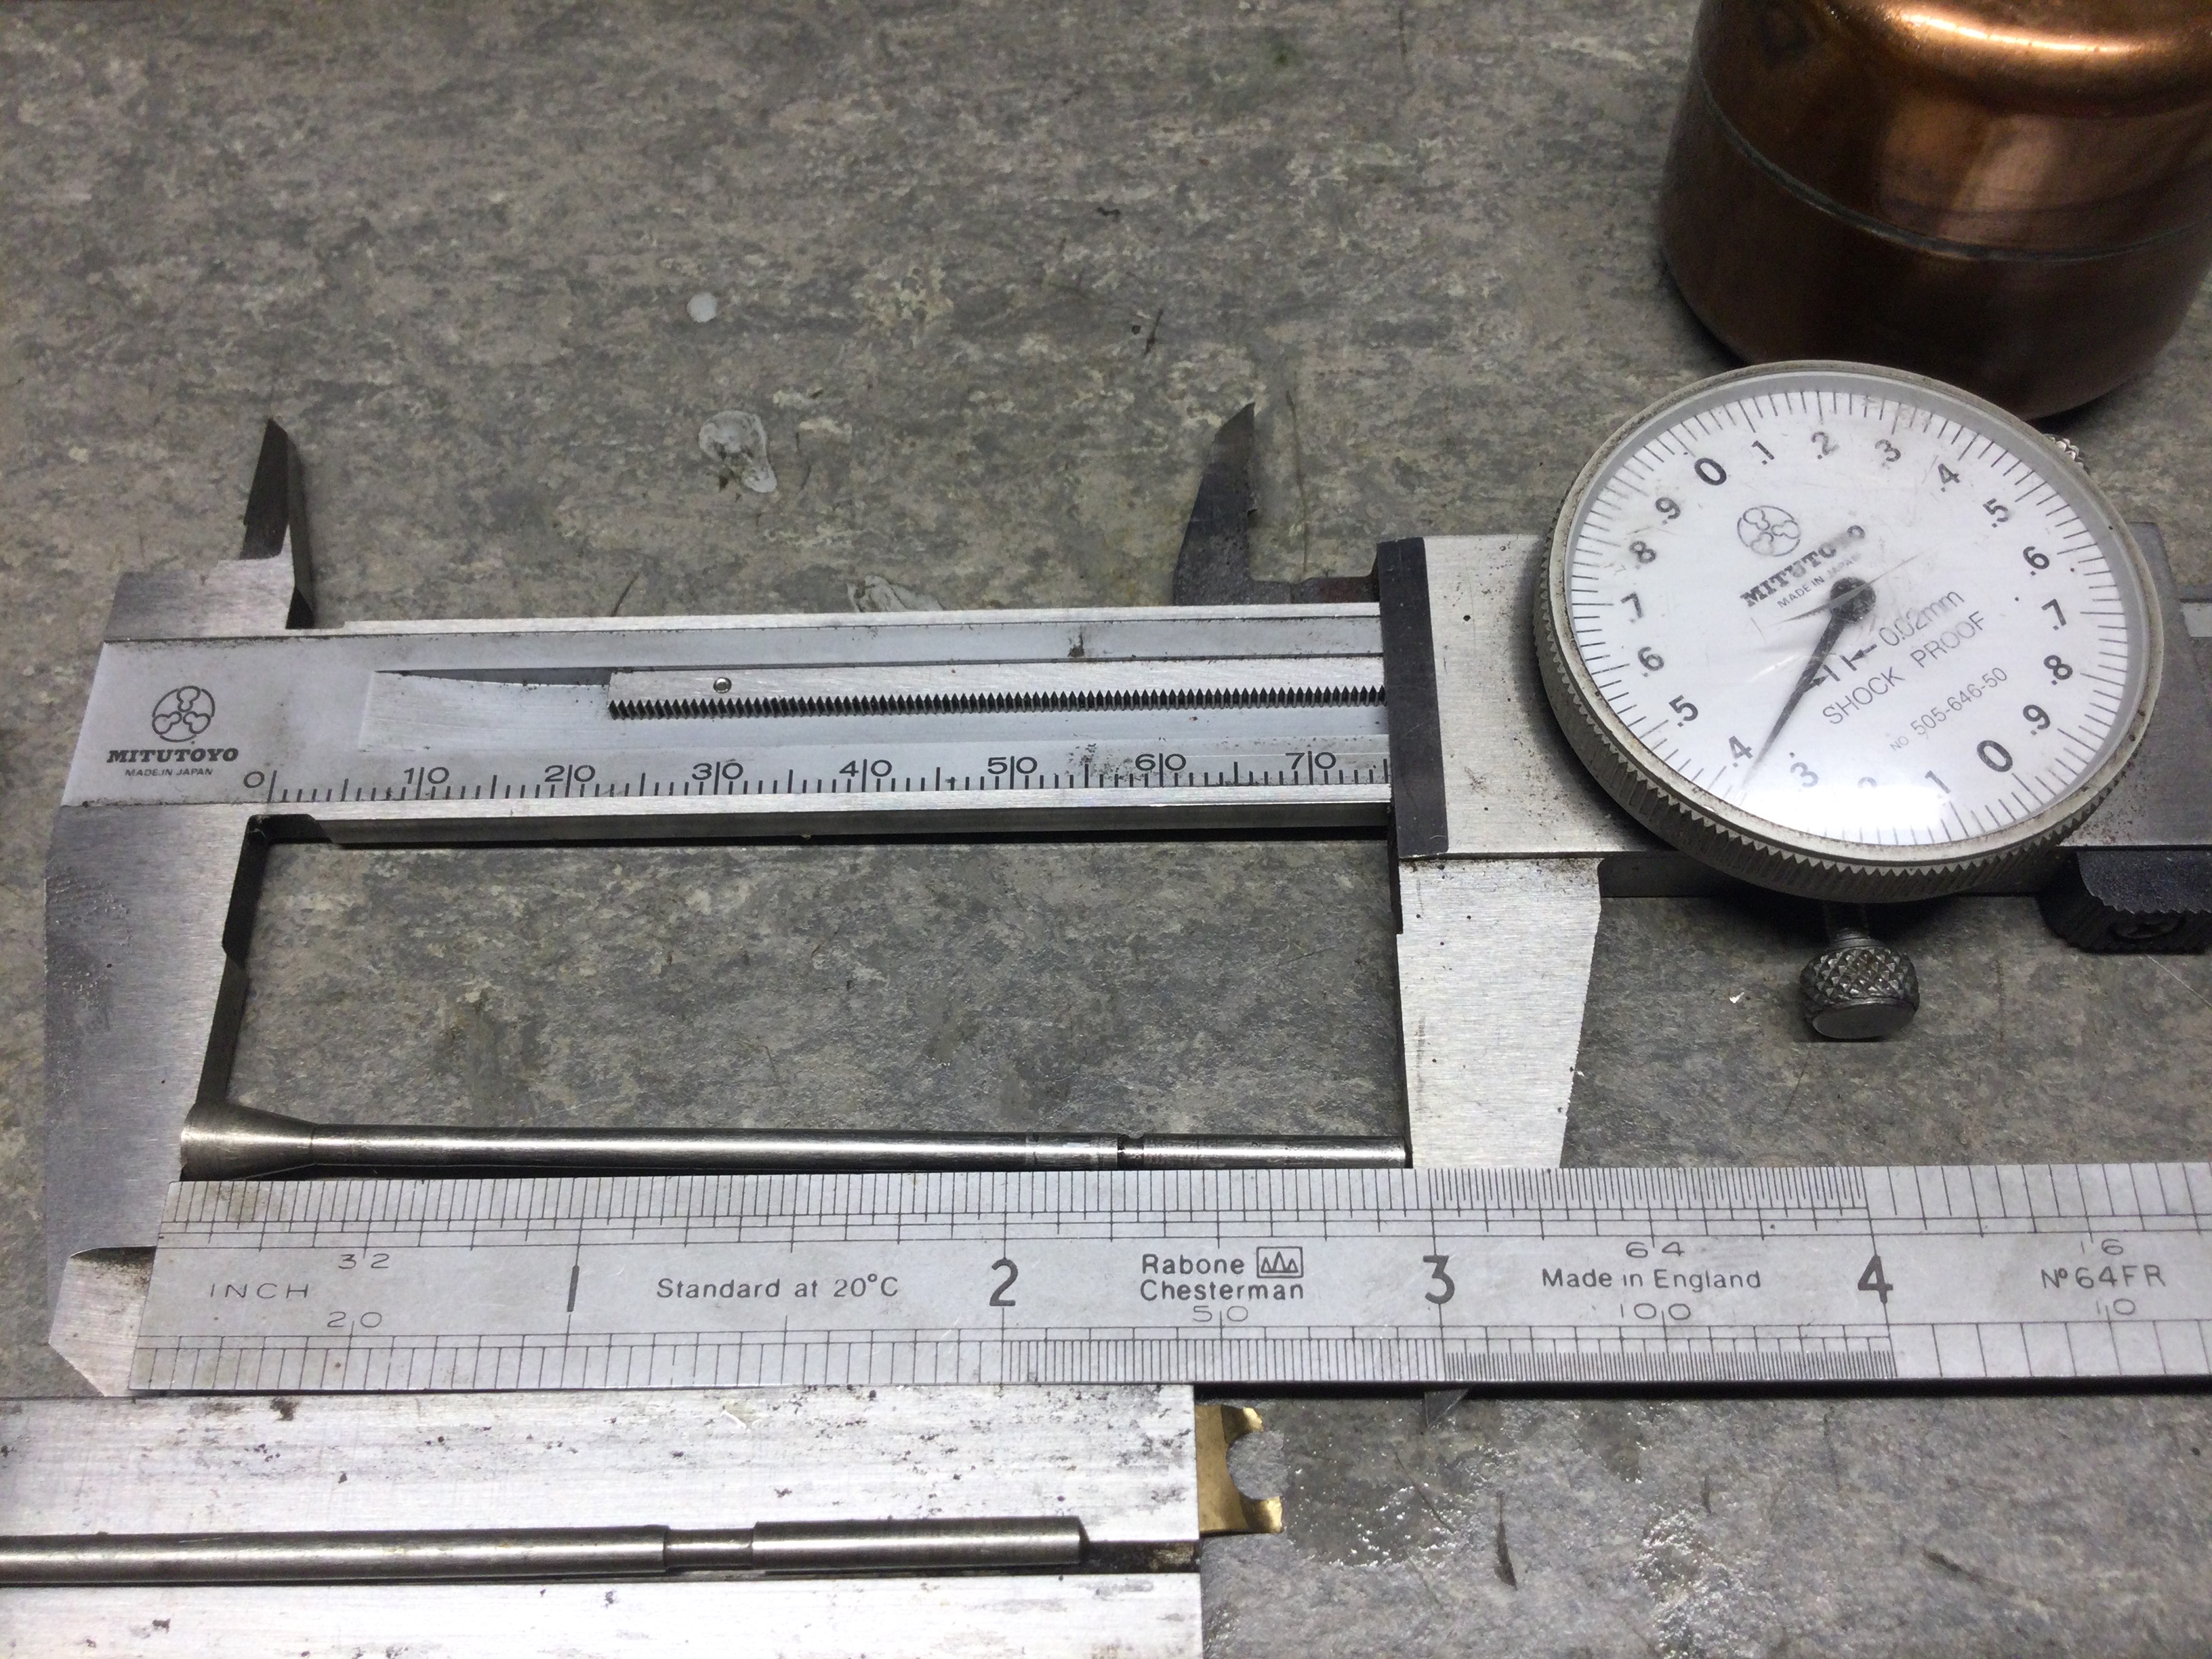
1. The distance from the top of the float needle to the middle of the groove is 21/32"
2. I lapped the needle taper with a pin vise into the needle seat using Brasso. Then checked my lapping work using Blue Dykem layout dye which left a 1/8" wide mark around the circumference of the taper on the lower 1/3 of the taper. Would think that should make a "seal."
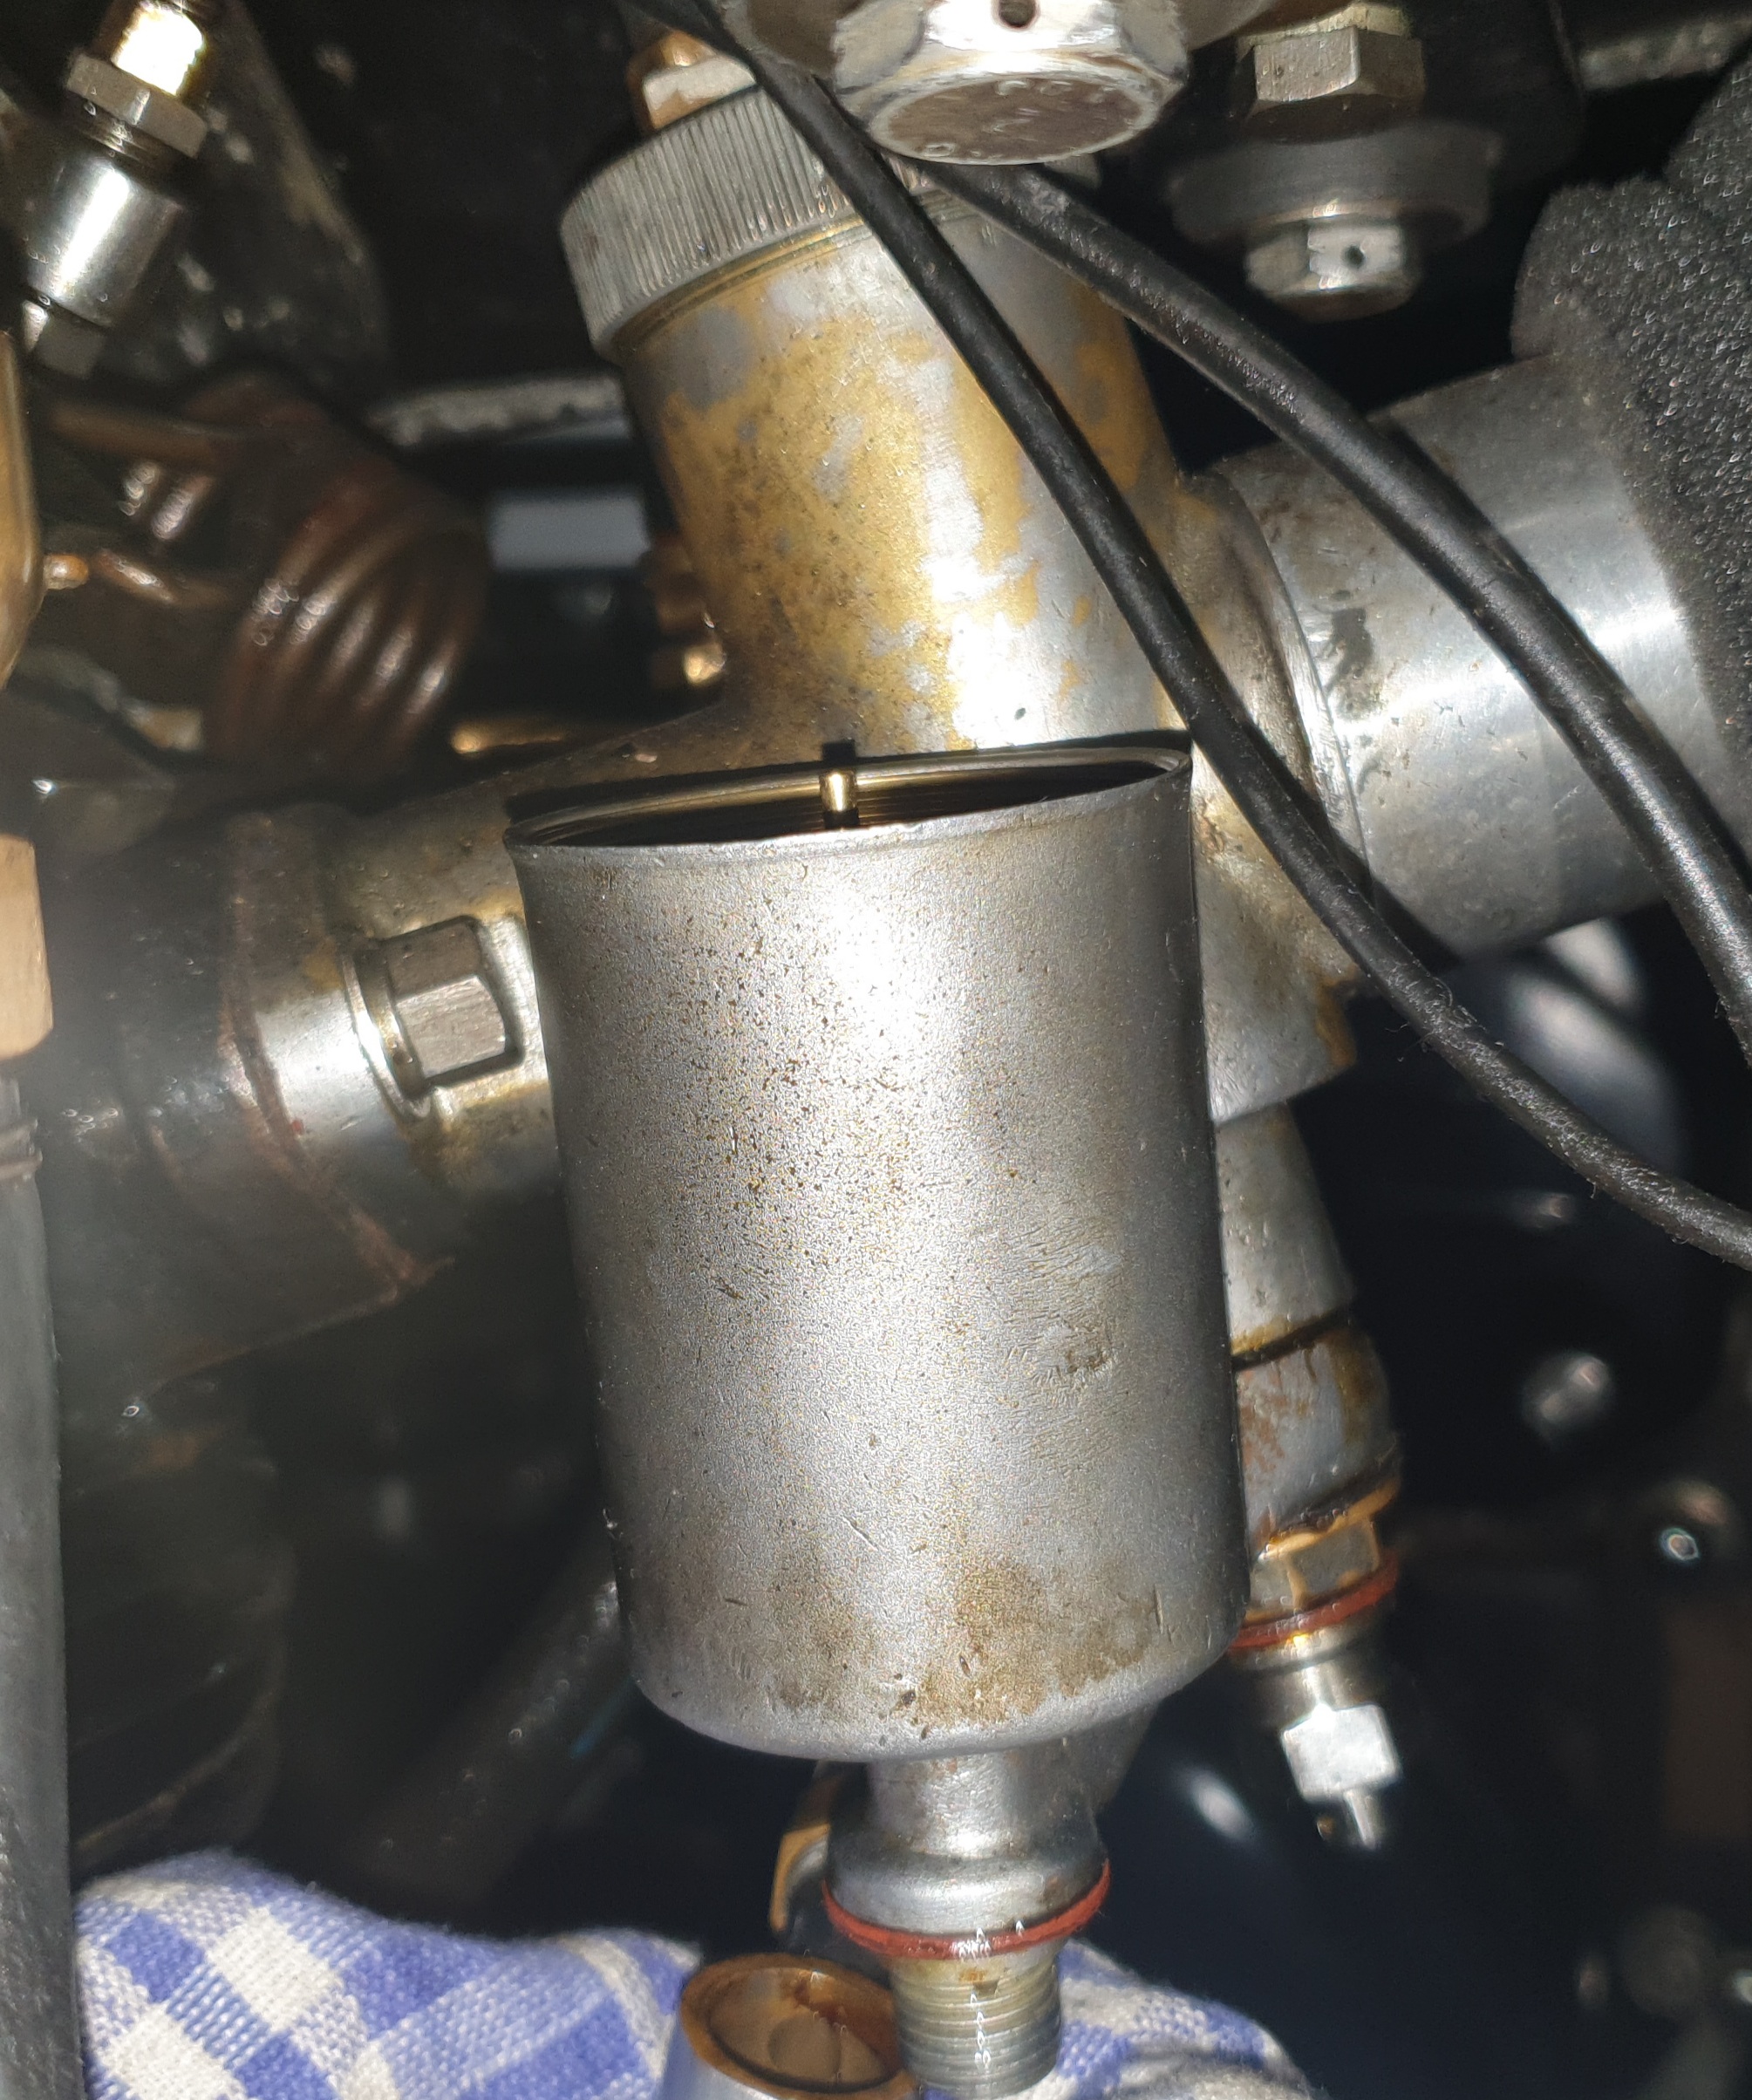
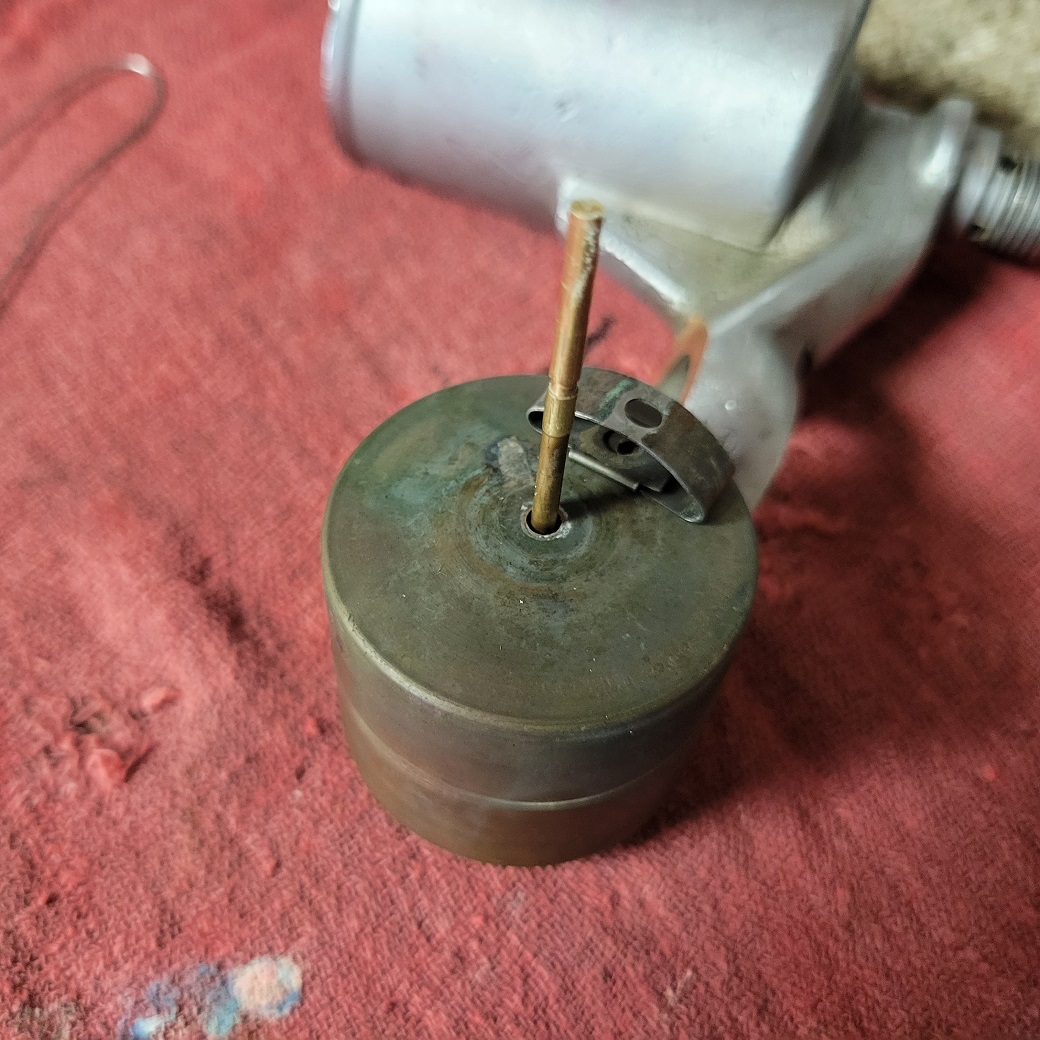
3. Attached you can see my set up using David's suggestion of a clear plastic hose to determine if the float valve assembly will allow gas to pass through the float valve. Once i have confirmed the float valve does not leak, then I can install the float assembly to the carb knowing with confidence the float valve is not leaking.
4. With float bowl attached to carb, I will use the clear plastic tube as a gauge to see where the fuel level aligns in relation to the lowest (forward most) emulsion hole that is in front of and below the pilot needle.
5. It is readily apparent that I need to take this process one step at a time to confirm each step I take accomplishes what I expect it to.
6. I finally have it in my head that the TT carb might, can and/or will leak with fuel tap on and engine not running but should be expected to not leak once the engine is running. On the other hand, I can't imagine the factory released machines with carbs that leaked...
7. Jon, if I am following your logic, by rotating the float bowl on its axial plane, there is likely a "sweet spot" where the bowl is as level as can be made possible while at the same time the fuel level should not be higher than the lowest emulsion hole...?
Nothing's more fun than screwing around with 85 year old parts to ideally make them work as well as they were intended to work when they were factory (: new :)
- Log in to post comments
Mark your level...
..on the outside of the float chamber with a pencil; when you are assembled you will see the level your fuel will sit at, relative to the mixing chamber...
The lapping should deal with the sealing but make sure the float is free and the needle goes up into the top guide cleanly on the lid.
You are right on point 1-5 and 7. Point 6, Leaking from factory was standard for most TT Carbs.
Cheers
J
- Log in to post comments
Thanks Jon...
...for clarifying point 6 that leaking at standstill would be characteristic of a new from factory TT carb.
- Log in to post comments
Its hard to realise that…
Its hard to realise that even by the 1950's modern synthetic seals were still so rare that nobody expected fluids not to leak. Remember car parks a few decades ago? They always had black marks from the oil leaking from crankcase and back axles.
Hope you enjoy riding it!
- Log in to post comments
Thanks David...
...for your mention of technology in decades past which helps normalize my expectations of the machine. Once i have the fuel leakage sorted, then will give riding another go. I am certain i will enjoy riding the machine!
- Log in to post comments
No leaking on bench test...
Apparently my lap-work has effectively stopped the float valve from leaking. The float bowl sat filled with gas for a little less than 3 days and 2 nights and allowed no gas past the float valve. While on the bench i determined the fuel level the float allows when the float strikes the needle clip.
i have the float bowl back on carb, the fuel level is approximately 1/4" above the 3 emulsion holes with the float bowl turned fully forward. When i turn on the right fuel tap with left tap off there is no leakage. When i turn on the left tap with right tap closed the drip rate is approximately 1 drip or less per second. Both fuel taps allow gas to freely pass through the hoses to the carb. Turning the float bowl in any position does not affect leaking or not leaking.
My conclusion for the reason fuel is leaking past the float valve is that there may be a higher level of gas on the left side of the tank than on the right side. The one thing i did not do is connect the float bowl to a fuel cell hanging 12 or 18 inches above the bowl to allow gravity to put more pressure on the gas thereby more effectively testing the lap-work.
Before i were to take the bowl off to test for leakage past the float valve using a hanging fuel cell, i am going to ride the machine to see if the valve leaks during operation.
I have installed the correct springs for the crank shaft and cam oil feeds including the correct-sized 7/32" ball and have adjusted all 3 metering devices per spec. i also punched out a 3/32" thick leather washer and laid it atop the packing of the Tell Tale so will be looking for what affect that washer may have. If the profuse leaking past the Tell Tale is slowed in the least, i will be happy; the leather was a good interference fit in the hole and around the pin, so i can only imagine being compressed there is a better seal than what the existing packing was providing. I also have the the 0-15 psi pressure gauge installed.
A special thank you to Jon for his gracious supply of the 2 correct springs and the ball. And a big thank you to each and all who have been sharing your experience in my journey.
So... The proof of the pudding will be in the test ride. More to follow in the next few days.
- Log in to post comments
None of my old TT type …
None of my old TT type Side float carbs leak when not running . You have to get the fuel level below the bleed holes or the motor will run horribly rich and foul the plugs, wash the oil off the bore and contaminate the engine oil. Could be you have the wrong needle , I would cut an extra clip slot . What is there to lose?.
- Log in to post comments
Robert, i appreciate your reply...
What i have run into, even if i move the float as low as it will go, the fuel level is still above the emulsion holes and then the float cannot rise enough to adequately fill the bowl.
As i mentioned in my earlier post, the center of the groove is 21/32" from the top of the needle. it would be helpful if someone could give me a measurement of that distance to compare to the needle in my float bowl.
The other thing i am beginning to wonder is if i have the wrong float, given i cannot lower it enough to move the fuel level below the holes. If someone could give me a measurement of the length of the float, that would also be helpful.
If none of the above,then i would be led to believe i have the wrong float bowl which seems unlikely...
Kind regards,
Steve
- Log in to post comments
Some float bowls are top…
Some float bowls are top feed ,some bottom, and there are different carb bottom fittings and needles ,so its very likely you have some rogue parts in the mix. A close study of the Amal literature might throw some light. Its the main reason i switched to a remote float which gave me unlimited scope for tinkering with levels. One bike had to be leaned to the right at traffic stops to keep running , OK till you needed to put it in gear !!. If you carry on as you are you are going to need some fire extinguisher brackets on the front forks and some flame proof undies.
- Log in to post comments
Robert,
My bowl is bottom feed. A remote float would be ideal to adjust the correct float height to obtain the correct fuel level. Can you provide a picture showing how you have mounted a remote float?
If you are able to take a measurement of length of the float, I would appreciate that.
I have drawn a line on the bowl indicating the fuel level with clip in groove; will measure the distance between line and top of bowl.
Are you aware of variations of the 15 degree bowl that could give different bowl heights relative to emulsion holes?
Kind regards.
- Log in to post comments
A distant memory tells me…
A distant memory tells me that the fuel level should be 1 5/16" below the top of the chamber body. So it will look a long way down.
- Log in to post comments
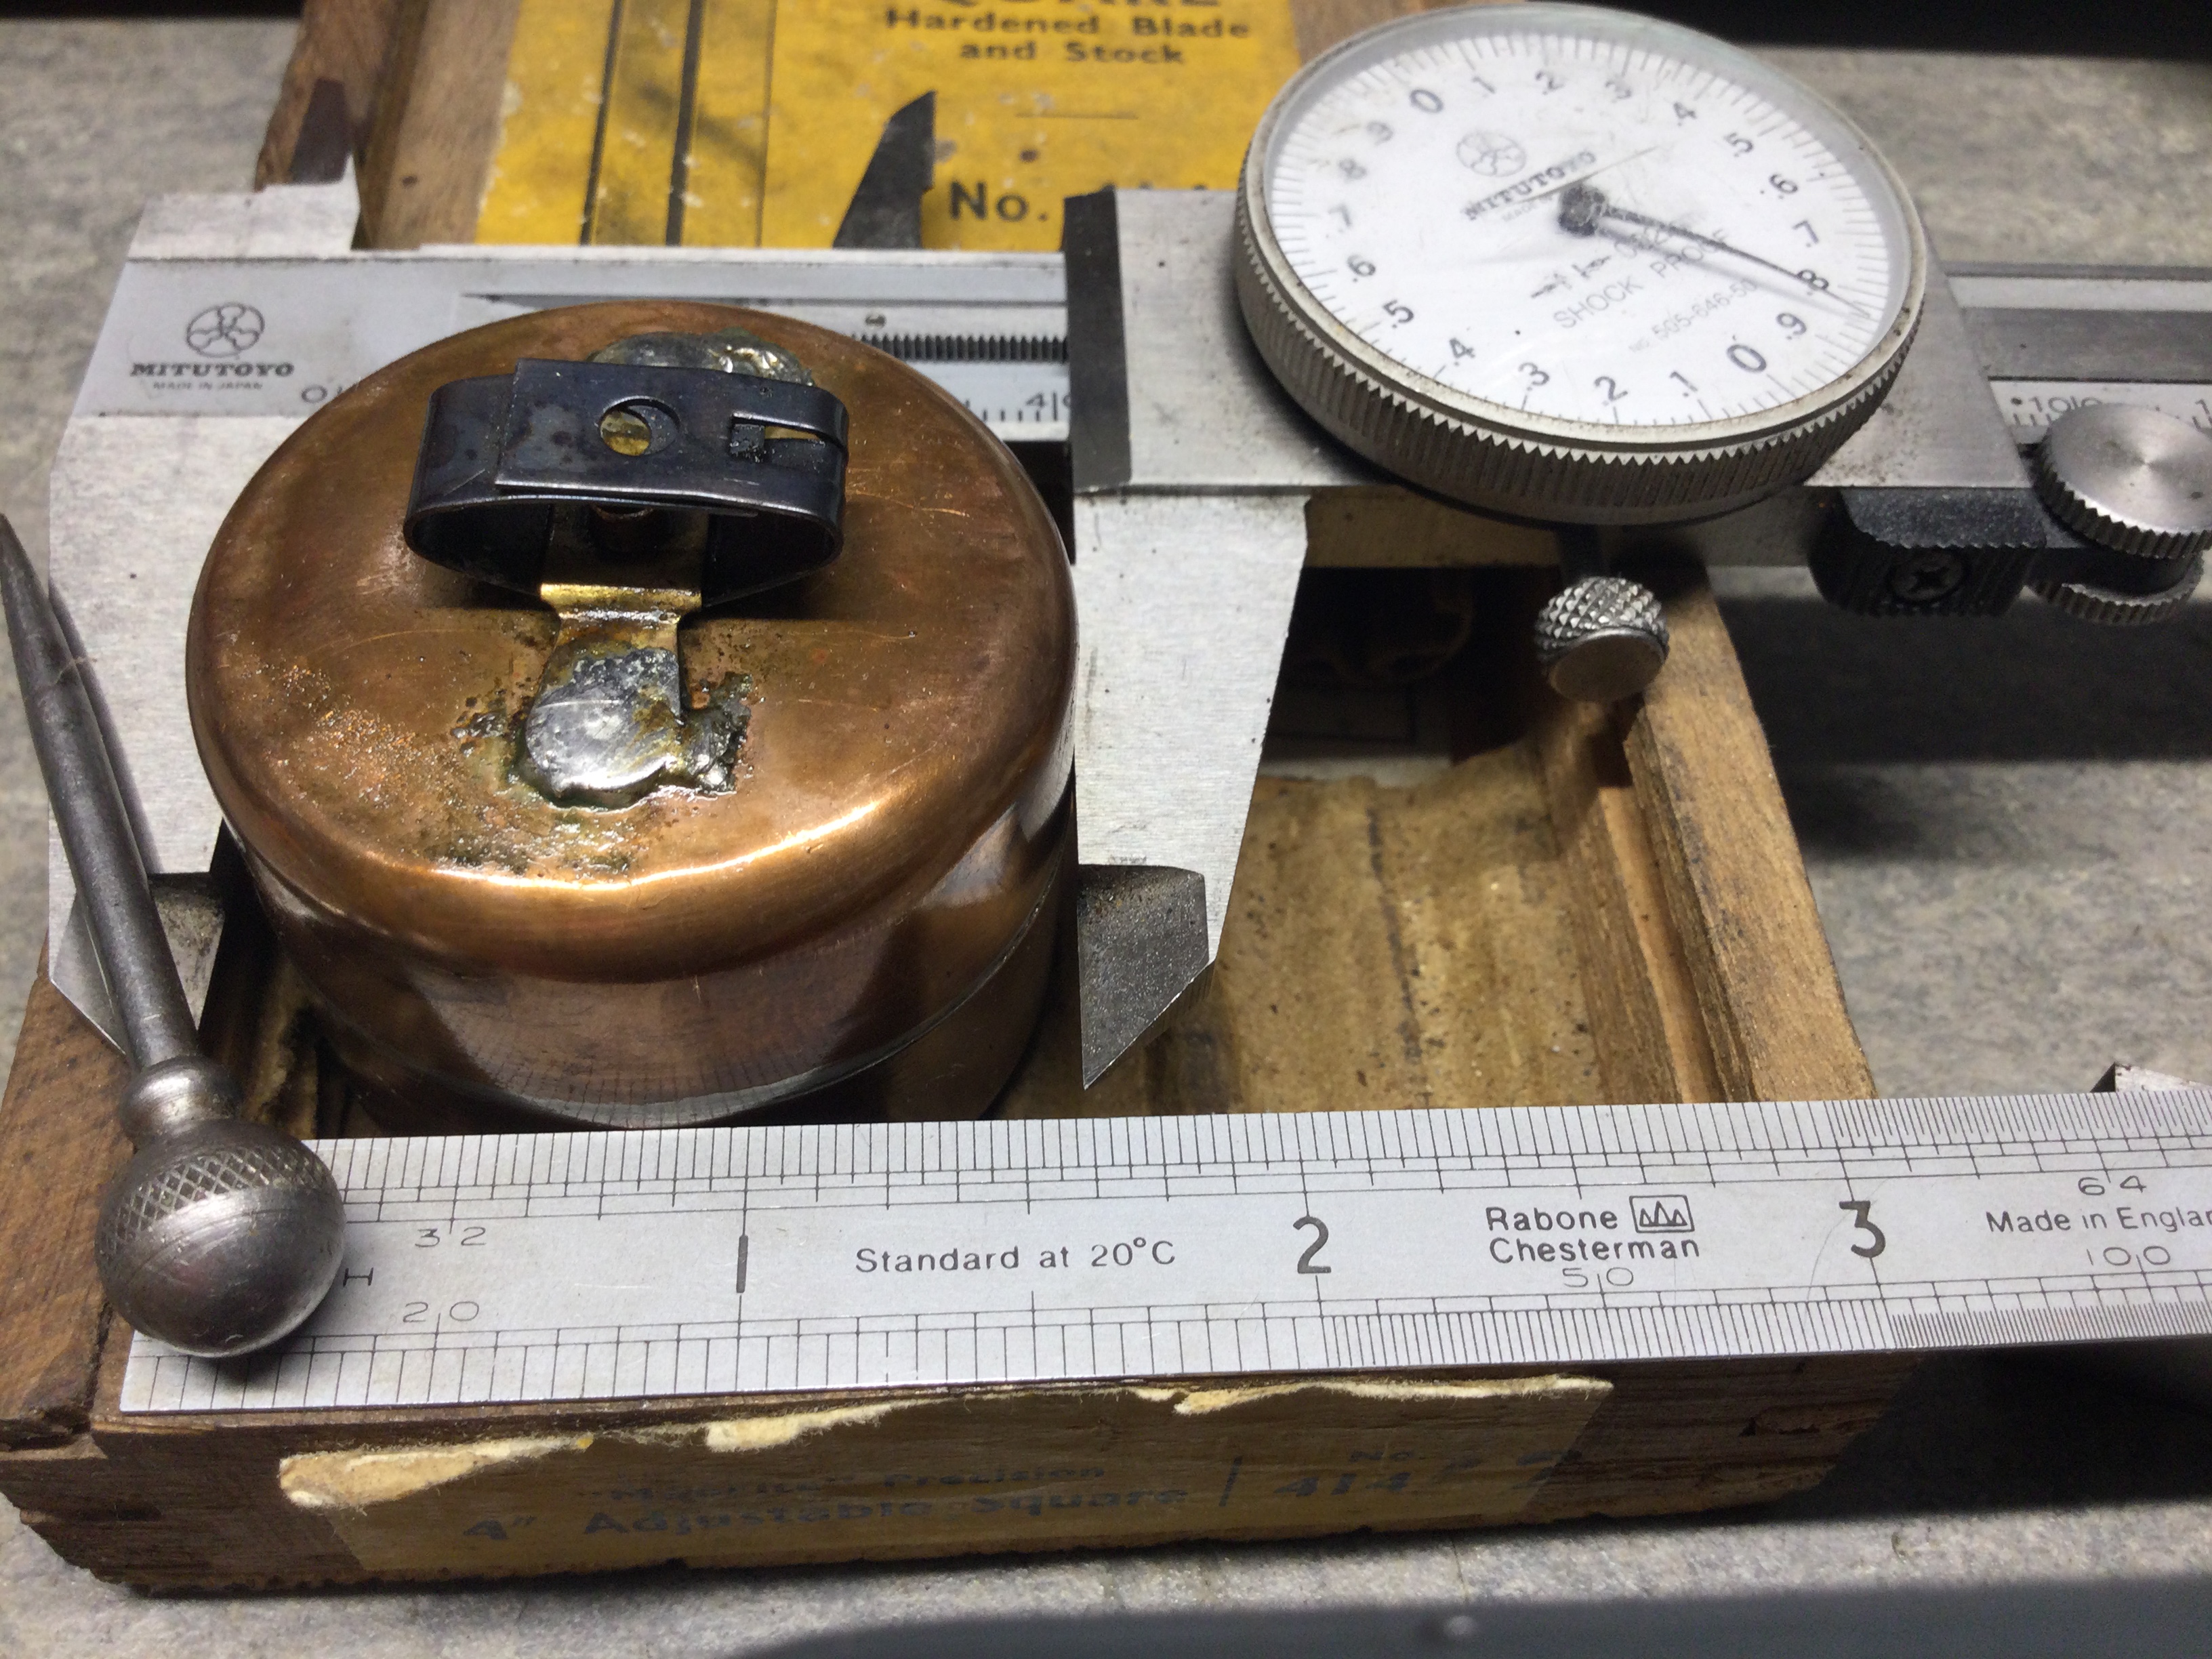
My needle clip is 3/4" from…
My needle clip is 3/4" from the top of the needle. The top of the needle is about 1/8" above the top edge of the float chamber body when float is at the bottom and it rises about 1/4". Side view shows relative heights. It is not practicable to remove the float without taking the tank off. 21/32 is near enough 20/32 = 5/8" so your clip is a tiny bit higher than mine. So float needle is lower (more open) at a given float height so your fuel will be 1/8" higher. If the float does not cut off fuel even with a higher needle (bigger distance from top to clip) then some parts must be mixed up or float leaking maybe?
- Log in to post comments
My needle clip is 3/4" from…
The carby you have shown in your picture 20210604-130334.jpg is not an Amal TT. It is the earlier AMAC TT, very similar BUT different. This chart may help.
- Log in to post comments
Hi David, It looks like…
Hi David, It looks like your float chamber could do with a bit more angle to get things vertical .
- Log in to post comments
Thank you David...
Hmm…
David, thank you very much for those measurements and taking the time to unscrew your cap to show your picture of the float with cap removed.
The needle with my bowl is below the top of the bowl. I need to measure the distance my float travels, but memory says the travel is > ¼”. Early on, I checked that the float does not leak.
One dimension I still need is the length of the float. Looking at the plastic float on RacingNorton, it’s difficult to tell, but the float appears perhaps to not be as long as the float I have. Also in the pics of brass floats on RacingNorton’s site, there is a part soldered on top of the float which my float does not have, being smooth on both ends. But, pictures being what they are, are only pictures, not parts necessary for my float. Unless someone can give me the length of the float, I believe my next step will be to reach out to RacingNorton and ask for the needle and float dimensions.
I am beginning to suspicion my float assembly may be a mix of parts…
- Log in to post comments
Maybe Robert...but it's dark…
Maybe Robert...but it's dark, cramped and uncomfortable in the garage and I doubt if the camera was level! I'm not messing about with a carb that works perfectly!
- Log in to post comments
Those tilted float chambers…
Those tilted float chambers are allegedly hard to find. And I am fairly sure they came in several levels relative to the banjo. Have you lifted the needle by moving the clip down so it shuts sooner?
Also and this might be clutching at straws...the top of the needle must enter a guide hole in the cap. If yours does not start off in the hole maybe the cap is holding it down? Have you checked with the cap left off? It's only needed when running to prevent splashing. That would however cause major flooding.
- Log in to post comments
Oh boy... David,
i was wondering if there are different variations of the float bowl... I'll have a look at the AMAL literature to attempt verifying if different part numbers exist for the possibility of deducing that there may be bowls making different levels that would be predicated by the thickness of the banjo, if that makes sense...?
Yes, i have tried moving the clip down further to no avail...
Yes, i make certain the top of the needle enters the guide hole.
Yes, i have checked with the cap left off...
- Log in to post comments
Have been reading Paul's RacingNorton about...
Paul provides some helpful information about floats and needles for the TT type 15 degree bowl which he says is not easy to find.
He does state that no leakage should occur when machine is upright.
I am concluding probably what i should do next is take the different measurements of the needle and the float that are with my bike and contact Paul to confirm if the parts i have are same as measurements on the needle and float he supplies.
- Log in to post comments
Needle dims…
The needle with the long notch is what you get from Burlen. The other is what was fitted.
- Log in to post comments
Jon, needle dims...
Jon, thank you kindly for these pics with measurements. Offhand, i seem to recall my needle has a groove narrower than your needle that "was fitted."
When i arrive home for the evening, i will inspect and take measurements of my needle.
Do you by chance have a float lying around that you can measure the length of? I will also post pictures and measurement of my float.
- Log in to post comments
Float dims…
Clip is a replacement as the brass one had lost its shape and tension.
- Log in to post comments
And I thought I might be on to something…
You’ll note the attached picture showing the clip separate from float. Duh. So I silver soldered the clip to float, submersed float in gas for 3 hours to make sure no factory-soldered joints had given way; float no leak. (Bench re-test = still no leak past float valve).
Reinstalled float bowl assembly hoping that the leak would be solved. Not to be.
Moving onward. New datum.
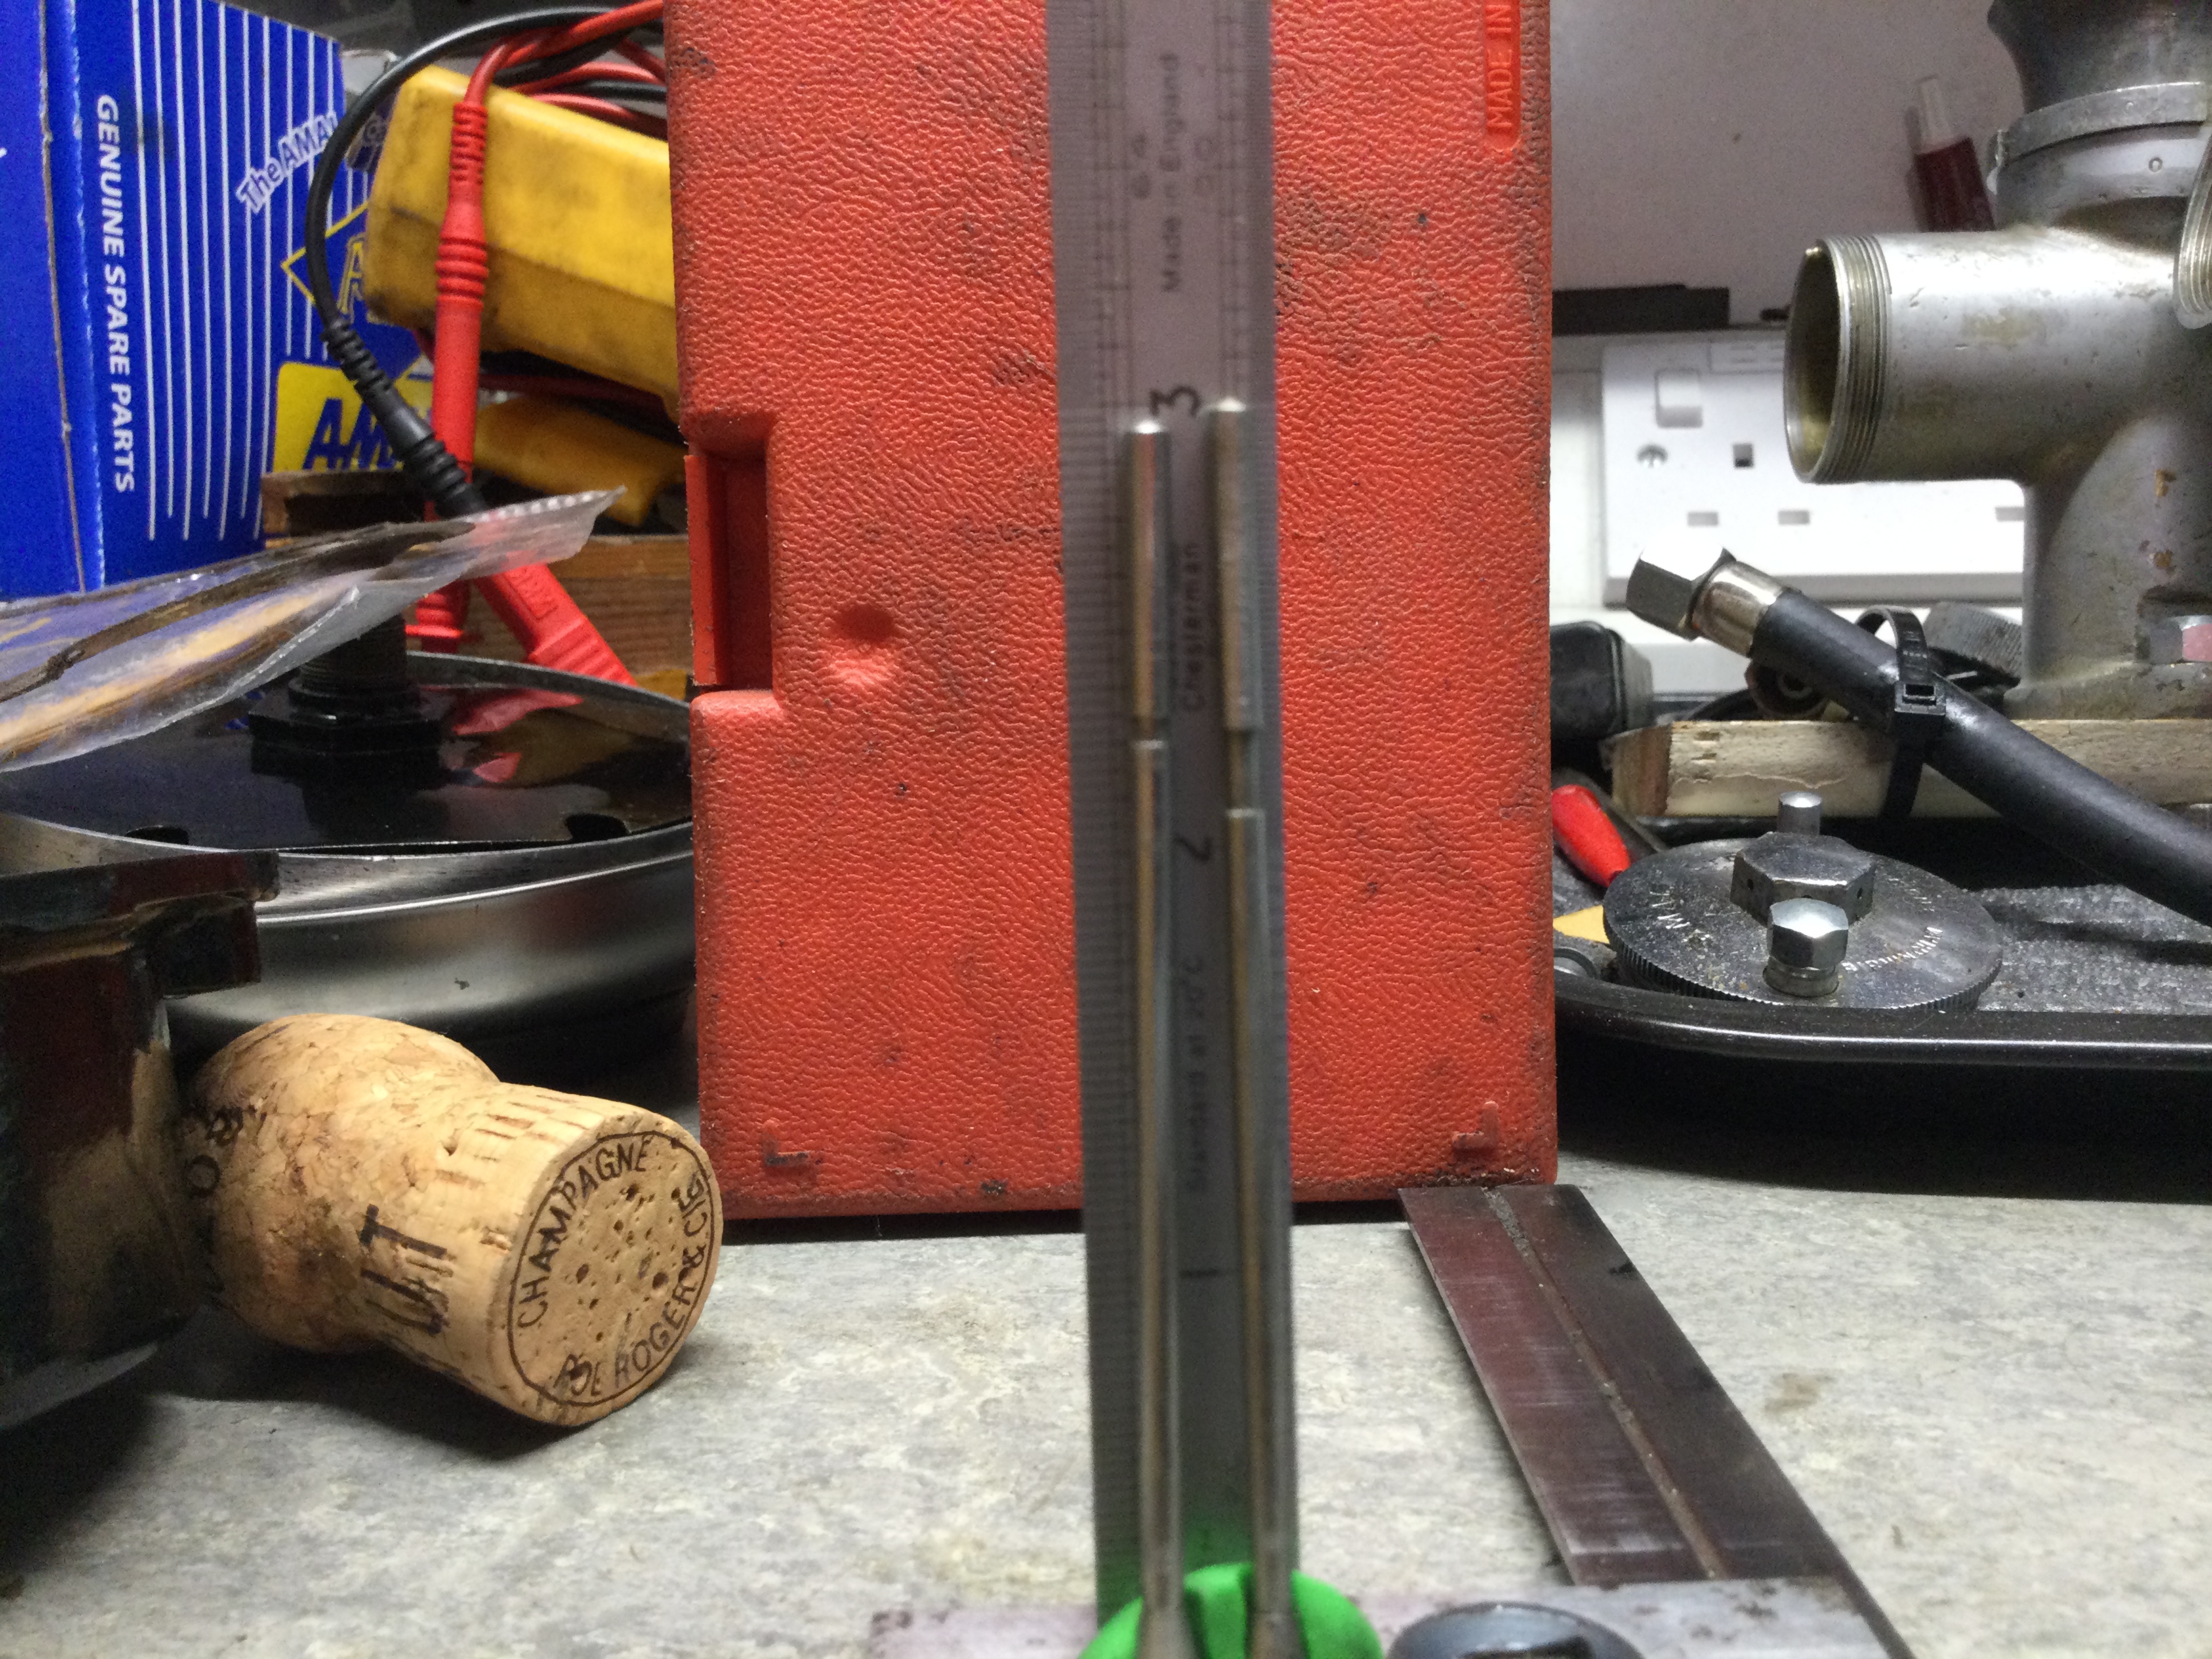
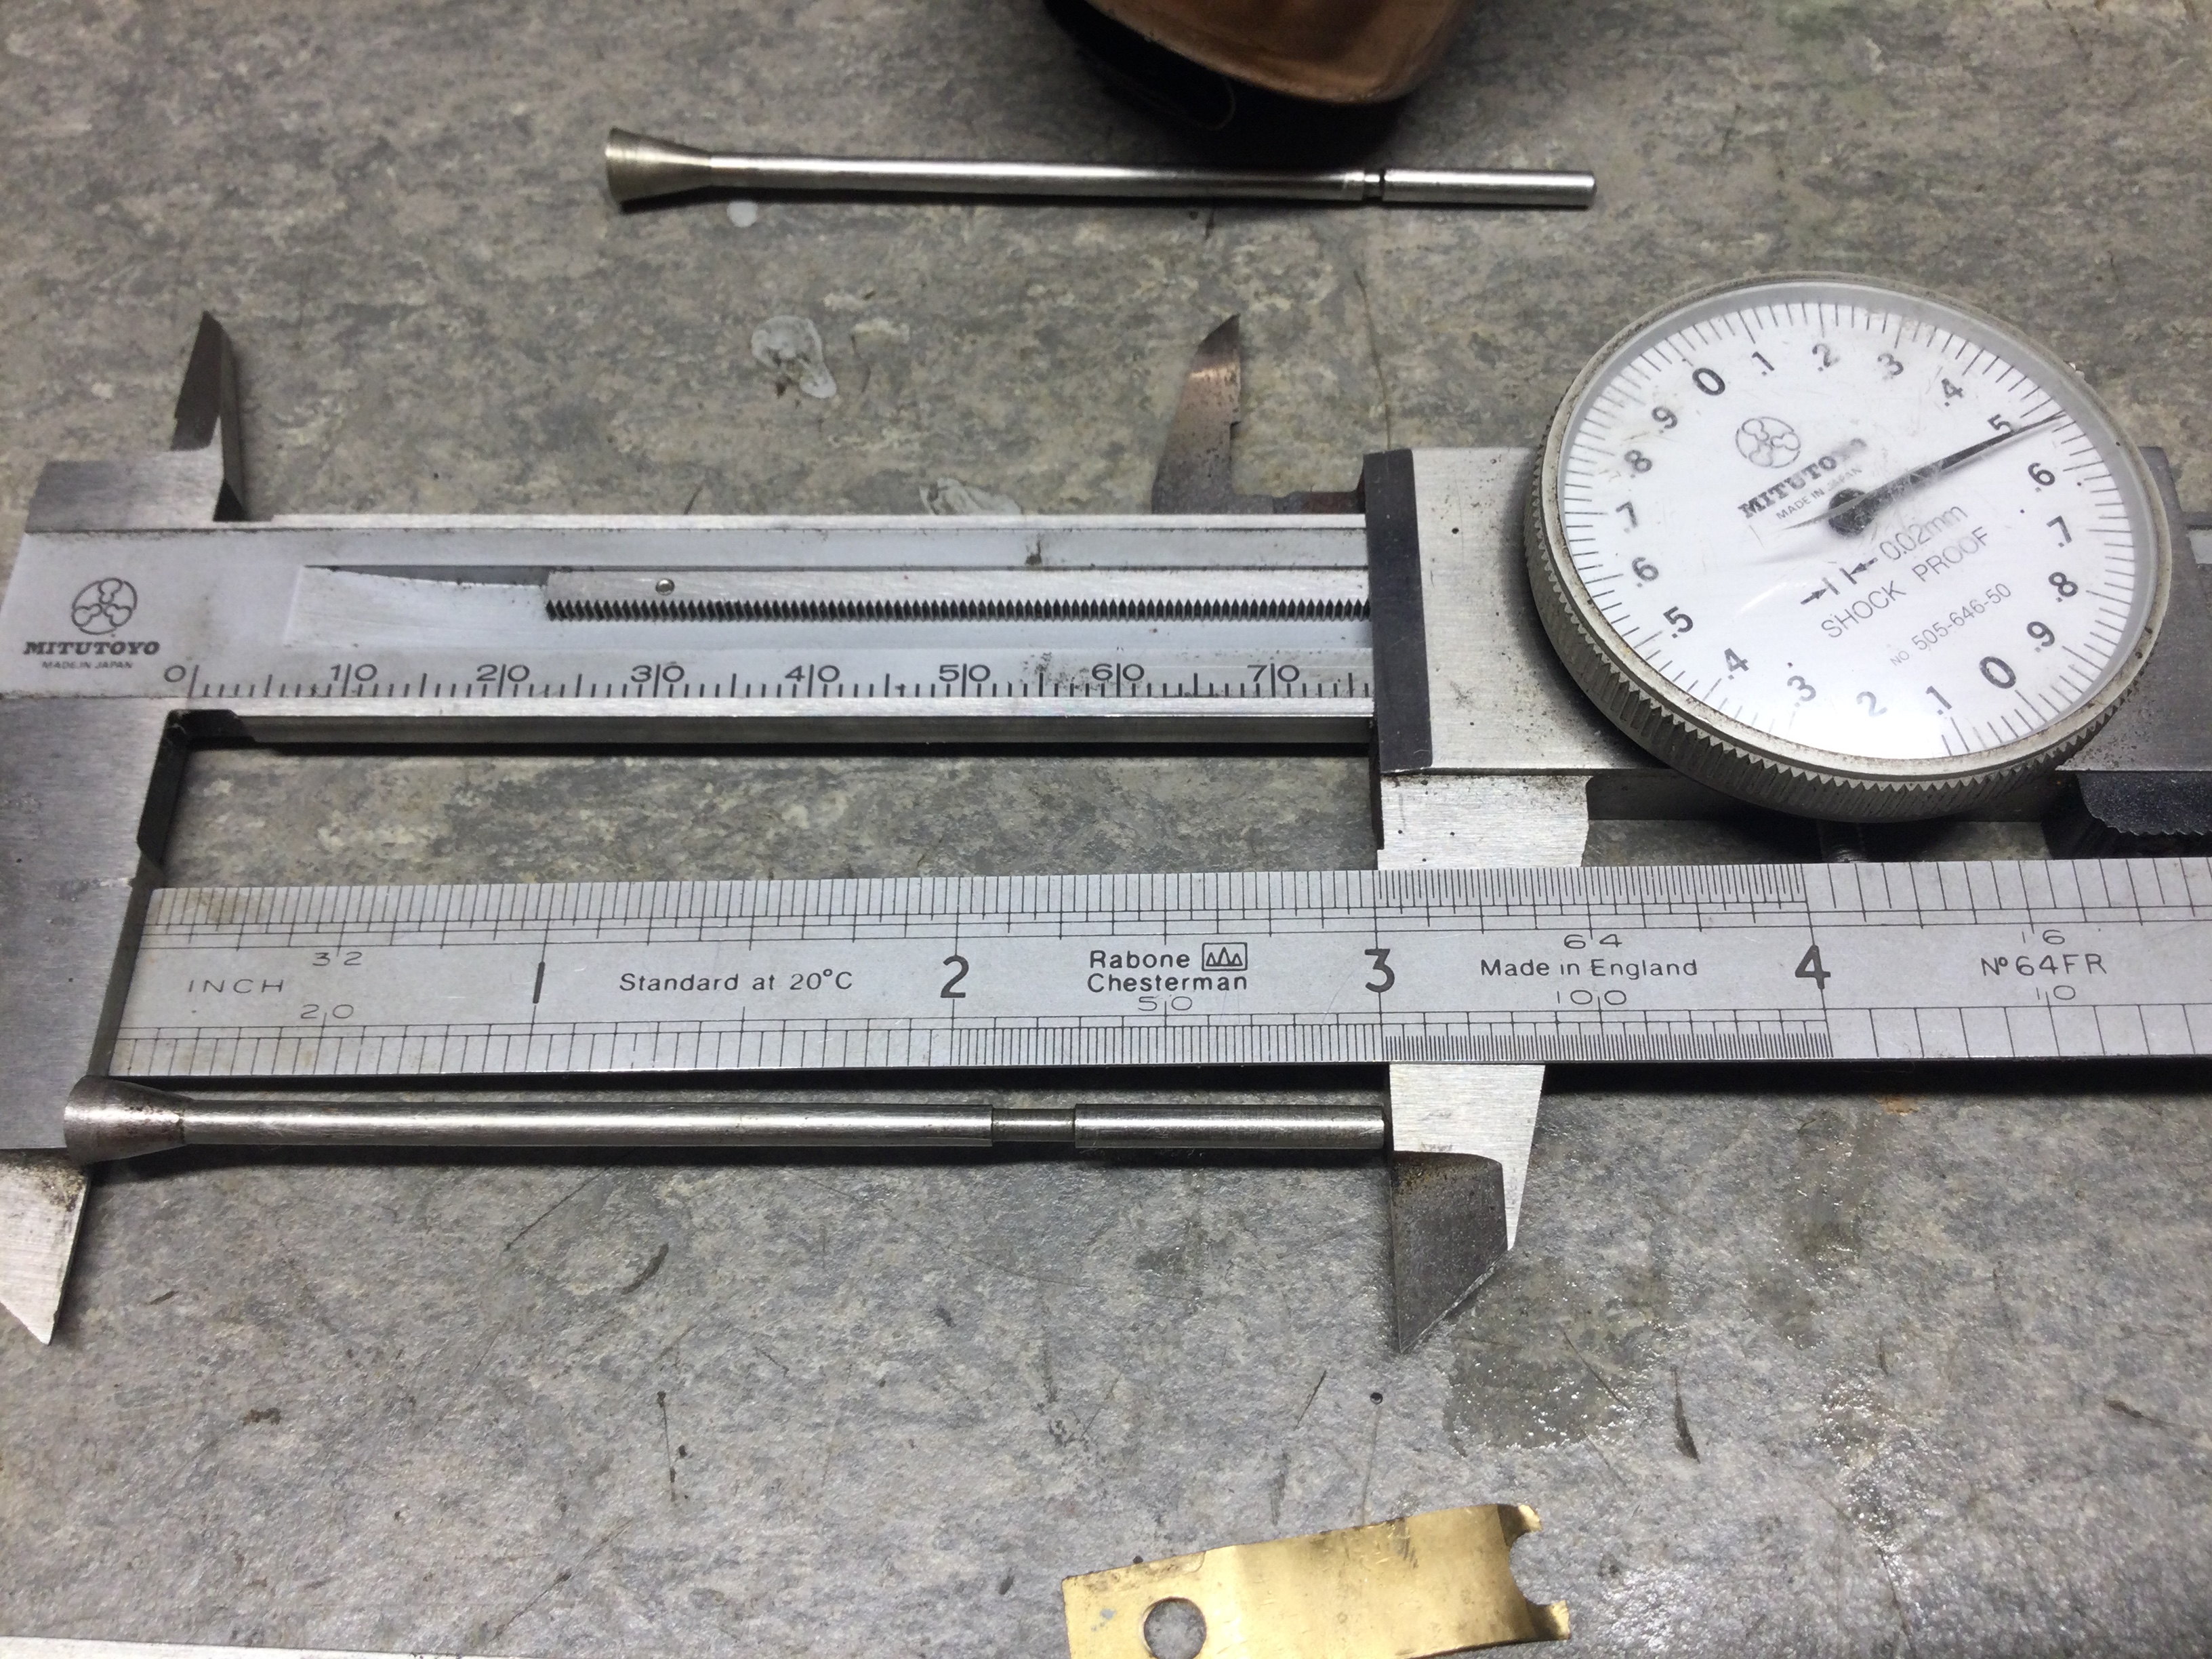
- My needle length is same as Jon’s non-Burlen needle.
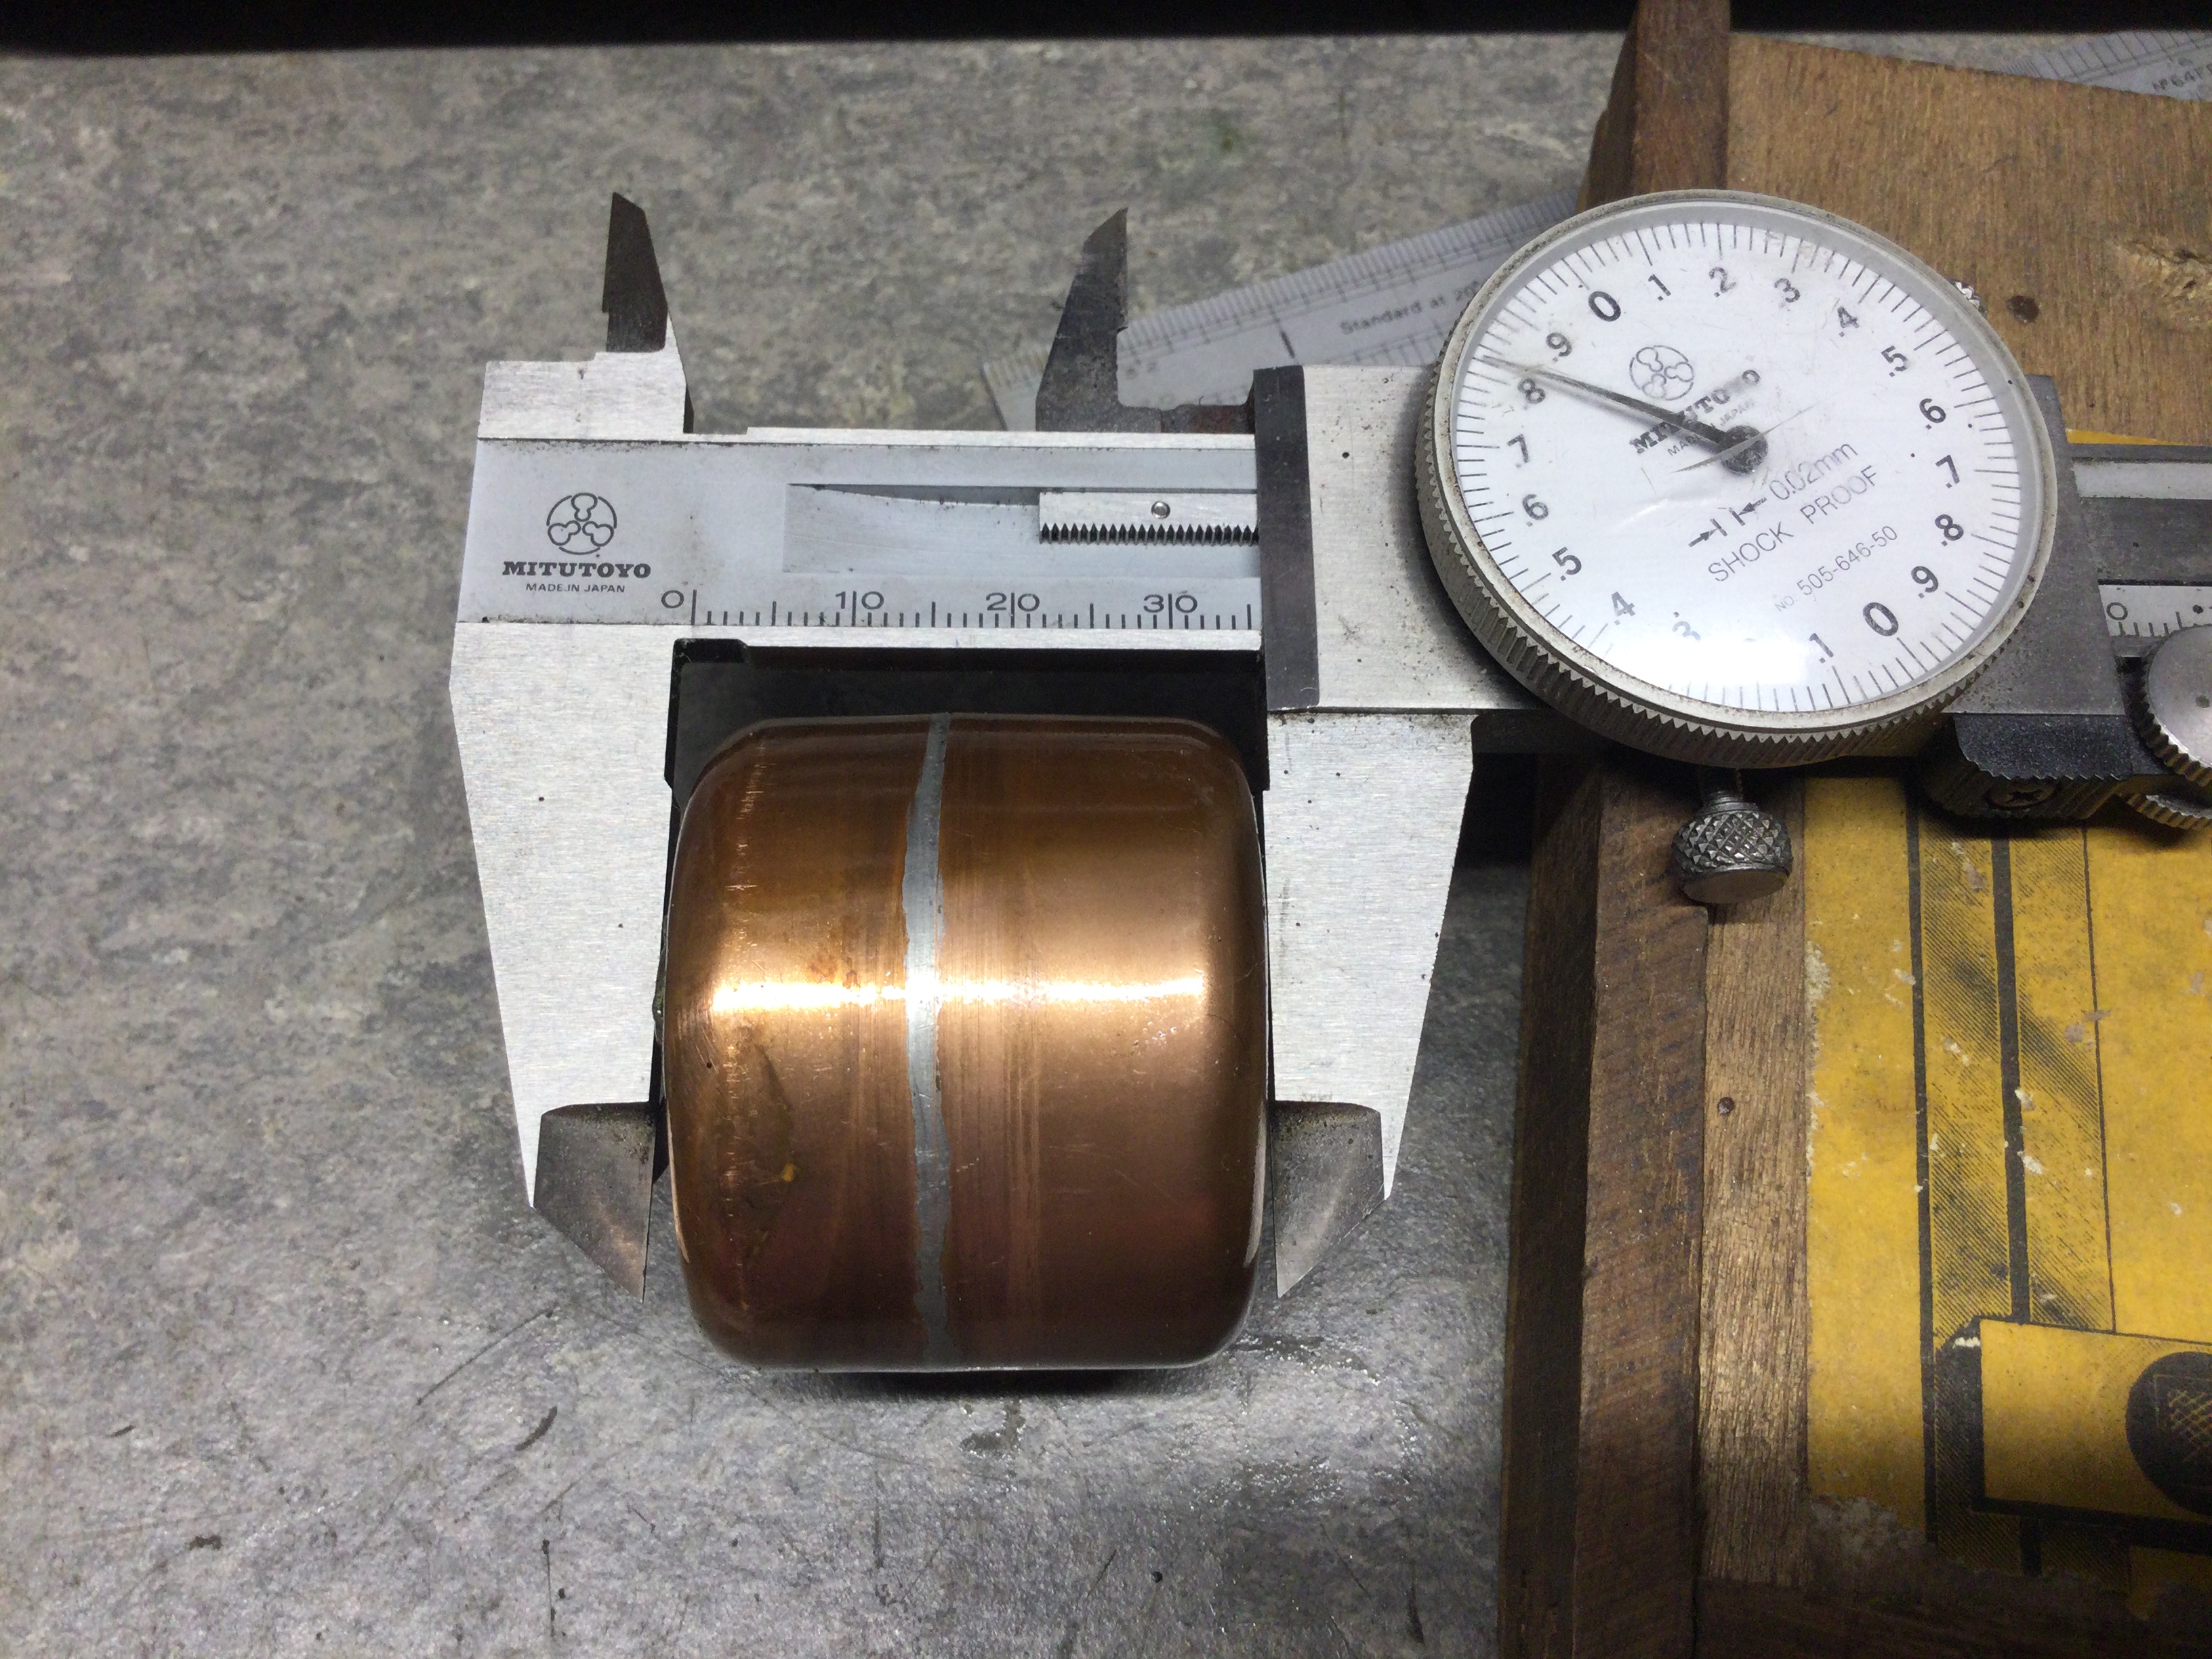
- The widest part of my needle cone is 0.218” or 5.56 mm (RacingNorton states the pre-war needle cone width is 0.222 mm).
- My float is 1.23 mm shorter than Jon’s float. 34.77 mm vs. 36 mm.
- David’s float travel is approximately ¼” My float travel is 9/32”
Conclusions:
- I believe we have ruled out the needle and seat being a problem because they bench test no leak. The distance from the top of the needle to the groove is 21/32” which appears same as Jon’s non-Burlen needle.
- Without David putting a 6” scale to his float to measure travel, at most my float’s measured travel distance is approximately 1/32” more than David’s travel. My needle projects above the top of the bowl like David's needle.
- Since my float is 1.23 mm shorter than Jon’s, in theory my float should have only very slightly more travel assuming the distances from top of needle to the groove are the same.
- Seems like perhaps my float bowl is the problem, not allowing the float to achieve a fuel level lower than the emulsion holes...? One thing I need to do is look for the "0 / 7 / 15" on the bottom of the bowl as discussed by RacingNorton.
The problem remains that my fuel level, even with the bowl move full forward, remains approximately ¼” above the emulsion holes. The only way I can get the fuel level just slightly above the holes is if I push the clip all the way down the needle and then I have no float travel which does not allow gas to fill the chamber. I guess what I will do is lower the float as far as I can and still still allow gas to enter the bowl, reinstall and see if the leak is not there. (But I already tried that yesterday… What the hell, I’m up for trying again, just get a bigger hammer…)
Will certainly look forward to your thoughts. What questions have I not asked in this troubleshooting process?
I’m beginning to feel like I am waay over thinking this and missing something obvious. If I had a remote bowl like my Gold Star had, I could adjust the fuel level. If wishes were fishes and if’s and but’s were candies and nuts, pigs would fly.
Tomorrow after I get home from the office, i think I'll take the Interceptor for a ride and spatter a little oil on the tarmac.
- Log in to post comments
Exhausted my knowledge level here Steve.
The theory has not worked out. The 15 is usually on the underside of the transfer port. There were 12 degrees also according to one of our team.
Any thoughts on lowering the connection to the carb with a small spacer?
Maybe the depression in the mixing chamber and fuel flow keeps the holes clear of fuel when running So it’s only dripping until it starts?
I use a BMW to clear my head!!
Jon
- Log in to post comments
Thanks, Jon...
yes, i definitely thought about a spacer. it drips after it starts. will have to sit with this a day or so.
- Log in to post comments
10TT carb continued
Following this thread of issues sounds exactly like the problems I had when getting my Plunger Inter/Manx back on the road 10 + years ago. The engine is a ‘38 and has an alloy head with bronze skull and the carb of the same vintage. I too had had a 15 degree float chamber and what ever I did with the float chamber position, float level, replacing the float needle, lapping in the needle, made no difference, petrol still came out of the small overflow hole.
Luckily I had a another Amal float chamber that I could modify to work remotely. I was able to get this high enough to stop the petrol dribbling out and get the bike to start and run. However all was still not good as I later learnt I had slide with the wrong cutaway, more designed for full throttle running as the motor would die when slowing down and not pick up smoothly.
in the end I put all down to the carb being so old it was probably past it’s best, I spent probably 3 or 4 months messing about and desperately wanted to get the bike on the road and ended up fitting a 930 Amal Concentric, problem solved, she starts easy, pulls like a train and ticks over when you stop... what’s not to like... a bike is to be ridden after all
- Log in to post comments
Hi Simon!
Thank you for your comments. Your Inter looks lovely and well kept. My Inter also has a bronze head.
Going with a new carb is in my playbook; I'm not quite ready to give up yet on the TT. However, I would appreciate if you could give me the full specs on the concentric you fitted? Do you have to use a spacer between carb and head?
I've heard the Concentric Premier units have improvements over the original concentric, so that could be something i consider if my attempts at moving forward stay at a standstill.
I've worked on enough old carbs to know that some of them do live beyond their usefulness especially when one is using an EGA to get the different gas percentages within spec.
Kind regards, Steve
- Log in to post comments
Concentric specs
Hi Steve
specs as below
310 mains, n/jet 106, pilot 30(bush removed)
slide 3
And yes i have probably a 1/4 “ fibre spacer between carb and head
the premier version of the concentric wasn’t around when I did this but recently fitted one to my ‘68 Atlas that was converted to single carb use and has performed perfectly so could be the way to go
all the best
Simon
- Log in to post comments
My choice....
.....was a Monobloc with an Atlas manifold bored to match. This gets the carb in the same relationship to the head and tank. Also enables use of a tidy air filter.

- Log in to post comments


I can't pretend to know all the answers but in regard to different floats, the new Amal float needle in a new 276 carb has two grooves. One for new plastic floats, and one for original. So the needle might need changing at the same time if such a float is available.
The books I have suggest lapping in the float needle with metal polish. 2 drips a second does sound like it's not seating.
Someone might correct me but I think the holes are to stop fuel running down the inlet tube into the cylinder if the fuel level does become too high. So they are doing their job. They are too small for pilot air.
Can you measure the level? If it is too high or the float needle leaks it will rise slowly until it is above the holes in which case they must drip. Does it leak when running? With metal to metal seal, the tank tap needs to be shut when parked up for any length of time. It might be OK when running.
They are not like the viton seals on new carbs. I accidentally left the fuel tap open on my Dommie for over a week and it did not drip, but that has viton tipped float needles.