So to make it more comfortable to follow an post I start part two of the story..
I found No 20873 rocker oilway grub screw(8) in the 1961/62 parts list. Guess these go into the holes on the spindle towers?
Thread size?
Does a sealing ring go between the head and push in headers?
None mentioned in the parts list.
Grub Screw; the screw hole…
- Log in to post comments
Here are a couple of pictu…
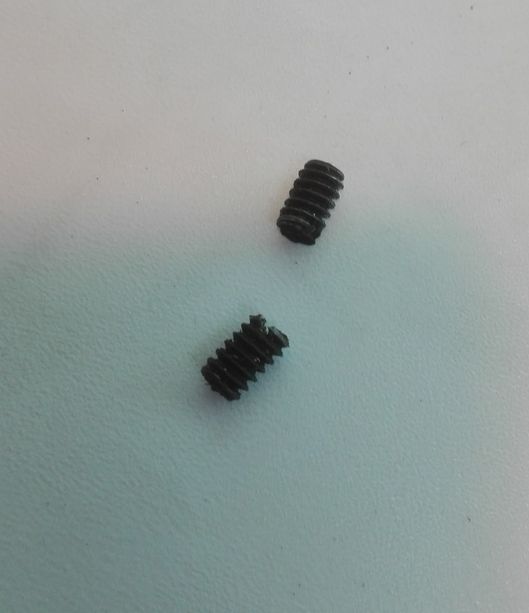
Here are a couple of pictures relating to '20873 rocker oilway grub screw'
There are 8 of them, two on each rocker post. They are normally installed at the factory after making the oilways to blank them off, and would not be expected to come out in service.
Having said that, I found this one had come out on its own on my most recent engine strip.
Attachments
20873-2a-jpg
- Log in to post comments
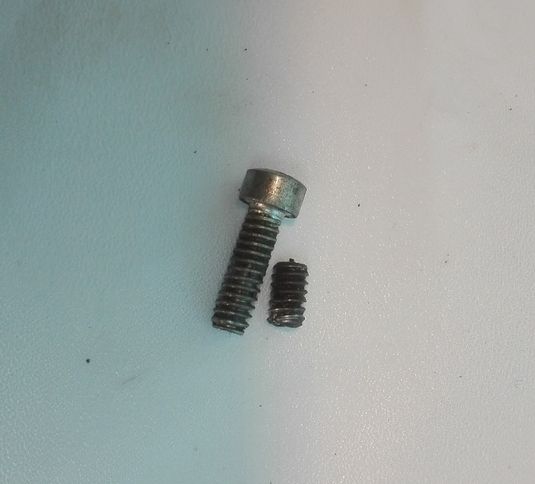
picture2 Thread appears to…
picture2
Thread appears to be less than 3/16" of an inch - about 4.5mm - and around 22TPI - but not quite!
Attachments
20873-4-jpg
- Log in to post comments
Thanks Andy for the posts…
Thanks Andy for the posts an pics. I wondered where the other for screws would go.. SInce I have NOS heads from Russell motors none of these grub scres were installed.
I have some Jubilee heads and was able to get two screws out.
Then I looked around my spare parts boxes and found one screw with the same size and thread.
I sawed it in half and so I had two other grub screws.
Ok, now I need for more, but no more screws..
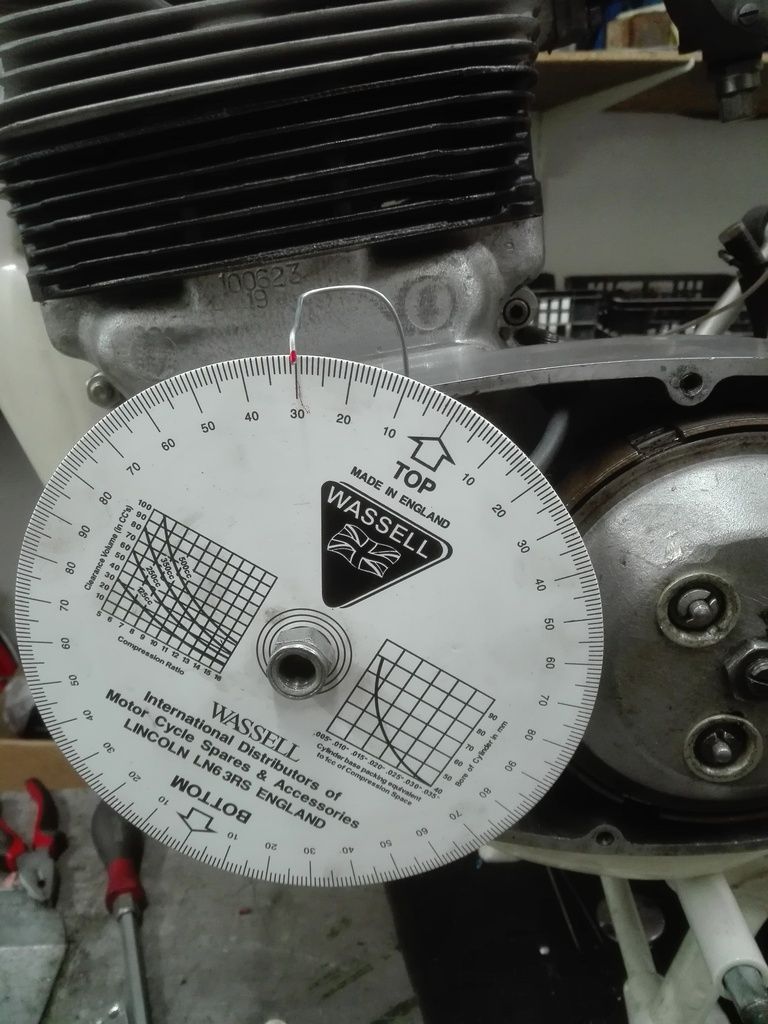
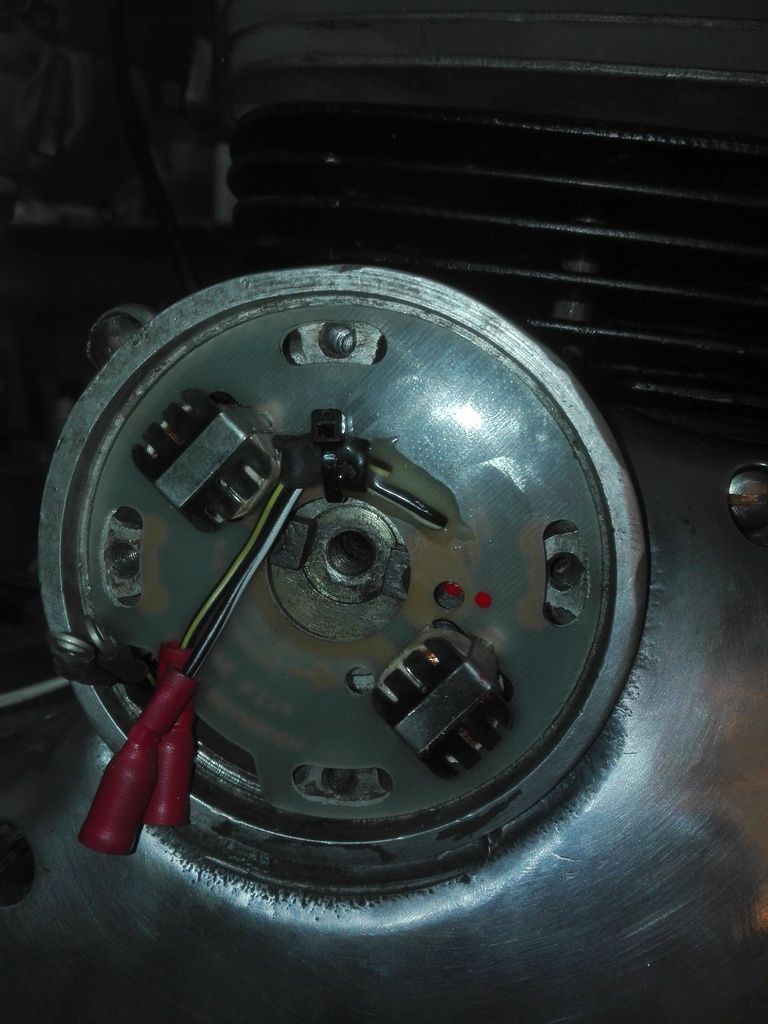
Timing:
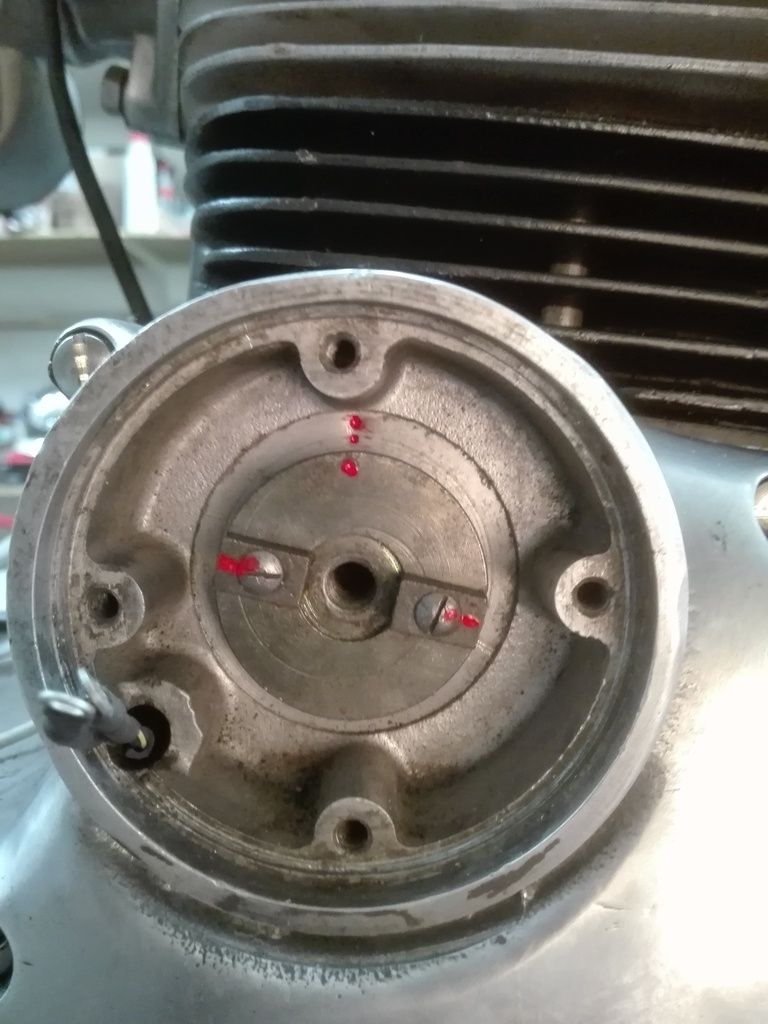
Seting at 30? I marked the rotor and housing.
And I installed the pick up disc. There was a modified Commando pickup disc but this one I made for the lightweight ignition housing.
- Log in to post comments
Hi Uli and Andy, Your pict…
Hi Uli and Andy,
Your pictures of the grub screw are very useful. It immediately reminded me that I had seen a screw(as in Uli's picture) identical to this- it is the screw(3 of them) on the float bowl of the HS4 SU carburettors on my 1963 MGB. So I tried one of these MGB screws on the old Jubilee head and it almost certainly fits. I say almost certain as I cannot unscrew any of the old Norton screws and only a few threads are visible to test on. The screws on this head have been centre punched.
I measure the MGB carb screw as 3/16 of an inch UNC and it is 24TPI. These carbs were fitted to loads of old British motors of the sixties. So easy to get. Later HIF carbs are different.
- Log in to post comments
Not much progress here. Ma…
Not much progress here.
Managed to find a mudguard on ebay.uk and mounted it with the struts from the NOC shop. Need to weld shut the holes for the pedestrian slicer then ready for paint!
Sealing the tank inside with one component sealer what a sticky mess!
- Log in to post comments
Hello Uli, It looks a dece…
Hello Uli,
It looks a decent front mudguard but a 1960's bike looks so much better with a 'proper' front number plate !. Maybe it is not legal to have this in Germany ?
Have you tried starting up yet?. You must be close on one year now into the rebuild. Doesn't time fly.
- Log in to post comments
Patrick, I just got back m…
Patrick,
I just got back my right header from Armours Ldt. It had a loose fit in the head but the new one is not much better. Will use some sort of sealer I guess. The front fork ist just a mockup with unknown chromed bridges to hold it together for fitting the mudguard. It is from an Atlas/Dominator. Therefore I cannot kickstart the bike. The original fork bridges an other hardware is still at my friend?s paintshop. This morning I asked the local "TÃV" (MOT) tester if a front license plate is allowed. He said if it was fitted originally it?s ok, but you cannot fit one if there was none originally. In Germany only pre-war bikes had the front plate. I don?t like it that much either...
Yes, time flies , hope to get it running soon.. Got all the parts but front and rear mudguard and tank still needs paint and the seat needs to be covered.
- Log in to post comments
Making some progress! My f…
Making some progress! My front mudguard bought on Ebay UK was looking good but turned out to be heavily corroded at the indents for the forks. All was covered with putty.
But it could be saved thanks to a polish master welder working at my friend?s paintshop.
These parts were cut out and new indents were welded in.
Other parts are aleady primered, waiting to be fillered and finished.
- Log in to post comments
That's a superb painting…
That's a superb painting rig you have. I am jealous What paint are you using -2K, Cellulose or Water Based ? or Powder coat?
- Log in to post comments
Painting is done at my fri…
Painting is done at my friend's professional paintshop.
Will have to ask what primer he is using.
But it is paint, no powdercoat.
- Log in to post comments
That is a nice paint set u…
That is a nice paint set up. On another note: how did you get the photos to show up in your postings rather than just the usual link we see?
- Log in to post comments
What like this? ....... !!…
What like this? ....... !!!
 You have to click the HTML button above the box and paste in an HTML link from a suitable photo hosting site .. not photobucket ... grrr!
dan
- Log in to post comments
Yes, like that. It's a pa…
Yes, like that. It's a pain clicking on the links at the bottom of threads and waiting for photos to open.
- Log in to post comments
I use postimage.org as a p…
I use postimage.org as a photo host, without costs so far..
- Log in to post comments
Hi Dan, That is a tidy loo…
Hi Dan,
That is a tidy looking Navigator with a competition number up front. Is it one that is used for road trials ?
Patrick
- Log in to post comments
Hi Patrick, the number is…
Hi Patrick, the number is a show number, it was at the Great Dorset Steam Rally, I stopped to pick up a M50 engine! It was very tidy, not far up the row there was a over head valve single being shown as an Inter .... couldnt find the owner to ask him about it!
- Log in to post comments
Before and after: After…
Before and after:
After some messy 1,5 hours all four caps are shiny!
I borrowed a polishing motor with 750 watts which made the job quite easy.
- Log in to post comments
You have more patience tha…
You have more patience than me, I just gave mine a quick buff!
- Log in to post comments
That looks shiny. I agree…
That looks shiny. I agree that it is a messy job - I wear an old full face helmet during polishing.
- Log in to post comments
Strewth Patrick, I just us…
Strewth Patrick, I just use a pair of safety googles!
- Log in to post comments
Strewth Patrick, I just us…
Strewth Patrick, I just use a pair of safety glasses!
- Log in to post comments
Ah yes but the helmet keep…
Ah yes but the helmet keeps the dirt out of my hair. My polisher is only an old drill which I clamp in the vice but it works amazingly well.
- Log in to post comments
Yesterday I got the painte…
Yesterday I got the painted parts for the fork.
Today I started assembling the fork. Firstly fixing the balls on the races with grease.
First try went wrong, two balls fell out the lover race and destroyed it while I was tightening the fork crown nut. These ball races do not seem to be very hard? So I used the better one of the old ones.
Success on second try!
No on to the spring cover tubes. I glued the leather seal to the fixing ring or else you go crazy aligning the whole stuff with the screw holes while putting it into the tube!
After sliding in the fork stanchions I fitted the upper bridge and had to shim it to get
everthing aligned. Without the shims the upper bridge does not sit on the crown nut.
I used two washers for the fork tube plugs.
Did I miss something? Upper ball race-dustcover-fork crown nut.
Not sure if I stick with these handlebars or go for the straight "drag" bars I also have.
- Log in to post comments
Hi Uli what was stopping t…
Hi Uli
what was stopping the top yolk sitting down on the nut?
- Log in to post comments
I guess I found the soluti…
I guess I found the solution: When rebuilding the fork I only had the diagram out of the 1961 Navigator parts list for the roadholder fork. Later I looked at the early commando Fastback parts list and at the diagram at the Andover Norton site. There is a spacer between the upper ball race and the dustcover. I did not put that in so the fork crown nut sits too deep. Well, I have to dismantle the fork again praying for the balls not falling into the steering head again.
- Log in to post comments
Hi Ulrich... There is no s…
Hi Ulrich...
There is no spacer UNDER the dust cover. You have the two washers shown in last but but one photo - wrong way round. The fat washer goes UNDER the blue fork crown, and the thin washer goes under the top chrome nut. See photo of my (rusty) Electra...
Attachments
p5010040-1-jpg
- Log in to post comments
Took me a couple of goes t…
Took me a couple of goes to get mine right, but will have to go and check again now!
- Log in to post comments
So the rear mudguard fits…
So the rear mudguard fits fairly well.
It is not original you can tell by the gap at the chainguard but I had no better.
Here is the setup with the spacers and a selfmade rubber washer. Are these spacers also painted dove gray?
The front one is another story..
Looking good from the side
But not from the top:
The fork shrouds already hit the mudguard . The indents at the siede are too shallow. I did not realize the shrouds having a larger diameter than the chromed fork extension. They were not at hand while testfitting.
Back to the welder an painter...
Or getting wider triple trees? I have the 7 inch ones.
- Log in to post comments
Wider trees will need a wi…
Wider trees will need a wider slider and top yoke, or find an earlier narrow guard.Or cut a 3/8th strip down the center of the guard and weld back together!!.
- Log in to post comments
Are the yokes and trees di…
Are the yokes and trees different to the ones from the slimline?
There are often auctions in eBay.
Or from AN: https://andover-norton.co.uk/en/shop-details/14919/lower-fork-yoke-late-dominator-c-w-pinch-studs-nuts and https://andover-norton.co.uk/en/shop-details/14920/fork-top-crown-late-dominator-steering-lockversion-
As far as I know are those the wider, 7 3/8".
Fritz
- Log in to post comments
Oh that is a shame as it w…
Oh that is a shame as it was looking so good. But you have overcome bigger problems !.
IF you know a well equipped machine shop with the right hydraulic press equipment it should be possible to press the mudguard indents deeper with minimal damage to the paintwork and IF the paint was oven cured 2K you might get away without a respray. But that's two big IFs .
Yes you can change to the 7 3/8" yokes but that will be a very costly option unless you hit lucky. The later model Electra had the wider yokes and is the same as Dominator as far as I know.
Patrick
- Log in to post comments
Fritz, these are also the…
Fritz, these are also the yokes also for early commando .
I have them on my 1970 Commando Roadster.
I already looked for them on the internet. Top ones are available but no bottom ones at the moment.
Patrick, the paint is from my friend?s automotive paint shop. It is 2K.
To press the indents deeper a special form will be required I guess.
I?ll talk to my friend and see what he suggests.
- Log in to post comments
Previously Ulrich Hoffmann…
Previously Ulrich Hoffmann wrote:
Fritz, these are also the yokes also for early commando .
I've found some here https://www.mortons.co.uk/cbc/obm/classifieds/classdemo.php?ID=6131, searched in the browser for the term ?yoke?. The third hit is interesting
Then I've found one from Mick Hemmings (it's the part-no from the 1968-1970 Commando)
Fritz
Attachments
mick-hemmings-retailpricelist-p13-pdf
- Log in to post comments
You could always use stand…
You could always use standard steel/aluminium mudguard while you look for another, Iâm sure that one would sell well as it is.
i have a front guard in my garage for my navigator (when I get around to starting on the project!) Iâd better check that one!
this sort of thing http://www.classicbikeshop.co.uk/frame-chassis-mudguards/mudguards.html
- Log in to post comments
Dan , if you look at my av…
Dan ,
if you look at my avatar you see the Navvi as I got it with a generic alloy front mudguard. I can still use that but I like the original one better.
The employee in my friends paint shop welded the indents new .
Form was taken off the old rusted ones.
Anyway, will have it fixed and will report.
Back to another question: are the spacers for the rear mudguard also painted dove gray?
- Log in to post comments
Hi Ulrich, You will probab…
Hi Ulrich, You will probably find that you have to re-make the bridge to the guard as well. Shame really as the correct narrow valenced early slimline guards are scarce but do turn up. I have a couple and need a wide guard!!.
- Log in to post comments
Uli, how will you attach t…
Uli, how will you attach the seat with those spacers there? I thought they were for the delux, but Iâm quite often wrong on such matters! My seat bolts to the back of the top shock bolt.
- Log in to post comments
Previously Ulrich Hoffmann…
Previously Ulrich Hoffmann wrote:
Back to another question: are the spacers for the rear mudguard also painted dove gray?
Hi Ulrich.
For a standard lightweight the spacer arrangement is as your photo, but there was never a rubber washer between the long spacer and the mudguard. The original finish on the spacers was zinc plated and passivated to give the grey finish seen on many fasteners. If you have stainless spacers, I'd just leave them.
Obviously Norton/AMC did not want the hassle of painting spacers to match different frame colour options. Same with the frame spacers at headstock and lower downtube.
Won't the spacer crush the paint on the mudguard and damage it? Probably, but AMC could get their cellulose paint on very thinly.
All the best
Peter
- Log in to post comments
Hi Dan, I am sure that Uli…
Hi Dan,
I am sure that Uli is correct; there are two spacers there, one short and one long, and the seat leg fits between them. But you are also right as most people simple do the simple thing and make one slightly longer spacer.
Patrick
- Log in to post comments
Carrying on from Peter's…
Carrying on from Peter's observations I believe that all the early frames -pre 1963- were always painted in Dove Grey so my choice would be to paint the spacers. The black frame came in 1963 and two tone was then an option. That's just my opinion and could be wrong. Whatever you do it's right- it's your bike.
- Log in to post comments



Grub Screw; the screw hole pictured seems bigger than the screw hole on a spare head I have here and it looks to be the same size as the rocker cover screws. The rocker cover screws on mine are 1/4" Whitworth but the grub screw is definitely smaller. It is impossible to measure in position but my guess is 3/16"and I would expect the thread to be Whitworth. Maybe someone knows better.
Front Pipes;these are just a push fit- no gasket or sealing ring.