
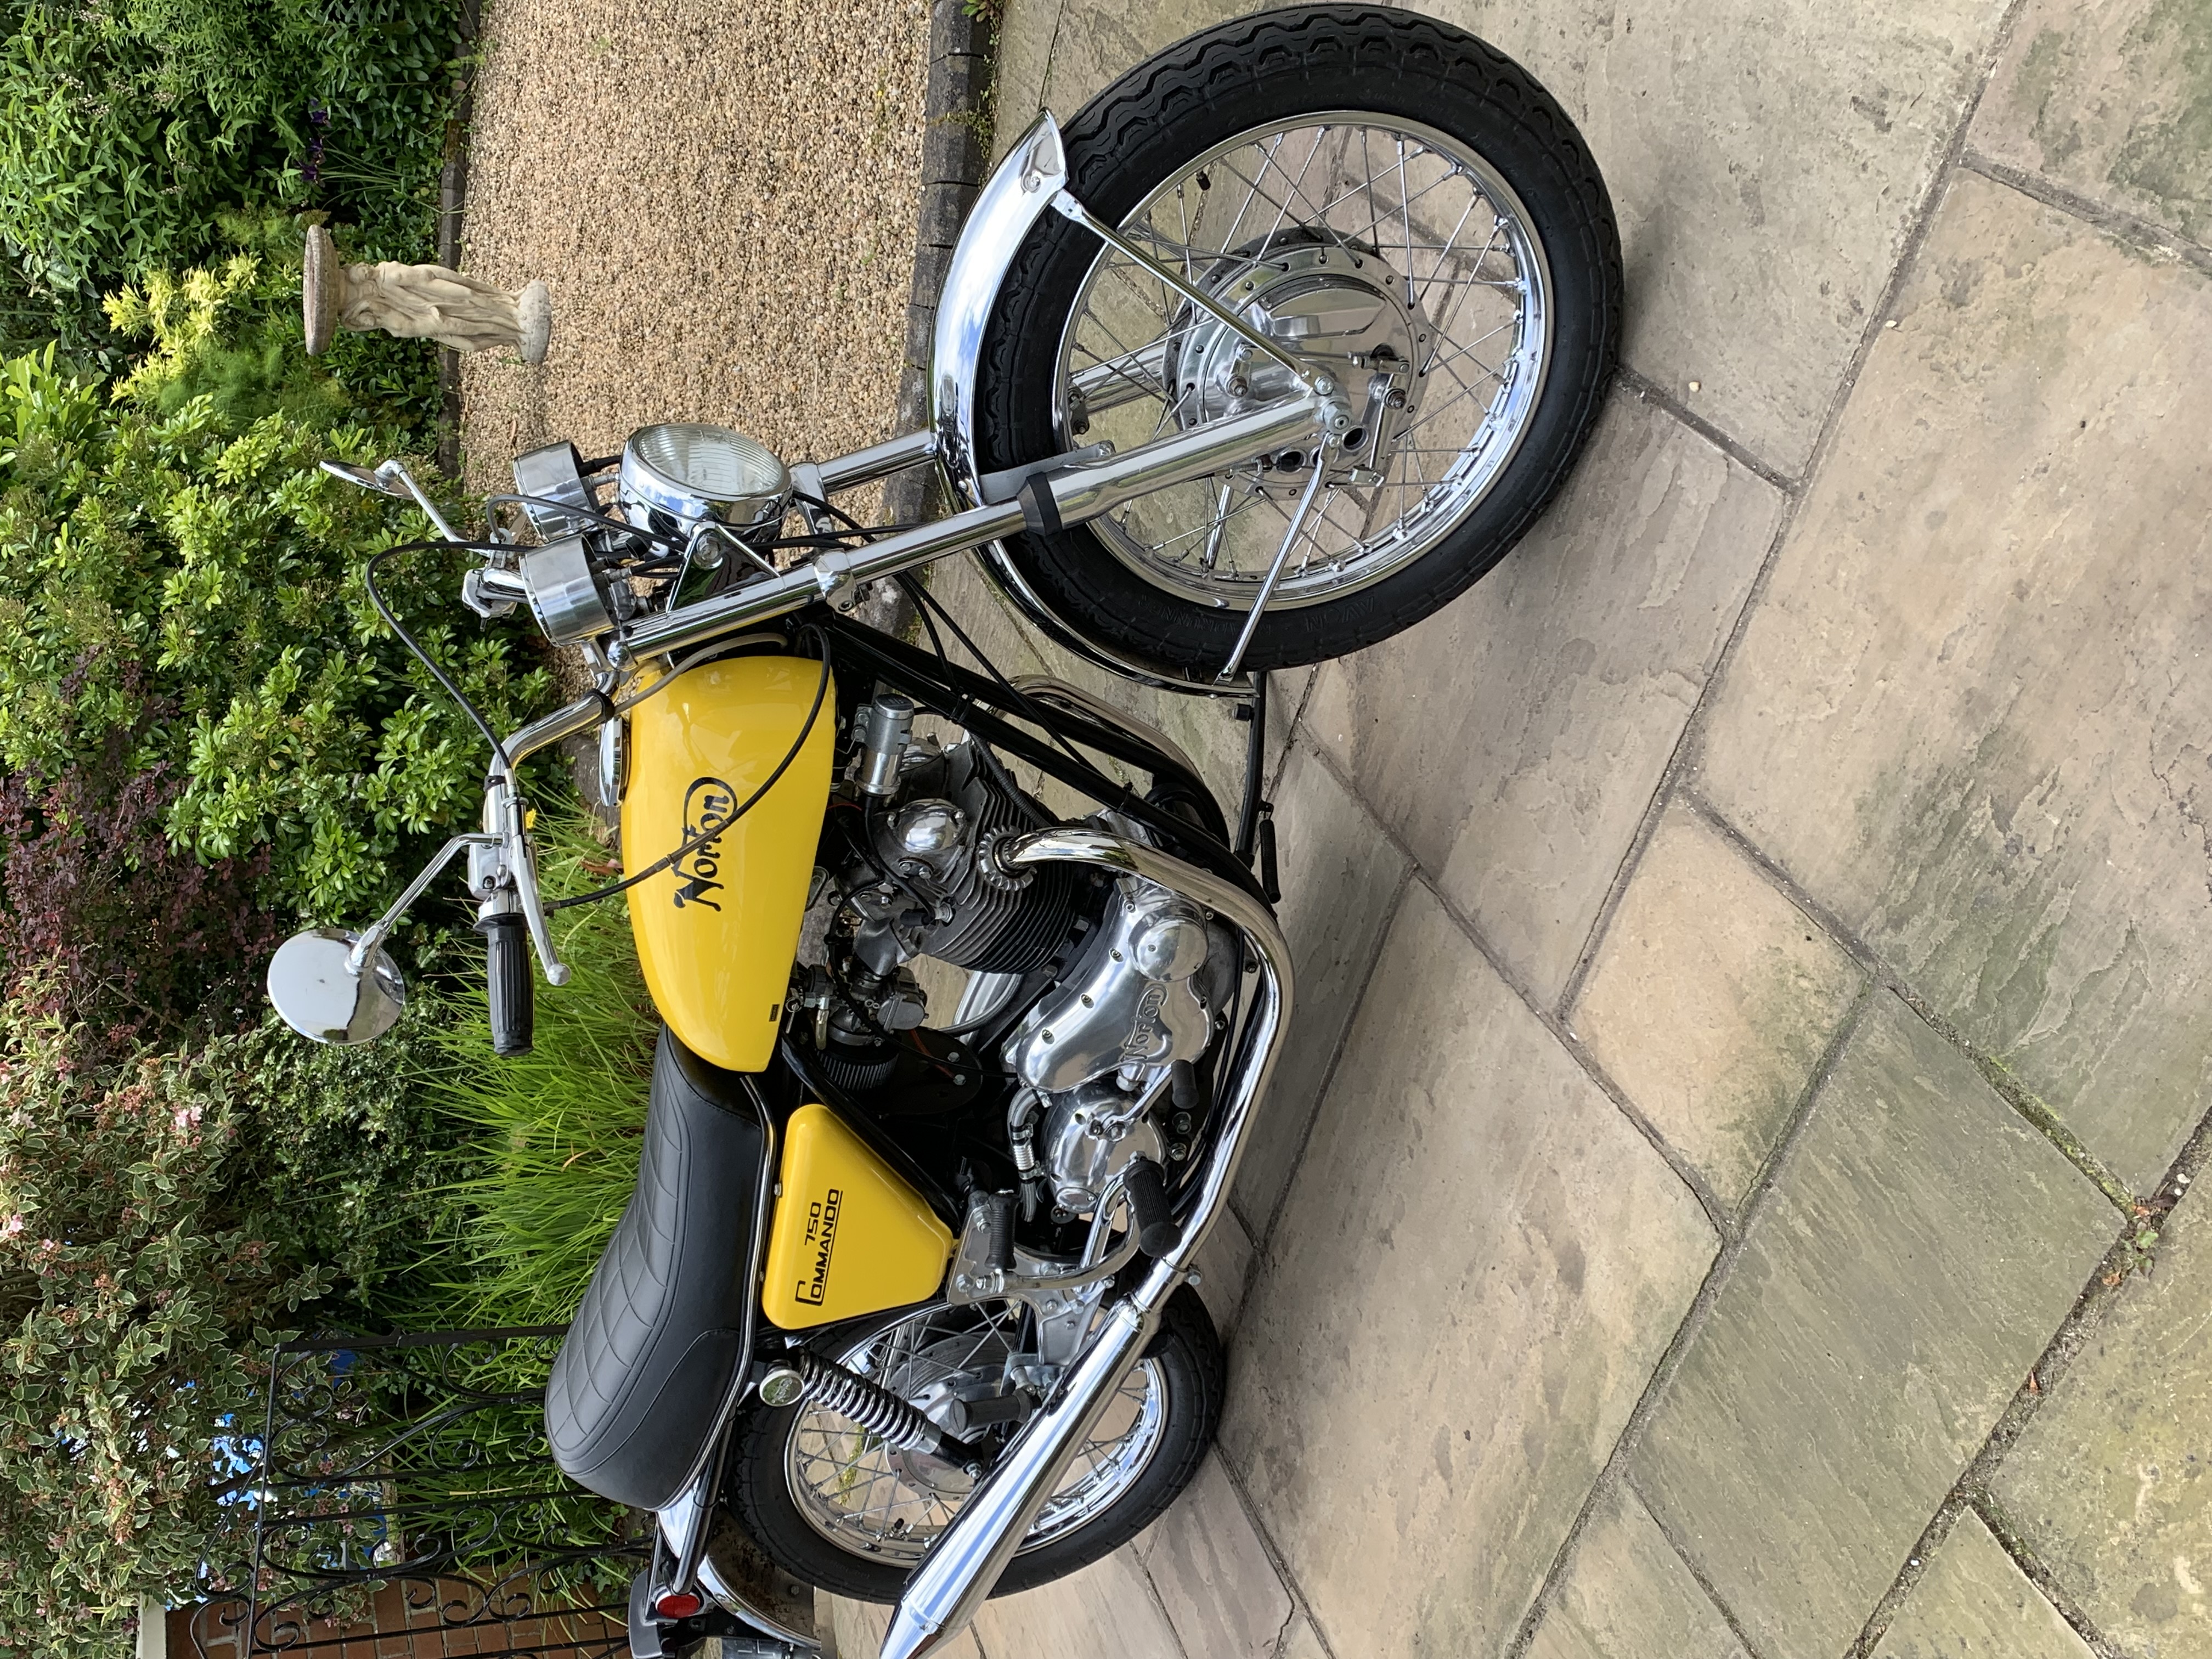
Hi, I'm new to the club after just buying my Commando. It's restored, looks great and is so far unreliable and dangerous.
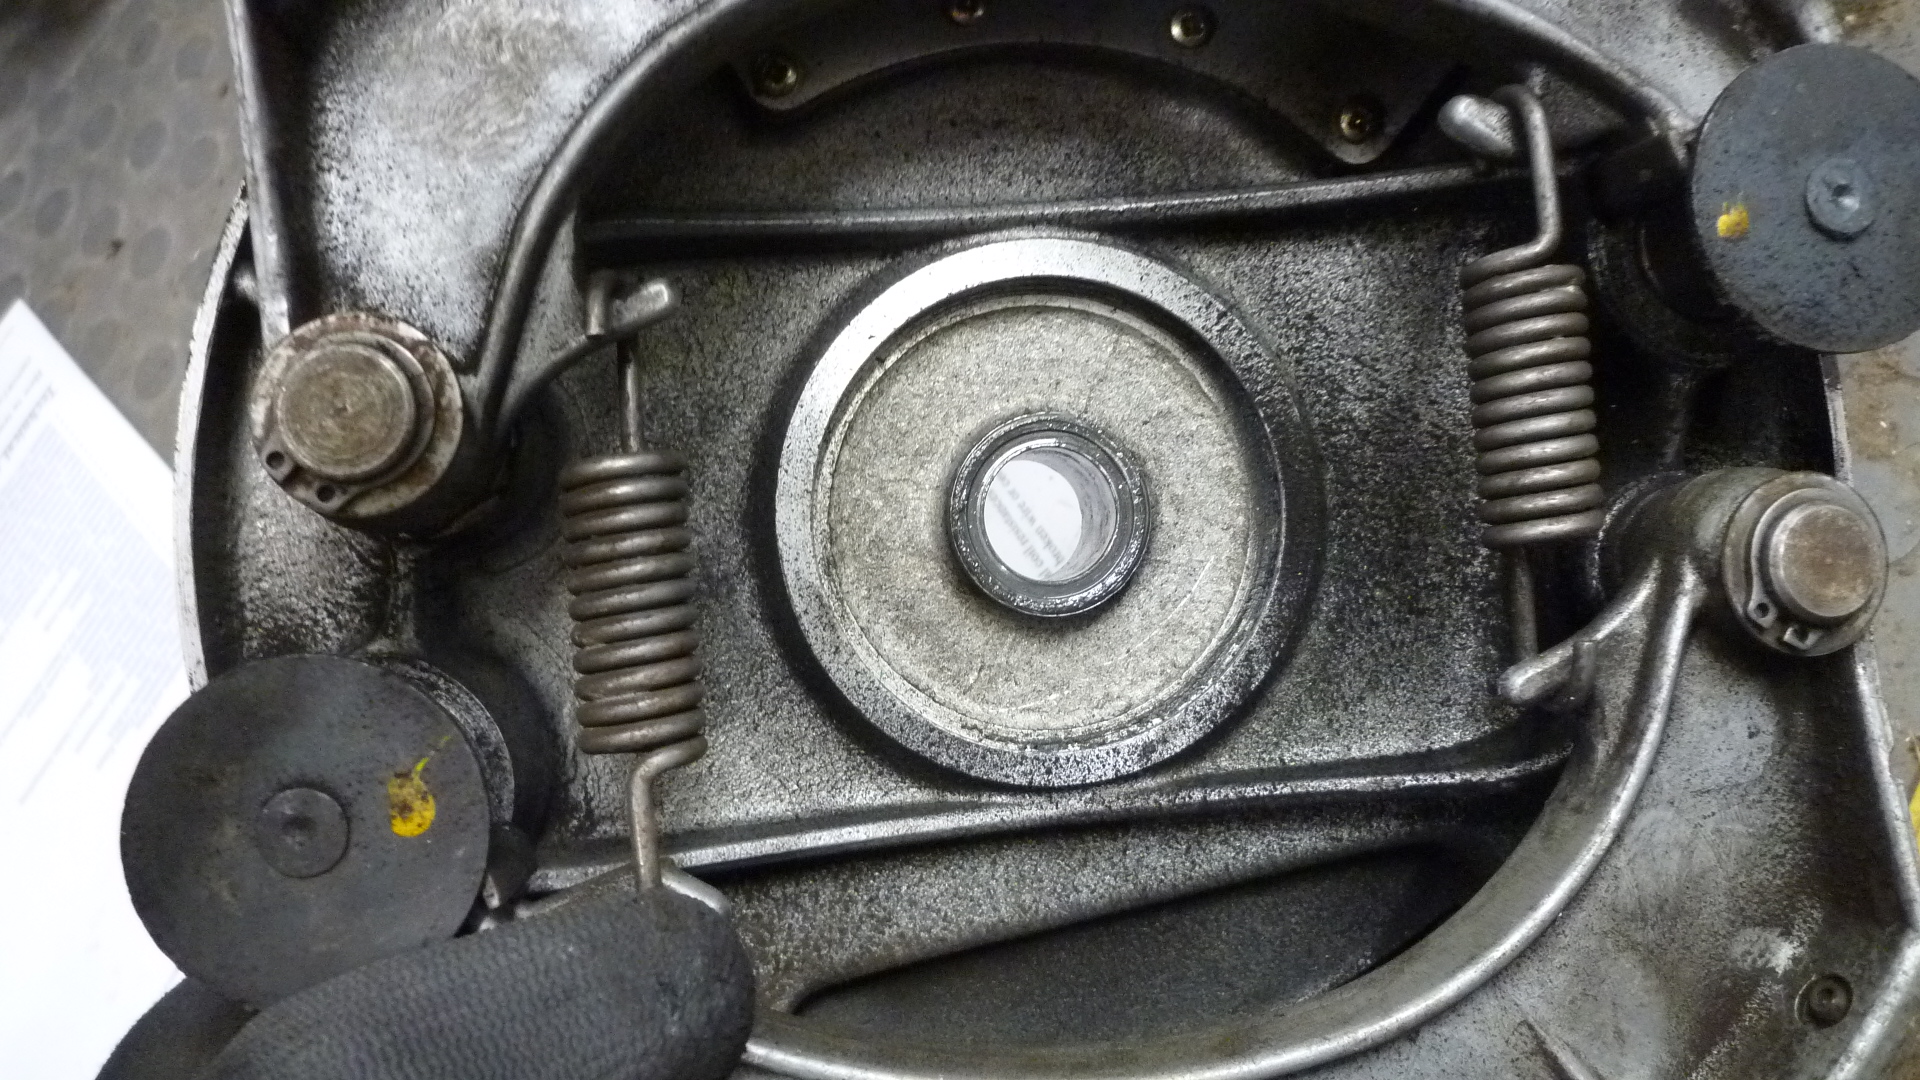
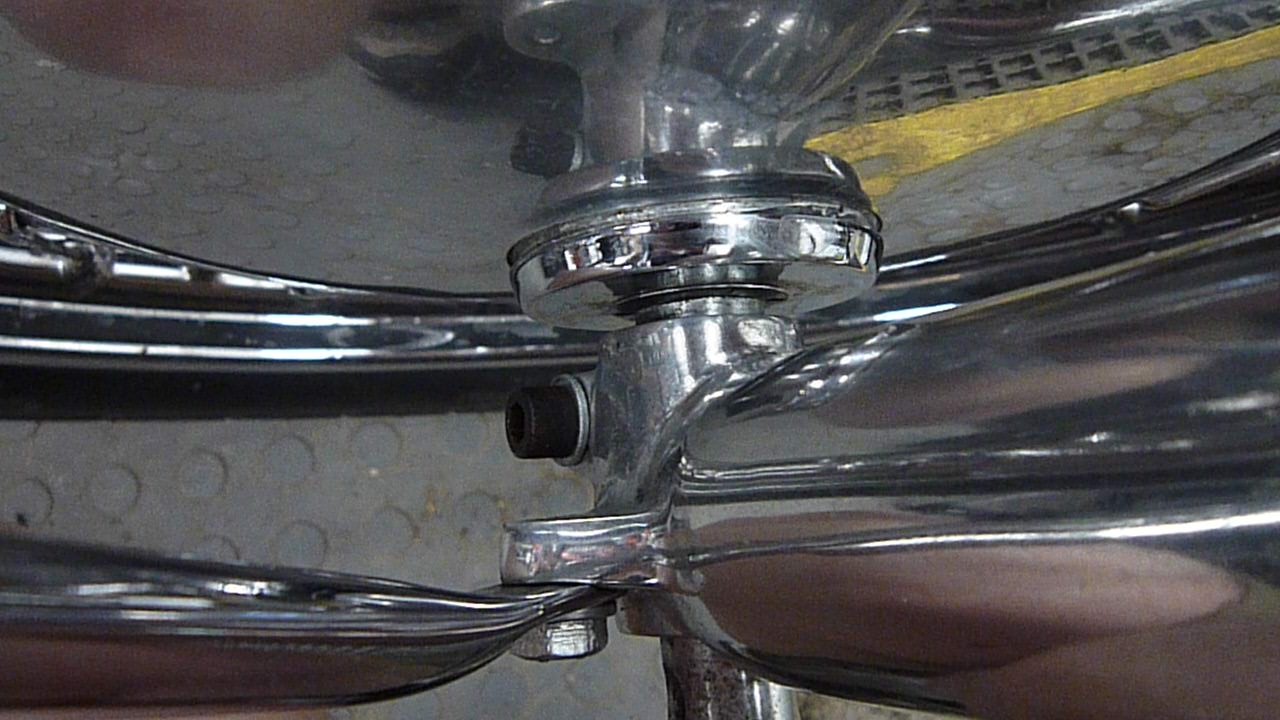
The latest in a line of problems is the front wheel. I found it was shaking around so tightened everything up. Unfortunately then it won't spin which is inevitably why it's been left loose. I've got the wheel off and it has a bearing and I can feel a spacer, on the other side is a cap with 4 dimples in. I assume that unscrews with a special tool, I'm not really the special screwdriver and hammer type.
Even so, what can make it tight if all the components are seemingly there?
Thanks,John.
Hi and welcome! Sounds like…
- Log in to post comments
There can be several reasons…
There can be several reasons why you can feel play. It can be worn bearings ,a missing or incorrect spacer/felt holder, an incorrectly made replacement axle or a missing dust cap . I have found some of these on a recently re-built bike . The bearing retaining ring can be punched round ,I believe some have a RH thread and some a LH thread . The NS fork leg has a pinch bolt that must only be lightly tightened or the leg will fracture ,very expensive. Usually there are two sizes of bearing in the hub. Overwidth brake shoes or incorrect assembly is another possibility.
- Log in to post comments
Have competent bike mechanic look it over
It sounds very much like this bike was 'restored to sell on' Looks great but under the surface a boat load of problems. I wonder if the engine has been apart as after fifty years anything could lurk inside. Try and get an experienced mechanic, preferably familiar with commandos and their problems. There was an article in a recent Old Bike Mart outlining this very problem.
I am always very wary of 'just restored' bikes. Often with very few miles on them since 'restoring'
Looks like a high rider front brake cable has been fitted (too long) and a right hand Mk3 alloy footrest plate has been used (the hole that mounts the hydraulic brake pipe has had a bolt fitted to bung it up) It also has an oil shut off valve fitted. Ask your self why? It is because the engine wet sumps, possibly quite badly. If it was restored properly the oil pump should have been overhauled which would stop (or very much reduce the wet sumping) I would remove this valve asap as you risk destroying the engine. Was this imported back from the USA?
Sorry to be a bit negative but i think you might have been had. Depending on how much it cost.
- Log in to post comments
Welcome John, lots of…
Welcome John, lots of knowledgeable and friendly people in the club, you are in the right place for help.
Steve
- Log in to post comments
Nice looking bike!
Welcome to the club John.
I agree with the above. Get a mechanic familiar with Commandos, to go over it.
I noticed it has a Mikuni carb. Don't let the mechanic persuade you to change it back to Amals!
It is a nice looking bike. I would be proud to own it.
- Log in to post comments
Thanks for the welcome,…
Thanks for the welcome, sorry when I said I'm not a hammer a screwdriver guy I didn't mean I don't know my way around tools, it looks like the bearing cap wanted a "special" tool rather than butcher it off. Anyway it was right tight so I need a new one.
So I'm thinking there might be an issue looking at the Andover diagram. I seem to have some parts missing and the bearings aren't correct or I'm looking at the wrong diagram or I have a different wheel from the '71.
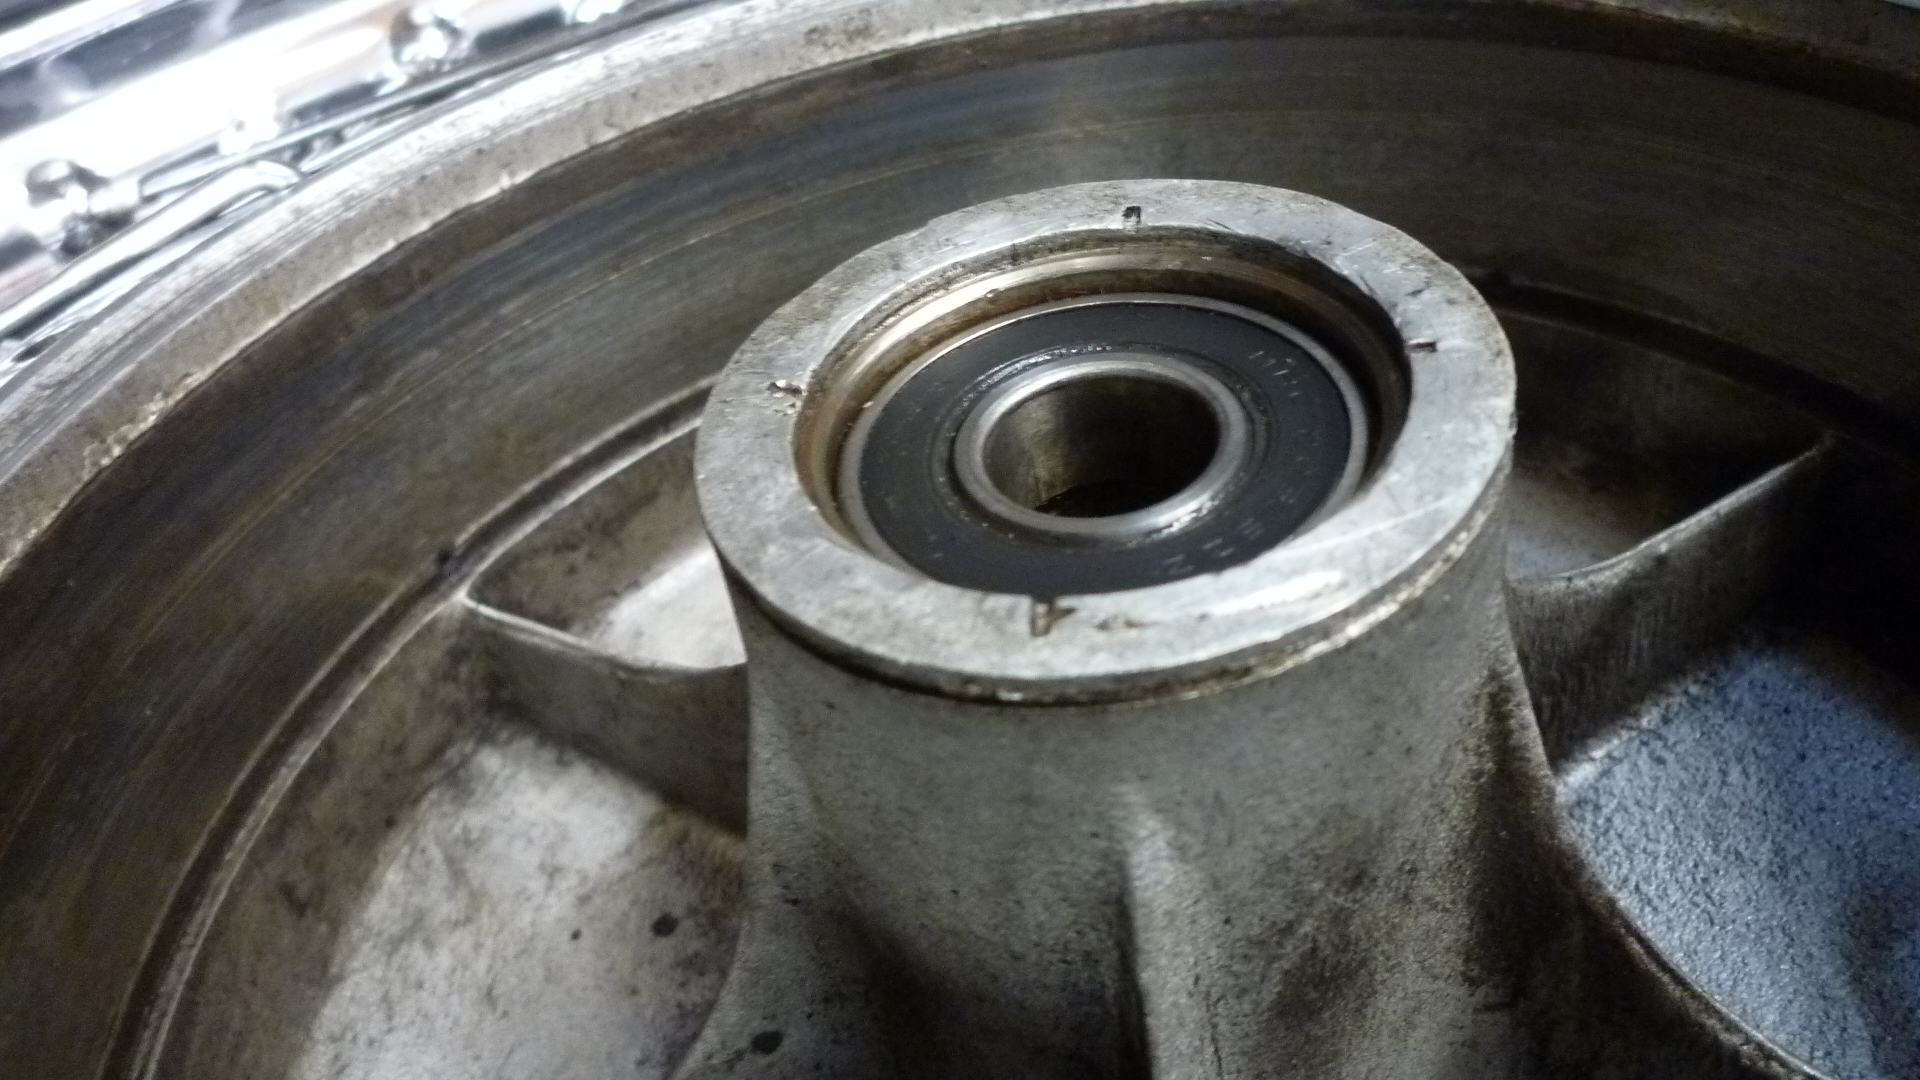
The picture of the parts on the stool are all the loose bits. I also have 2 x 6203 bearings and a spacer in the wheel but the picture says one is a 4203 bearing which is wider.
Also on the right hand side I seem to be missing 3 washers and a felt washer. I'm not sure why there are so many washers, that bit doesn't make sense.
Regarding the previous owner I don't think he did it to sell on but maybe preferred to polish than anything else. It is a highrider, I've put the lower bars on so need a shorter brake cable. It has a mikuni and starts 1st kick apart from the breaking down which turned out to be manky connectors on the electronic ignition.
He did mention the 1 way valve. Is that not a good idea? Why not?
It was imported from USA in 2017.
I love the bike but this is the 2nd restored bike I'm having to fix immediately. Pretty annoying as I just don't have time.
I also need to look at the clutch, it's has a four finger at full power pull on it. Can't see the cable lasting long.
ps any special way of making paragraphs? Seems to be one long text when I'm putting blank lines in??
- Log in to post comments
Haynes Manual Cable Luber.
John before you do anything about the clutch cable, I strongly suggest you oil it properly.
The Haynes manuals show a diagram with a little funnel made of plasticene. I use a plastic bag with a corner cut out and sealed with a cable tie or duct tape.
Disconnect the bar end and attach the funnel. Attach the cable to something high.
Fill the funnel with oil and comeback in 3 or 4 hours.
I have fixed many many stiff clutches with this simple method.
Don Anson
Melbourne.
- Log in to post comments
I guess all those bits…
I guess all those bits missing and wrong bearing might explain this gap
- Log in to post comments
Looking at the photo of the…
Looking at the photo of the gap; it looks correct, if you look at the spindle it has a shoulder on it and a thread and nut at the other end, so the wheel and bearings are located between the shoulder and the threaded end of the spindle, the large diameter on the spindle is then clamped by a pinch bolt on the fork leg so the gap you are seeing is not free play. I think your problem lies with the bearing type/setup.
- Log in to post comments
The gap is meant to be there…
The gap is meant to be there, by tightening the axle you pull the complete wheel assembly over to the timing side fork lower. You then pump on the front suspension which moves the driveside fork lower to the correct position for alignment and then only then tighten the pinch bolt in the bottom of the driveside fork lower to fix it in that position on the larger diameter portion of the axle. If you did not have the gap the driveside fork lower could only move outwards. I only have disc front wheels so can't help with the parts. However if a 6203 has been fitted instead of the double row 4203 then you will have issues as the widths are different.
You seem to be missing this
https://andover-norton.co.uk/en/shop-details/17293/wheel-bearing-spacer-front-drum-brake-nm19646-c2-656-
Without this part which keeps the bearings a set distance apart when you tighten the axle the bearings will be moved and the wheel jam up.
- Log in to post comments
Spot on advice from John…
Spot on advice from John Holmes, if you don't have correct width bearings they will slide into hub as you tighten axle, that is assuming correct spacer is inside. So dismantle and send a pic of internal spacer.
With regards Clutch there is a whole section on club website regarding how to set it up.
In a nutshell as plates wear it gets stiffer to use due to diaphram spring changing shape. Solution is to restore original stack height of plates, how you go about it depends on which plates you have, no need to buy a full set of new friction plates as they come in different thicknesses.quite often you can get away with taking a worn one out and swapping it for one of the thick fibre ones. Before buying any you would need to open up primary and compress clutch with it's special tool and gauge free space behind circlip.
Let us know where abouts you are as someone nearby might have tools to lend.
Good luck
Martin
- Log in to post comments
Front hub parts.
Hi John,
As said, welcome to our good value club. Yes you should have a 4203 double row ball on the brake side and a 6203 on the nearside, plus the all important centre spacer as John H has pointed out. The extra washers and felts were fitted on this set-up that dates from at least 1932, and the only purpose these serve is as grease seals, but with modern sealed bearings these are redundant and they don't actually affect the spindle width and are not needed. The sealed bearings should only have one seal each on the outer side so they can still receive grease from the hub centre.
Yes agree with you on the paragraph issue, but I don't think space is a problem. I think a spell checker would be more useful. Regarding your clutch, I think you will have to do a step by step check of all moving parts and get back here.
- Log in to post comments
Oil valve, not a good idea
Any one way valve fitted in the oil supply line to the engine is a potential disaster waiting to happen. You are relying on the suction from the oil pump to open this valve, if it sticks shut you can kiss your engine goodbye at the least. With a possibilty that it could throw you down the road as well. Not a good idea at all.
- Log in to post comments
Oil Valve
I tend to agree with Peter Shand ref. oil valves. The type that rely on suction of the oil pump to open could result in very expensive (and dangerous) seizure. Many people state that a new/reconditioned oil pump will stop wet sumping but from experience this is often not the case. When these bikes were designed and built they were usually everyday transport and hadn't the opportunity to wet-sump. Now many are only ridden on high days and holidays there is plenty of time for oil to slowly seep through the pump gears (albeit speed-dependant on the condition of the pump). Manual oil taps are a better option as long as they have the electrical cut-out feature which disables the ignition system if the tap is turned off. Kingpin Components can supply such a tap:
https://shop.kingpincomponents.co.uk/oil-tap-with-cutout-switch
Good luck with the bike in any case.
- Log in to post comments
The highest risk point of a…
The highest risk point of a sticking non return valve is the first start up of the day. So if you check the return flow to the tank on start up for long enough so you are not seeing the initial sump contents but fresh oil delivered from the tank you are good to go for the day. I have had one fitted for 20 odd years and its yet to fail, but I did take it apart before fitting and lowered the spring tension and fitted a rubber seat for the ball to seal against.
- Log in to post comments
It only has to stick once
'I've had one fitted for twenty odd years'
You've been lucky, it only has to stick once. Then its bye bye the bottom end
- Log in to post comments
Non-return valve prejudice …
… is exactly that. They have been fitted to every Velocette since about the dawn of time, and no one complains about them sticking shut.
Obviously it is possible to go wrong when priming the oil line, but that is just as easy to do with no valve fitted.
Others will correct me if needed, but from its appearance yours is the type that used to be supplied by the late Mick Hemmings, in which case I would think that it should be dependable.
The only qualification to the above is that whereas the traditional Velocette type has a steel ball and steel seat, modern versions may have either ball or seat in nitrile or similar. It is at least conceivable that one of these might stick shut if left unused for an extended period, but as John Holmes says, the first start of the day is the crucial one.
- Log in to post comments
A Velocette isn't a Norton
A velo was designed from the outset to use one of these and it looks nothing like something just plumbed into the delivery pipe. Correct me if i'm wrong but the velo uses a much bigger ball so the suction from the pump has a greater effect as the area of the valve seat is much larger. It also has a roller bearing big end whereas the commando with its shell bearing conrods cannot stand any disruption to the oil supply.
Norman White quotes on his invoices for engine work that if anything of the like is fitted in the oil delivery pipe his guarantee is null and void.
Nuff said
- Log in to post comments
Velo vs Norton check valves
I haven't seen the insides of the Hemmings-type in-line check valve, so can't say anything about those (though a dimly-remembered previous thread suggests that they may in fact use Velo internals).
What I can say, since I have both, is that the Holland Norton Works valve — which replaces the standard banjo-bolt-with-gravel-strainer — uses a steel ball of what seems to be notably larger diameter than the Velo one, with a nitrile seat. (Unfortunately I've never had them out of use simultaneously, so don't have actual dimensions.)
My Venom's valve is fitted with the nitrile ball sold by the VOC spares scheme as an upgrade.
I'll need to think about your argument about the effect of different ball sizes, but my initial reaction is that one would also need to consider the ratio between the diameter of the ball and the diameter of the seat. Prima facie, a smaller ball, relative to seat, would tend to increase any tendency for the ball to wedge in the seat.
- Log in to post comments
Oil feed valves are the new …
Oil feed valves are the new 'what oil to use topics'. So I post once and leave it to others to continue the to and fro'ing. As it is a wobbly wheel that binds when everything is tightened is a more immediate and unsafe concern.
- Log in to post comments
Confirmed, just like a 'What…
Confirmed, just like a 'What's the best oil' thread.
- Log in to post comments
Emotive nonsense
Three Dominator machines with Hemming’s oil valve, a Commando with “a n others” version and of course the Venom. You can’t ride all regularly so wet sumping was an issue.
Sump plug out, clean receptacles in place, reuse oil, plug back in after a clean, funnels, measures, clean up? Now what time did I need to be there? Anyone who rides intermittently or has multiple machines will look to reduce the wet sump issue.
Cautions noted but when you live with them you create your own checks and measures to ensure you have flow before you go… and you get away on time and less oily dabs about the place.
By the way Halfords Classic 20:50….
Jon
- Log in to post comments
Thanks for all the comments,…
Thanks for all the comments, duly noted. I like the idea of the tap on the oil line. I did think straight away I'm more likely to forget to turn that than a pump failing but the electrical switch is a nice idea.
I guess the oil valve is very simple and if the oil pump is not pulling it open the pump could be on it's way out with similar consequences?
Well I'm another £250 lighter from Andover with new parts and tools arriving soon. Once I've fettled the wheel l'll look to doing the clutch. I'll oil the cable 1st but I don't think that's the issue, it feels like it has racing springs in it.
Oh and something totally unrelated affecting my ocd is the rear tail light. It could't be more on the wonk but the holes are pre-drilled looking at the diagrams. I'll probably find something wholly wrong when I look into that but at least it's not going to kill me dead.
- Log in to post comments
Julian, that makes sense ref…
Julian, that makes sense ref ball size to seating size as its akin to a machine tool taper. So the angle of contact needs to be in the self releasing range not the self holding range.
https://en.wikipedia.org/wiki/Machine_taper
Machine tapers can be grouped into self-holding and self-releasing classes. With self-holding tapers, the male and female wedge together and bind to each other to the extent that the forces of drilling can be resisted without a drawbar, and the tool will stay in the spindle when idle. It is driven out with a wedge when a tool change is needed. Morse and Jacobs tapers are an example of the self-holding variety. With self-releasing tapers, the male will not stick in the female without a drawbar holding it there.
- Log in to post comments
Looks like I'm going to be…
Looks like I'm going to be here quite often. I bought a new spacer before I'd taken the old one out as I just had to buy a bearing puller. Anyway the new one is 4mm shorter than the old one. I don't suppose anyone knows what the overall dimension should be?
I have a 64mm in bike and the new one is 60mm. Thanks.
- Log in to post comments
I believe that 60.3mm (2 3/8…
I believe that 60.3mm (2 3/8”) is correct for the drum front hub.
Perhaps someone wiser know where the 64mm one belongs!
Great looking bike by the way. Problems aside it does look like someone has spent some time and money on it.
- Log in to post comments
The 6203 width is 12mm, 4203…
The 6203 width is 12mm, 4203 width is 16mm. So my guess would be the 60mm is for the 6203/4203 bearing combo, 64mm is for two 6203's. The 64mm spacer will come from an earlier model before the introduction of the 4203, how and why it got into your hub is a mystery but a lot happens to 50 year old bikes.
- Log in to post comments
Putting in the wrong spacer…
Putting in the wrong spacer is an easy mistake to make. But I don’t understand the mentality that when it’s obvious the bike is unroadworthy you happily sell it on to some unsuspecting new owner , makes me wonder what else he was happy to bodge. As others have said ,a good inspection is in order.
- Log in to post comments
Early Christmas Present
A very smart move, before more DIY results in further unnecessary expense, would be to get hold of a copy of Norman White's book about servicing a Commando. It is full of useful information, quality photos and diagrams. You won't regret the investment.
- Log in to post comments
I'll keep a look out for one…
I'll keep a look out for one of those books it looks like I need all the help I can get.
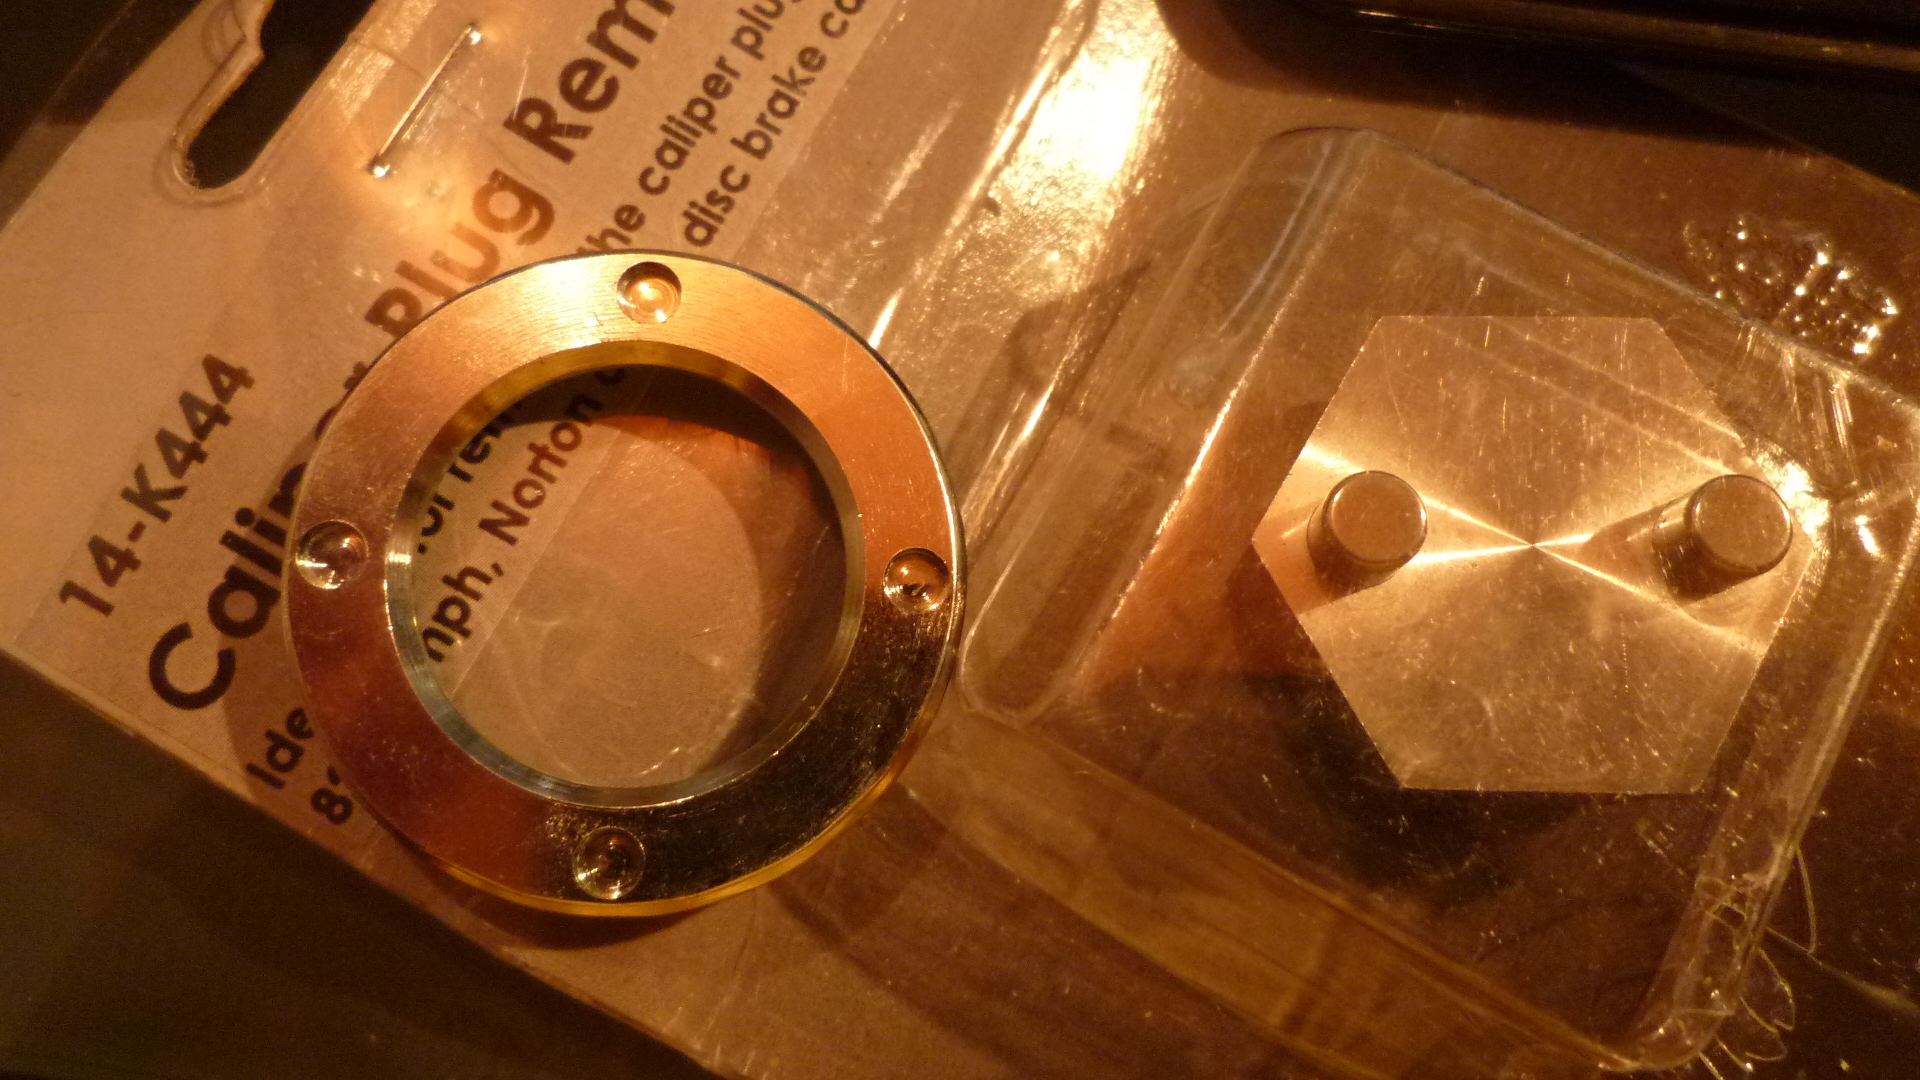
The latest is Haynes saying I need tool 063965 to undo the locking ring for the bearing. I went on the NOC site and see tool with pegs in 063965, although the description says it's for the caliper I thought they must be the same size.
Apparently not. Where did that number come from on the site and how is it linked to anything?
- Log in to post comments
Wheel bearing sizes
One each of a 6203 and 4203 ball bearing has been used on all Norton hubs with drum brakes from 1932 up to at least 1970 ( as on my front drum braked 750 Roadster.
I replace mine regularly as they are a low cost item.
The change was made from the earlier pre 1930 bicycle type cup and cone bearings for the full model redesign.
One of the few items which remained unaltered for the life of drum brakes.
Different spacer lengths for detatchable hubs to the full width hubs.
- Log in to post comments
My 1st win. I've changed to…
My 1st win. I've changed to the correct bearings and bought all the correct washers, spacers etc. Tightened the whole lot up and it till spins. I've put a shorter brake cable on because of changing the bars and fired it up as a bonus. All good except I need to test the brake on the road.
Anyway at least the wheel isn't going to fall off after it being loose just to spin. That's a classic.
- Log in to post comments
Haynes manuals make good…
Haynes manuals make good door stops.
70 onwards online manual. Andover Norton's drawings are also a good resource.
https://www.anotherflyonmyvisor.com/norton/index.html
- Log in to post comments
I can't believe how bad it…
I can't believe how bad it is. I've done nut and bolt rebuilds using Haynes and they were 99% perfect.
So that was £20 gone and another £15 for the wrong tool. Still begs the question why the number for the tool in haynes does to point to the correct tool online while the NOC site has that number against the wrong tool?
- Log in to post comments
My ‘restored’ Atlas, bought…
My ‘restored’ Atlas, bought from an NOC member (who owned an Inter) via a Roadholder ad, had a stainless 7” front wheel spindle fitted rather than the required 7 3/8” - the nut engaged by only 2-3 threads. The footrest stud spacer between the engine plates had been omitted, resulting the the engine plates and primary case being severely deformed. Plus, the swinging arm metalastic bushes’ soacer had been omitted, meaning the swinging arm spindle nuts could not tighten. So nothing can be taken for granted on a restored/rebuilt bike.
- Log in to post comments
Part nº 06.3965
According to the factory workshop manual this is "Peg spanner (wrench) for wheel bearings and disc caliper". You can see what it looks like by searching the Andover Norton web-site, where you should find this:
https://andover-norton.co.uk/en/shop-details/16200/peg-spanner-with-instructions-06-1007-
From experience with the rear hub I recently overhauled I would say that you need every inch of its substantial length.
- Log in to post comments
I'll get one of the lads at…
I'll get one of the lads at work to make me one now.
- Log in to post comments
Just a point re the Velo NR valve....
... it seats against a knife edge ie line contact not a chamfer. Experienced Velo folk warn against "seating" the ball by tapping it onto the seat as this spoils the seat's knife edge.
For what it's worth I've fitted a Yamaha valve to my ES2. The crucial point to remember is that the oil line downstream of the valve MUST be absolutely full of oil with no air gaps as this can cause cavitation and oil starvation. I've put a piece of clear tubing in this position on mine to make checking easier. It's only potentially a problem when removing the oil line as otherwise it's completely submerged.
- Log in to post comments


Hi and welcome! Sounds like your bike needs going over thoroughly. Get yourself a manual or look at the exploded diagrams on Andover’s site, that should help you. I expect something is missing or the spacer is wrong/damaged. I think the screw you refer to is the bearing retaining screw.