
I have studied hours of video and understand the workshop manual process for replacing the guides (and valves). One of the main suppliers seemed taken aback somewhat, that I would even contemplate such a job and should entrust it to a professional. Are there any non professionals amongst you who have done it themselves and what was your experience like?
Looking through the exhaust ports from the outlets back towards the guides and combustion chamber the alloy around the back of the guides seems rather random and if cast - then badly! Is this the norm please?
I've changed guides..
- Log in to post comments
Thanks Ian! I have a lathe…
Thanks Ian! I have a lathe so could make my own drifts, although they are relatively cheap. The primary reason for considering a change of guides and valves is because the seats are slightly pitted where the previous owner allowed carbon build up; I may just be able to restore them with grinding paste. The valve to guide tolerances are fine.
Doubts are creeping in as you will have noticed another reply where it has been suggested the Commando head may crack! So......liners within the existing guide?
- Log in to post comments
Its easy, especially with an…
Its easy, especially with an RH4 head, to scrap it by changing guides, the inlet guide holes in the head are very prone to cracks. I would instead leave the guides in place and get the guides fitted with K liners which will restore the valve stem fit but leave the original guides in place.
I have replaced guides myself over the years on Triumphs and BSA's and all have worked but a replacement Norton head is too expensive to risk an error so I will use K liners myself when needed on a Norton head.
- Log in to post comments
Thanks John I will…
Thanks John I will investigate the K liners - that is something new to me
- Log in to post comments
It is easy to score a bore,…
It is easy to score a bore, crack the head, and then to re-cut the seat accurately needs a decent machine. So yes, the home mechanic can change them, but what it costs to have them swapped and seats cut professionally makes it pretty pointless to do it yourself.
Our local specialist is £20 a corner plus the guides you will need to supply. They are considered expensive, but even this price makes it worthwhile.
Unless the guide is worn or leaking between it and the head, why change it, most will last 100K miles.
- Log in to post comments
Hi Ashley would you mind…
Hi Ashley would you mind letting me know who your local specialist is?
- Log in to post comments
This can be done, just don't follow the manual!
It is far too easy to ruin the valve guide bore in the head by hammering or pulling the old guide out even with the head being heated up (as per the procedure in the manual)
I always machine most of the guide away (using a counter boring tool made from silver steel) to just leave a thin shell of the old guide that then comes out quite easily. The counterboring removes most of the guide metal so allowing whats left to collapse inward slightly, hence easy removal.
The danger by 'doing by the manual' is that the old guide picks up bits of alloy and the hole gets scored by this as the guide is pulled or hammered out. No amount of cleaning the old guide (even by abrasive blasting) will stop this happening.
Done this way and by using a good pipe freeze spray on the new guides and by heating the head they should be a drop in fit. Using the pipe freeze spray, make up a small insulated pot and a couple of wooden dowels stepped to hold the new guides, as you cannot hold the guides as you will suffer cold burns. Make sure the pipe freeze spray boils down to a liquid in the pot as the action of it cooling looks as if its boiling. when it stops 'boiling' the guides are at there coldest. Liquid nitrogen is much better for doing this kind of work, BUT it is far colder than the pipe freeze spray from the diy store, so needs to be treated with due respect. Not just the danger of cold burns but loss of flesh etc!
No wonder so many cylinder heads need remedial guide work, people following the manual just creates it!
Measure the new guides, valves etc to make sure that the fit is correct. Unless your going racing don't be tempted to fit bronze guides, they will conduct heat better but will wear out faster. A lot of bronze guides on the market are crap, unknown material spec etc, (Colisbro is the grade bronze guides should be made of) Valves the same. I know AN supplied me with good valves compared to another supplier, their valves looked ok, but under a magnifying glass the surface finish on the valve stem was awful.
Good gear costs more as well!
I must have been typing the same time as Ashley and i agree with all his comments!
Second edit of this post!
If as you mention the valve to guide clearance is ok, a grind with paste or if required a touch with a valve seat cutter is all thats needed.
- Log in to post comments
Hi Peter thank you for your…
Hi Peter thank you for your feedback! Everything you suggest makes perfect sense and guides me (no pun intended!) to a machine shop; I can't machine out the guides.
Has anyone cracked a Commando head - following correct procedures - whilst changing guides?
- Log in to post comments
Crack a head?
I firmly believe (without any proof) that the RH4 head port and larger diameter guide, was likely cracked at the factory during initial assembly. The port to spring seat area material between them is exceptionally thin. The larger diameter guide makes this even worse. A big factory guy with a big hammer and one too many hits probably did it's damage to one OR both ports.
A friend had a cracked RH4, so I bought another take-off head off an exceptionally low mileage MKIII.
That head too was cracked. That is I when I did a large investigation to discover the high percentage of cracked RH4's. Smaller port RH10 means thicker wall and I have not seen one RH10 cracked yet.
I have an industrial oven for heating the head , always use dry ice (frozen CO2) for seats or guide installation and a $2700 Snap-On valve service kit and much additional tooling I made myself.
A "profe$$ional" $hop ruined my combat head. That is when I got serious about improving my skill set and tools to do my own work as norton knowledgeable shops are very rare here. For me a "brit shop" (triumph does not qualify).
- Log in to post comments
David, that is really…
David, that is really interesting! Do you think the mass of ugly alloy built up around my guides (spring seat side - exhausts only) may have be done prior to or retrospectively by the factory for the very reason you mention?
- Log in to post comments
Seems this should have been…
Seems this should have been about seats, definetly best done professionally.
- Log in to post comments
Me an engineer?
No
I used to tell people 'i'm a mechanical fitter' but after a conversation with a colleague he told me i was a craftsman, explaining that a fitter is someone who just replaces parts ('fits them') A craftsman is someone who can make the parts as well!
- Log in to post comments
Something else to consider
If you do decide to use an Engine reconditioner / Machine shop ask to see examples of their work or know someone who has had work done there. Don't get talked into have 'Unleaded seats fitted' as the valve seats in commando heads are perfectly suitable for unleaded fuel.
- Log in to post comments
Thanks Peter! You're right…
Thanks Peter! You're right of course - I would only go to a specialist.
- Log in to post comments
Fitter?
... was always used to describe someone who could make parts fit ie not just someone who fitted new bits. It was always regarded as a skilled job in my day. I wouldn't actually expect an engineer to have hands-on skills.....
With regard to your original question, I would take the advice from people who've done it (or not) on a Commando head as my experience has been with others - particularly Velo and Enfield singles.
- Log in to post comments
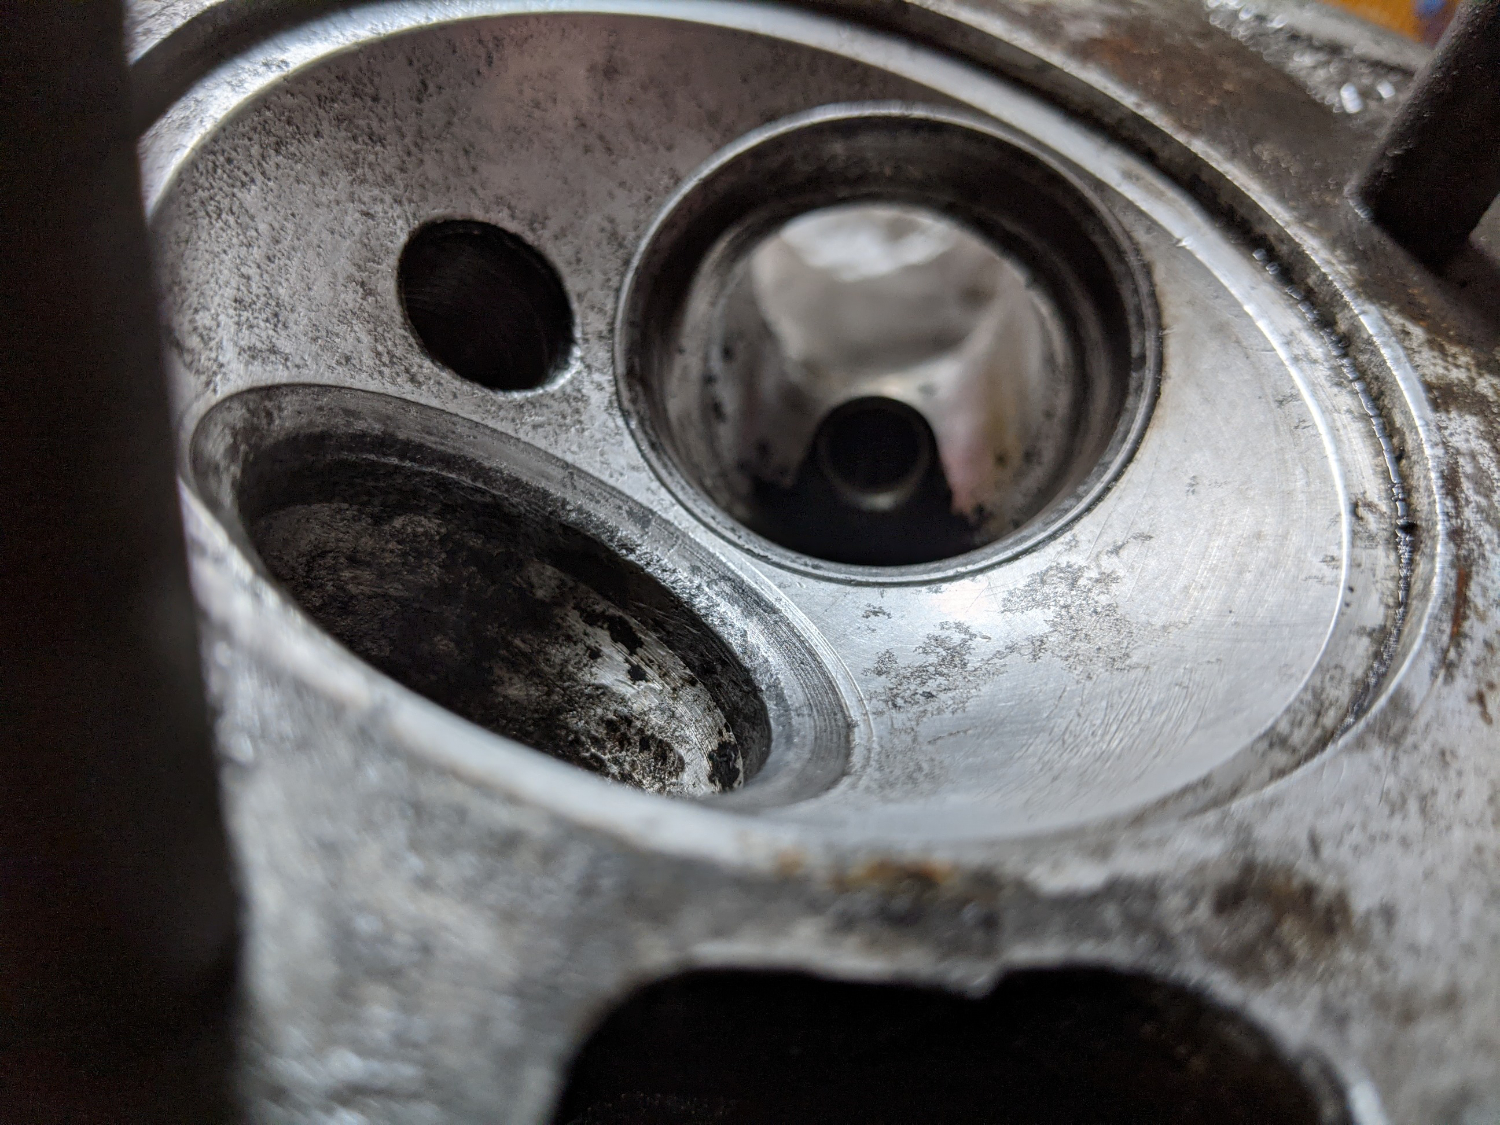
Please take a look...
I appreciate it is difficult to offer advise based on photos - however....
1. Why are there areas with texture like orange peel and is it OK for me to carefully polish this out?
2. Does one think the pitted seats can be restored with grinding paste?
- Log in to post comments
Polish the orange peel out,…
Polish the orange peel out, I no longer grind in seats but use Neway tungsten carbide seat cutters. The finish they give does not need any further work so the valves are not worn away by grinding away on the seat.
https://www.newaymfg.com/cutters
Does not make sense to buy a set for one head, I do a lot of different heads so it makes sense for me. That's if they are ever in my workshop as they are borrowed a lot, but never had to buy new carbide inserts.
- Log in to post comments
Hi John thank you for your…
Hi John thank you for your reply. A cutter may well prove to be the right solution, however should I go that route I will use a specialist; I wouldn't be able to justify the cost of good cutters! In the meantime I will have ago with some paste. Cheers1
- Log in to post comments
looking at your photo
What is the history behind this cylinder head/? My impression is that it has had some corrosion occur and that has given the combustion chamber/cylinderhead gasket face the 'orange peel' appearance.
By all means try to lap the valves in. You will soon see if you are wasting time. A pass with a valve seat cutter will speeds things up.
Clean the inlet/exhaust ports up, combustion chamber as well and lap the head gasket face flat but don't bother to polish the 'orange peel' out of the head, by the time it has got a layer of carbon on it, it will look the same as any other used head. Plus polishing material away will lower the compression ratio!
- Log in to post comments
Thanks Peter! I will have a…
Thanks Peter! I will have a go with paste but I think a cutter will prove to be the way forward......
- Log in to post comments
Worth trying to recover the…
Worth trying to recover the seats fitted, might take a little time and elbow grease but worth a go.
I use Owslebury cranks at Winchester for my engine work, not cheap but never had an issue either.
- Log in to post comments
Thanks Ashley, quite right …
Thanks Ashley, quite right - elbow grease! I understand the width of the seat face will increase however - if I'm correct - this will only serve to disperse the heat better? All else fails then the seats will be cut or replaced. Based on the feedback, I have decided to leave the original guides as they are only 15k miles old. I will polish the awful factory finished exhaust ports to improve flow.
Do you think it would be OK if I put new exhaust valves into the existing guides - as I said they appear to be unworn?
- Log in to post comments
To determine how far the…
To determine how far the guide is worn is quite hard to do for most owners. Comparison with a worn guide and new valve stem or vice versa gives an idea. On the exhaust side expanding gas regulates the rate of oil passing between the stem and guide. This works well, but is dependant on several things, and the wear or clearance between the guide and stem is just one.
15k miles I would expect guides to be as new, it is no real mileage. If they are bronze then they should be OK even at that mileage, as it depends on the bronze used. Colsibro is very good for racing guides, it allows very close clearances to be used, but it wears, that is the tradeoff, but should still be good for 40k + miles.
If you have new valves then you can use them in the existing guides. On the old valves you might be able to measure the stem as a comparison to the new.
Worn exhaust guides or stems results in increase oil consumption, you'll notice the increase in topping up, or sticky and gummy black deposit in the silencers that you can feel with your finger. It does not affect starting or oiling the plugs.
- Log in to post comments


.. on several bikes (although not a Commando) with no problems. The main thing is to make the head nice and hot (200 C) both before removing and fitting, and to thoroughly clean the protruding part of the old guide that will go through the bore.
After fitting you will probably have to ream to the correct clearance and purists would say you need to recut the valve seats although I have to say I've not neded to do that.
You do need a close fitting double diameter drift for both removal and replacement.