
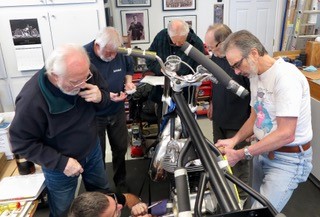
Hello ! Several of us in our local vintage club; Old Fort York, Toronto, (all members of the CVMG,) are helping a member finish off his extremely weathered, basket case Commando Combat restoration, which has stalled for years. We meet every Saturday since Christmas and have had great progress and the bike is nearing completion.
I have been appointed the wiring guru. ( I drew the short straw )
I've renewed all of the bullets and blade connectors and the headlight bucket is fitted and wired.
I now struggle with the routing for the rest of the loom; our Norton manuals are not very informative and compared to my ES2, the wiring of a Combat is a great deal more complex.
I already have the Kojaycat 1972 Norton, full colour wiring diagram...a godsend for tracing faults.
My question; is there a wiring diagram that shows the routing of the loom ? Is there any source that shows the pathway the various branches of the loom should follow along the length of the bike .
Thanks in advance
Grant MacNeill, in Toronto
There is no routing diagram,…
- Log in to post comments
Hello John. Thanks ! that…
Hello John. Thanks ! that is very helpful indeed.
I also acquired 72 Combat of my own; It is useful as a reference but don't trust the wiring layout as the last two owners did a lot of odd things to the bike.
Your outline will help with the routing of the main section and especially positioning of that 5-pin connector.
I'm finishing off a RD400 this past month and the Yamaha shop manual was a real thrill; it shows ALL of the routing of cables, loom, oil supply, speedo drive etc...exactly what goes where and which lays on top of or curls around what. Never seen anything like it !
I did this posting on the vague hope that somebody had gone to the trouble of sketching out the routing for the Commando. No luck there but your verbal description is the next best thing!
Thanks again
Grant MacNeill, Toronto
- Log in to post comments


There is no routing diagram, that's why when I replace a harness I try to leave the old one on and cut it into pieces as I add the new one in.
On a 74 (doubt a 72 is much different) the main harness starts at the large 5 twin connector positioned close to the head steady and on the right hand lower side of the main tube, forward from there is the headlamp harness and the handlebar switches all going forward as does the links to ballast, points and coils. Then the harness continues back along the main tube and above the air filter into the battery compartment, there you link up with charging socket, alternator, zener, horn (if you can get to it ;) ) rectifier, flasher unit and down to the rear brake pedal switch. The harness then goes through the grommet in the bulkhead continues on the right seat support rail back to the rear light cluster and indicators.
Easiest way is to lay it out in position and through the grommet and then starting at the front and working backwards, get it all connected and only then tie it in place. In advance you can tie a label to each link section identifying is rectifier, alternator etc
Ignition other than points will change some items as will modern rect/reg.