
If your interested in seeing my Electra undergoing restoration I've create a page for it here... (nothing commercial...)
Hello there, That's the w…
- Log in to post comments
Patrick, Glad you liked th…
Patrick,
Glad you liked the photos. Not up and running yet. What you see is where I'm at with it. There's not a lot of info on 'the net' about the Electra so I thought I would put this together.
- Log in to post comments
I'm just starting an Elec…
I'm just starting an Electra rebuild from several boxes of parts so your photos are really helpful. Please keep them coming! Thanks,Maurice
- Log in to post comments
Ian, I wish you had put th…
Ian,
I wish you had put these photos up eight years ago when I started my Electra rebuild. It is a travesty that the NOC have never produced a video of a lightweight rebuild. Your photos are, in many ways even better.
I can see from your photos that my clutch is probably more worn than I thought. I'm not sure I saw any cork inserts on the inner race plate as you show. Something else to check before summer and might explain why it slips.
I see your clutch cable has an adjuster where it enters the gearbox. This is a clutch cable from the 'early' Jub and Nav. All clutch cables on later gearbox lightweights have an adjuster mid cable. If it works for you, fine, but you will be caught unawares if you buy the original replacement.
You show all the clutch plates laid out before fitting. The thick plain plate is shown wrong way round. It should be fitted with the stepped side inwards, and may explain why your clutch spring retainers look so near to the end of the stud threads.
As for the rest, I get the impression your engine has done hardly any miles. At 15 to 20k miles the gearbox sprocket is usually losing a tooth and the clutch centre and drum are usually indented by the plate tangs and the tangs show signs of wear. It is a delight to see how a lightweight engine was put together when new, and a source of information for all.
I'm self taught like everyone else and ready to be corrected on these comments.
Wonderful. Please keep it up and include some cycle parts too.
Peter Holland
Previously Ian Easton wrote:
If your interested in seeing my Electra undergoing restoration I've create a page for it here... (nothing commercial...)
- Log in to post comments
Thanks guys. Peter, thanks…
Thanks guys.
Peter, thanks for the advice on the clutch cable. I actually bought a new one a few months ago and didn't know there was a difference. I need to go check what I actually received. You've got me thinking now about that thick plate on the clutch too. I'm pretty sure I installed it correctly but I'll check. As for the adjuster screws thay are not fully turned in yet -I'll do that one I get the cable attached and can spin the clutch easily. I've started on the heads and have only one bad valve which was badly corroded. It was on the left side which was no surprise considering how bad that side was. I'll be posting more photos of the progress today. Valve measurements and grinding! I'll also be showing all the frame etc, as we get to it. You'll see we've started on the seat pan.
Ian
- Log in to post comments
The only thing I'm missin…
The only thing I'm missing from the bike is the sheet metal panels that go behind the carb and wrap around the frame. Can anyone help?
- Log in to post comments
Previously Ian Easton wrot…
Previously Ian Easton wrote:
The only thing I'm missing from the bike is the sheet metal panels that go behind the carb and wrap around the frame. Can anyone help?
Have a look at NOC Shop and search for:-
SS19 E5_23168/9
Are these the parts you mean ?
Regards
Tony
edit -just noticed - out of stock.
I believe they had a batch built a while ago so it would be worth contacing anasking if they are going to do another batch.
Tony
- Log in to post comments
See attached for the corre…
See attached for the correct looking Clutch cable
Anfy S
----------------------
Previously peter_holland1 wrote:
Ian,
I wish you had put these photos up eight years ago when I started my Electra rebuild. It is a travesty that the NOC have never produced a video of a lightweight rebuild. Your photos are, in many ways even better.
I can see from your photos that my clutch is probably more worn than I thought. I'm not sure I saw any cork inserts on the inner race plate as you show. Something else to check before summer and might explain why it slips.
I see your clutch cable has an adjuster where it enters the gearbox. This is a clutch cable from the 'early' Jub and Nav. All clutch cables on later gearbox lightweights have an adjuster mid cable. If it works for you, fine, but you will be caught unawares if you buy the original replacement.
You show all the clutch plates laid out before fitting. The thick plain plate is shown wrong way round. It should be fitted with the stepped side inwards, and may explain why your clutch spring retainers look so near to the end of the stud threads.
As for the rest, I get the impression your engine has done hardly any miles. At 15 to 20k miles the gearbox sprocket is usually losing a tooth and the clutch centre and drum are usually indented by the plate tangs and the tangs show signs of wear. It is a delight to see how a lightweight engine was put together when new, and a source of information for all.
I'm self taught like everyone else and ready to be corrected on these comments.
Wonderful. Please keep it up and include some cycle parts too.
Peter Holland
Previously Ian Easton wrote:
If your interested in seeing my Electra undergoing restoration I've create a page for it here... (nothing commercial...)
Attachments
clutch_cable-electra-jpg
- Log in to post comments
Previously Tony Ripley wro…
Previously Tony Ripley wrote:
Previously Ian Easton wrote:
The only thing I'm missing from the bike is the sheet metal panels that go behind the carb and wrap around the frame. Can anyone help?
Have a look at NOC Shop and search for:-
SS19 E5_23168/9
Are these the parts you mean ?
Regards
Tony
edit -just noticed - out of stock.
I believe they had a batch built a while ago so it would be worth contacing anasking if they are going to do another batch.
Tony
Hi Ian, I have a set of Panels bought from the Clubs stock some time ago and they are available at cost (club price £144.64) + postage if you still need them, give me a call.
Bob Nicholas 01934 852259 North Somerset.
- Log in to post comments
Bob, Yes it's me that nee…
Bob, Yes it's me that needs them but that's a bit more than I want to spend. at the moment. I got the whole bike for less than that! Thanks for the offer though - much appreciated.
Ian
- Log in to post comments
Well, there's oil in the…
Well, there's oil in the bike now (and some coming out too disappointingly). It's leaking out of the kickstart bush and the gear shift. Not much but enough to be an irritation after all the care I took for it not to leak. I didn't fit new bushes as they seemed OK, there's almost zero play in them. maybe I'll have to go back in and fit new ones. I need to look at my other photos too as it appears there's a square sectioned seal on each of those shafts and I can't remember if I replaced them although I would think it would leak really badly if I hadn't.
Anyway, I couldn't resist putting a syringe full of petrol into the carb, hooking up a 12v battery and giving it a kick.
After 3 kicks it went 'pop' and a huge flame shot out the right exhaust (no pipes on it yet). Another kick and a similar flame shot out the left exhaust.
Looking promising for a start up soon!
- Log in to post comments
Just checked and it looks…
Just checked and it looks like I didn't put new seals on for those shafts. I guess the old seals are in there and they are the ones that are seeping. Nothing catastrophic.
- Log in to post comments
Ian, I've just put my ano…
Ian,
I've just put my anorak on and been out to the garage.
I have used a bolt, 3/8 diameter, 4 1/2 inches long with 4 ins unthreaded, on each side of the upper mudguard/shock/seat/lifting handle position.
Put a washer over the bolt and push it through the mudguard mounting hole from the inside.
Then a spacer 1 3/16 ins long, 3/8ins hole, 3/4 ins diameter. This spacer has a 1/16 ins 45degree chamfer at ONE end. The non-chamfered end goes over the bolt and against the mudguard.
Then a spacer as above, but only 1/4 ins long. The chamfer on this spacer faces the chamfer on the long spacer.
Then the bolt goes through the upper shock absorber mount.
Then through the mudguard stay/lifting handle.
Then a washer.
Then a nut. (A dome nut looks best. You will find a coarse BSW threaded bolt much easier as this fastner will be on and off more than any other fastner on the bike)
Before tightening the nut, fit the seat on the front hooks and force the seat brackets between the chamfers on the spacers. Do it once, and you will see what the chamfers are all about.
It never seems necessary to hold the bolt head when tightening/loosening the nut - thank goodness!
Suggest you make the spacers out of stainless. OD could be 20mm if this is the bar you lay your hand on.
Glad to hear you have combustion left and right.
Cheers
Peter
Previously Ian Easton wrote:
I'm assuming where the rear mudgaurd mounts that there are spacers that I don't have. I'll make a set up on the lathe. i have to collect my seat too.
- Log in to post comments
Peter, Many thanks for get…
Peter,
Many thanks for getting the jacket on and getting the measurements and info I needed for the seat mount - much appreciated.
I'm glad you mentioned the chamfers for the spacers as that's not something I would have done .
I'll post some photos of the finished parts when I make them up.
I'm assuming there's no form of seal where the exhaust enters the head - it just pushes in and sits there?
Ian
- Log in to post comments
I fitted some silencers th…
I fitted some silencers that I had (not Norton ones). They fit and looked great but unfortunately they interfere with the brake pedal and kick start, so reluctantly I had to buy a new set.
Just a few things left now. I need to get grips (I thought I had some already), footpeg rubbers and a battery. I would like to go for one 12v battery instead of the two 6v. What are you guys using for a battery?
New points have been ordered as I can't get the bike to time correctly. The points looked OK but must be a more worn than I thought.
I'm curious too; the frame/engine number on my bike is EL/364, judging by the information I can find I think it's around March 1963 production date - any ideas?
Ian
- Log in to post comments
Hi Ian, I'm running two 6…
Hi Ian,
I'm running two 6 volt batteries of the same size as originally fitted. The reference number is 6N 11A -3B
This reference gives you a battery with both terminals on the same (front) face and a vent on the left (negative) side.
I considered other configurations, and the one above gives easiest routing for cables and vent tubes. I made up new starter/earth cables of slightly heavier gauge than the originals. I'm guessing yours are still in acceptable condition.
Advise you to make a plastic cover to go over the battery terminals on both batteries and under the securing rubber straps. The left hand terminal in the battery/tool case is particularly close to the metalwork.
I did notpursue the single 12 volt battery route. You get 11 Amp hours with the standard arrangement. Note: two 6volt 11A/H batteries in series is equivalent to a 12 V 11A/H arrangement, not a 22A/H arrangement.
Exhausts should be a close fit in the ports. Norton advise owners not to extract the pipes with a racking action, as the ports will become enlarged. One of mine was too loose. I made an expanding mandrel to stretch the first 1/2 ins of pipe and it now stays put under use. With time carbon will seal any slight gaps.
Agree with your estimate of manufacturing date.
Cheers
Peter
- Log in to post comments
I've got one of these on…
I've got one of these on my jubilee: http://www.motobatt.com/index.php?route=product/category&path=59mostly because I had one, it fits and needs less charging during a lay up. I had one on my Gasgas 400 and it certainly lived up to its claim about greater cranking power.
I bought two of the clubs silencers and getting themto fit was a bit of a trial fiddling with spacers, not helped by worn brake pedals and slightly bent kickstart, but they are all clear now ... just!
- Log in to post comments
It's alive! It's alive!…
It's alive! It's alive!
After much fiddling with the timing and just couldn't get it set right I remembered that the advance unit isn't keyed to the shaft as I had been thinking and that all I had to do was get it set in the correct position. Timed the points then after filling the float bowl with petrol, 3 or 4 kicks and it started up! It sounded wonderful. After a couple of minutes it settled in to a nice idle. It had wet sumped after sitting for a few weeks with oil in it, but after a bit of a puke out of the breather everything pumped back in to the tank. I put a short video on the facebook page. Not the best of quality as I was on my own at the time. It's running great. I just need to finish up the paint work on the tank and get my seat back from the seat guy (it's been 6 or 7 months now) then we'll get it on the road!
- Log in to post comments
Well Done! It sounds good…
Well Done! It sounds good and I like the Champion plug caps- so much better than NGK ones.
- Log in to post comments
Thanks Patrick. Plug caps…
Thanks Patrick. Plug caps came straight from our spares service here. They've been great at supplying me all the bits I've needed.
- Log in to post comments
Previously Ian Easton wrot…
Previously Ian Easton wrote:
Bob, Yes it's me that needs them but that's a bit more than I want to spend. at the moment. I got the whole bike for less than that! Thanks for the offer though - much appreciated.
Ian
That's OK. I ended up buying a set from a member that cost me about the same money but they were painted therefore I have the Club ones spare. Anyone else interested???
You did well to buy at the money your indicating even if it's missing a few bits. I have one on the road and have a second in the process of rebuilding. I need the money as well!!
Bob Nicholas.
- Log in to post comments
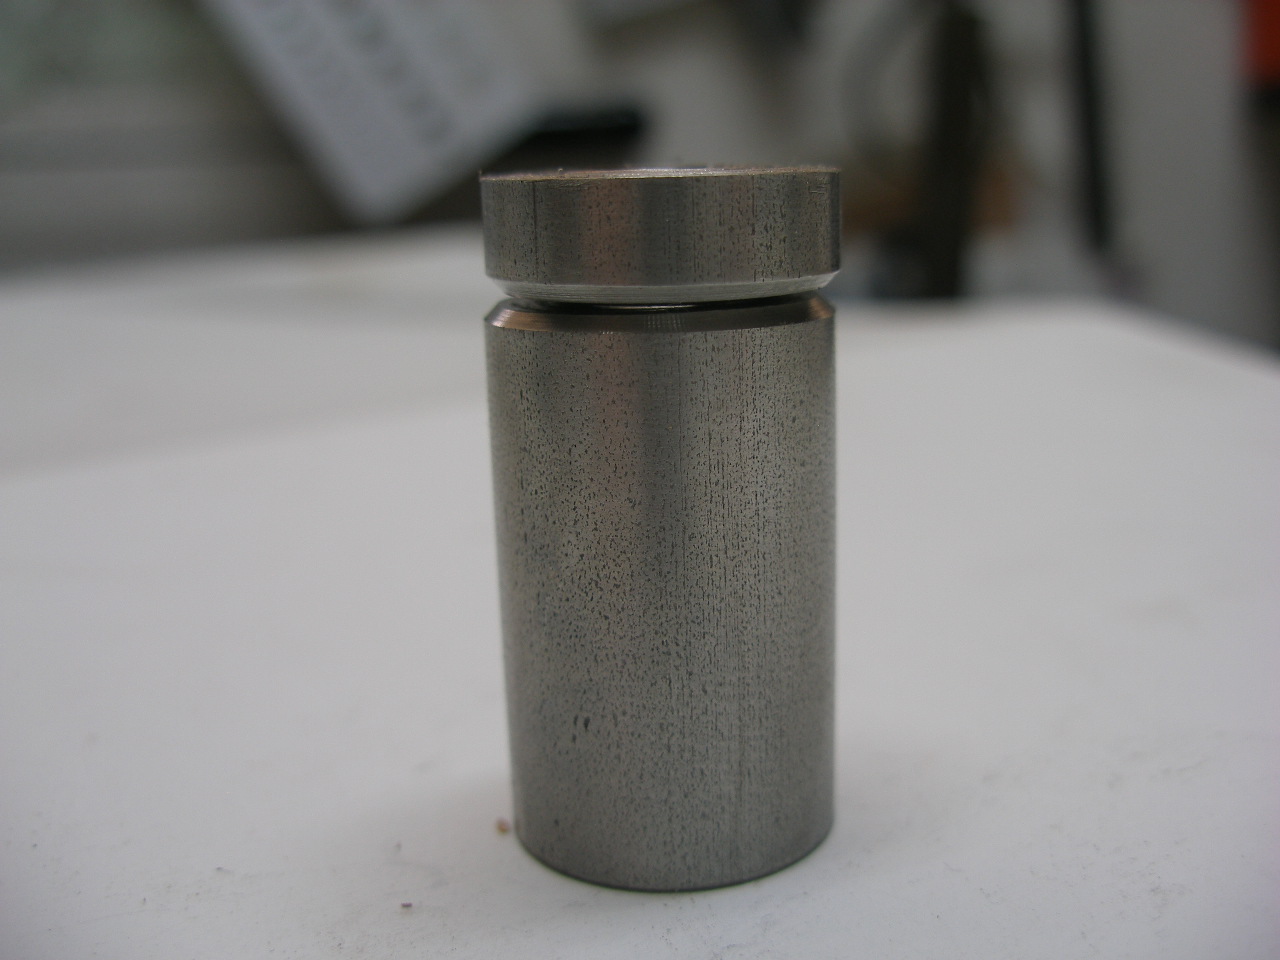
Well, my Electra seems to…
Well, my Electra seems to like to wet sump , so here's my solution to it...
I also decided to go the two battery route so ordered those yesterday. Still trying to get mt seat back! I just had a read through the thread again and saw that I sent my seat out in October 2015!
Attachments
P1010055.JPG
P1010056.JPG
tec
- Log in to post comments
Nice work! Mind you mine w…
Nice work! Mind you mine wet sumps a bit but doesn't spit it all back out while it's scavenging it back into the tank.
- Log in to post comments
New photos added to the fa…
New photos added to the facebook page on the Norton. Photos show the two battery set up and our solution to a flooding carburetor.
Bike is running great and idling well. We ran it up and down the gears while on the bench and everything worked nice and smooth. Speedo worked too (remember how cruddy that was).
Still waiting for my seat so I can get it road tested.
Even though the button for the electric start has no connections (see previous postings) I jumped the two wires in the headlight that connect the starter. Bike started right up no problem!
- Log in to post comments
Just to let those interest…
Just to let those interested know -within the next couple of days I'll be shutting down the page with all the restoration photos on it (as well as all the other bikes). I'll still be checking in here if anyone would like photos of any of the details.
While I'm on here I would like to thank everyone that has contributed to getting the Electra up and running. It's not quite finished yet, but I have appreciated all the input. After I get a few miles on it I'll get back to some details (like the centerstand) and keep you informed.
- Log in to post comments
Seat arrived back yesterda…
Seat arrived back yesterday! Got a couple of the spacers for the seat made up per Peter's recommendations before I stripped a plastic gear in my lathe. I'll finish up the rest when the new gear (and belt) arrive.
Attachments
P1010123.JPG
p1010122-jpg
- Log in to post comments
Lovely bit of workmanship.…
Lovely bit of workmanship. I think that you, Peter and Ulrich are really secret agents for Mercedes Benz designing a new high quality retro lightweight Norton (engine a twin turbo V12); us accountants feel quite ashamed for using old 'bits' found under the bench and which nearly fit !.
Do you now have to take your Electra for official test (MOT, TUV,etc.) before getting out in the Californian sunshine?
Patrick
- Log in to post comments
Thanks for the comments Pa…
Thanks for the comments Patrick. As for official tests there are none. The only hassle is getting the bike registered if there's no previous paper work on it. Fortunately I have the old "pink slip" for it, which is like the V5, which might make it easier. I imported my 1956 Airone into California and it was a bit of a nightmare getting it registered. I even had to pay sales tax (8%) (plus many more fees) even though I had bought the bike and registered it in the UK. It ended up costing about 600 pounds to get the paperwork straightened out and that was after the shipping company kept upping the ransom money every step of the way. It's a long story and still fires me up just thinking about it. Anyway, all is well now, the Airone is on the road and the Norton will be soon too.
- Log in to post comments
The Electra has now gone o…
The Electra has now gone out under it's own steam! A few minor things to fiddle with as expected. The ignition was cutting out when it revved up and that was found to be the connection plug for the ignition switch was a bit loose. The carb is a bit rich so the needle needed to be dropped. We're getting a small amount of oil coming out the breather but I'm thinking that may be because the rings haven't bedded in yet so we're getting a bit of blow by. We'll see hw that theory pans out... Apart from those things every thing else is working fine.
- Log in to post comments
Good to hear.. PS Is your…
Good to hear..
PS
Is your photo page on FaceBook still available - only, I cannot log in to it anymore...
- Log in to post comments
Thanks Andy. I closed up t…
Thanks Andy.
I closed up that facebook page. There was no interest in it - it only got halfa dozen responses in two and a half years. It felt like I was just doing it for myself and besides there are plenty other pages out there that cover the same things and do a better job of it than me. I thought I might start a page just for the Norton lightweights though,as they don't get a lot of positive representation and if I do I would repost all the photos again. Is there something in particular you want to see?
Ian
- Log in to post comments
I finally checked my new c…
I finally checked my new clutch cable -I got the right one!
There's more photos been uploaded on the page. The heads are reassembled now and getting bolted down this week.
Ian
- Log in to post comments
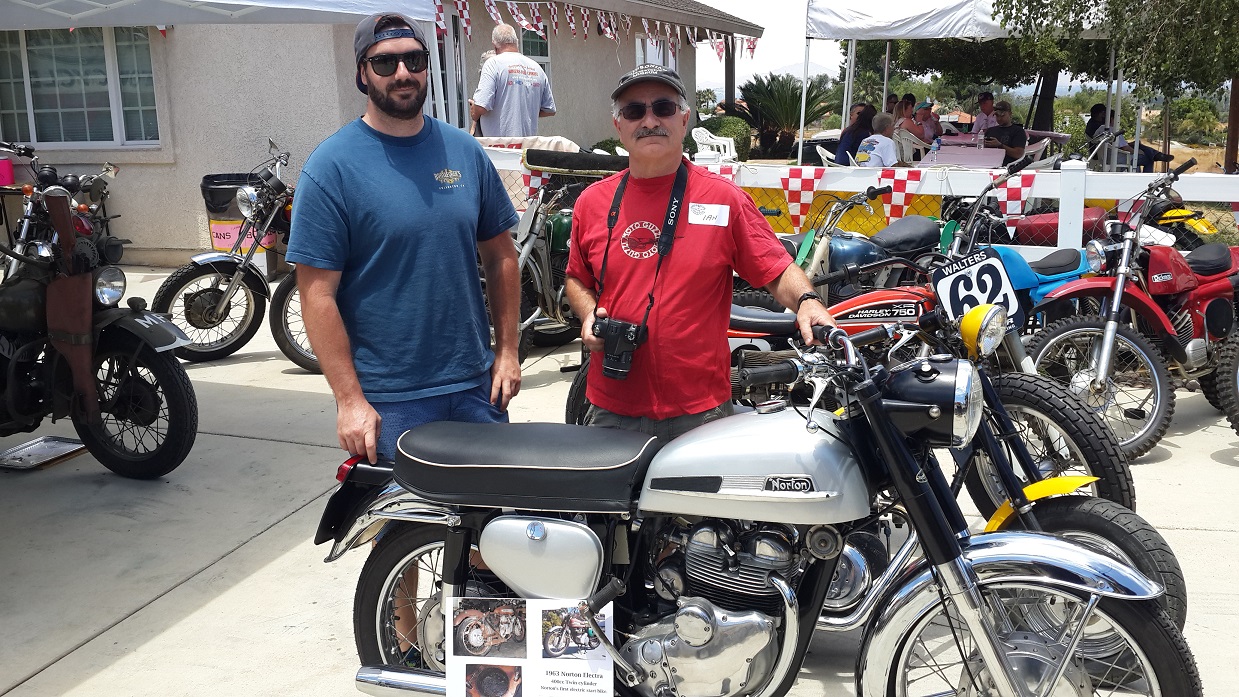
Out and about on the Elect…
Out and about on the Electra today to a bike party (albeit only a mile away, hence the riding attire).
Running great and no leaks!
Attachments
20170610_125630-jpg
20170610_125645.jpg
- Log in to post comments
Photo uploader is acting o…
Photo uploader is acting odd. Here's two more photos...
Attachments
20170610_170509-jpg
DSC06383.0.JPG
noc
- Log in to post comments
That looks great, and I'm…
That looks great, and I'm liking the other bikes in the garage, is that an RH Suzuki at the back, and what's the red tanked bike in front of it?
- Log in to post comments
Previously michael_sulliva…
Previously michael_sullivan wrote:
Dan:
Looks like a Greeves scrambler to me.
Mike
p.s. the other red tanked bike looks like a Jawa/CZ to me.
- Log in to post comments
Good spotting guys. They'…
Good spotting guys. They're not my bikes but the red one on the right is a Greeves scrambler, the orange one on the left is a twin port CZ on the left at the back is one of two RH67's, straight back, a Vincent Black Shadow, and the blue one in the foreground is a Simplex. I'm surprised the RH67 was recognized.
Ian
- Log in to post comments
That's a cracking collect…
That's a cracking collection! I race classic scrambles so know my way around dirt bikes reasonably well. The RH is recognisable by the high level exhaust, the TMs were all underslung I think It also has the same front wheel as my Montesa Capra that has TM front forks for some reason!
Guys I can spot a greeves griffon when it's got greeves written on the tank ..  it was the other one I didn't recognise, it was the tank badge that threw me, most of the CZs we see are pre 74 and have a circular tank badge. I shall pay more attention in the future!
Who ever owns them is a lucky guy, I hope he uses them from time to time.
Dan
- Log in to post comments
Hello Ian, I am indeed imp…
Hello Ian,
I am indeed impressed with the quality of your work - very thorough and your pictures are superb.
Where are you by the way? I thought you were in Scotland but where do you get acetone in QUART cans? Are you in USA?
Patrick
- Log in to post comments
More photos have been adde…
More photos have been added. Cylinder heads are on and we're moving on to the chassis...
Ian
- Log in to post comments
Very interesting - keep th…
Very interesting - keep them coming.The starter solenoid looks to be the same as fitted to the 1963/4 MGB.
The solenoid is still available new both as replica and geuine Lucas. They are very useful when working on a race car in the paddock as you can fire up the engine by just pressing the rubber button on the bottom.
Patrick
- Log in to post comments
Hi Ian, All the oil tank a…
Hi Ian,
All the oil tank and battery box mounts are supposed to be a rubber grommet with a steel tube inside. The rubber hardly gets squashed at all when the bolt is tightened.
Norton in their wisdom allowed for tolerances byenlarging the lower mounting holes in theouter frames. Your second to last picture clearly shows howthe steel tube, meant to be inside the grommet, has been driven into the enlarged frame mounting hole. It is a great pain to find this out when you have the frame professionally painted with the offending steel spacer driven into the mounting hole. Adding a washer between frame and spacer cures the problem.
I think your headlight shell is from another model. The Electra shell never had those two white-ishtell-tales on it. The mileage indicated may have come with the replacement shell. Your engine internals look low(er) mileage.
Thanks for putting all the photos on the web.
Good luck
Peter
Previously Ian Easton wrote:
More photos have been added. Cylinder heads are on and we're moving on to the chassis...
Ian
- Log in to post comments
Thaks for the comments Pet…
Thaks for the comments Peter. I see what you mean about the headlight tell tales. The shell seems to be the right size and shape. Wonder what it came from? I've got a lot of photos of Sammy Miller's Electra and his doesn't have the white markers as you say. His also shows a 20 Amp ammeter which I can't seem to be able to find - still looking. You can see I have an ammeter on the shell but the face is completely gone.
I've wondered about the mileage too because of the condition inside the engine.
I did find pieces of grommets everyhwere. They were all dried out and crumbly. I've got the frame all apart now (I can understand why people thought it wasn't Norton's "finest hour') and been taking out the steel inserts before it goes off for powdercoating.
Keep the comments coming -they're very helpful.
- Log in to post comments
Previously peter_holland1…
Previously peter_holland1 wrote:
I think your headlight shell is from another model. The Electra shell never had those two white-ishtell-tales on it. The mileage indicated may have come with the replacement shell. Your engine internals look low(er) mileage.
I have never owned an Electra and I do know that Peter has a superb Electra , so he does know his Electras. My 1961 Navigator has similar tell-tales (but in red plastic) and a previous 1963 Jubilee had the same as well (also in red). So the headlight shell is Norton - maybe yours has lived in a hot climate and the colour has faded to whitish. I think the tell tales were deleted on later models of Jubilees and Navigators but I don't know exactly when or if they were originally fitted to Electras.
Patrick
- Log in to post comments
Patrick, The bike sat out…
Patrick,
The bike sat out in desert heat of southern California for at least 30 years. I'm sure the red has just faded away. It's amazing that it's actaully in as good a condition as it is considering.There might be remnants of it when I take it apart. The frame is all dissasembled now and I've posted new photos.
Ian
- Log in to post comments
Hi Ian, Both theNavigator…
Hi Ian,
Both theNavigator and ElectraI've ownedhad the 1964-on wider Roadholders. Identified by a steering lock on the top yoke and lock stops welded to the front frame member adjacent to lower steering bearing. You have the earlier narrow forks with bolt-on lock stopand Patrick may be correct that tell/tales were discontinued with the wider forks.
The styling panels your bike lacks are held on by the 5/16 BSC outer threads on the long, cross frame,double threaded stud under the seat. Also by the thin nuts you found on the end of the swinging arm pivot stud.
Your centre stand has been repaired. Looks like the originalpedal broke off and was welded on again at a strange angle. Looks OK now, but it might foul a regular silencer. There's probably a picture of the lightweight centre stand, with foot pedal,on the NOC spares website. Pricey though. Navigators and Jubilees had a similar stand without the foot pedal. A 3/16 pin, about one inch long,was inserted just above the foot on the left leg. You'll see where if you look at the casting. You might decide to remove the welded pedal. Hope you read this before the new paint has dried.
Why does it always look so sunny in your photos? I'm beginning to think you must live in Australia.
Great photos
Peter
Previously Ian Easton wrote:
Patrick,
The bike sat out in desert heat of southern California for at least 30 years. I'm sure the red has just faded away. It's amazing that it's actaully in as good a condition as it is considering.There might be remnants of it when I take it apart. The frame is all dissasembled now and I've posted new photos.
Ian
- Log in to post comments
A bit of little Known lore…
A bit of little Known lore, Lucas headlamp shells were finished by Lucas, so its normal for them to be a completely different shade of colour from the rest of the bike.Especially after a few years in the sun.
- Log in to post comments
Thanks for the information…
Thanks for the information Peter.
The stand has already gone off for powdercoating but I have no problem fixing it when it returns. It's interesting you noticed the repair as it's not quite so obvious if you've never seen another before (like me) and I didn't look at it that closely. That might explain why it takes two men and a small donkey to get the bike on to the stand - it's unbelievably difficult. As for where I am - it's southern California (for now anyway).
Previously peter_holland1 wrote:
Hi Ian,
Both theNavigator and ElectraI've ownedhad the 1964-on wider Roadholders. Identified by a steering lock on the top yoke and lock stops welded to the front frame member adjacent to lower steering bearing. You have the earlier narrow forks with bolt-on lock stopand Patrick may be correct that tell/tales were discontinued with the wider forks.
The styling panels your bike lacks are held on by the 5/16 BSC outer threads on the long, cross frame,double threaded stud under the seat. Also by the thin nuts you found on the end of the swinging arm pivot stud.
Your centre stand has been repaired. Looks like the originalpedal broke off and was welded on again at a strange angle. Looks OK now, but it might foul a regular silencer. There's probably a picture of the lightweight centre stand, with foot pedal,on the NOC spares website. Pricey though. Navigators and Jubilees had a similar stand without the foot pedal. A 3/16 pin, about one inch long,was inserted just above the foot on the left leg. You'll see where if you look at the casting. You might decide to remove the welded pedal. Hope you read this before the new paint has dried.
Why does it always look so sunny in your photos? I'm beginning to think you must live in Australia.
Great photos
Peter
Previously Ian Easton wrote:
Patrick,
The bike sat out in desert heat of southern California for at least 30 years. I'm sure the red has just faded away. It's amazing that it's actaully in as good a condition as it is considering.There might be remnants of it when I take it apart. The frame is all dissasembled now and I've posted new photos.
Ian
- Log in to post comments


Hello there,
That's the way to buy them in the first place. It's amazingly complete so should be very original but still a lot of work and expense to get it pristine.
Excellent photos. Are you now up and running?
Patrick