
Hi,
I'm trying to get my new (1937) 16H on the road. I bought the bike this May and it was in pieces and I'm trying to get it together.
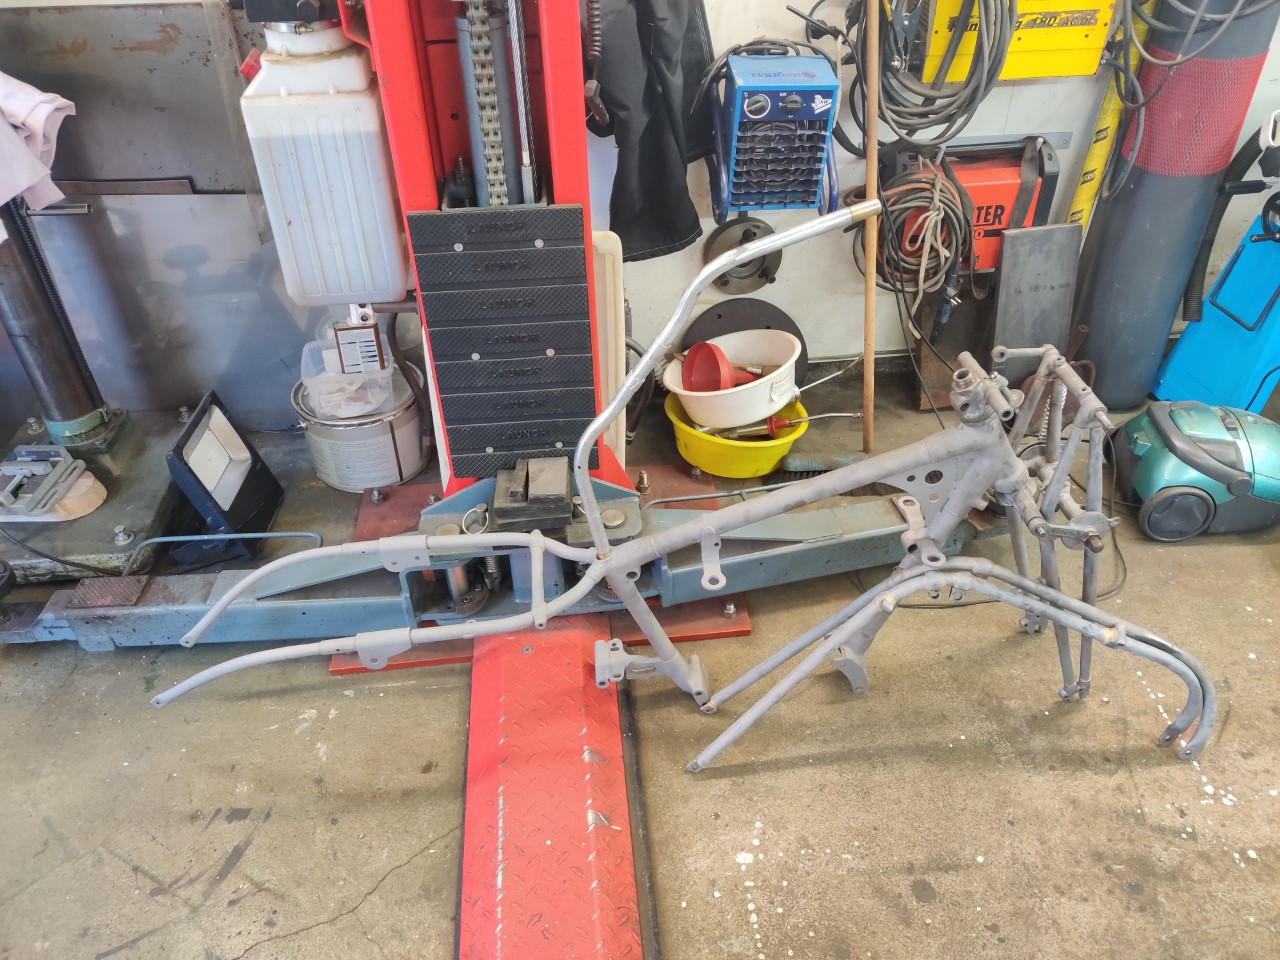
Problem at the moment is that some previous owner has made modifications to the back of the frame, it was used in dirt track competitions back in the 1950's. I'm missing the braket that connects the seat to the front mounting point near the tank and I was wondering could someone give me dimensions for this so I could make it myself since I cant find it anywhere. The rear mounting points aren't where they should be because of the modifications so I cannot figure out the braket dimensions from there. Also I would highly appriciate it, if someone knows the rear mounting points in relations to the front mounting point on the frame and could give those dimensions.
As you can see from the picture I need some help with the dimensions to modify the fback of the frame original shape :D
Good Grief !
- Log in to post comments
It looks...
.. as though the 2 upper frame tubes that should run down to the wheel spindle have been bent upwards and rear suspension unit mountings added. As Richard says, the horizontal tapped bosses are for the lower ends of the springs. The front mounting is a bolt / stud that goes through the hole in the rear petrol tank mounting.
I think you may need to have new rear frame tubes made and brazed into the lugs although the lower lugs seem to be missing....
Good luck!
- Log in to post comments
The 1/4" diameter hole in…
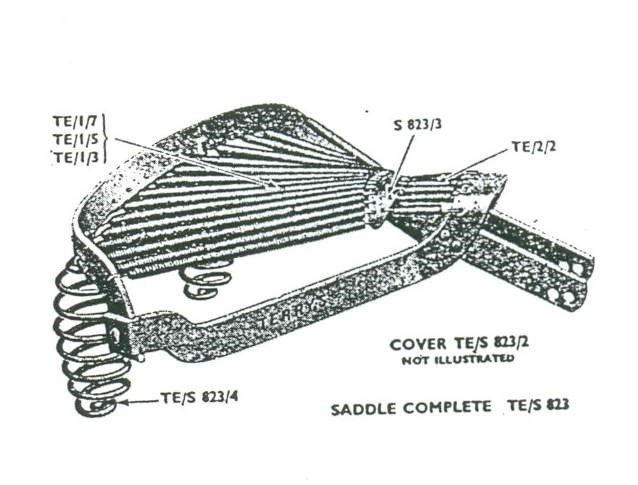
The 1/4" diameter hole in the rear tank mount that can be seen in your picture below the top frame tube takes a pin which passes through the nose of the saddle that Richard has posted.
The sideways tapped holes in the frame merely take threaded studs on which the loops at the bottom ends of the saddle springs fit and are held in place with washers and nuts.
Your 'only' problem with the saddle is to add those side noses as shown on Richard's picture so that they go each side of the frame top tube and take the clevis pin. This has a short cheese head at one end and is cross drilled for a split pin to hold it in place at the other end.
The side noses on the saddle are 1/8" steel plate riveted in place to the saddle frame.
It's blindingly obvious - but make sure your saddle doesn't collapse when you ride it! Don't underestimate the load from the sack of spuds sitting above it!
- Log in to post comments
Ian is correct the 2 upper…
Ian is correct the 2 upper frame tubes have been bent up and rear suspension has been added to the bike probably because of the dirt track racing that the bike has done.
David that piece is exactly the one that I'm interested in getting the dimensions for. You provided the thickness but if I could get the hole distances between the rivets and the mounting for the frame, width and lenght is also a plus.
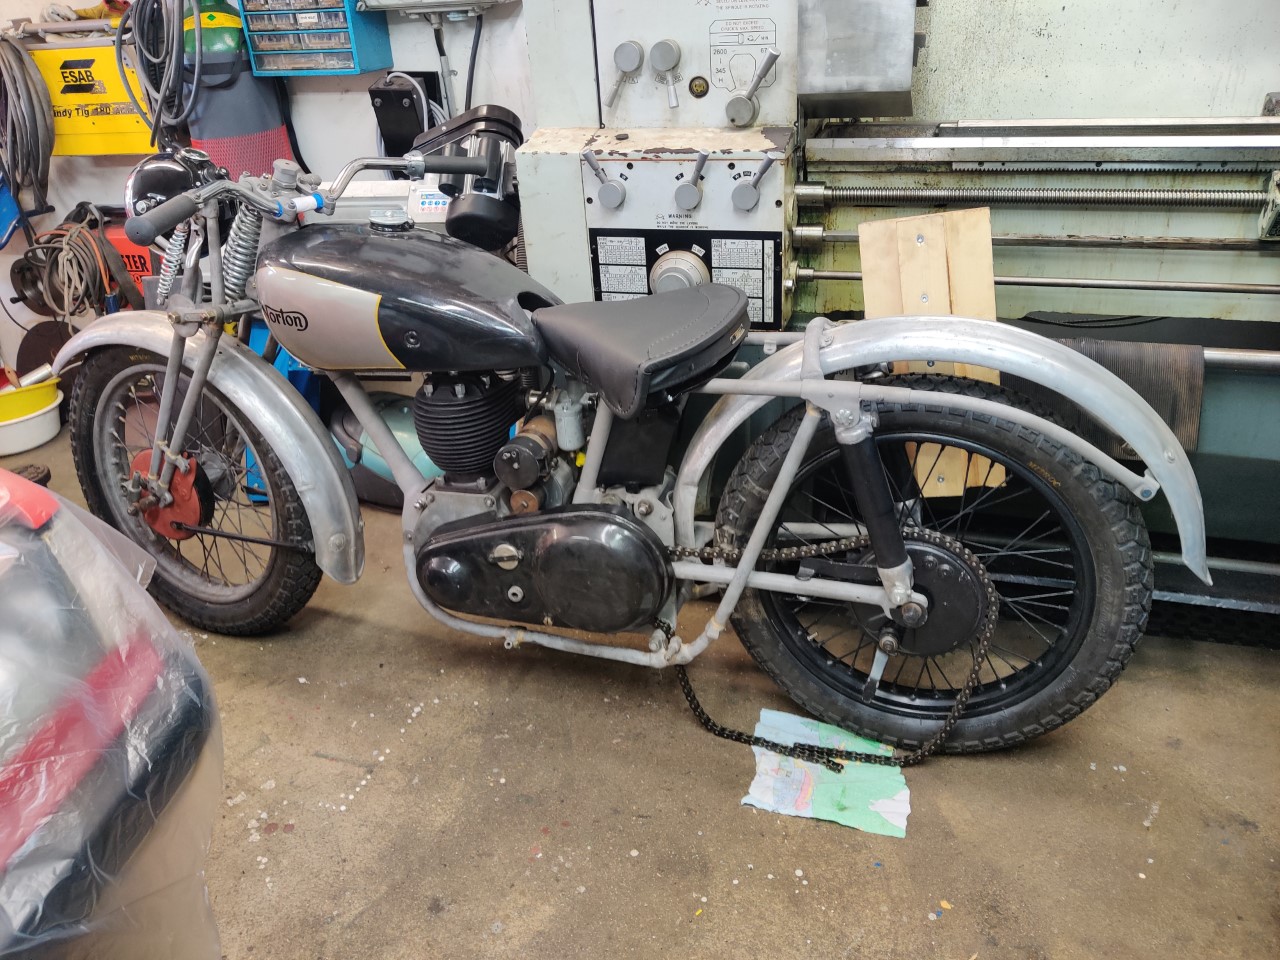
The saddle I have is a Lycett one.
The bike is coming together, I'm not sure when I'm going to modify the rear end back like it was but for now I'm going to assembly it as is. At the moment all the frame parts and some others have been sandblasted but not yet painted, because I'm going to assemble everything first so I can see if I need to do some changes to the frame before painting it. Engine and gearbox has been overhauled and I machined new bronze bushings almost everywhere in there etc.
The saddle and front fender is only placed on the bike atm, everything else is properly mounted.
Hoping to get this on one the road next summer!
- Log in to post comments
Is this a Rex McCandless…
Is this a Rex McCandless swing arm conversion? Whoever did it, it looks like a piece of history worth saving. And that will save you a lot of work!
I'm not sure if I have good pictures, but really all you need to do is aim to get the seat somewhere comfortable. I had to raise my seat with bolt on brackets because I'm too tall to be comfortable on the low saddle. It's all a bit inaccessible in the garage.
- Log in to post comments
The only thing that I know…
The only thing that I know about the conversion is that it was probably made in northern Sweden and it is stamped "SKT" on the right side tube.
- Log in to post comments
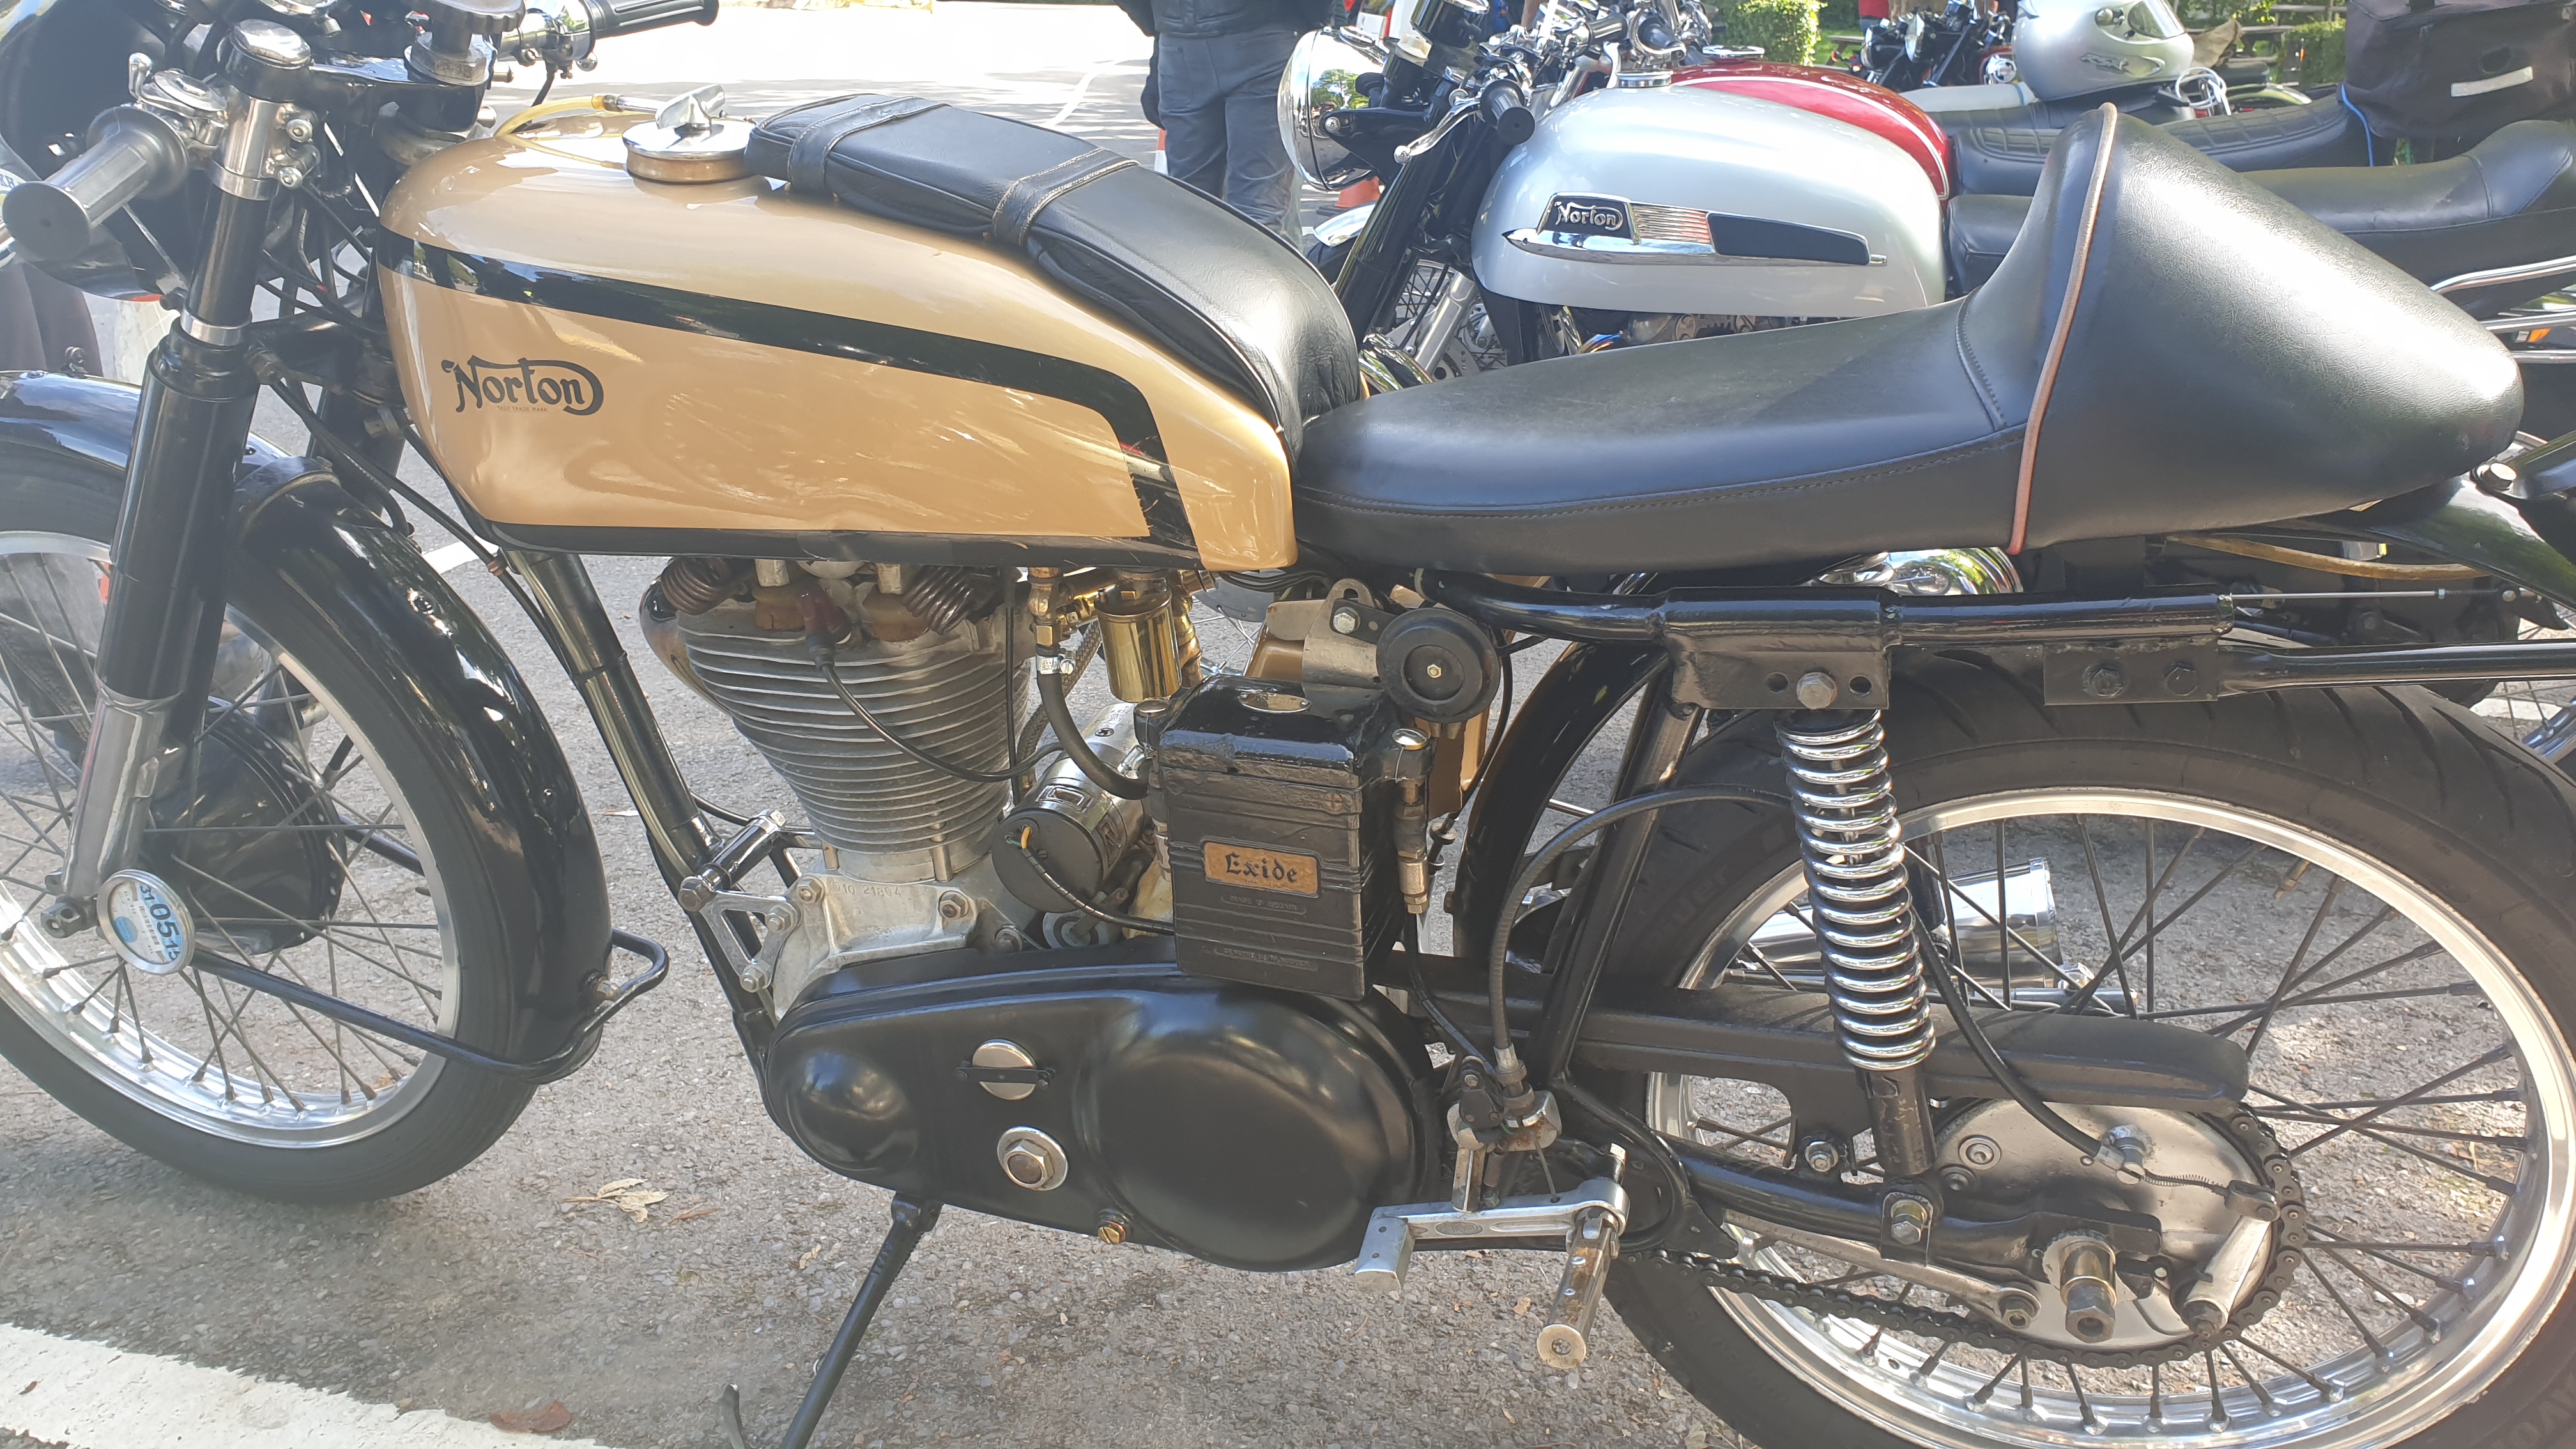
This is an example of an…
This is an example of an alleged McCandless conversion. But in the early 50's there were many owners updating machines to the latest spec. I'd say it was worth keeping if it's works well.
- Log in to post comments
It's quite difficult to see what's going on there...If your frame is 1937 civilian then the horizontal lugs are the lower mounting for the saddle springs. The front mount forms part of the saddle and they vary between Lycett and Terry's...I think that you'll need to decide on the saddle frame that you're using first. The typical Norton frame I believe was something like a Terry S823 which has a kink in the frame to clear the oil filler.